Category: Без рубрики

PDF is the international standard of electronic document workflow. They’re accessible on any device and compatible with different content types. However, PDF editing is a paid feature in Adobe Acrobat.
Need to make a minor change to your document? Here’s how to convert PDF to DOCX free.
Convert PDF to DOCX in AVS Document Converter
AVS Document Converter is a free tool for switching between document formats on Windows. Save output files as Word, HTML, eBooks, and even images.
- Install and run the app.
- Drag’n’drop your PDF file.
- Choose DOCX or DOC as a target format.
- Click Convert now!
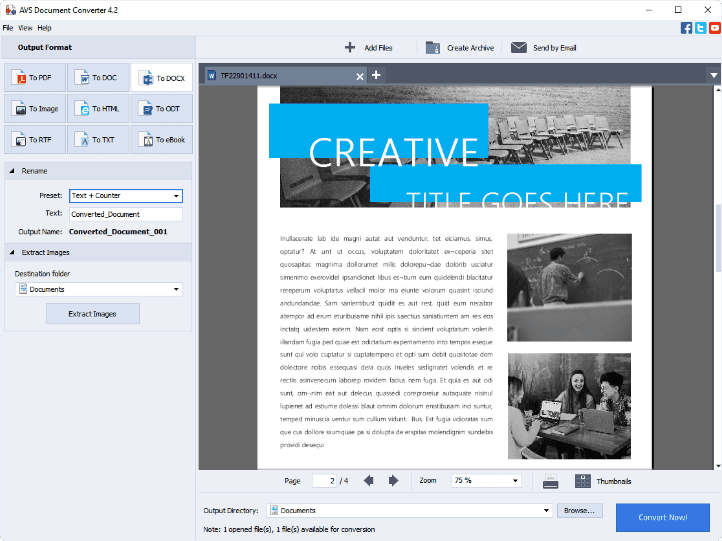
Our PDF to DOCX converter allows changing document formats without Internet connection, even on older Windows versions, such as XP and Vista. You can send new files per email directly via app.
Get the full pack of AVS4YOU applications, including AVS Document Converter.
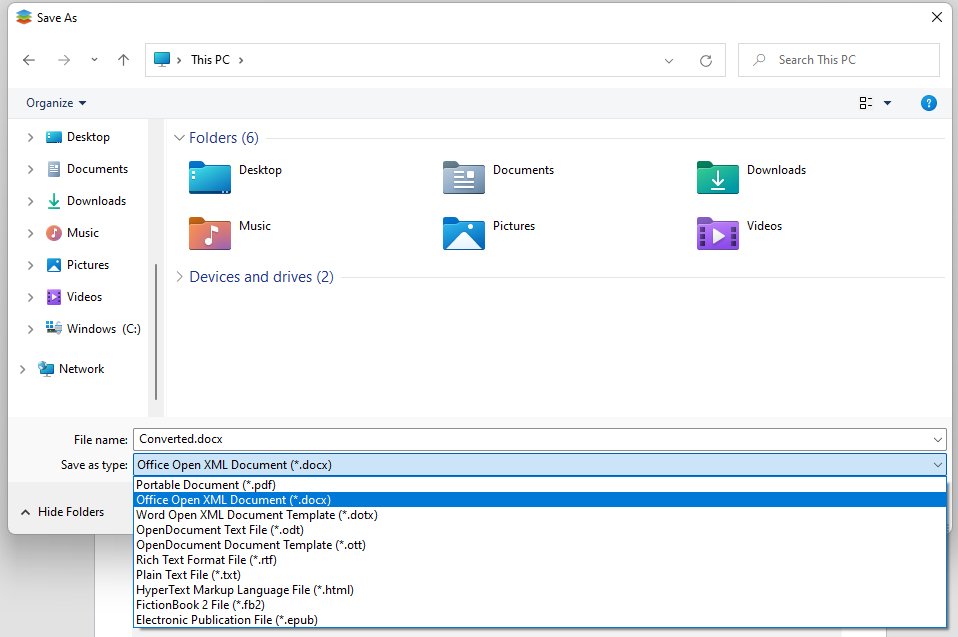
ONLYOFFICE for converting PDF to DOCX
ONLYOFFICE allows turning PDF into editable Word files online or on your desktop without any fee. Windows, Mac, and even Linux supported.
- Open a PDF document.
- Go to File -> Save as.
- Choose DOCX.
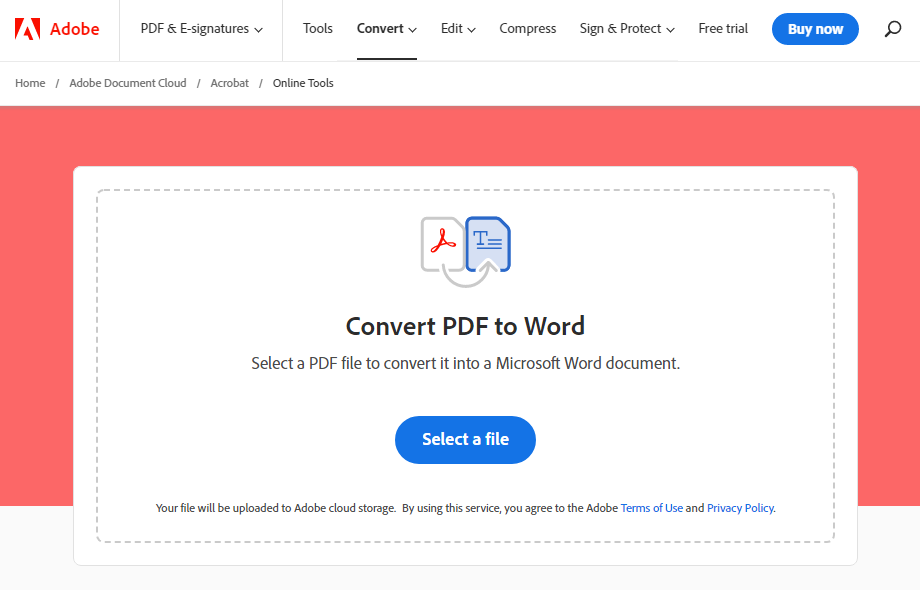
PDF to DOCX conversion with Adobe Acrobat
Another free tool for making editable Word files from PDF documents is the official online service by Adobe.
- Select your PDF files.
- Download the automatically converted DOCX file.
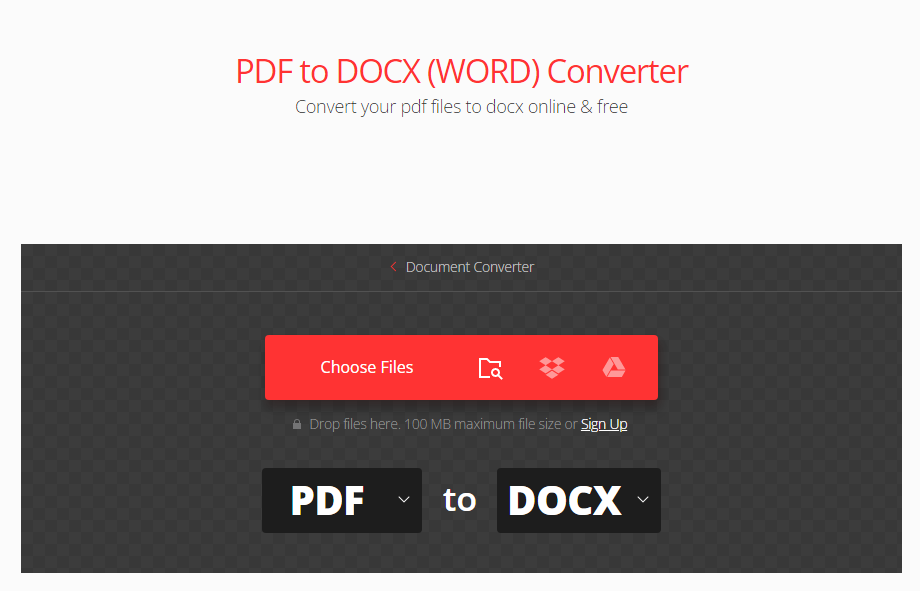
Convert.io and similar websites
On the Internet, you’ll find many third-party PDF to DOCX converters. Free and fast, they let you produce an output Word document.
- Upload file to Convert.io.
- Click Convert and download the DOCX file.
Some online services may also have limitations on the number of files processed in bulk. To avoid these restrictions, purchase the premium version or use an alternative for Windows alongside.
Frequently asked questions (FAQ)
Converting PDF to Word is effortless with numerous free tools. However, there are important things you should keep in mind.
Can I just change the file extension to DOCX?
No. We strongly recommend you don’t change the extension of your document. Not only the format will not be converted, your file and the entire content may be broken and inaccessible anymore.
Will DOCX files look the same as PDFs after conversion?
Not always. Format conversion is a complex technical process. Therefore, some formatting may be lost, and output documents will not be 100% the same as original ones.
Authenticity depends on how well your software supports both PDF and DOCX. To achieve the highest fidelity, choose AVS Document Converter or other apps from our list.
Is it safe to convert PDF to DOCX online?
Yes. Online services store uploaded files only for a certain period of time. However, nobody is prone to data leaks today. We recommend you avoid converting documents with sensible information online.
What’s the difference between PDF and DOCX?
PDF is the standard for digital documents, supports various content types, and offers advanced security features.
When it comes to editing and printing, DOCX is a better alternative. Fast and easy, you can make changes in a file, even collaboratively.
Can I distribute output DOCX files online?
No, unless you’re the author of the original document or have an explicit consent from the copyright owner. Otherwise, you violate against the intellectual property law – especially, if you plan to monetize the content.
Also, remember to check regulations regarding online file sharing in your region.
How to open a DOCX document?
DOCX is a widely supported text format. You can open it with Microsoft 365, Google Docs, ONLYOFFICE, and other office suites.
If you need to get a PDF again, just save your Word file in this format.

As a student, you’re often expected to complete exercises on a computer, individually or together with peers. In this article, we share the best free software that facilitate your remote study and in-class activities.
ONLYOFFICE Desktop Editors (Windows, Mac, Linux)
Writing an essay or research paper? Preparing a collaborative presentation? In ONLYOFFICE Desktop Editors, you can easily create, edit, and share any text and slides. The app is free for Windows, Mac, and Linux.

Here’s what you can do with this outstanding Microsoft 365 alternative:
- Change fonts and highlight text
- Structure text with headings, bulleted and numbered lists
- Insert images, shapes, charts, tables, equations etc.
- Add table of contents and hyperlinks
- Collaborate with classmates
- Integrate other apps: Google Translate, Mendeley, EasyBib, LanguageTool, and more
If you want to organize teamwork with your classmates online, use free ONLYOFFICE Personal.
AVS Video Editor (Windows)
AVS Video Editor has all necessary features for creating stunning video projects. The app is free with watermarks on videos, available for Windows computers starting with XP.
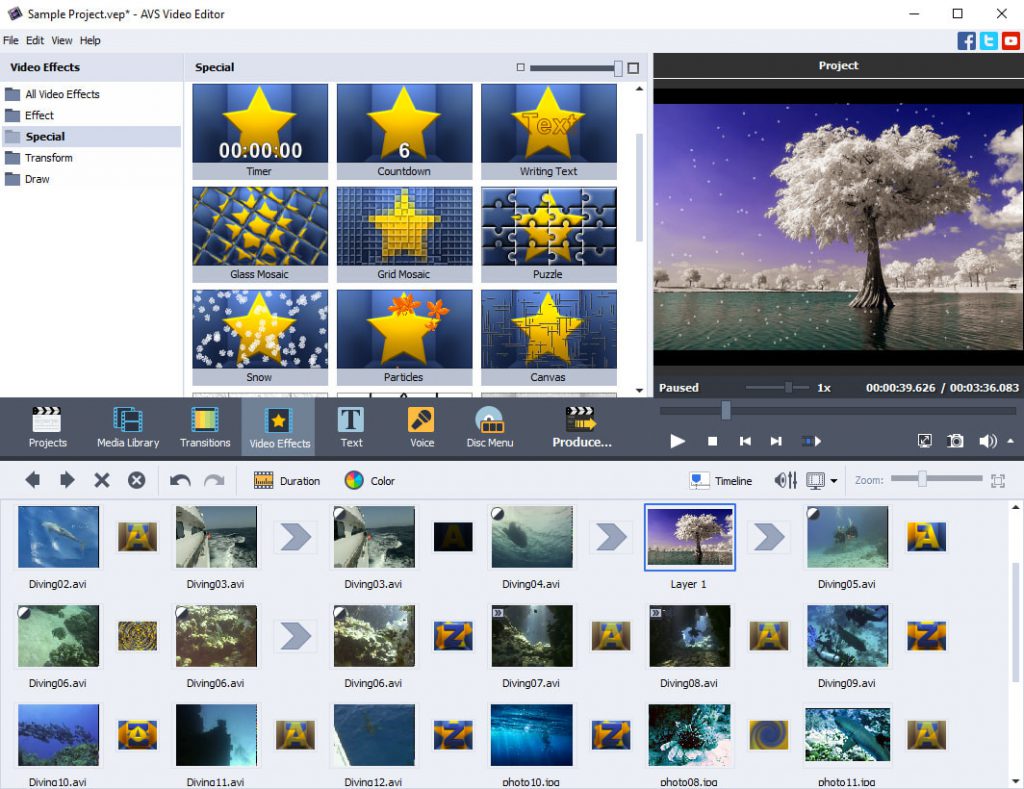
These are just some key benefits for you:
- Video effects and transitions
- Background change
- Adding audio tracks
- Adding images and stickers
- Titles
- Transferring videos from cameras, discs, and VHS tapes
- Screen capture
Also, you can fix your video with stabilization of shaky recordings, cutting out, merging, cropping, and trimming scenes.
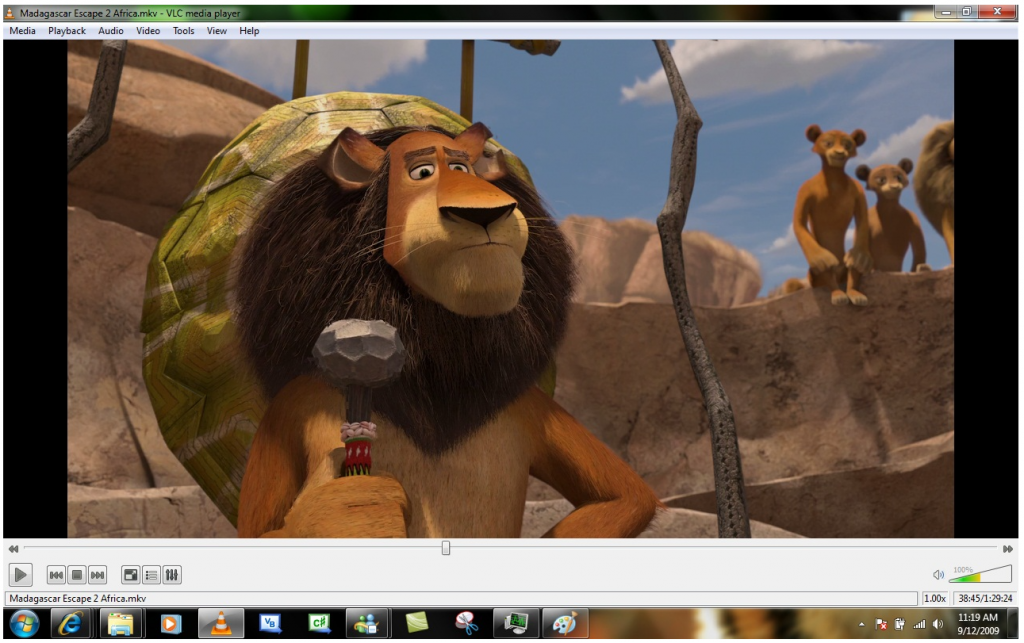
VLC Media Player (Windows, Mac, Linux)
VLC Media Player is a lightweight app to play any video or podcast on different platforms, including Windows, Linux, Mac, or even mobile devices. Besides, it lets you speed up and slow down video during the playback.
Evernote (Windows, Mac, iOS, Android)
One of the most popular productivity apps, Evernote helps make quick notes during a lecture. Additionally, you can plan study, for example make a schedule of extra courses and track how much time must be dedicated to each activity.

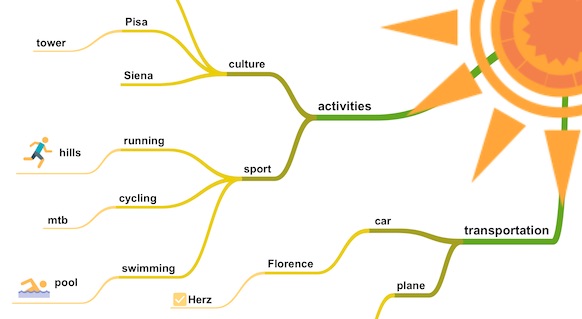
SimpleMind (Windows, Mac, iOS, Android)
Those who are familiar with mind mapping will find this application life-saving. It visualizes concepts of any complexity, brings order and structures any topic. Some people even use SimpleMind as a free tool to draw a family tree.
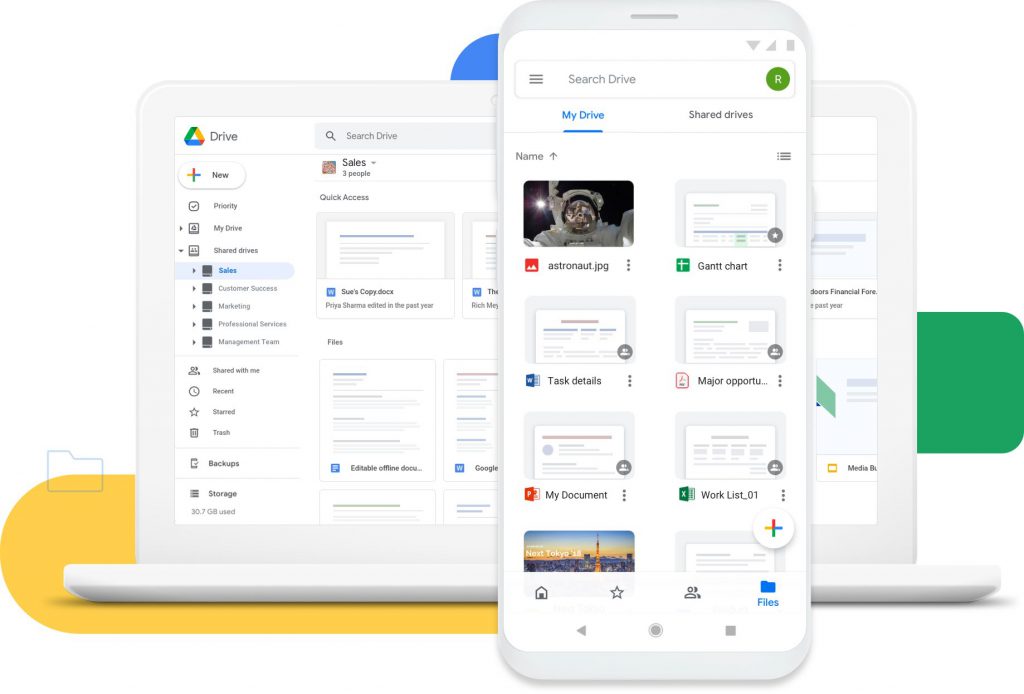
Google Drive (Windows, Mac, iOS, Android)
Most of you are probably using or at least know Google Drive. When you’re collaborating online and want to share files with your peers, cloud storage is the answer. Google provides you with 15 GB of free disk space, different access rights, and integrated native services.
Telegram (Windows, Mac, iOS, Android)
Telegram is considered to be of the most secure apps for instant messaging. Interact with your class, work on projects, share schedules and important announcements.
Also, you can join numerous channels dedicated to your subject, e.g. chemistry, algebra, literature etc. They share experience in regular posts and sometimes distribute ebooks or lecture notes.
Canva (Online)
Most features in this creative online project are available free of charge. The idea of Canva is to make design easier for laymen by providing professional templates. Banners, presentations, social media posts, even animation for your videos are just a few clicks away.
LanguageTool (Online, Windows, Mac, iOS)
Knowing grammar of your language is essential. Still, if you’re writing a huge research paper, inсorrect spelling and typos could remain unnoticed. LanguageTool has a mighty free version that analyzes your text and highlights areas where your attention is needed.
Zotero (Windows, Mac, Linux)
Zotero is a free and open-source reference management software. Instead of managing bibliographic data manually, you can collect, organize, annotate, cite, and share research.
These 10 apps are highly recommended in remote education. However, the list could go on and include some specialized software for your school or university, such as Merriam Webster for linguists or LaTeX for mathematicians.

Video has become the leading way to educate people, whether it’s about math at school or explaining strengths of your product to potential customers online. According to the recent study at Wyzowl, Internet users watch about 19 hours of video per week in 2022 compared to 10.5 in 2018. Thanks to the visual representation, videos help understand the delivered information easier.
What is an educational video?
Today, we see countless video courses distributed by prominent universities, tutorials on YouTube and Vimeo, training videos from big companies. They’re all educational videos and can be classified by type.
- Explainer
- How-to
- Screencast
- Lecture
- Micro
- Live stream
Now let’s find out what stands behind each type in the classification.
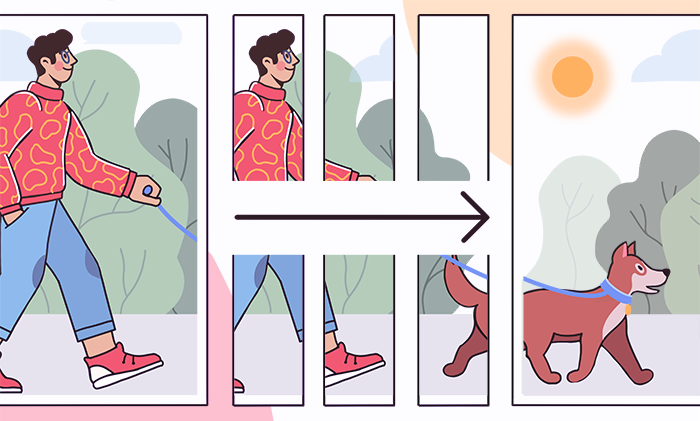
Explainer
Explainers are usually storytelling videos aimed at a brief introduction to the topic. They generally answer 2 fundamental questions: “What is it?” and “Why is it important?”.
Content makers may prefer animated explainers, as they help represent any information easier. Here’s an example from CNET:
Explainers can also convey the message to the audience. Their normal duration is 2-5 minutes and such clips rarely go into details and theory.
How-to video
As the name suggests, how-tos are clear instructions on making something. For example, writing a CV or cooking muffins. Ideally, you’d repeat actions from the video to have the same output.
This is a typical example of a how-to video:
Unlike explainers, how-tos are for viewers with at least a basic understanding of the topic. They’re also known as guides or tutorials.
Screencast
This one is a subtype of a how-to video: a screen capture with voice comments and sometimes drawing on the captured area. Screencast is nearly the only video type for software tutorials and reviews.
For instance, videos on our YouTube channel are predominantly screencasts:
Because the world of software is rapidly changing, bloggers often make updated screencasts annually.
Lecture
Lecture video is usually a unit of a larger educational course, sometimes with a digital certificate upon successful completion. Each lecture is dedicated to a single topic, which provides a clear structure of the entire course.
One of the most popular websites with video lectures is Coursera.
Lectures are more theoretical than how-tos, contain in-depth analysis, often produced and therefore recognized by educational institutions.
Micro
A short video (1 minute or less) with useful tips or important points to the topic. Such videos are motivating, rich in facts, and contain the essential information to the specific issue.
A micro can be explanatory, instructional, and even a mix of the two. Its only distinctive feature is the short length.
Live stream
Many universities, companies, and even bloggers organize video events in real time. The most popular types are webinars that you can audit and online workshops where viewers are expected to participate.
Such events often require registration, which is good for marketing in your organization. They stimulate engagement, because you can’t just tap Watch Later and get back to the beginning of the video with a single click. However, live streams can usually be sometimes watched on-demand.
What type of educational video should I use?
Each educational video type is suitable for specific goals.
Explainers are great for beginners and laymen, especially when teaching complicated concepts. They’re rather short and informative, but may require higher costs at the production phase.
How-tos are brilliant for showing the process of getting something done or just giving instructions. The audience is familiar with a subject on a basic level and spends another 20-40 minutes to dive deeper.
Screencasts are indispensable in software tutorials.
Lecture would help you create a well-structured educational course.
Micro is a good idea for promoting your educational institution in social media, such as TikTok and Instagram.
Live stream could be a premium option for loyal audiences, corporate trainings, and real-time interaction. Online events also stimulate higher engagement.
Want to create your educational video? Consider doing it with AVS Video Editor.
The entire AVS4YOU multimedia suite is currently available with large discounts. Save 70% today!
Useful links
How to create engaging teaching videos: 12 useful tips

There is no doubt that e-learning is a great way to increase your knowledge and skills in a unique and flexible digital environment with its own strengths and opportunities.
Whether you are attending online classes for the first time or looking for ways to strengthen your current learning habits and approaches, there are some key areas to consider to set yourself up for success and make the most of all that online courses and programmes have to offer.
In this article, we’ll share some tips and strategies to help you succeed in your e-learning and take it to a new level.
Tip 1. Don’t underestimate the importance of e-learning
If you tend to think that online classes require less work and are easier than traditional classes in the classroom, you are wrong. In reality, online courses are designed to be just as rigorous and demanding as traditional courses.
That’s why you need to be prepared for a minimum of several hours of work every day – and that’s a modest estimate. For some online courses, much more time will be required, especially during the final exam weeks and mid-term.
Tip 2. Create a comfortable learning environment
If you don’t want to be nervous about online learning, you need to make make sure you can see and hear your teachers and other students clearly. At the same time, it’s vitally important to feel relaxed and be on firm ground.
If you study from home, you need to make sure that the environment you are in is tidy and well-lit, and the temperature is neither too high nor too low. Nobody and nothing should distract you so that you can concentrate on processing new information.
However, you don’t have to make your new place to study online look like a regular classroom.
Tip 3. Set clear learning objectives
Setting clear learning objectives will help you see the benefits of the learning process and how it will help you develop and improve your skills.
Why am I attending these online lessons? How can I benefit from this knowledge? What qualifications will I get at the end of this course? Do I really need this skill to get my dream job? The answers to all these questions will help you make the most of what you study online.
Once you have established your learning objectives, all other aspects of your learning strategy will automatically fall into place.
Tip 4. Make use of the required hardware and software
Such requirements are usually specified somewhere in the course. You may not be able to complete written assignments, watch educational videos, listen to podcasts or participate in group video and audio calls if you do not have the right technology. Making sure you have the proper Internet connection, anti-spyware software and software programs installed is essential to your online learning success.
Tip 5. Record your online lessons if possible
Some teachers don’t record their online classes, and sometimes you may face technical problems, like incompatible software. That’s why it’s a good idea to find a way to record your online lessons whenever possible.
There are some evident benefits. If you are sick or unable to attend online classes for some other reason, you can watch the video later. Even if you never miss anything, you may want to replay some parts of the video to better understand the topic.
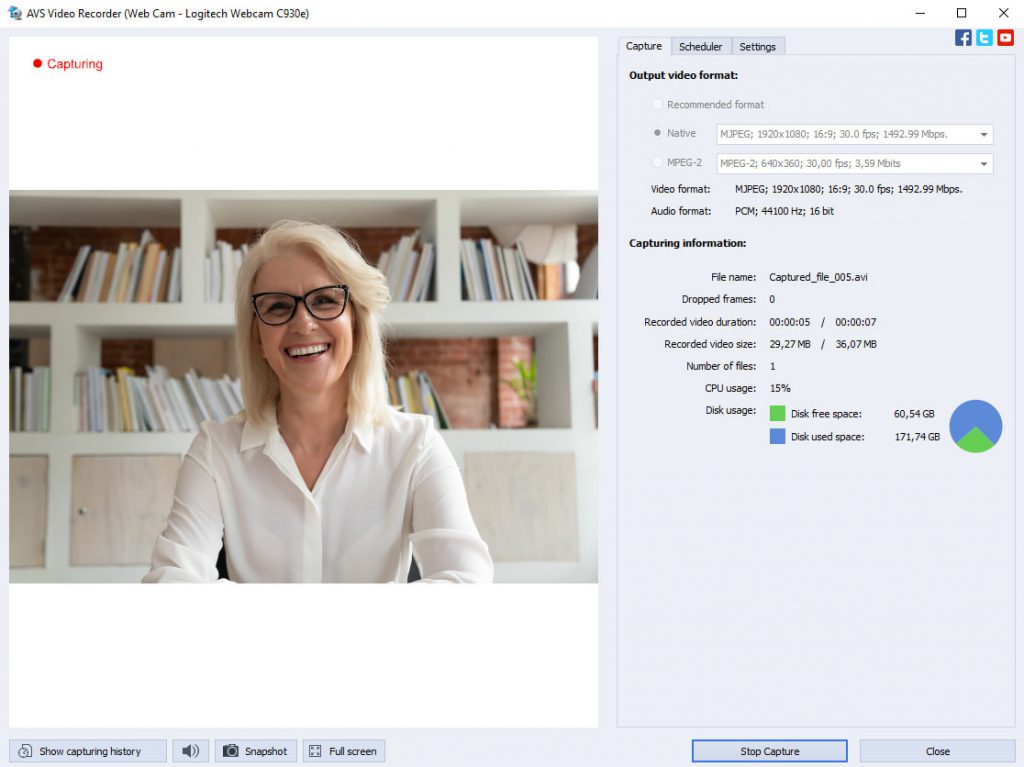
For this purpose, you need special software. For example, using AVS Video Editor you can not only record video files from your PC screen but also add text annotations and apply animation effects while recording. It’s also possible to edit and save video files in all popular formats (MP4, M4V, MOV, MKV, WEBM, AVI, DVD, VOB, MPG, WMV, 3GP, FLV, M2TS, TS, etc.) and adjust them for iOS and Android devices.
Tip 6. Listen to audio podcasts everywhere
Video courses and content work great when you try to learn new information online. However, audio perception is also important, and some people process auditory information even better than image information. That’s why it’s important to get new knowledge via podcasts and audio lessons.
On the Internet, there are plenty of web resources where you can find educational podcasts and listen to them online. At the same time, it’s a good idea to extract audio from videos and listen to it as a podcast while doing the household work or going for a walk.
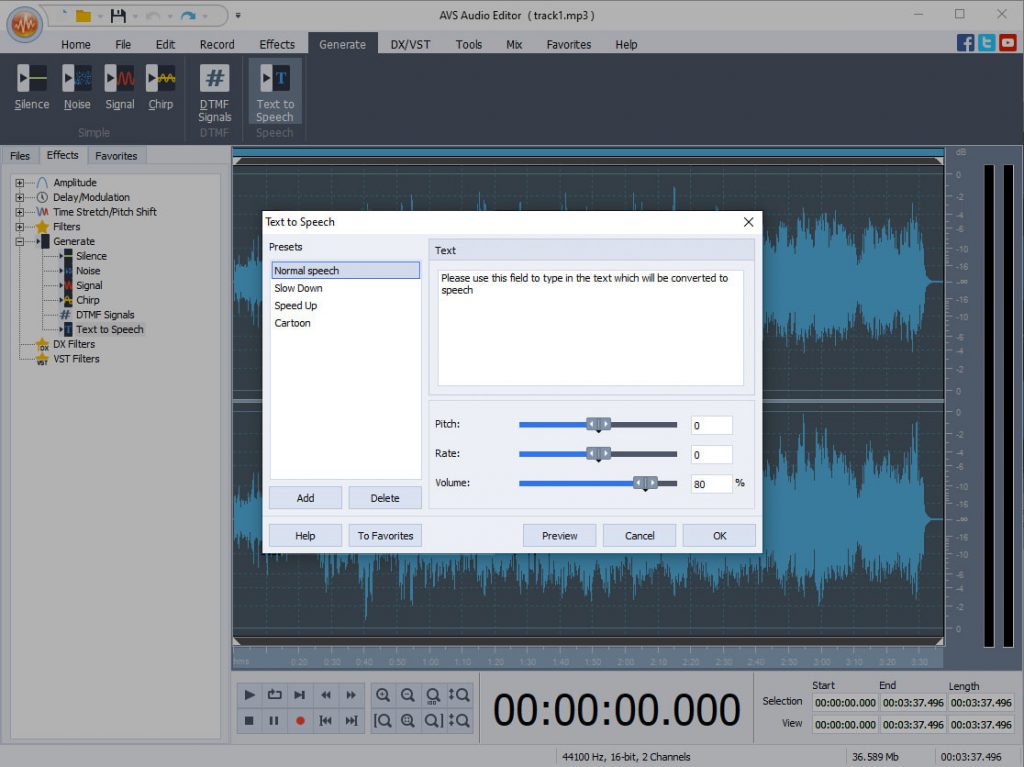
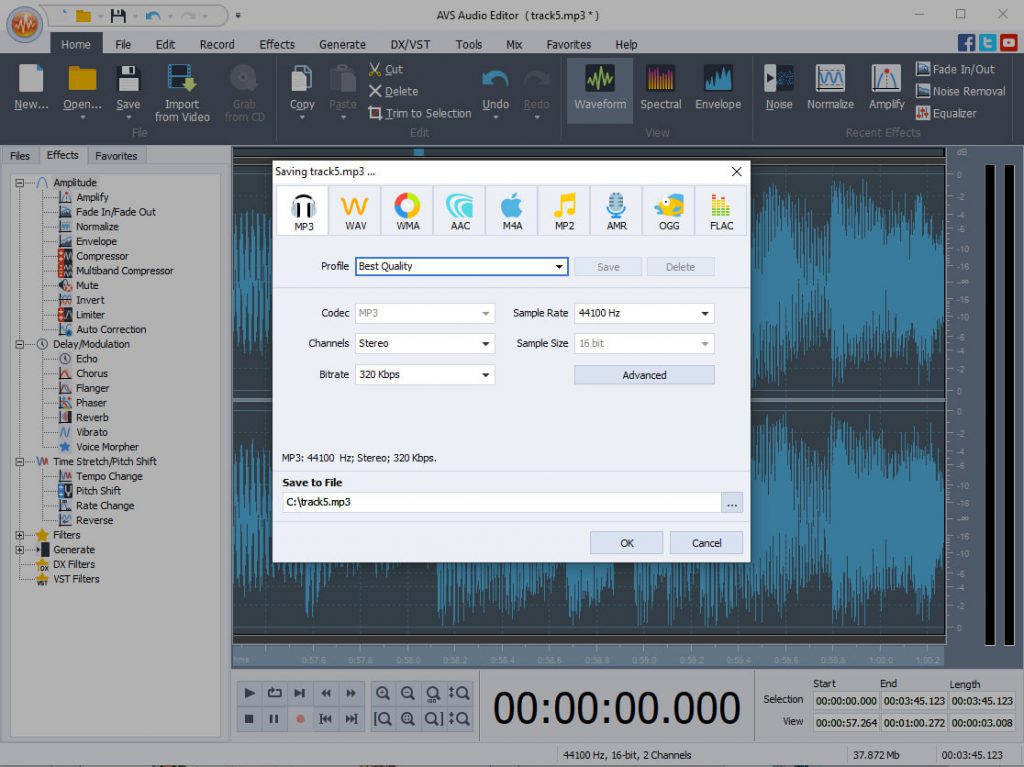
If you need to extract audio from video files, you can try AVS Audio Editor. With this software tool, you are allowed to extract and edit audio from your video files and even record audio data from various inputs. For example, you can record the voice of your teacher during an online lesson and listen to it later to better understand the topic. Importantly, AVS Audio Editor can turn text into a voice with the Text-to-speech feature so you can create audiobooks from written materials and listen to them everywhere.
Tip 7. Regularly treat yourself to a break
If you study too hard, it may lead to unintended consequences, like a lapse of concentration, chronic fatigue or even depression. Don’t try to learn everything 24/7. Regular breaks will help you ingest information better and remember things much easier.
After studying online for a few hours, take a break for at least 15-20 minutes and do what you like. Go for a short walk, do some push-ups, read a book or listen to your favourite music. When you feel refreshed after the break, get back to your computer and keep grinding away at your studies.
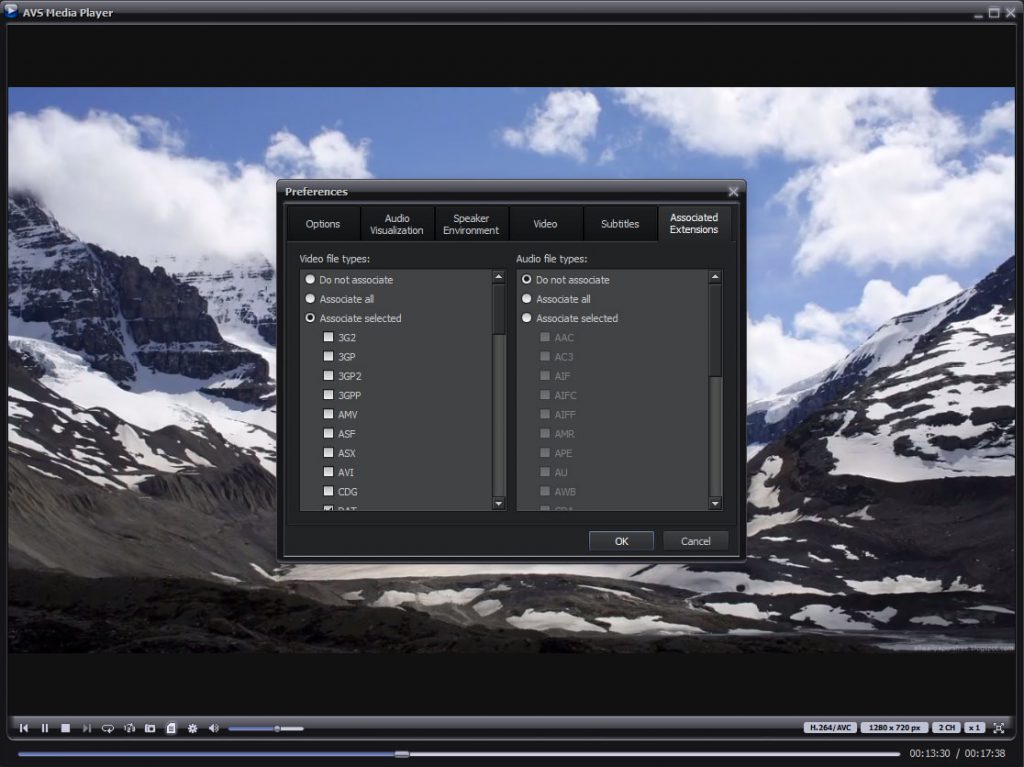
If you prefer to relax with the help of music, we recommend trying AVS Media Player. This powerful multimedia tool makes it possible to listen to audio tracks in different formats (WAV, MP3, ALAC, FLAC, M4A, OGG, AAC, AMR, etc.) and create personal playlists according to your mood. It also allows you to play videos so you can watch your favourite films and video clips.
Conclusion
As you can see, e-learning is made easier with the right approach and dedication. If you are motivated and know what you want to archive, you can easily gain knowledge and acquire new skills via online classes and courses.
Software tools, like AVS4YOU, help you make some things easier when studying online and allow you to make constant progress. Use the benefits of modern technology and become a better learner.
Useful links
How to record voice on Windows 10
How to remove audio from video

Decided to launch a series of educational videos for your students online? Start with choosing a suitable video editor and then use these best practices to offer maximum value.
1. Choose the type of your video
Define the nature of your video lessons. Are they tutorials, lectures, or maybe live webinars?
- Tutorials review an object or phenomenon and often require screen capturing.
- Lectures help explain the material to remote students, just as you’d do in a classroom.
- Webinars are live workshops where you can interact with students in real-time.
You may need different software and equipment for producing each type.
2. Put your students’ interests forward
Think about what your target audience is in terms of age, online presence, and content preferences.
Younger students usually prefer to get information from shorter clips (e.g., TikTok or YouTube Shorts), whereas older generations may expect a comprehensive series with a deep dive into details.
The target audience also determines the way and volume of information provided.
3. Use the proper tone of voice
Decide from the very beginning, whether you want to use a formal or a slightly more friendly language in your video lessons. Avoid talking to adults and elementary school kids in the same way — one of these audiences will just not understand you.
Stick to the chosen tone of voice throughout the whole video series.
4. Choose a platform for hosting video lessons
Websites where teachers can upload their online courses are different in reach, audiences, requirements to video specifications and content. Some of them allow sharing clips right away, others have an approval process for each course.
YouTube and Vimeo are general video platforms that encounter billions of views daily. On specialized educational services like Coursera, students can get certified after watching all your video lessons.
5. Write content for your videos
Have the entire text for each video lesson or live webinar ready before making a video. Offhand performance is a bad idea even if you know the material perfectly. Speaking on camera is pretty stressful, and you can forget something anyway.
Make sure the text for each lesson is well-structured and only contains relevant information to the topic. Include multiple examples, especially when talking about complicated things.
Avoid difficult terms when teaching kids and laymen. Using colloquial words is not recommended.
6. Prepare imagery and other creative assets
Visual content is a great fit for your speech, both during live webinars and recorded video lessons. That could be a colorful PowerPoint presentation or just relevant images.
Create a folder on your computer and collect there all images, charts, tables, and music tracks.

7. Check necessary equipment
Conduct an audit to make sure you have everything for recording an educational course. To capture a video, you may need the following:
- Camera
- Tripod
- Lighting
- Additional lenses
To make the sound in a video cleaner, use these devices:
- Microphone
- Pop filter
- Shock mount
If your budget is not super tight, we recommend hiring a professional clip maker — they have all necessary equipment.
8. Look at your background
This step is important for everyone who records a video lesson at home instead of professional studios. Keep the background simple — there should be no distracting elements or personal things.

9. Record a video lesson in one take
Even professional actors perform multiple scenes and producers then choose the best one. This is a perfect approach when you have enough time and budget.
In educational videos, it’s recommended to record your clip in one take. Even if you’re making mistakes or forget something, just go ahead — you’ll cut out unwanted scenes afterwards.
10. Communicate with your viewers
At the beginning of your clip, always make a brief overview of what you’ll cover in this lecture. People don’t want surprises here — they should have a clear idea of what’s going on.
Inform students when you want to show something on the screen. Comment on any graphs and images.
Moves from one topic to another should be possibly smooth. At the end of your clip, give a hint of what will be discussed in the next one.
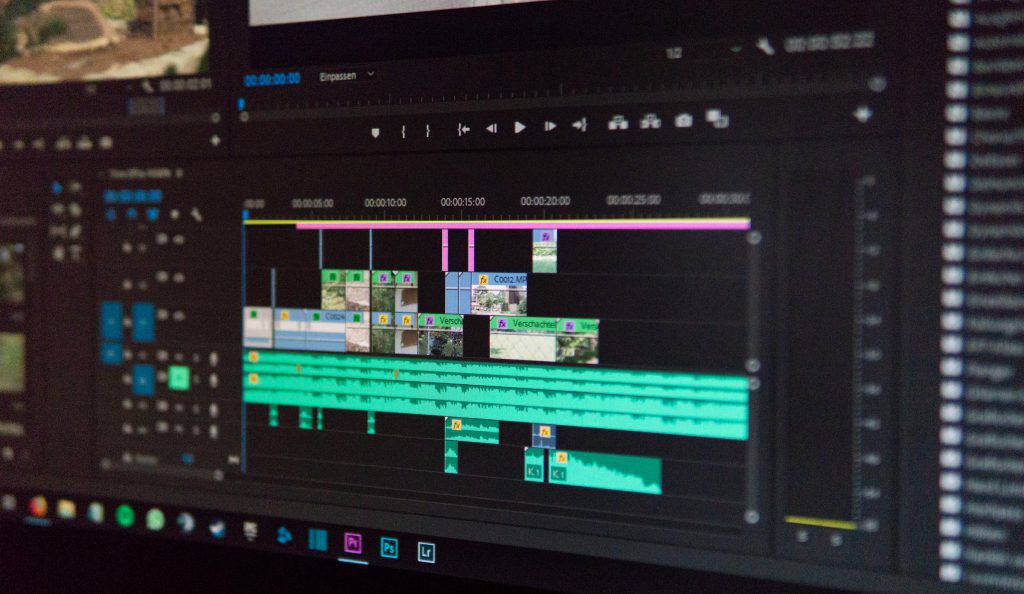
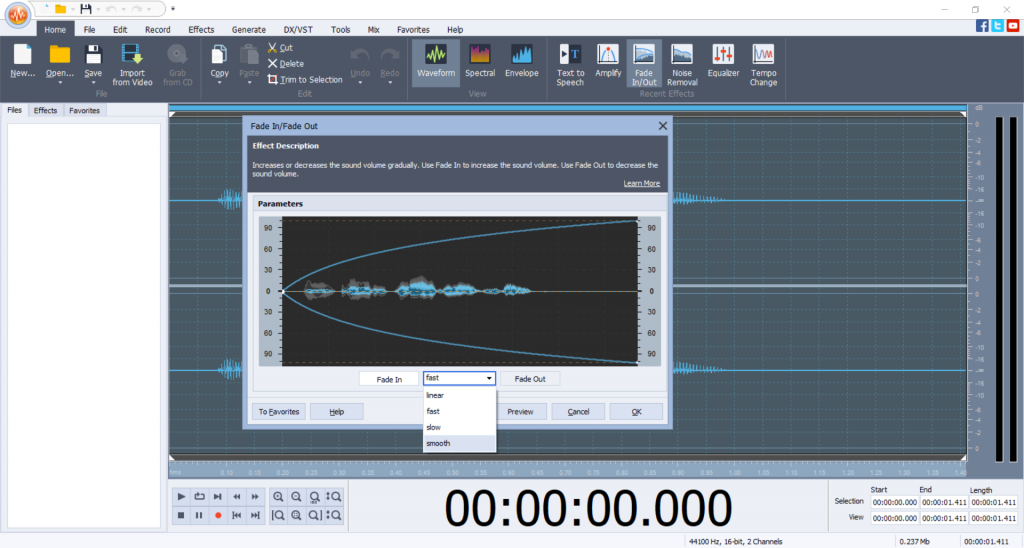
11. Edit your video & audio
Alright, you have a video lesson footage ready for post-editing. Open AVS Video Editor and consider making these changes:
- Cut out unwanted scenes
- Apply the Fade In / Fade Out effect
- Insert text, pictures, voiceover or background music
- Add new scenes, e.g. intro with the logo of your university
- Apply transitions between scenes
You can make numerous amendments to the video look and feel. Guides for different tools in AVS Video Editor can be found in our blog or knowledge base.
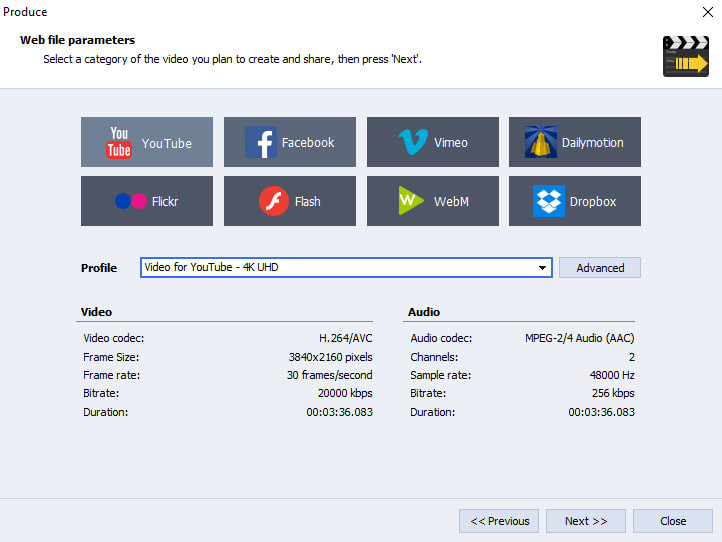
Polished up your video lesson? Save it in the compatible format with suitable parameters. In AVS Video Editor, you can choose a pre-defined standard.
12. Share your video and engage viewers
Depending on the video hosting platform, there will be various ways to interact with the audience. For example, YouTube allows adding timestamps in the description, so that people can jump to the desired part of your video.
On Coursera and similar educational platforms, you can add short quizzes and even ask questions during watching a clip.
The success of an educational video depends on numerous factors. The above-mentioned essential tips are relevant for the most cases.
Plan to record your video course? Get AVS4YOU with a special discount for education!
In the following section, you’ll find some other guides for making engaging videos.
Useful links
How to add a picture to a video
How to overlay a video on a video

Are you a teacher and plan to publish your own course on YouTube? Or you want students to learn the basics of multimedia production in class?
Here are the best 5 software applications that are easy enough for kickstarting video editing without specific skills. We also recommend considering these points when choosing.
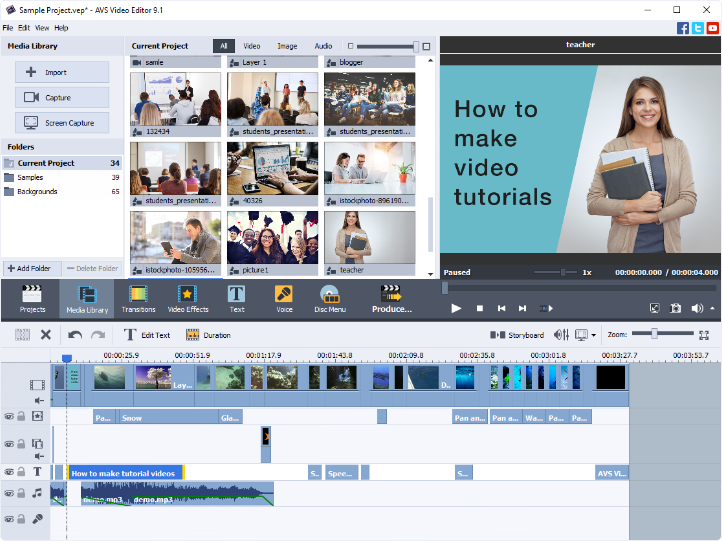
AVS Video Editor
AVS Video Editor has all essential features for processing visuals and audio tracks. The app is available for Windows computers, even older versions up to XP.

When working with footage, you can play with color correction, apply visual effects and transitions, change background, combine video with pictures and titles. Videos can be transferred from cameras, webcams, and VHS tapes, or recorded right in the app. Screen capturing with drawing tools is also available, which is nice for computing tutorials.
It’s easy to fix your video with stabilization of shaky recordings, cutting out, merging, cropping, and trimming scenes. To make the final touches, you can add some text and background audio.
In AVS Video Editor, you’ll make the output file compatible with any platform or device you need at the saving stage. And of course, we’re not leaving you alone when you want to learn more about the features – find guides for each functionality in our knowledge base.
Make your first steps in video editing for education today:
Windows Movie Maker
One of the most popular Microsoft’s native apps, Movie Maker used to be a place to make stunning videos up to Windows 7. If you have a rather older PC, this software would be good for producing free clips.

In Movie Maker, you can import media from various sources. The features include numerous visual effects and transitions, adding text and audio tracks, splitting and trimming videos. It’s probably not the best option when you’ll want some advanced editing, but nice for beginners with not very powerful computers.
Windows Video Editor
In Windows 10, Movie Maker has been replaced by Video Editor. It’s still a good and free app for basic editing.
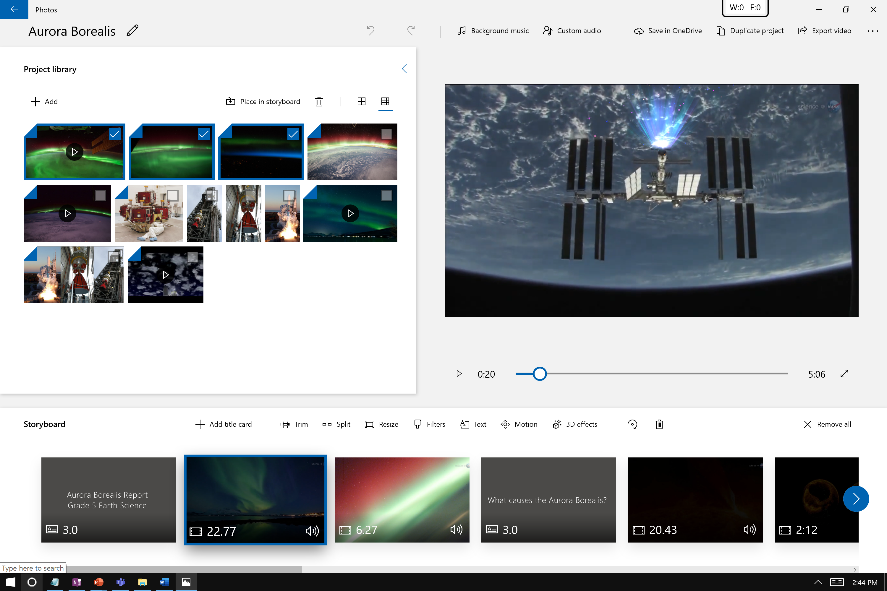
As in any software of this kind, you can crop, trim, and merge clips and pictures. Adding music, captions, and credits is easy and very similar to the way you’d do that in Movie Maker.
A very promising feature is the ability to add 3D effects, such as snowing or flying confetti. Also, you can draw on the scenes, apply filters and adjust visuals.
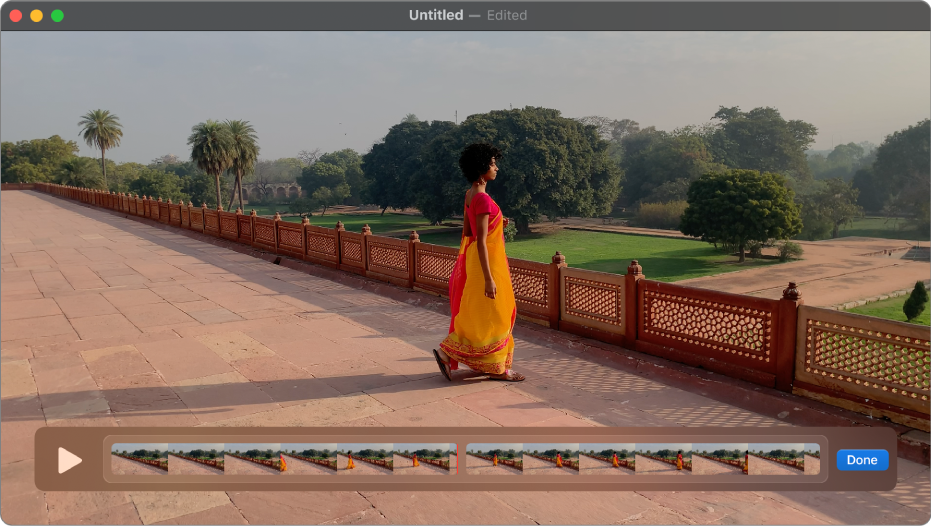
iMovie
This free app for Mac and Apple’s mobile devices is known to many users. iMovie is easy for beginners and doesn’t require much effort to create an awesome video.
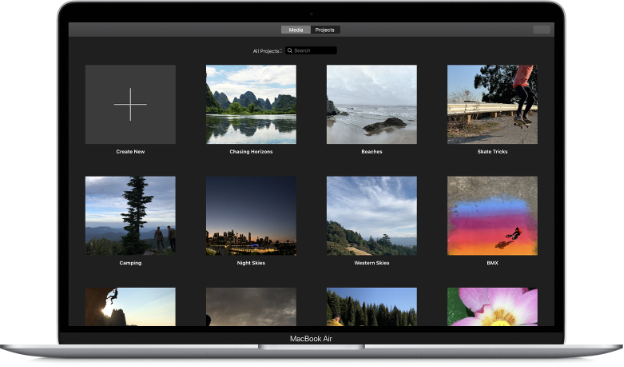
A pretty handy feature in iMovie is the ability to work on iPhone or iPad and then continue on Mac. Cloud-storage functionality makes conversions, transferring, and USB sticks unnecessary.
The application works with high-resolution formats, includes video filters, allows adding text, music, and sound effects. With the new Storyboards functionality, you can easily create a guide with well-structured storytelling.
For those who want background music in a clip, there are over 100 soundtracks on iOS and they automatically match the length of a video.
The interface may seem a bit unusual to Windows enthusiasts, but in fact the tools are logically positioned on the screen. With quick tips, you won’t get lost in the app, and the comprehensive documentation on the website helps you along the way.
DaVinci Resolve
DaVinci Resolve is designed for professional movie editing and can be useful when you’re producing a large and advanced video. Also, it’s a great fit for video editing education.
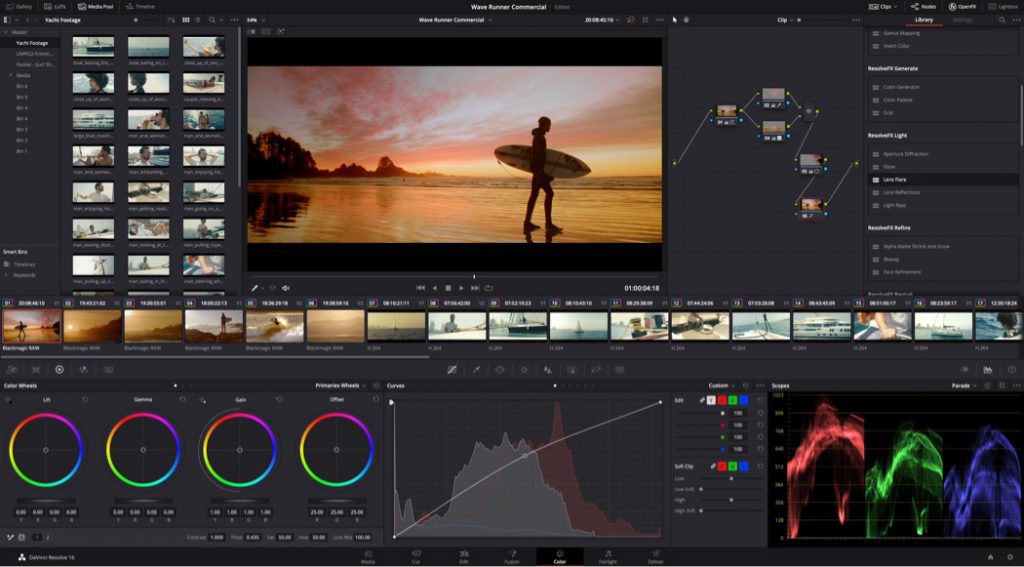
This solution has as the steadily growing library of effects and transitions. There are tools for creating soundtracks, applying titles, cutting, trimming, delivering videos over the web. DaVinci Resolve supports all popular video and audio codecs and allows multi-user collaboration.
Surprisingly, the most features in DaVinci Resolve are free. The software is compatible with any computer, whether it’s Windows, Linux, or Mac.
Because of the huge variety of tools, the interface looks complicated for beginners. Therefore, the app is recommended for experienced users.
Final words
There are so many easy-to-use video editors that you can opt for in education, both for recording video lessons and nurturing creativity of your students.
AVS Video Editor is the best for movie editing on Windows overall.
Movie Maker is suitable for everyone with Windows 7 and older versions.
Video Editor is optimal for basic editing on Windows 10.
iMovie is the free solution for Mac, iPhone, and iPad.
DaVinci Resolve is an option for making professional videos on Windows, Mac, or Linux.
Choose one of these software applications based on your skills and expectations regarding advanced functionalities.
Useful links
Top 7 audio recording software for Windows
Have you encountered disappointing messages saying that the format of your picture isn’t supported by a device or software? No worries – there are enough paid and free image converters for Windows and other platforms.
Best image converter for Windows
The vast majority of software developers make their converters available on Windows.
AVS Image Converter
AVS Image Converter is a free application for changing picture format on Windows.
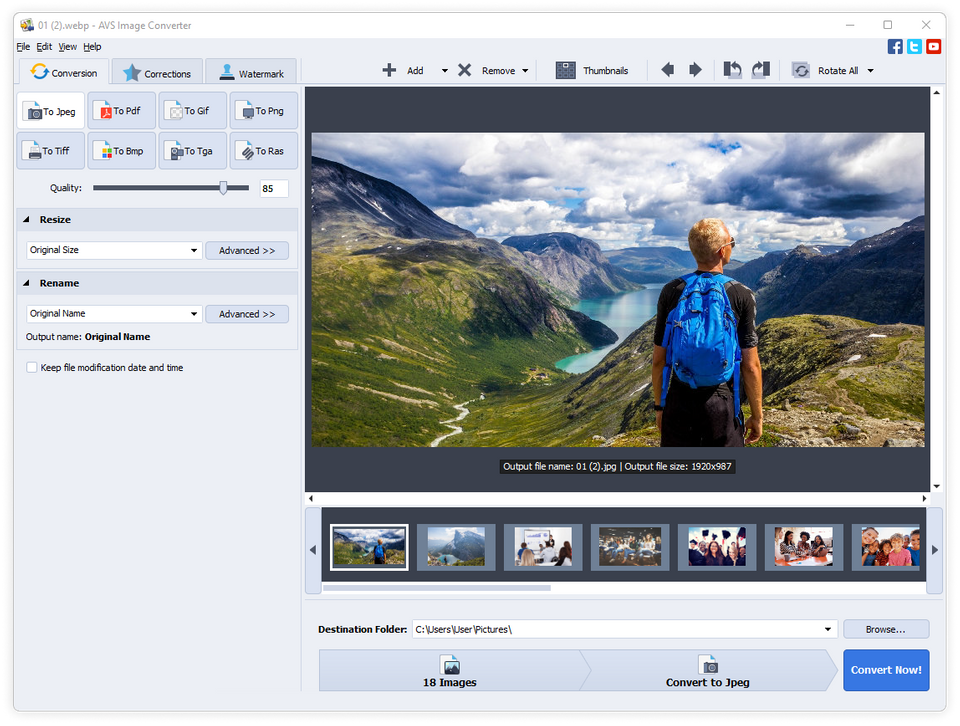
You can convert images to all key formats, including JPEG, PNG, BMP, TIFF. There are also additional options:
- resizing a picture to make it fit various monitors and photo standards,
- quality adjustment,
- basic editing,
- applying watermarks to protect intellectual property.
There are some other apps for converting images on Windows. See the most popular ones below.
ImageConverter Plus
This app supports all graphics file extensions for conversion on Windows, even RAW formats. You can also make your photo smaller in size, so that it corresponds with maximum limits on some sharing platforms.
Note that this application is not free. The license key costs $49.00.
PearlMountain
This software for switching between photo formats also enables bulk conversions at a high speed. With all popular extensions supported, the app includes some editing features, such as color correction, cropping and resizing.
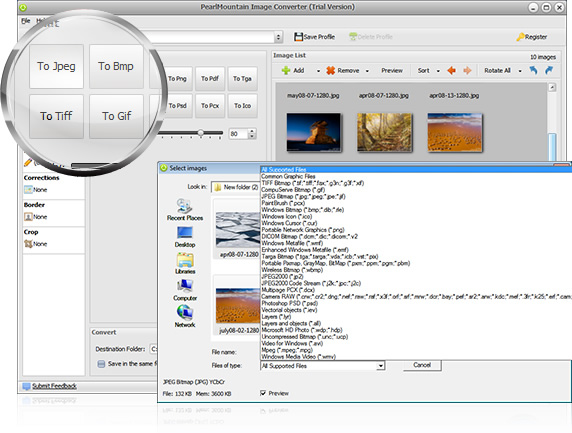
PearlMountain Image Converter is available for $29.90 per license.
Image converting software for Mac
Apple provides Mac owners with native software for many tasks. Still, changing the picture format requires third-party applications.
BatchPhoto
Perhaps one of the most popular on Mac, BatchPhoto operates with any well-known extensions: JPEG, TIFF, PNG, BMP, uncompressed RAW files. Before conversion, you can retouch and edit images.
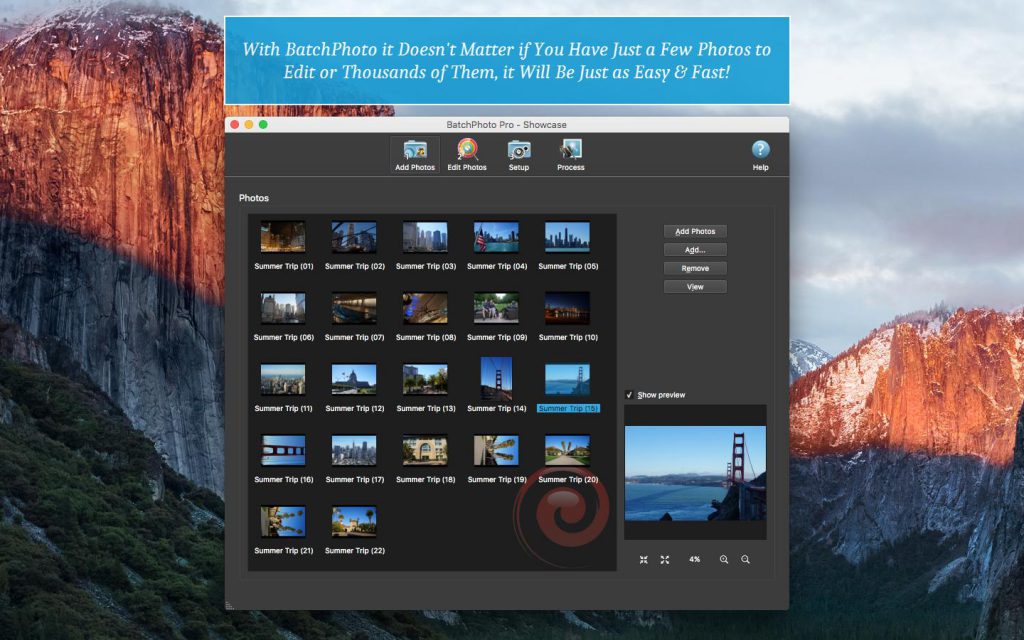
BatchPhoto is a paid product available from $29.95 for non-commercial use. The Pro edition is required for some features like RAW development and watermarking.
GraphicConverter
Oldie, but goldie. Since the initial release in the 90’s, GraphicConverter obtained support for dozens of popular image formats for input and output. Besides, you can apply simple editing before the conversion.
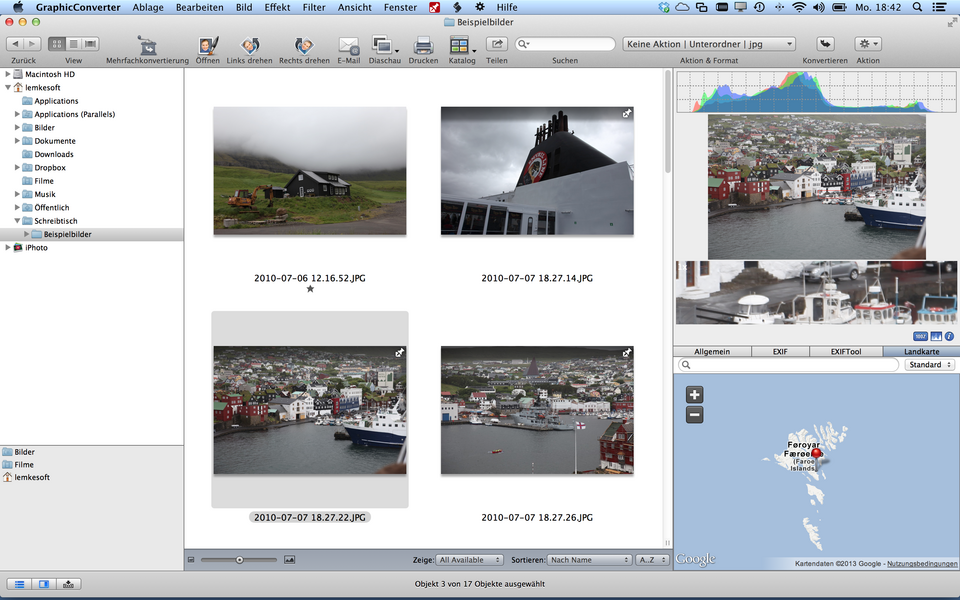
The full version of this app costs $39.95.
Best online image converters
There is a large number of online services to change the extension of your graphical file. They all operate similarly – you upload a file, wait until the conversion is complete, and download the output.
Here are some popular examples.
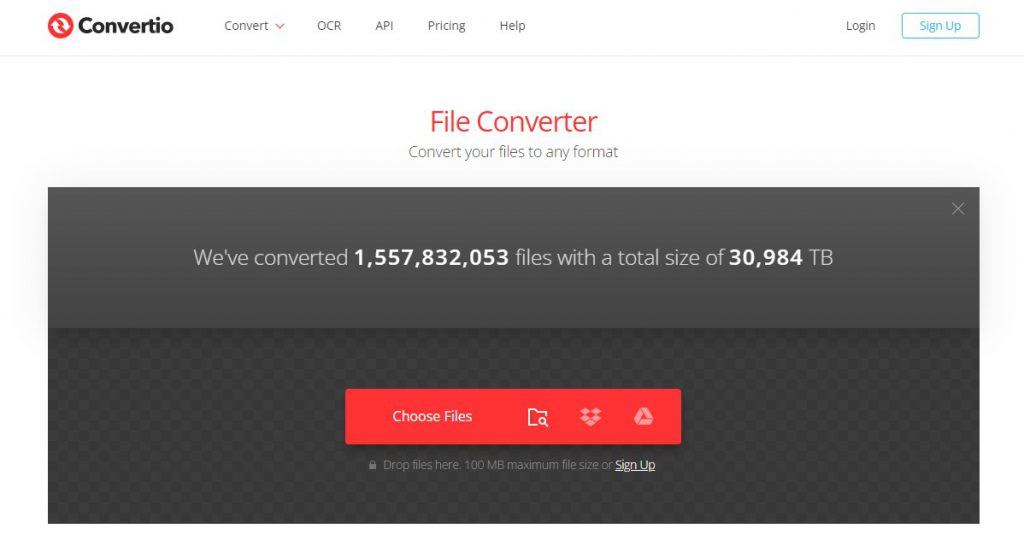
Convertio
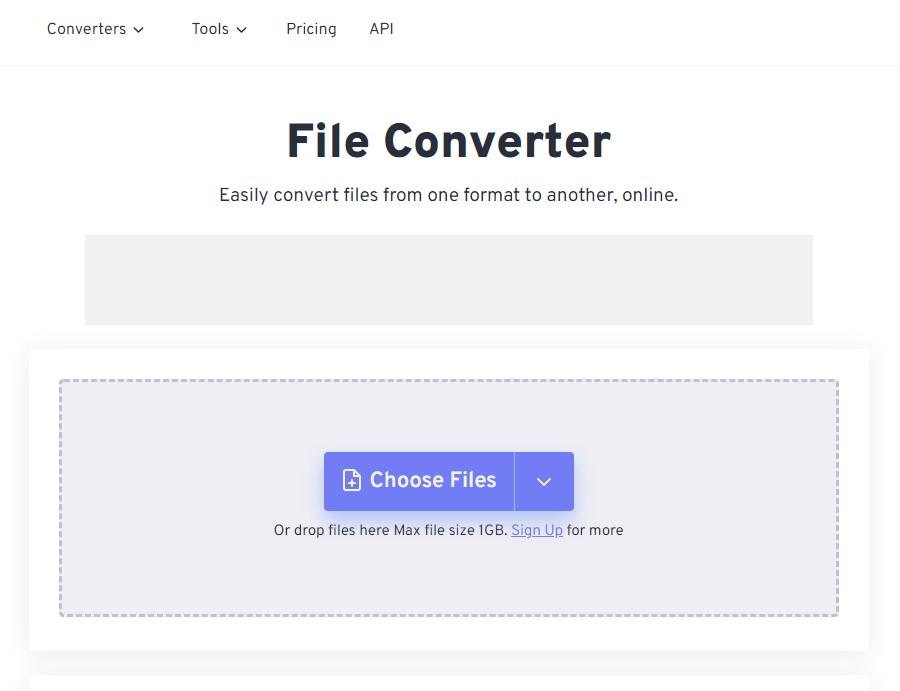
FreeConvert
cloudconvert
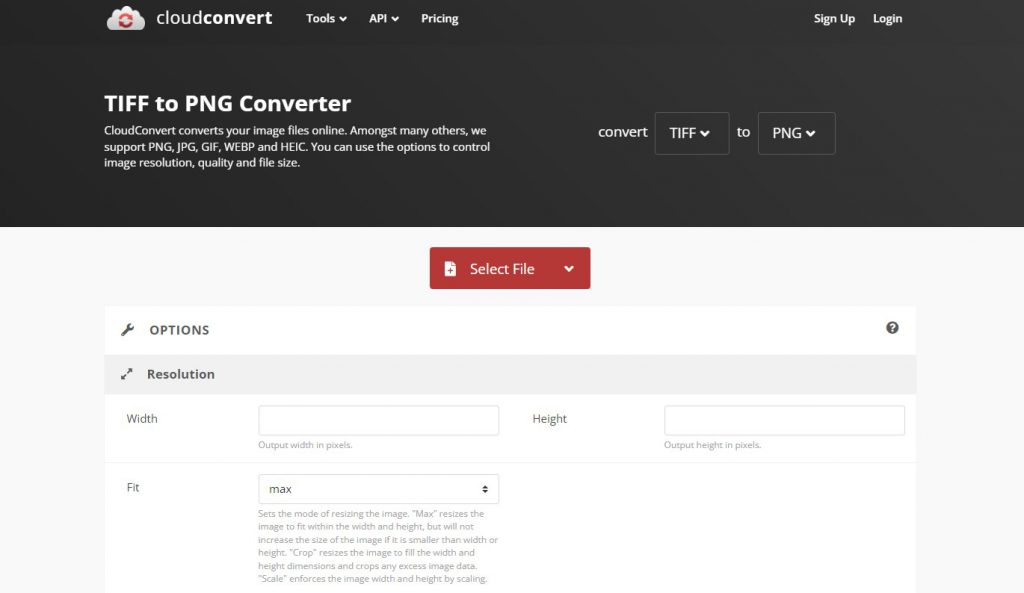
The online conversion is fast and simple, but also has disadvantages. You need to expose personal images to a web service, plus processing many images simultaneously requires stable Internet connection and time.
Free plans usually limit concurrent conversions or image file size for bulk processing.
Apps for mobile devices (Android / iOS)
Need to open the unknown picture format on your smartphone? Use one of the applications for your operating system.
Android
FixThePhoto Editor & Retouch is a top-tier app to resize photos on iOS and Android which also provides capabilities for professional image conversion.
Users can easily upload images and specify their desired adjustments, such as background changes, object removal, or color corrections, and receive the refined photos.
This personalized approach, combined with a user-friendly interface and quick turnaround times, makes FixThePhoto a standout option for those looking to enhance their images on mobile devices.
iPhone and iPad
Photo & Image Converter is a simple iOS app with the user-friendly interface, where you can process uncompressed RAW pictures and have a widely supported file as a result.
There are in-app purchases for converting more than 3 files at once.
Mobile apps are often distributed as freemium, meaning that you’ll pay a small fee to unlock all features. To avoid expenses, you can just transfer images to your Windows PC or Mac and use one of the free converters for these operating systems.
Useful links

Want to create a song or just make a voiceover for your video? Fortunately, every audio editing software for Windows 10 allows recording voice.
In this article, we share with you the most popular ones, both free and paid.
Best voice recorders for Windows 10
There are many apps on the market. Your choice would ideally depend on whether you need additional features and hardware at your disposal.
Microsoft’s Voice Recorder
This is a free and native Windows application that is exactly what most of users need. Just tap the button with a microphone and speak up.
The drawback is obviously the absence of any editing features that you might want for cleaner sound.

AVS Audio Editor
AVS Audio Editor allows recording voice on Windows 10 as well as other sound from various inputs like microphone, vinyl records, and other input lines on a sound card. You can also extract tracks from videos.
For those who want effects and editing of recordings, AVS Audio Editor has popular tools arranged in tabs.
Start with watching this step-by-step guide for voice recordings on Windows:
Try the app today – see all features in action.
Adobe Audition
This solution is familiar to any professional music producer. With virtually endless number of tools and effects, it lets you create impressive sound on Windows 10.
Adobe could be rather costly for individual use, so make sure you’ll use at least some of its features that aren’t available in alternative software.
Audacity
Another popular voice recorder for Windows 10. Free and open-source, it offers all important tools for post-editing your audio files and mixing them up.
Beginners find this application rather difficult to use at first, since the interface looks pretty daunting for users without much experience in audio production.

What do you need for a good voice recording?
Software is not the only element you need for voice recordings at a high quality. Here’s some additional equipment you may find useful.
Microphone
Today there are many microphone models from dozens of manufacturers, from the most affordable to expensive ones. Good news is that almost all of them provide acceptable input quality.
Choose with your goal in mind. Professional musicians may opt for microphones with a higher price, while beginners will be happy even with lavalier mics.
Microphone stand
This is what you’ll need as a complement to the professional mic, in order not to stay with it in your hands.
Shock mount
This piece of equipment is necessary to reduce some vibrations and rumbling.
Pop filter
Filters help eliminate unwanted speech sounds that will be unpleasant for ears in the final voice recording.
How to edit the recording?
Even with the appropriate software and equipment, most recordings need editing. Let’s see how it works in AVS Audio Editor.
Open the Effects tab and browse different tools there.
Sound normalization
This option automatically regulates different volume levels. Especially useful when you want to merge multiple recordings.

Equalizer
Set suitable voice frequencies in equalizer automatically with the Vocal preset.

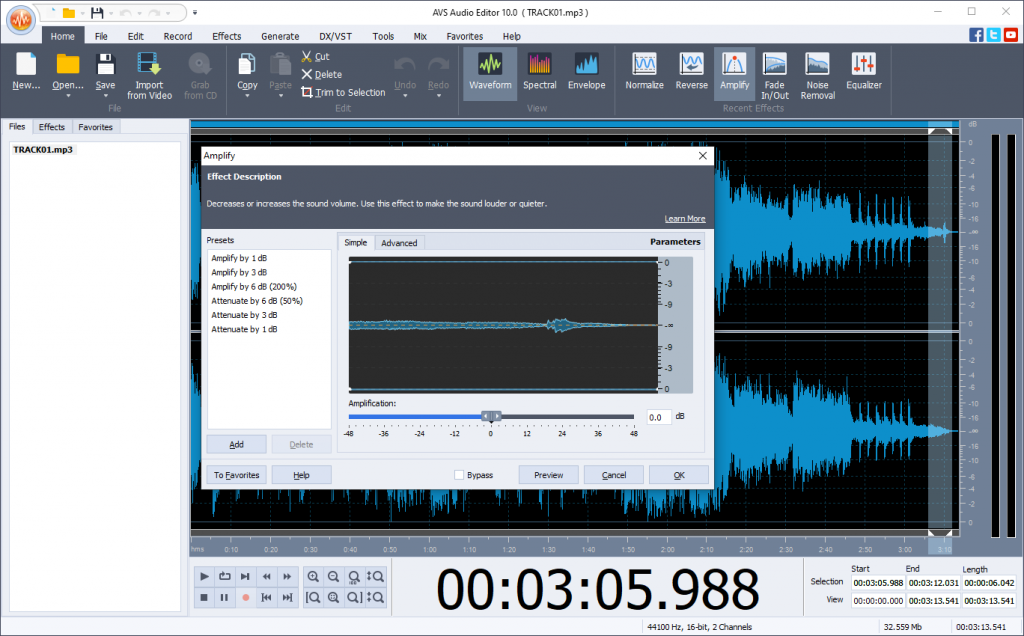
Amplification
Remove sharp sounds or make whisper audible. Choose one of amplification presets or adjust one manually.
Fade In/Out
With this tool, you can remove occasional mouse click at the beginning or end of your recording. It also makes the audio start and finish smoothly.
Final words
To do a voice recording on Windows 10 is pretty easy with a wide range of free and paid apps available for this operating system.
Find additional guides in useful links below. They’ll help you along the way.
Useful links

MOV is a filename extension for the QuickTime multimedia file format. This popular container format is developed by Apple and hence quite popular for working with videos on Mac. Audio, video, and subtitles can be present in this type of movies.
The MOV format is perfectly suitable for editing and distributing videos over the Internet.
If you’re a Windows user though, don’t leave this article. We’ll cover MOV specifications, pros and cons, how to open and convert these videos.
Is MOV a good video format?
As any other video type, MOV has advantages and disadvantages that you should keep in mind when making clips in this format.
MOV is a lossless, so the output files have high quality even compared to MP4. The format is supported by nearly any player – Windows, Mac, and iOS users don’t need additional apps for it.
The most disappointing about MOV is incompatibility with Android phones and large size due to the authentic quality.
How to open a MOV file?
Thanks to the support for high-quality video, most of media software can play back MOV files. The list below contains the most recommended examples.
Open a MOV file on Windows
Even on Windows, you’ll open any MOV video without additional conversions. Integrated Microsoft’s app Movies & TV supports this extension.

Another option is AVS Media Player. It’s free, plays back MOV and other video formats, audio files, and images.

The app is suitable for Windows 11 and previous versions up to XP. Get your media player for different multimedia content:
Open MOV clips on Mac
As mentioned previously, Apple computers is the sweet home for MOV clips and you definitely can open such files without any third-party apps. Just find or download QuickTime Player:
Unfortunately, this method is mostly suitable for older Macs. Apple ceased the support of QuickTime in 2018.
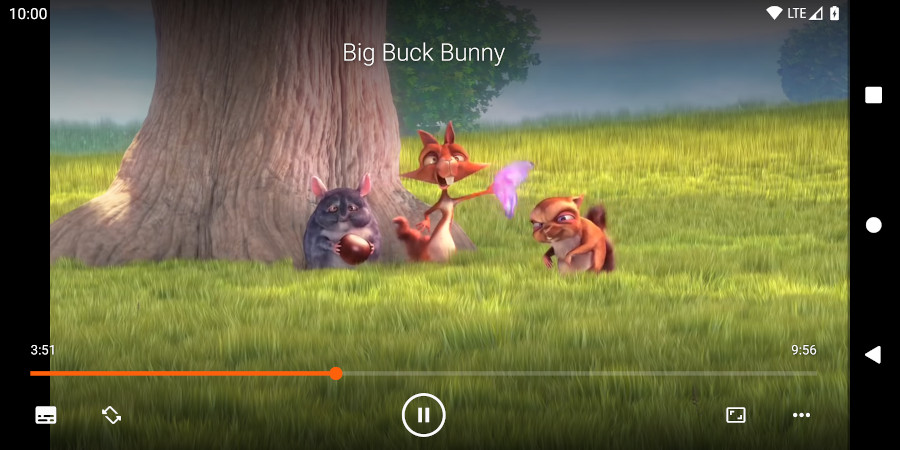
For the most recent Macs, we recommend VLC Media Player. It’s a free application for opening MOV videos.

You can also make some minor amendments to the playback. For example, slow down or speed up videos.
Apps for iOS (iPhone / iPad)
Apple mobile devices support MOV video files. No additional players needed – just open your clips in Files.
Apps for Android
MOV files are incompatible with Android devices. You’ll need a third-party application. Luckily, Google Play has many options, such as MX Player.
VLC for Android is another nice player that opens a large amount of video formats.
Share MOV videos online
Although the most popular format for streaming and sharing videos over the Internet is MP4, MOV files are widely supported by well-known online platforms, including YouTube and Vimeo.
Google Drive is an example of storage services where you can preview almost any video.
How to convert MOV to another format?
If you want to change the format of your MOV video, do not rename the file. It doesn’t automatically convert the file properties, whereas your clip can become corrupt and unusable.
Convert your movie with free AVS Video Converter for Windows.

- Upload or drag’n’drop your video to the AVS Video Converter.
- Choose the output format on the toolbar. MP4 is set by default.
- Open the dropdown list with profiles and choose one with suitable video properties. Optionally, go to Advanced and enter parameters manually (recommended for experienced users).
- Click on Convert Now!
Afterwards, you can open a folder with the output file or upload it to your gadget or digital storage devices.
Get AVS Video Converter for Windows today – it’s free and super easy to use.
Final words
MOV is a high-definition and widely supported format. In some cases, you still need to install additional players or convert a movie to another format. There are many apps to choose from – for Windows, Mac, iOS, and Android.
You can also edit MOV without conversion using AVS Video Editor.
Useful links
What is the smallest video format?
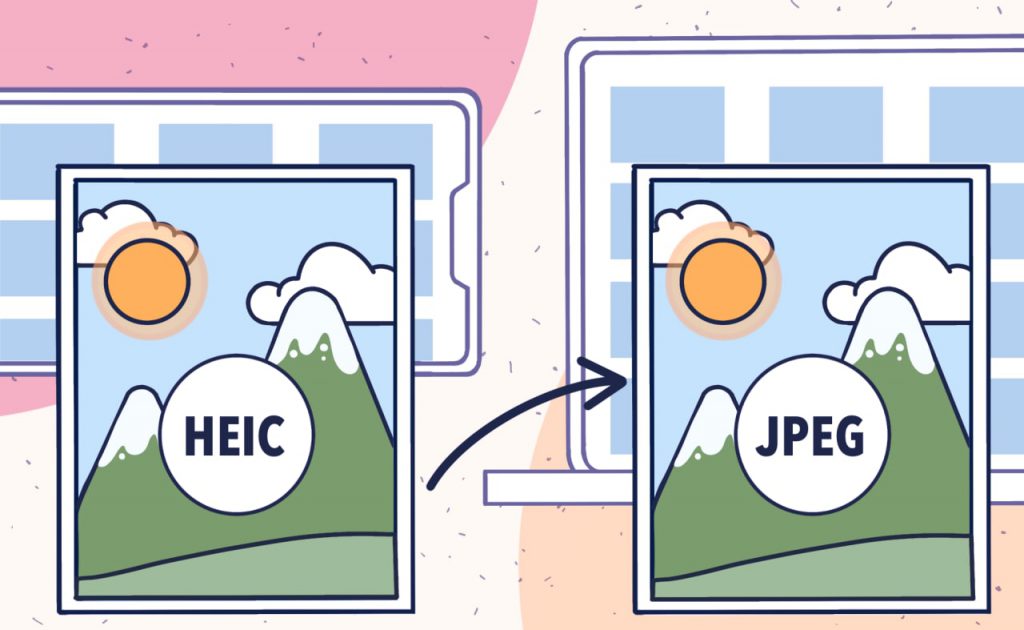
As an Apple device user, you probably know about the HEIC extension. This image format is indeed useful: with the same quality as JPEG it requires about 50% less space on your smartphone or tablet.
But there‘s a minor drawback about HEIC: not all devices support this format. To make sure that a shared photo will be available to recipients with any smartphone, use one of the HEIC to JPG converters from our list.
The best HEIC to JPG converter for Windows
AVS Image Converter is one of the best free options to change HEIC to JPG.
- Upload your HEIC image to the app.
- Choose To JPEG.
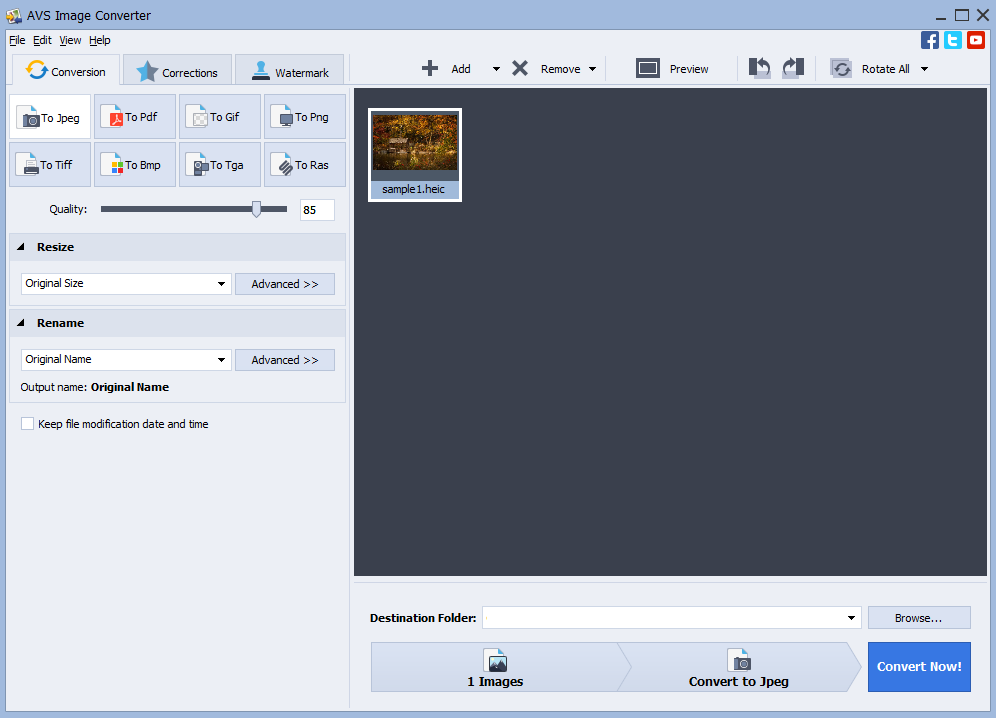
- Click on Convert Now!
To find your output JPEG image, click on Open folder in the popped-up window.
Download AVS Image Converter today — it’s free!
The entire AVS4YOU multimedia suite is currently available with large discounts. Save 70% today!
The best converter for Mac
Preview is the native Apple software where you can turn HEIC photos to JPG for free.
- Open your HEIC file in Preview.
- Go to File ⇾ Export and select JPEG in the dropdown list.
- Click Save.
There’s a good guide on the conversion process by Show Me on Mac:
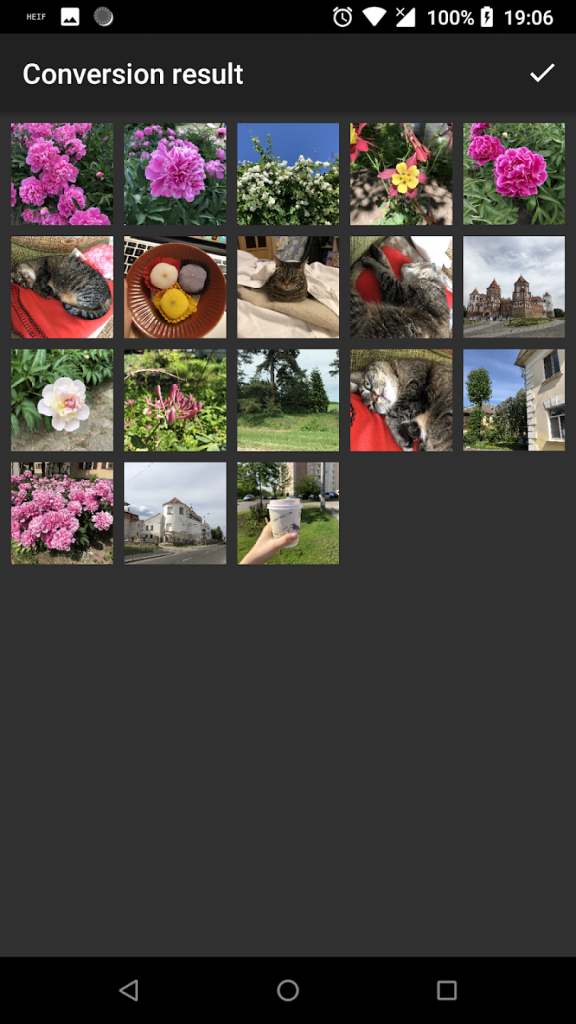
For Android
The most Android devices doesn‘t shoot photos in HEIC. But if someone has send you a file of this format, you can use the Luma app to have an output JPG image.
- Select HEIC files to upload them.
- Save a picture as JPEG.
Alternatively, you can transfer files to your PC or Mac and proceed with format conversion there. Without ads or in-app purchases.
For iPhone
iOS devices are exactly where changing the image format to JPEG must be relevant. The software from Spicy Apps is perfect for this task.
- Select HEIC files to upload them.
- Save a picture as JPEG.
Again, if you have time and want to process images for free, in bulk, and without ads, consider using desktop apps for Windows or Mac.
The best HEIC to JPG converter online
Numerous free services over the web let you change HEIC to JPEG without installing third-party apps. Just one popular example is Convertio.
- Drop files to the upload area. You can choose them from Dropbox or Google Drive too.
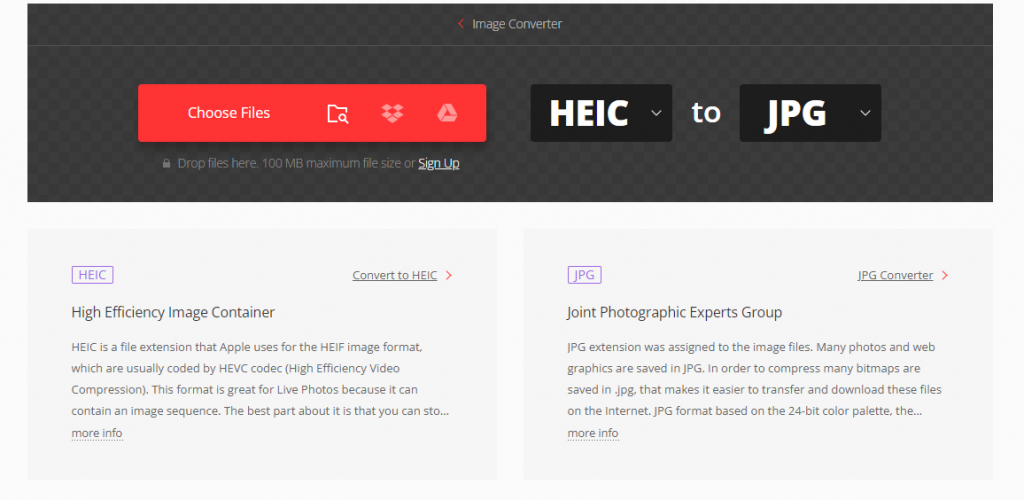
- Click on Convert and wait until the process is complete.
- Download the output JPEG file.
The online conversion also has disadvantages. You need to expose personal images to a web service, processing many images simultaneously requires stable Internet connection and time — free plan limits concurrent conversions to 25 only.
Frequent users may consider a subscription from $5.99/month.
How to set JPEG as a default photo format?
Starting from iOS 13, you can disable HEIC as a standard for images on your iPhone. Just go to Camera -> Formats and choose Most compatible.
Now you won‘t even need to convert HEIC photos each time!
Final words
HEIC is a nice format for storing pictures on a mobile device. Since the summer update 2021, you can add such photos to your projects in AVS Video Editor.
We‘ve collected some more interesting articles around working with images below.