Category: Без рубрики
Many high-quality music listeners love the M4A format for clean sound at smaller file size. Not all players and devices support it though.
Want to make your songs and tunes compatible with any software or gadget? Learn how to convert M4A to MP3 on Mac and Windows!
What is M4A
MPEG-4 Audio (M4A) is a container format widely used on Apple‘s devices and services, including iPad, iPhone, iPod, iTunes etc. Here are the main benefits of this M4A:
- Original sound quality
- Manageable file size
- Low bitrates
- No Digital Rights Management (DRM)
- Standard for Apple devices (iPhone, iPad, iPod touch)
- Supported by iTunes, Winamp, QuickTime, VLC etc.
One of the reasons to turn M4A into MP3 can be incompatibility with some players or hardware.
Why convert to MP3
MP3 is probably the most widely known and supported audio format worldwide. It makes files easy to transfer, access, and listen. Look at the top advantages of MP3:
- Reduced file size
- High quality (at 320 kbps)
- Compatible with all media software and devices
- Standard for any online service (Soundcloud, Amazon Music, 7Digital etc.)
- Free format without patents
Want to make your M4A more manageable for online sharing or just need more music in your library?
Learn how to convert M4A to MP3 free on Mac and Windows computers!
How to convert M4A to MP3 on Mac
MacOS has a simple way to change M4A to MP3 without installing new third-party software. You can use iTunes or Apple Music.
iTunes
Open the iTunes app on your Mac computer and follow the steps below.
1. Go to Preferences —> General and click on Import settings.
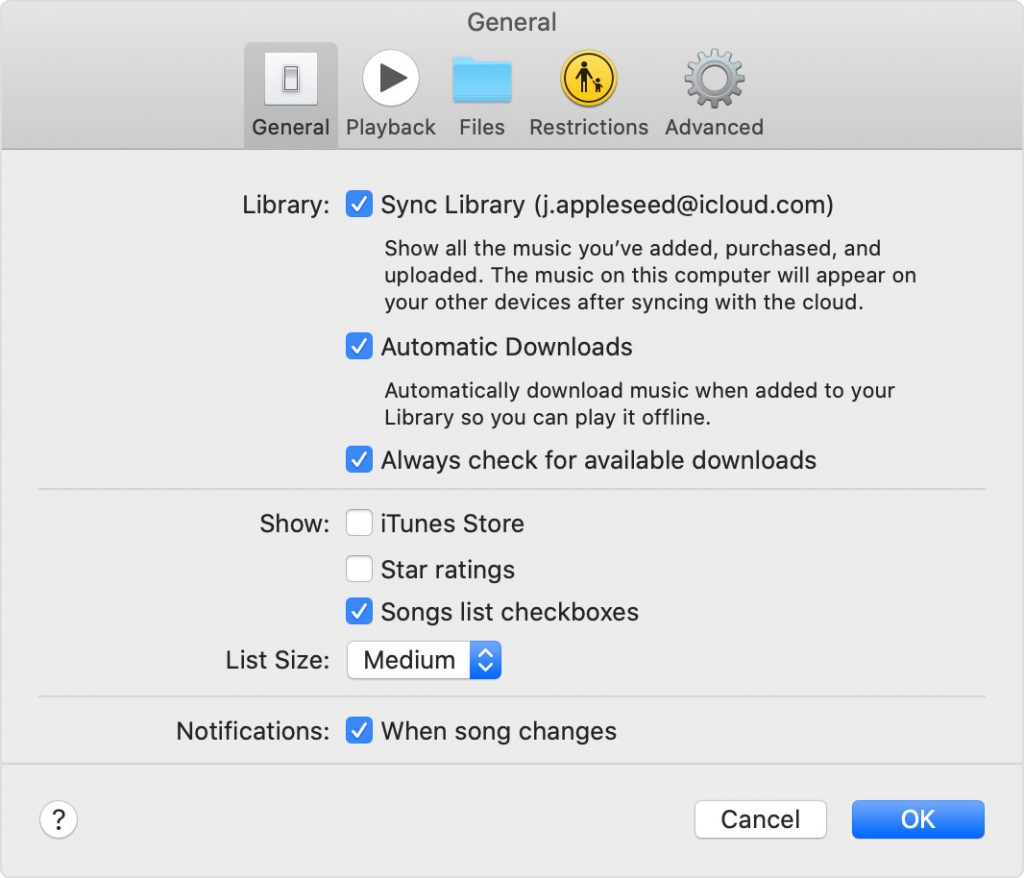
2. Open the dropdown list next to Import using… and choose MP3 Encoder.
3. Select songs in the library, go to File —> Create New Version and choose Create MP3 Version.
Apple Music
Open the Apple Music app on your Mac computer and follow the steps below.
1. Go to Music —> Preferences and click on Import Settings.
2. Activate the menu next to Import Using and choose MP3 for encoding.
3. Open File —> Convert —> Convert to MP3.
That is how to change an audio file from M4A to MP3 on Mac.
How to convert M4A to MP3 on Windows
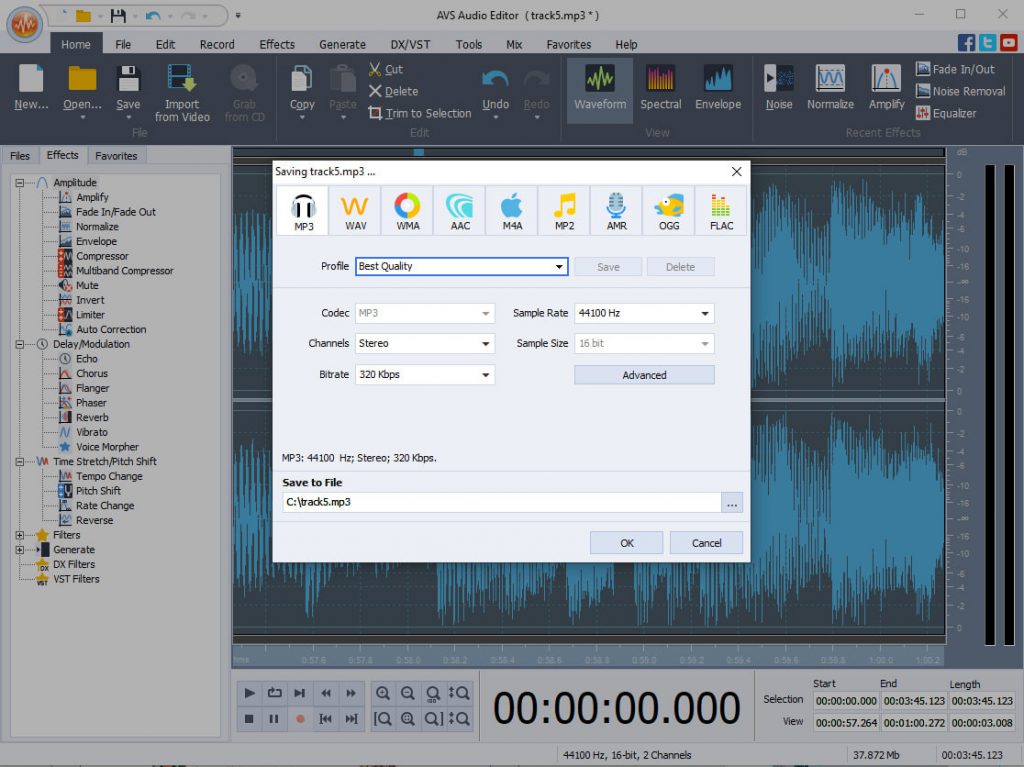
The easiest way to change M4A to MP3 on a Windows computer is to use free AVS Audio Converter. Follow several simple steps below.
1. Upload a M4A file for conversion by clicking Import on the main toolbar.
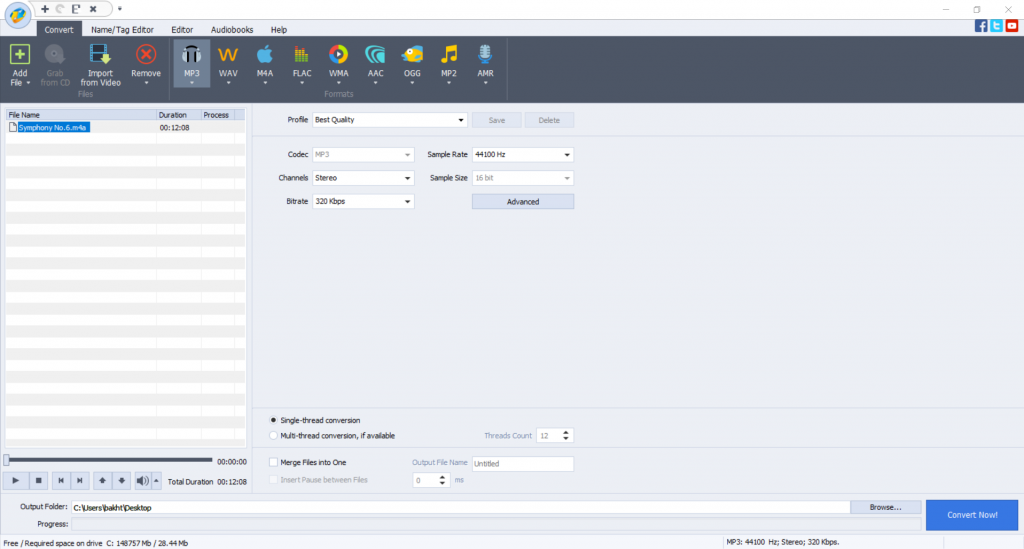
2. A format for conversion is by default MP3. If it is not the case, click MP3 on the main toolbar.
3. Choose one of pre-defined profiles depending on the required quality of the output file or modify its properties yourself.
4. You can convert multiple tunes and even merge them into one file by selecting the appropriate checkbox in the settings.
5. Customize the location of the output file by clicking Browse…, if needed.
6. If you want to choose more precise properties of an audio file (Coding method, filtering frequency), click Advanced >>. Please note that if you are new to audio encoding, it is recommended to use pre-defined profiles to get a file of expected parameters.
7. Click on Convert Now.
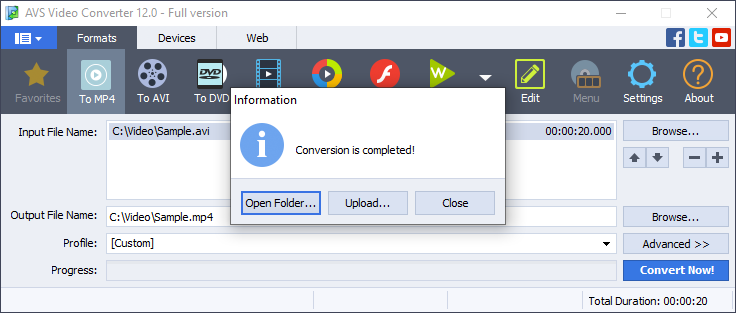
When conversion is completed the following window pops up:
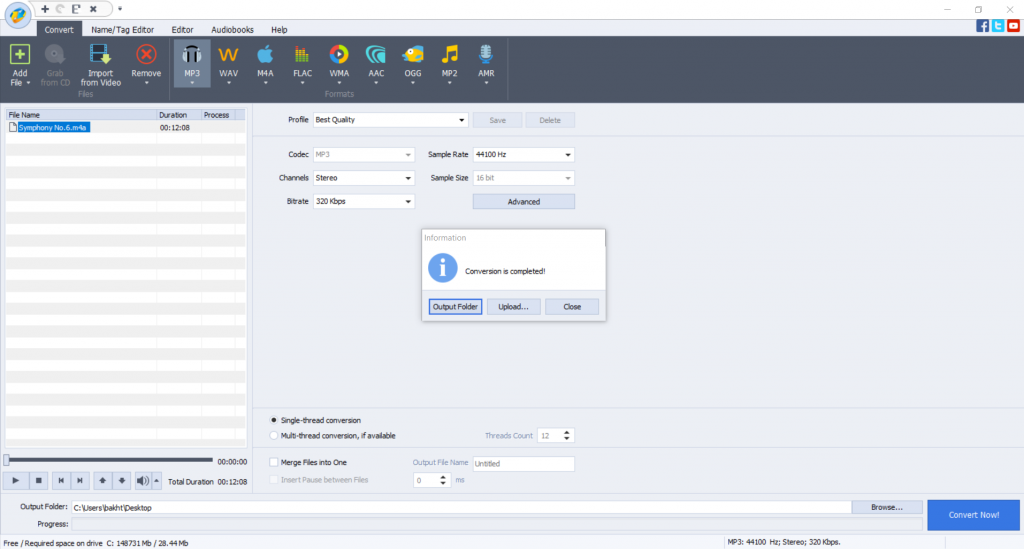
The Open Folder… button helps you find the location of a converted file easily.
The Upload… button transfers the converted audio to your gadget or digital storage devices.
Get AVS Audio Converter to convert M4A to MP3 free without registration!
How to convert M4A to MP3 online
Another way to make M4A into MP3 is online via CloudConvert or ConvertFree.
1. Select file from your computer, Google Drive, Dropbox, OneDrive, or upload it using URL.
2. Set MP3 as an output format and click on Convert.
3. Download the new MP3 audio file.
The disadvantage of this method is that you need a stable Internet connection.
Now you know how to turn M4A into MP3 free on Mac, Windows, and online.
Useful Links
Polish up scratchy voice recordings. Learn more>>
Regulate different volume levels. Learn more>>
Add Echo to your audio files. Learn more>>
Still trouble getting started? Leave your questions in the comments or use our support contact form.

Make content on YouTube, but have no introduction part? Your content needs personalization! Today we‘ll overview some common ways to create an intro.
Why you need YouTube intro
Intro video is literally a face of your channel — it makes your YouTube project a brand. Videos without an intro at the beginning look raw and unedited. With your loyal audience growing, subscribers will trust clips containing the logo of your channel.
Intros are just videos. Any visual editor has basic features to create them.
In this article you‘ll learn how to make a YouTube intro in BluffTitler, Canva, and AVS Video Editor. We gathered ideas for every wallet and taste.
How to make a good YouTube intro
These tips are to help you choose necessary elements for a professionally-looking intro.
Spread your word. Make sure to add some text — name of your channel, slogan, some important captions. In most cases vloggers stick to simple text zooming in or out. Animated text will make your intro easy to memorize.
Be yourself. Many apps offer templates to compile an intro in a few minutes. But if you want people to associate it with your content, intro must stand out. Play with elements, add custom backgrounds, apply logo.
Keep it shorter. Different researches show that viewers need first 5-10 seconds to decide, whether they want to continue watching a clip. YouTube users should get the idea about the content in seconds. Ideally you need to make a teaser to what this video is about and then show your brief intro.
Add some music. There are numerous free stock audio tunes on the Internet that you could use in your intro. The tune must correspond to your content and never be annoying to the ear.
Quality is king. The visual quality of your YouTube intro should be the same as the whole video. Branded 4K clip followed by 360p looks strange and unprofessional. Viewers may think you don‘t know much about video production.
How to make a YouTube intro in BluffTitler
BluffTitler is arguably the most simple software to create animated text intro videos. Available for Windows 7, 8, and 10, the app generates spectacular and professional clips with moving words.
Just enter your text into one of numerous templates. No prior experience needed.

When your intro is ready, upload it to a video editor and insert at the beginning of a future YouTube clip. BluffTitler does not provide footage editing.

The most affordable Easy version starts at 29.95 € — its functionality is pretty limited. You can only render and export layers, styles, and properties. To edit them and unlock all capabilities you have to purchase the Ultimate version for 79.95 €. Compare versions
Template packs cost something too. These investments are sensible for commercial video producing and owners of well-known YouTube channels.
How to make a YouTube intro in Canva
Canva allows creating intros with photo or video backgrounds online. Dozens of templates are available and customizable to your taste. The result will be saved as a high-quality MP4 file suitable for further editing in the specialized multimedia software.

The process is similar to what you have in BluffTitler — just replace text and visuals, or add custom ones. Move objects, play with zooming, invite fellows to collaborate. In Canva you‘ll get your intro video done in a few clicks with no editing skills needed.
Canva is free. Experienced users who need more premium templates, additional design and video editing features, should consider Canva Pro. This plan costs $119.99 paid annually or $12.99 paid monthly.
How to make a YouTube intro in AVS Video Editor
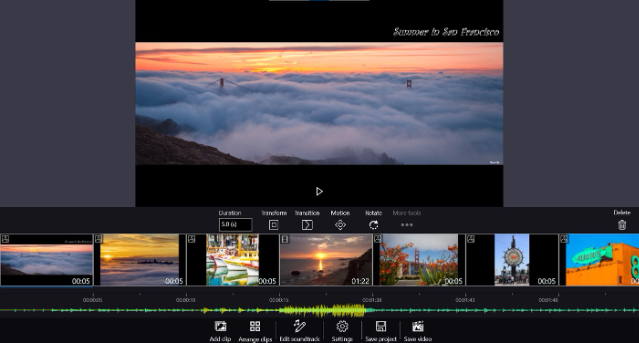
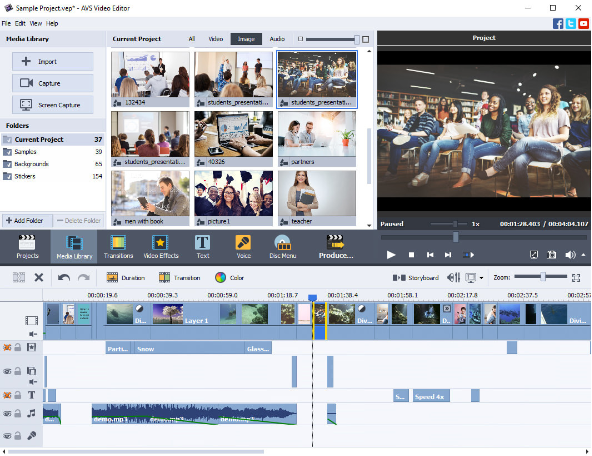
In AVS Video Editor you can create customized intros from scratch. With text, videos or photos in the background, you can apply a sound track and continue producing the whole clip in the same application.
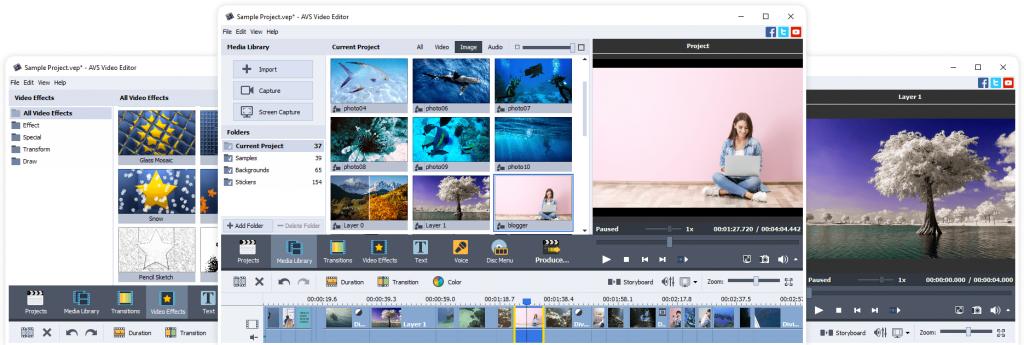
To provide a background, upload a picture or a video. Drop it to the corresponding line on the working area.

Add text with the name of your project, if necessary. Go to Text, choose a suitable sample and modify the caption.
Done! Proceed to the main part of a video and share the project to the YouTube audience.
The unlimited access to AVS4YOU costs only $59.00 now! Alongside with the video editor, you‘ll have a complete multimedia suite: video converter, audio converter, audio editor, and media player.
Get the full AVS4YOU video/audio editing solution and create a personalized intro for your YouTube channel.
Useful links
What is YouTube video editor and how to use it. Read blog
Best supplements to YouTube editor in 2021. Read blog
How to make your intro look cinematic. Read blog

Passionate about singing or playing musical instruments? Or want to record internal audio on Windows 10? Record everything with the best audio software for professionals and laymen.
Before we overview the applications though, let’s find out what hardware you may need during the process.
How to record audio on Windows 10?
To get the output recording you really expect to, make sure you have necessary and additional devices:
- PC or laptop with Windows 10
- Microphone (internal or connectable)
- Sound card
Finally, you’ll need a good piece of recording software.
1. AVS Audio Editor
AVS Audio Editor allows recording audio data from various inputs like microphone, vinyl records, and other input lines on a sound card. You can also extract sound tracks from videos.
AVS Audio Editor offers numerous tools and effects to remove roaring, hissing, crackling, etc. You can alter bitrate, adjust different volume levels, cut, join, split audio files, and create ringtone for your smartphone. All popular audio formats are supported, including MP3, FLAC, WAV, AAC, WMA, etc.
The interface is easy to navigate through. All you need for a quick start is to open the Record tab and hit the button with a red circle. That’s why beginners choose AVS Audio Editor as the best audio recording software.
Apart from an audio editor, you‘ll have a ready-to-go multimedia suite: video editor, video converter, audio converter, media player, etc. See full list >>
AVS4YOU constantly has attractive discounts, free updates and support. Now you can get an unlimited access to the complete suite for $59.00.
Why choose AVS Audio Editor for Windows 10?
✅ Audio editing features & effects
✅ Easy interface for non-professionals
✅ Acceptable system requirements
✅ Additional apps: audio converter, video editor, media player etc.
✅ Windows 10 supported (+previous versions, e.g. Windows 8, 7, XP, Vista)
2. Adobe Audition
Adobe offers a comprehensive solution for audio recording and editing. In Adobe Audition you can record and adjust multitrack sessions, automatically regulate voice levels of multiple tracks, and apply numerous professional audio effects.
Adobe Audition runs on Windows 10 machines and its prices start from $20.99/mo. Students and teachers can get the complete multimedia software suite Adobe Creative Cloud for $19.99/mo.
It’s a bit tricky to find the recorder in Adobe. You’ll need to go to Window -> Editor and find the recorder at the bottom.
Audition is certainly one of the best audio recording software for Windows 10, if you are a producer, sound engineer or just have rather deep knowledge of advanced multimedia tools. Beginners may want a cheaper and less complicated solution.
Why choose Adobe Audition?
✅ Working with multitrack sessions
✅ Windows 10 and higher supported
✅ Numerous advanced audio effects
✅ Wonderful noise reduction
3. Audacity
Audacity belongs to the best free audio recording software. Open-source and cross-platform, it allows recording through a microphone, line input, mixer and other devices. You can record multiple channels at once, digitize audio files from tapes, LPs, and MiniDiscs.

Audacity can record at high sample rates, which boosts the quality of your track. All necessary sound effects are available. Experienced users may want to integrate additional plug-ins to experiment with the sound.
The app well-localized and supported by any operating system — Windows, Linux, and macOS. Definitely the best free audio recording software with numerous sound effects.
Why choose Audacity for Windows 10?
✅ Free and open-source
✅ High compatibility with Windows and other OS
✅ Basic and advanced audio effects
✅ Audio conversion
✅ Plugins
4. Sound Forge
Owned by Magix, Sound Forge has been providing musicians and producers with professional tools for audio recording and editing. There are 3 major solutions for sound makers — Audio Studio, Pro, and Pro Suite.
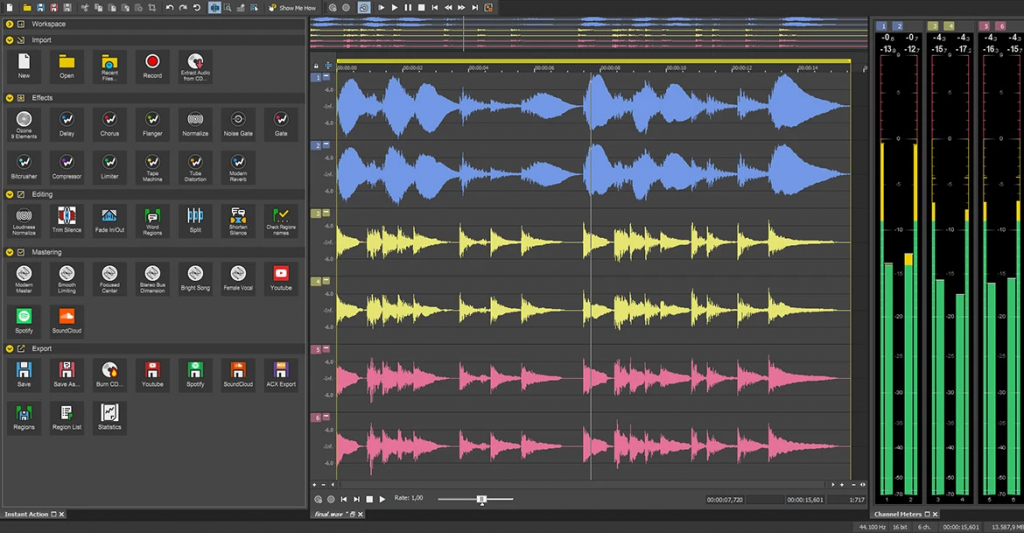
All three Sound Forge versions allow high-quality recording multiple channels. But maximum bit depth, number of channels, availability of advanced effects and editing tools are different. You can also integrate additional plug-ins — most of them are only available in Pro and Pro Suite versions.
Sound Forge runs on Windows 8 and 10, and macOS. Acceptable minimum system requirements make the app compatible with most computers. Popular audio formats is supported for import and export.
Each version of Sound Forge is a one-time purchase, not a subscription. The prices start at $49.99 and reach $399.00 for the most advanced solution Pro Suite. Many experienced musicians refer to Sound Forge as the best audio recording software for Windows 8 and 10.
Why choose Sound Forge?
✅ Professional audio editing features
✅ Acceptable system requirements
✅ Many plugins
✅ Intuitive interface
✅ One-time purchase
5. Voice Recorder
This is the native Windows 10 app for simple voice recording. Unlike the big proprietary solutions listed above, it doesn’t provide too many features. Just recording and flagging important points in your audio file.
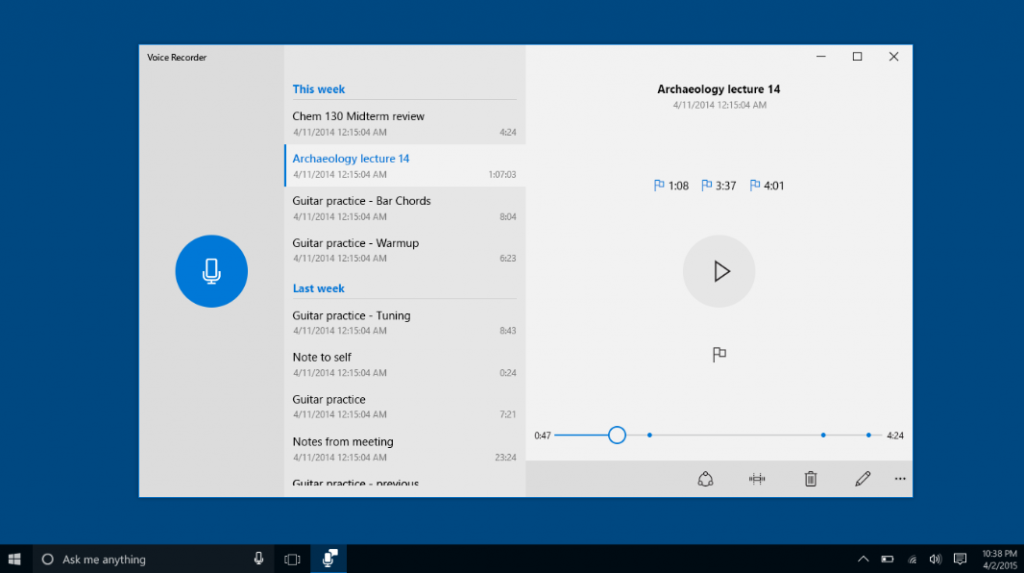
The best advantage of the Windows’ Voice Recorder is that you get a free and trusted app in the Start menu. To begin recording, just connect the microphone and tap the big button in the opened window. No complicated things to learn!
At the same time, lack of features for even audio recording is disappointing: what if you want to adjust gain, normalize the volume levels, or cancel noise of surroundings? Let alone advanced effects or format conversion.
Still, this app for Windows 10 is good for a quick start or occasional speech recording.
Why choose Voice Recorder for Windows 10?
✅ Fast and straightforward recordings
✅ Native, trusted app
✅ Super easy to use for everyone
✅ Free
6. VirtualDJ
VirtualDJ is software for mixing and recording music tracks on your Windows 10 computer. You can even use it without specialized hardware.
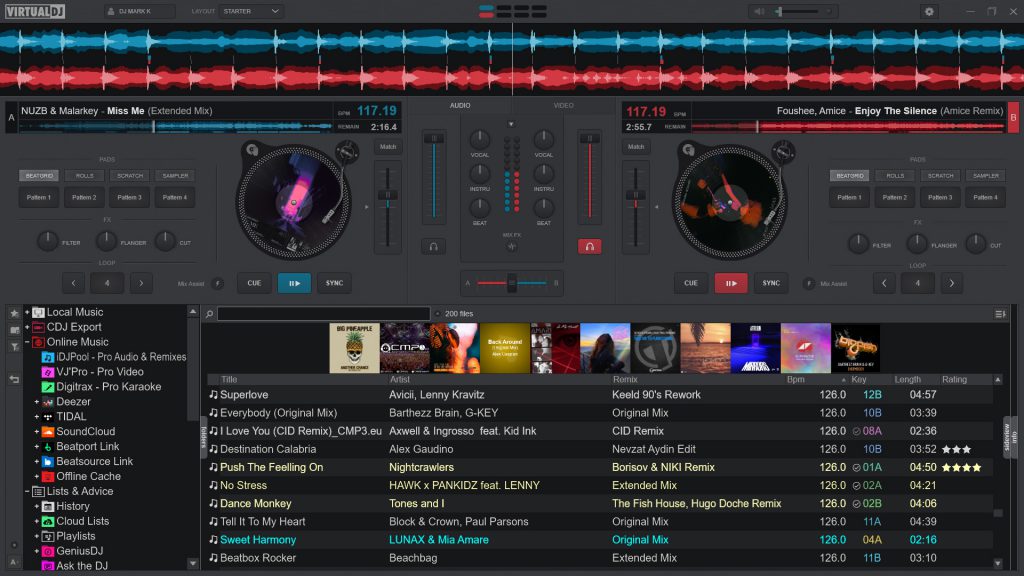
Not only you can make music, but also record your voice in this application. When you’re producing a session, for example, you’d want to comment on what track is playing.
Professional, but easy to use thanks to the intuitive interface, VirtualDJ has many features on board. High-quality sound, filters, equalizers, effects, sampling. Everything a professional DJ needs, in fact.
Besides, VirtualDJ offers flexible pricing with the Pro version available as a subscription for $22.80/month or a flat purchase for $358.80. There’s also the Home edition with more realistic price tags for individual users.
Why choose VirtualDJ?
✅ Music mixing software
✅ Voice and sound recording
✅ Numerous audio editing features
✅ User-friendly interface
7. i-Sound Recorder
Another small, but powerful app for voice and sound recording on Windows. i-Sound Recorder can persuade everyone who likes high-quality sound.
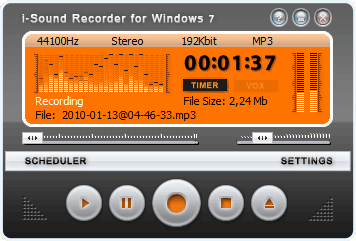
The application directly records audio from speakers, microphone, or sound card in lossless FLAC, WAV, and APE formats to ensure the perfect quality.
Along with i-Sound recorder, you can purchase a bundle of audio software with a converter, CD burner, editor, MIDI renderer etc.
Still, even with all advantages, the prices may surprise you. $29.95 for the recorder as a one-time purchase.
Every of the above listed apps has strengths and drawbacks, so the right choice will fully depend on your needs, experience and volume of investments. It may sound banal, but there is no one-size-fits-all solution even in big multimedia suites.
But we don‘t want to let you go empty-handed! There are some basic tips for your first steps in audio recording on Windows 10.
Making the best of recording software
Every above mentioned solution can record sounds without additional hardware. Unfortunately, audio software is just a small part of what you need for a high quality recordings. Make sure to have some necessary equipment too.
Microphone has the largest impact on the output sound file. Better mic means cleaner recordings. If you have none, the system will use a microphone on your PC by default, which does not perform good enough.
Beginners do not need expensive equipment, sometimes a lavalier microphone is more than enough.
Microphone stand and shock mount help reduce rumbling, but are not necessary for audio recording.
Some mics need phantom power for additional electricity supply.

Pop filters is a must for voice-overs. They help supress unwanted plosive and hissing sounds in your recording.
Сomputer audio interface is rather expensive and used to record clean high-resolution studio sound.
Finally, make sure surrounding noises and computer buzzing will not spoil the recording.
Useful links
How to clean up voice tracks in AVS Audio Editor. Read blog>>
How to regulate volume levels in AVS Audio Editor. Read blog>>
How to add echo to audio files. Read blog>>
Get free AVS Audio Converter. Download now

Video cropping is one of the most important editing tools for any content maker. In this article we will explain how it works, when you need it, and how to crop videos on different operating systems.
What is cropping
To crop means to frame a clip to the desired area you want to be shown. Some visual parts are removed and aspect ratio can also be altered. The video length remains the same.
This process is not a synonym to trimming and cutting, as believed by some beginners. When you trim or cut clips, you just make them shorter and nothing happens to the image on the screen. Read this post to discover more about all three tools.
The most common use case is to remove the unwanted parts from a footage. Poor-looking surroundings, embarrassing situations, and just things you do not want to go public — the list can go on forever.
Popular social media may have their own standards, when it comes to the aspect ratio or resolution. Instagram, TikTok, Snapchat, and similar services usually provide native tools to crop the borders of a video free.
Sometimes you want to make a vertically-oriented clip fit a horizontal aspect ratio. Vertical recordings have annoying black bars on the sides that ruin the harmonious view of the overall project.
But no worries — let us see how to crop a video screen easily on any platform!
Crop videos on Windows
AVS Video Editor lets you crop clips on Windows 10/8/7/XP/Vista. Just follow these simple steps below.
In this example we‘ll get rid of the black bars in the vertically-oriented footage.
1. Import a vertically-oriented recording and add it to the timeline.
2. Select a horizontal aspect ratio (16 x 9).

3. Right-click the file, choose Crop Scale, and set 100 as the value.
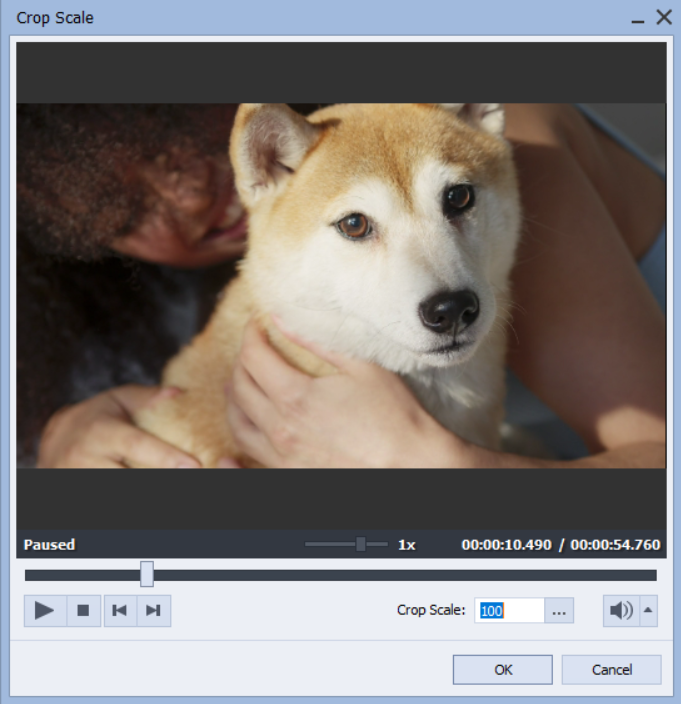
Done! Now the sides, but also some top and bottom lines are beyond the video borders. Add the clip to your project and save it as usual.
See each step in this guide on our official YouTube channel:
Need to fix vertically-oriented recordings? Get AVS Video Editor with all necessary filmmaking tools:
Crop videos on Mac
Apple provides users with a free editing software iMovie. Usually you have it pre-installed on any iMac and Macbook. Here is how to crop a video in iMovie.
1. Select a clip and drop it to the timeline.
2. Click the Cropping button and choose Crop to Fill.
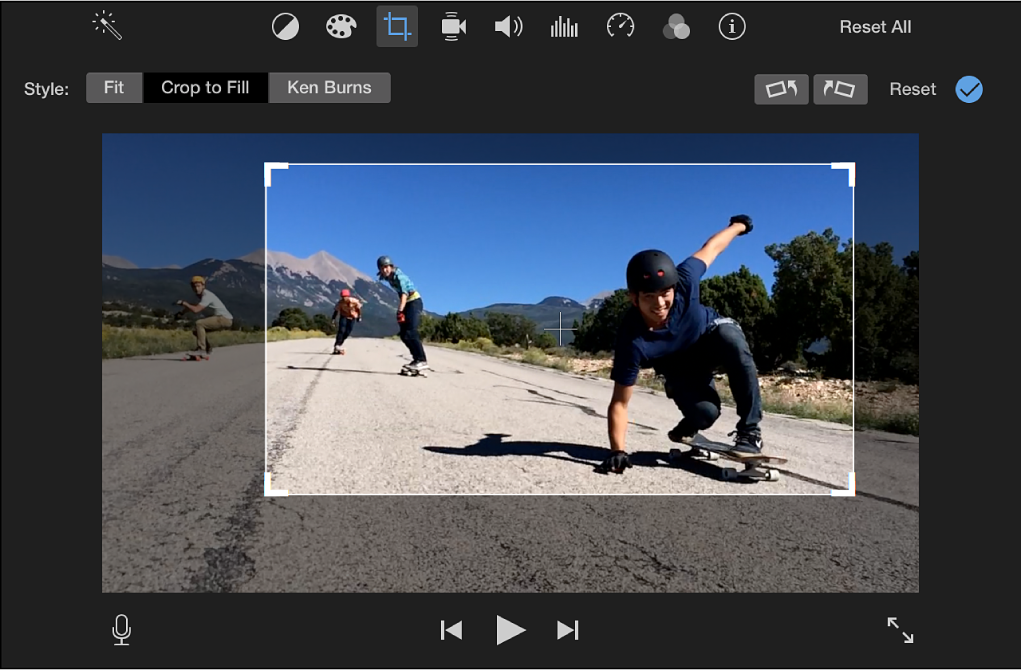
3. Choose the area you want to preserve in the finalized version.
4. Click Apply to save the parameters.
Easy, right? Now proceed with editing or share the project with your friends!
Crop videos on iPhone
There are two common ways to crop a video on iPhone or iPad free — iMovie and the Photos app. Let us try iMovie first.
1. Upload a file to the app and click on Create Movie.
2. Tap the video on the timeline and the Zoom icon.
3. Choose the suitable cropping settings and save the file.
This approach below uses the pre-installed Photos app.
1. Select a video in Photos.
2. Click on Edit -> Crop-Rotate. Drag one of the video borders in the desired direction.
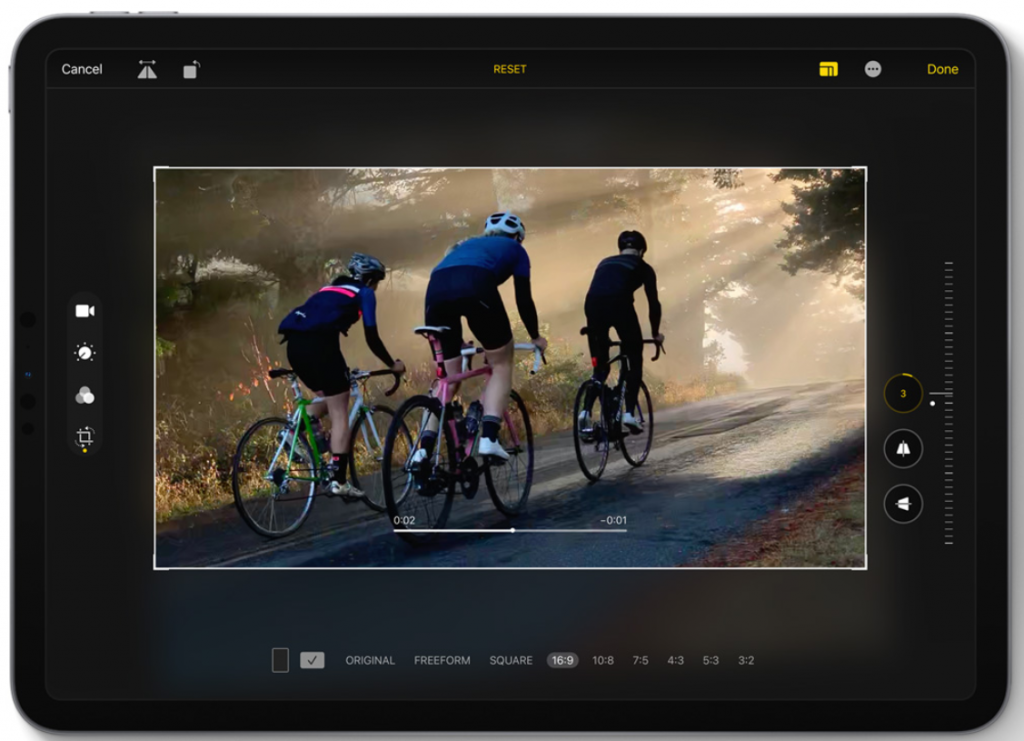
3. Save the changes.
Also, numerous third-party apps in App Store offer video cropping free.
Note: Use iMovie to crop images and videos without losing actual aspect ratio.
Crop videos on Android
Unlike iPhones, Android devices have no integrated cropping tools in the Gallery. You will need a third-party app, such as Crop & Trim Video editor. This is just an example, you can choose among dozens apps in Google Play.
Here is how to crop a video on Android phones.
1. Upload a file to Crop & Trim Video editor.
2. Click on Crop and move the borders of your footage in the desired direction.
3. Save the changes.
Manufacturers of Android devices can pre-install editing software with cropping. Check the list of default apps before searching one on the marketplace.
Want to crop mobile videos on your PC? Convert them with free AVS Video Converter and proceed to editing!
Useful links
How to make videos look cinematic. Learn more>>
How to make stunning clips for Facebook. Learn more>>
How to fix recordings filmed upside down. Learn more>>

Sometimes computers need pretty much time to process videos and graphics. With powerful components like GPU you can speed up rendering, conversion, and overall performance of video software.
What does hardware acceleration do? How to enable or disable hardware acceleration on Windows 10? Find the answers in this article.
What is hardware acceleration
Like any task on your computer, video producing is performed by two major components — central processing unit (CPU) and graphics processing unit (GPU).
Hardware acceleration is when CPU shares some workload with GPU, which results in a better overall performance. Some common tasks that will benefit from this option are computer graphics and audio editing. For example, you can make video conversion run faster in AVS Video Converter.
To speed up applications, you need hardware that is relevant to your task. Integrate powerful GPU for working with videos and high-quality sound card for audio processing. Consult experts in an electronics store, if you need assistance in understanding specifications. Remember that purchasing market-leading hardware for an older PC won’t make any good: new components require additional power supply and better performance of other hardware.
Note: Video conversion and other tasks performed with at the ultimate speed may lead to freezes in some applications. If you notice a drastic decrease in Windows 10 performance, more powerful elements may be required.
Hardware acceleration vs software acceleration
Software acceleration is used to boost application and system performance by offloading system functions to software and distributing some important ones between external hardware pieces. Your computer components still need to be rather powerful to implement this acceleration – software alone won’t help much, if your CPU is outdated.
While software acceleration is suitable for a limited number of tasks, hardware acceleration works everywhere.
Software acceleration in AVS4YOU means that Software Intel® Media decoder will be used to speed up video conversion. The decoder works on both Intel and AMD processors.
In this article we explore how to turn on hardware acceleration in AVS Video Converter.
How to enable/disable hardware acceleration
While working on Windows 10, you can turn hardware acceleration on and off for the whole system or particular apps, including AVS Video Converter and browsers. Both options are good for processing graphics.
Windows 10
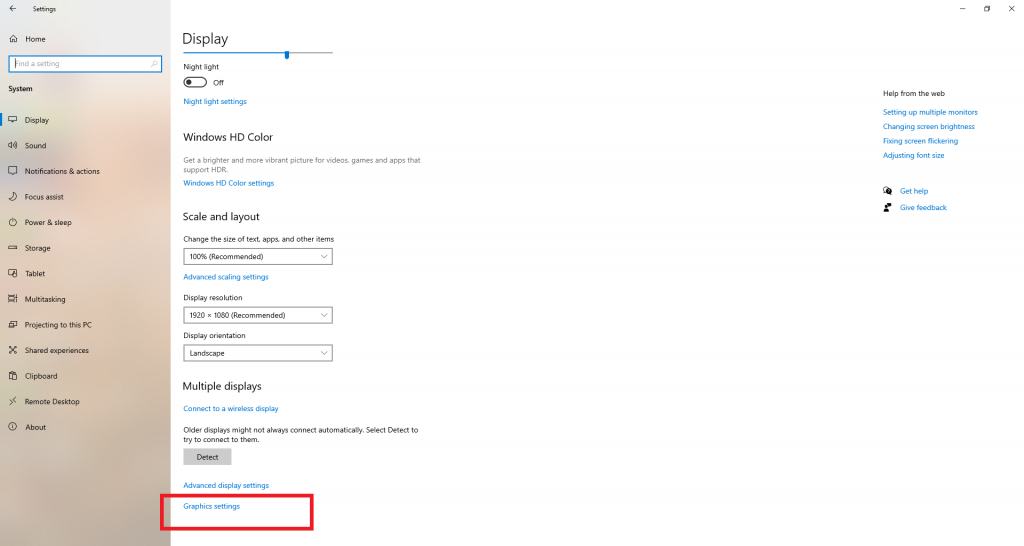
Here is how to reduce latency and improve performance on your Windows computer.
Step 1. Search for Display Settings and go to Graphics settings.
Step 2. Choose Change default graphics settings and turn on Hardware-accelerated GPU scheduling toggle option.
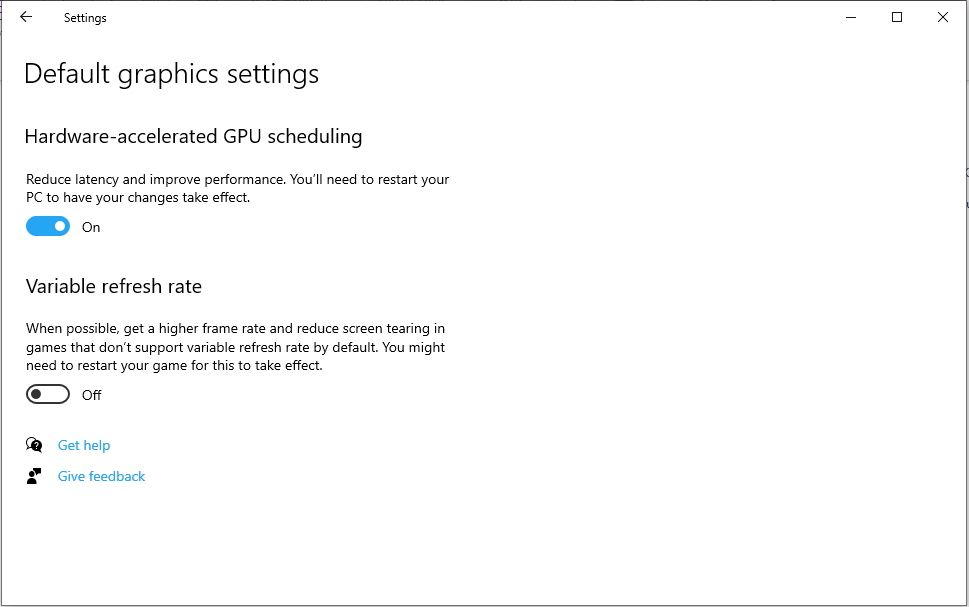
Important: If your system does not support the Hardware-accelerated GPU scheduling option, you won’t see it in the opened window.
Done — now proceed to a faster work in any application on your Windows 10 environment.
Google Chrome
Likewise you can speed up any particular app, for example browsers. Each one has own configuration settings. Follow these steps to enable or disable hardware acceleration in Google Chrome:
Step 1. Open Settings in Chrome.
Step 2. Find Advanced at the bottom of the page.
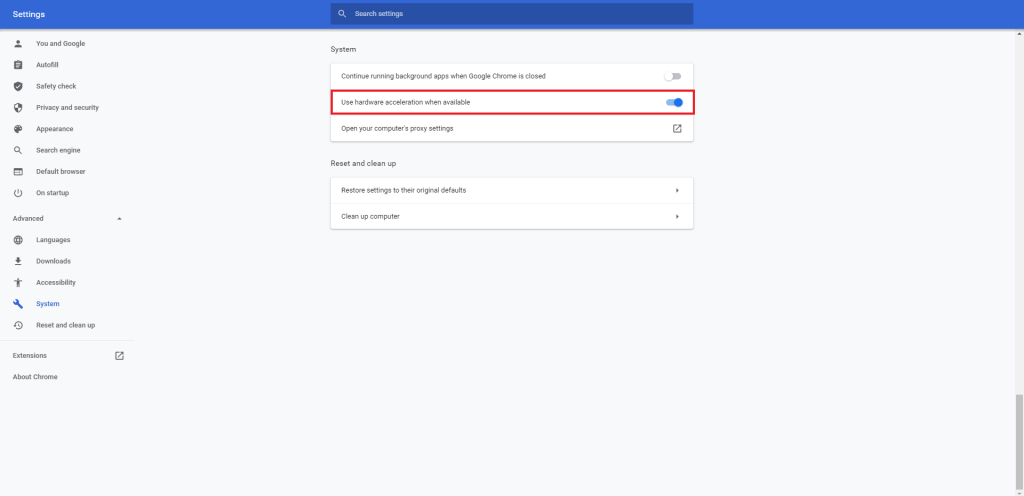
Step 3. Activate or deactivate the Use hardware acceleration when available option.
Now your Chrome runs faster — enjoy better performance when loading multimedia files.
AVS4YOU
In AVS Video Converter you can choose between Hardware Intel® Media decoder with Intel® Quick Sync Video technology and NVIDIA CUDA® decoder with NVDEC/NVCUVID technology.
Switch to Hardware in the dropdown list of Intel® Media decoder. If your computer has an NVIDIA video card, check the box to enable acceleration via NVIDIA CUDA® decoder.
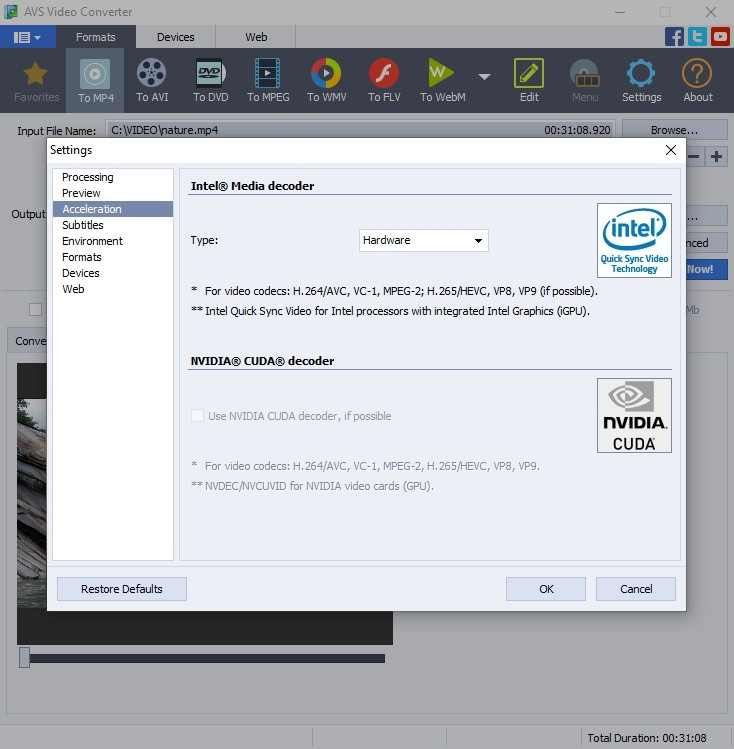
Choose the Disable option, if you need to turn off hardware acceleration.
Have enough computing power? Use it to boost application performance! Get free AVS Video Converter to switch between needed formats faster.
Useful links
Set Intel® Graphics as a preferred graphics processor. Learn more>>
Set NVIDIA® as a preferred graphics processor. Learn more>>
What are codecs and why you need them. Learn more>>
Today content makers mostly prefer MP4 when it comes to high quality at manageable file size. But what if you want ultimate video quality? Choose a lossless format for your footage, for example AVI.
Why choose AVI
AVI (also Audio Video Interleave) is a proprietary container format that was dominant in the early 2000s. Suitable for storing high-quality video and audio, AVI is still widely used and has comparative advantages:
- Lossless. Your video file does not lose quality after compression.
- Compatible. AVI supports lots of popular video codecs, which makes encoding easier.
- Adaptable. The format is supported by most video players. AVI can be opened on Windows and other operating systems with third-party apps.
- Best for DVDs. Many users choose to burn AVI videos onto discs for its high compatibility with digital video standards.
Keep in mind that AVI files are pretty bulky and cannot contain subtitles. These shortcomings make the format barely used for live streaming.
Have enough disk space and ready for better video quality? Let us see how to convert your MP4 files to AVI.
How to convert MP4 to AVI
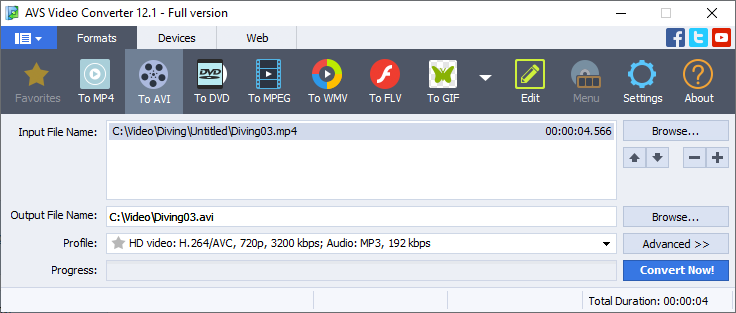
Follow these simple steps in AVS Video Converter.
- Click on the upper Browse… button to upload MP4 files.
- Click on the lower Browse… button to name the output video and define its location.
- Select To AVI on the main toolbar.
- Open Profile to set video parameters for certain devices and goals.
- Go to Advanced>> to customize the output video properties. This option is recommended for experienced users only.
- Click on Convert Now!
Choose Open Folder to find your AVI video.
Press Upload to save AVI on a mobile or USB flash drive.
Convert your videos to the most popular format in free AVS Video Converter!
Useful Links
How to make a killer Facebook video. Learn more>>
Tips for Hollywood-looking videos. Learn more>>
Colour correction for beginners. Learn more>>
Choose a suitable audio converter.
Still trouble getting started? Leave your questions in the comments or use our support contact form.

In video editing you probably came across the term codec. Most users pay no attention to this important component of literary every video they make!
In this article we explain what codecs are, why you need one, and overview the most common codecs out there.
What is codec
When you record a video, codecs make them smaller in size for storage and sharing. This operation is also known as compression. Without codecs every video would be large, filmmakers had to buy dozens of USB flash drives, video sharing would last many days and require the fastest Internet connection.
Codecs can compress videos without quality loss and degradation after multiple saves. Such files are referred to as lossless and rather big in size. Some lossless video formats are AVI, DV, VOB, and MOV.
Most codecs shrink files to a more manageable size with lower quality. Such compression is called lossy and performed in FLV, MPG, WMV.
When you open a video for viewing, codecs decompress it to deliver the best quality possible.
Common codecs
Not all video codecs are compatible with every media player. Let us see what are the most suitable ones for you.
HEVC/H.265
Most content makers prefer using H.265 for live streaming, which speaks for its compression efficiency. Videos are reduced in size with the least amount data loss and keep the image quality to the standards. Initially the codec was developed for making 4K videos. Popular hardware with HVEC support includes iPhone, iPad, Samsung Galaxy S, Google Pixel, Sony and LG TVs.
Shortcomings are minor compatibility issues, for example in VLC. After almost ten years from the initial release of H.265, it has a very low adoption due to licensing. The codec is not supported in Chrome and Firefox, and has only partial support in Edge.
H.264 (AVC)
Before the release of HEVC in 2012, H.264 was the most popular video codec. Some filmmakers still prefer it for faster compression as compared to its successor. The quality remains on a high level though. H.264 has better compatibility with players and browsers, consumes less bandwidth, and hence allows streaming high-quality videos with modest Internet connection.
AV1
This codec is extended from VP9 developed by Google for delivering YouTube videos. It is open and royalty-free, designed for streaming 8K videos without losing image quality. AV1 works stable in Google Chrome and Mozilla Firefox.
The worst thing about AV1 is the compression time, which is many times higher compared to the competition. Besides, it does not work in Safari, Edge, Opera, VLC player — low compatibility is reported by many users.
DivX
The oldest among previously overviewed codecs, DivX is distributed as freemium. You can still come across it when using hard drives to transfer videos. DivX is quite popular and easy to use.
Bad news is that the codec is commercial. If you are ready to pay for one, modern alternatives can be a better choice for you.
How to choose a suitable video codec? Think of where and how you want to deliver your content. Prioritize file size, video quality or maybe even time spent on the enconding. The choice can also depend on hardware and software you use.
AVS Video Editor works with all above-mentioned codecs — open, save, and modify your videos using any codec you prefer:
Useful links
Get free AVS Video Converter for your files. Download>>
Get free AVS Media Player to view videos. Download>>
Having trouble with a particular codec in AVS Video Editor or want to suggest adding new ones? Drop us a line in the comments or use the support contact form.

Passionate about making videos and sharing them on YouTube? Definitely you know how important basic video editing tools like trimming, cutting, and cropping are. YouTube Studio provides creators with necessary capabilities, but sometimes they are simply not enough.
Let us consider some YouTube editor alternatives for polishing up videos.
About YouTube editor
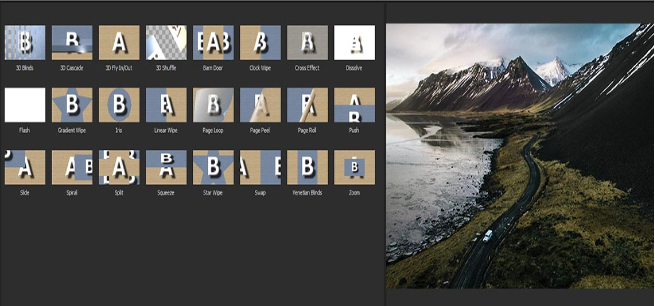
As of 2021, YouTube allows you to cut out unwanted parts from videos, add free audio tracks from the library with 2,500+ tunes, apply blurring, and insert end screens. That is pretty much it, do not expect a Swiss Army knife in online video editing with advanced options like colour correction, white balance, effects, transitions, etc.
Editing videos right on YouTube can be slower than offline on your computer. It takes time to upload a file, process and apply all changes. Editing on the spot is a good idea if you make minor changes to a video with many views and don‘t want to reset engagement. In other cases, the best way is to get offline video editing software.
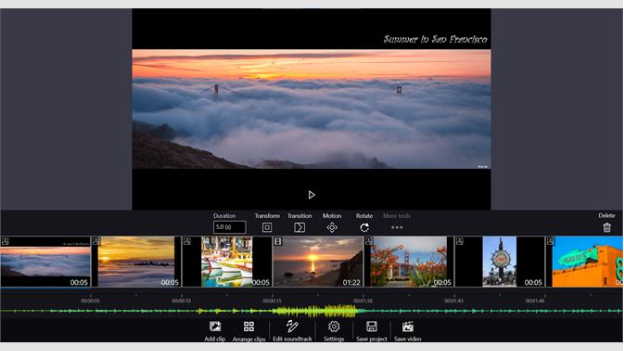
AVS Video Editor
AVS Video Editor offers a rich set of editing tools, including colour correction, stabilizing shaky videos, adjusting aspect ratio, trimming, cutting, blurring, etc.

The app supports all popular formats and HD video editing, the processes are faster due to the integrated video cache technology and GPU acceleration.
In AVS Video Editor you can create multi-screen videos, add music and text, choose from 300+ effects and transitions. After videos are ready, save them with YouTube presets to apply recommended file parameters automatically.
The unlimited AVS4YOU subscription costs $59,99 and also includes other multimedia apps: video converter, audio editor and converter, media player, etc. See full list >>
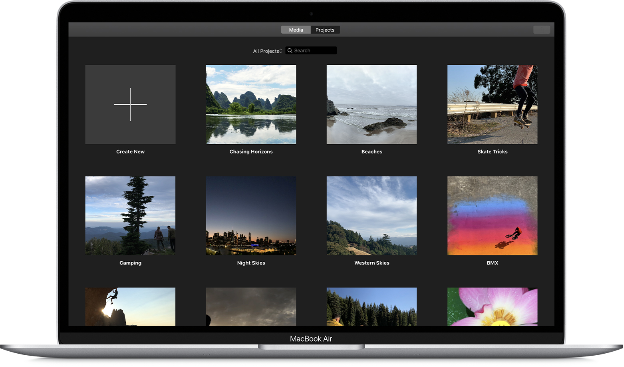
iMovie
iMovie is a free editor for iMac, iPhone, iPad, and other Apple devices. You can edit 4K videos, add music, titles, effects, transitions, apply high-fidelity filters, etc.

iMovie has an intuitive interface to edit footages, replace green screen with backgrounds, apply picture-in-picture and split-screen effects. The editor offers an audio library with about 80 soundtracks and built-in sound effects.
With mobile apps you can get videos ready for publishing on the go and post them directly to YouTube or other social media.
Windows Movie Maker
Windows Movie Maker is one of the most popular video editing apps for Windows. This editor is developed by Microsoft and included in any Windows computer by default for free. Some features and tools are only unlocked in Pro version.
Free Windows Movie Maker is good for simple video projects and allows trimming, joining videos, images, adding music and text, etc. You can apply effects, transitions, animated pan-zoom, photo filters, and output HD videos. Soundtracks can be selected from users‘ library on the computer.
Today Pro version of Movie Maker costs $14,99 and enables customizable video output settings: bitrate, output format, hardware/software encoder mode. Built-in music library and professional transition effects for photos and videos are also included.
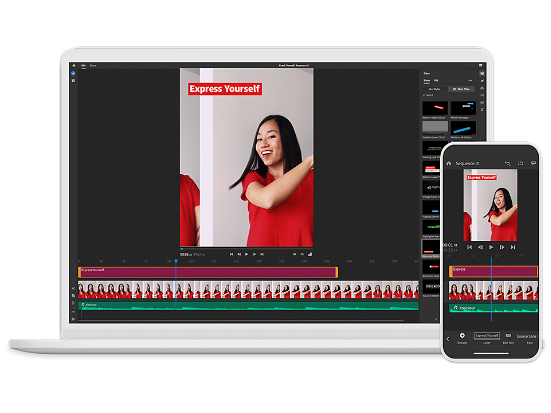
Wondershare Filmora
Filmora is a video editor available for Windows and Mac OSX. Among the main tools are transitions, motion elements, filters, up to 100 layers for songs and text, and the basic ones to remove unwanted scenes.

Filmora offers advanced visual editing with accelerated rendering even in 4K resolution. You can stabilize videos, correct colours and fisheye distortion, create freeze frames, adjust speed control and more.
Audio tools include background noise removal, keyframing, and tuning sound with audio equalizer.
Filmora is available for a free trial or as a yearly subscription from $39,99.
Vegas Movie Studio

Award-winning video editing solution Vegas Movie Studio is suitable for amateurs, but rather experienced users can make the most of it. The app allows fast rendering through CPU/GPU, and professional visual effects.
In Vegas Movie Studio you can apply effects and transitions, use advanced colour grading, colour match, motion tracking, Lens Correction plug-in and more. The Platinum and Suite plans include SOUND FORGE Audio Studio for editing songs, background noise removal or even creating your own sound.
The prices start from $49,99, but most valuable features and tools are unlocked in more expensive versions.
The list can go on forever, because new alternatives with individual strengths and shortcomings appear regularly. We recommend combining offline video software and YouTube editor to deliver the best visuals.
Not sure which editor to choose? Get AVS Video Editor to try all features and tools available:
Useful links
More about YouTube video editor. Reag blog>>
How to choose video editing software. Learn more>>
Best editors for 4K videos. Learn more>>
GIFs are everywhere over the web today — blogs, messengers, websites and social networks. Want some funny song in your favourite animation? Convert it to a video in free AVS Video Converter.
GIF to video conversion
Just follow these simple steps.
1. Choose a preferred video format on the main toolbar. AVS Video Converter supports all key formats: MP4, AVI, DVD, WebM, VOB, MKV, 2K QHD, 4K UHD etc. See full list>>
We recommend MP4 — it is the most popular out there and accepted by any video hosting, such as YouTube or Vimeo.
You may need another format — it fully depends on your requirements to an output video.
2. Click on the button with your format, for example To MP4.
3. Upload a GIF by clicking the upper Browse button.
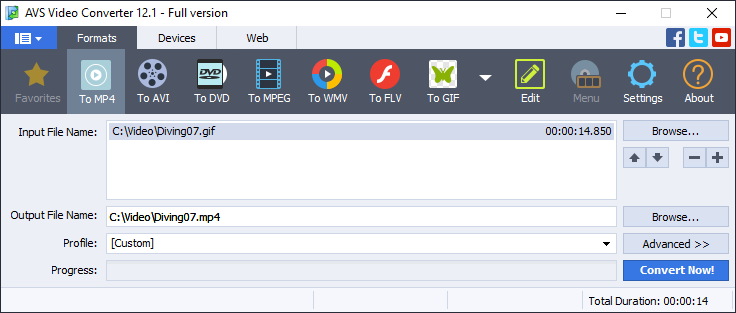
4. Define the output file directory by clicking the lower Browse button.
5. Choose Profile to set pre-installed parameters for your video format.
Experienced users may want to edit the selected video profile or just preview input and output file properties. Just open conversion options by clicking the Advanced >> button.
6. Click on Convert Now!
7. As soon as the conversion is completed, the following window pops up:

To open the folder containing the converted video file, play it back and check its quality, press the Open Folder… button. To close the Information window, press theClose button.
Your GIF animation has became a video. Edit it in AVS Video Editor, apply music and text, join multiple files together and do even more.
Try free AVS Video Converter today!
Useful links
Learn why and how to convert videos to GIFs.
Make stunning videos for Facebook.
Read how to choose video editing software in 2021.
Have any questions to this topic? Leave them in the comments below!
Lost in dozens of video editing apps over the web? In this article we will highlight some most important points to consider when choosing video editors.
Take the following five factors into consideration before you make choice.
Experience
Be honest about your prior knowledge in video editing and personal requirements to the software. Do you need:
- Video editing for your job?
- Colour correction and visual effects?
- Adjusting white balance?
- Editing files in 8K and virtual reality?
- Rendering complex animations?
If at least 3 positions are true to your case, probably you are familiar with video editing for many years. The best choice may be Adobe Premiere Pro or similar powerful software for professional multimedia files processing.
Such apps are pretty costly, but video production companies would usually cover these expenses for their employees. Freelancers may have to fork out.
Those who are not confident about their skills probably need to choose alternative software suitable for beginners. Take some time, learn basic tools and terminology. Otherwise your video editor can become a simple waste of money.
Budget
Decide how much you are ready to spend on video editing software. Prices usually depend on the number and complexity of features.
Most apps have free versions with simple functionality, including trimming, joining, adding background music, etc. A greater number of tools are available in Pro versions only. A well-known example is Windows Movie Maker.
Unlike Windows computers, Apple‘s iMac and portable devices provide you with a free video editor iMovie. No additional payments, all features unlocked.
Have an iMac or iPad? You are a lucky iMovie user!
If you need smaller edits before hosting a video on the Internet, use free editors on YouTube or Vimeo.
Those who are ready to unveil video editing without ads or restrictions can choose paid software.
AVS Video Editor offers tools to work with all popular video formats, including MP4, DVD, AVI, MOV, VOB, WMV, etc. 2K, 4K and other HD quality footages are also supported. You can use 300+ effects and transitions, colour correction, and presets for automatic editing.
Unlimited access to the complete multimedia suite costs $59.00.
Wondershare Filmora is a video editor available for Windows and Mac OSX. It offers filters, overlays, transitions, and popular effects. You can try them all free or get a subscription from $39.99/year.

In the most expensive Bundle subscription plan you get new effects every month.
VEGAS Movie Studio provides you with many visual effects and features close to the professional ones. The most affordable pricing option starts at $49.99, but some features can be locked.
Experienced filmmakers have higher requirements to the software and need expensive apps.
Adobe Premiere Pro is probably the most popular multimedia suite ever. It offers the widest editing opportunities and a free trial. The subscription plan is $20.99/month for the video editor only and $52.99/month for all Adobe apps.
VEGAS Pro is a solution for experts in video editing developed by Vegas Creative Software. Compared to laymen-oriented VEGAS Movie Studio, it includes industry leading hardware acceleration, AI-driven tools, and special effects. You can purchase a license from $299.00 or get a subscription from $15.99/month.
There are video editors for every wallet on the market. More features, higher costs. Next we will look at features in different solutions.
Functionality
Look back on your previous projects to have an idea about your requirements for a video maker.
Have little or no experience? Try an affordable and user-friendly video editor to get familiar with basic tools and features. They are cutting, trimming, joining, automatic effects and video stabilization, transitions, titles etc.
Professional features are complex visual elements, custom effects, GPU acceleration, detailed colour grading, AI-based editing. Video designers often create their own tools, adjust deep colours and shades, but also have expensive equipment such as chroma key and exclusive lenses for cams.
Free video editing apps are usually limited by basic features and paid ones offer advanced functionality.
Learn why AVS Video Editor is suitable for everyone.
Compatibility
Check whether your PC or mobile device is compatible with the video software you want.
There are some cross platform video editors like Blender. Some of them are even free and open-source.
Most video apps can run on Windows: Movie Maker, Filmora, AVS Video Editor. Do not forget to check compatibility with your version of Windows and recommended requirements for an app — some may refuse to work on XP or Vista.
Linux is less used at home, but there are quite a lot of video editors suitable for every distribution: Kdenlive, Shotcut, Pitivi etc.
Mac OSX users get a free editor iMovie. But if you need alternatives, check ones compatible with your computer: Final Cut Pro, DaVinci Resolve, Filmora, Adobe Premiere Pro.
Additional software
Video editing is often not only about image — why not add your favourite song or titles? Besides, you may need software to import or create videos. If that is your case, consider complete multimedia suites.
Audio editing software is a necessary element in every suite. You can apply various effects to recordings manually or automatically, add echo, normalize volume levels and more.
Capturing is sometimes included in video editors, but some developers provide a stand-alone app to transfer videos from cams or capture screen of your desktop.
Converters are useful for videos of outdated formats such as F4V or 3GP. You will also need them to meet the requirements of web hostings when posting videos.
Remember the 5 above-mentioned factors and you will make numerous stunning videos in your new favourite editor.Still difficult to make the right choice? Begin with AVS Video Editor — it has all basic video features, additional multimedia software for audio and pictures, and some advanced tools for experienced video makers.
What are the most important points in video editing software for you? Share in comments!
Useful Links
Best video editors for 4K videos. Learn more>>
How to make Hollywood-like videos. Learn more>>
How to use colour correction in AVS Video Editor. Learn more>>
Create demo and guides in AVS Video Editor. Learn more>>
Make like-winning videos for Facebook. Learn more>>