To avoid some issues which may occur when rendering video in case your computer has an integrated GPU (Intel/AMD CPU with iGPU) and a discrete GPU (NVIDIA), you need to assign the preferred graphics processor for the AVS4YOU applications. This guide describes how to set the NVIDIA GPU with CUDA® technology as a preferred graphics processor used for video decoding.
If your OS is Windows 10 starting with v.1803, then you can use Windows Settings as described below. If your computer is a laptop, then you can refer to this article.
First of all, adjust the AVS4YOU program settings for necessary applications.
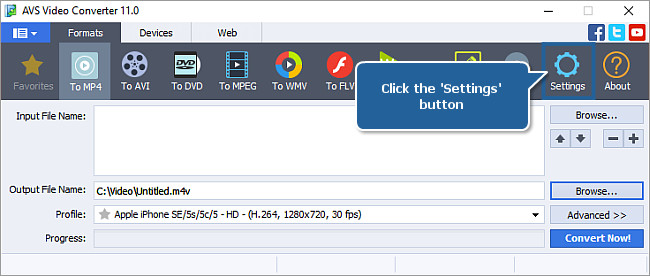
For AVS Video Converter, perform the following actions:
click the "Settings" button in the AVS Video Converter main program window,
switch to the "Acceleration" tab of the "Settings" window,
check the "Use NVIDIA CUDA decoder, if possible" option,
 Note
Note: when the "
Use NVIDIA CUDA decoder, if possible" option is enabled, it has priority over the Intel settings regardless of the settings specified for
Intel Media decoder, so you
don’t need to disable the
Intel Media decoder.
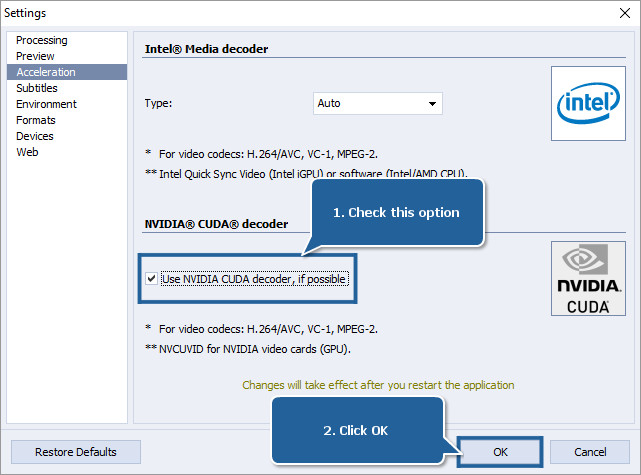
click OK to save the settings,
close the application for these changes to take effect.
Note: to adjust these settings for
AVS Video Editor and
AVS Video Remaker, click the "
Edit" option in the
Top Menu, select the "
Settings..." menu item, then open the "
Acceleration" tab.
For
AVS Media Player, right-click within the
Preview window, select the "
Preferences" option, switch to the "
Video" tab and use the "
Decoders" section.
[Back to the Top]
Run Windows Settings in one of the following ways:
Click the "Start" button in the lower left corner and press the "Settings" menu item.
Alternatively, you can press the Win+I keys on the keyboard.
Add the application you want to customize:
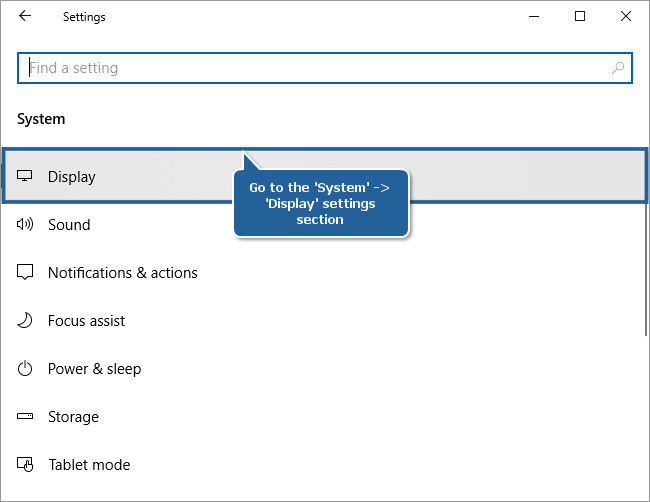
Open the "System" -> "Display" settings section,
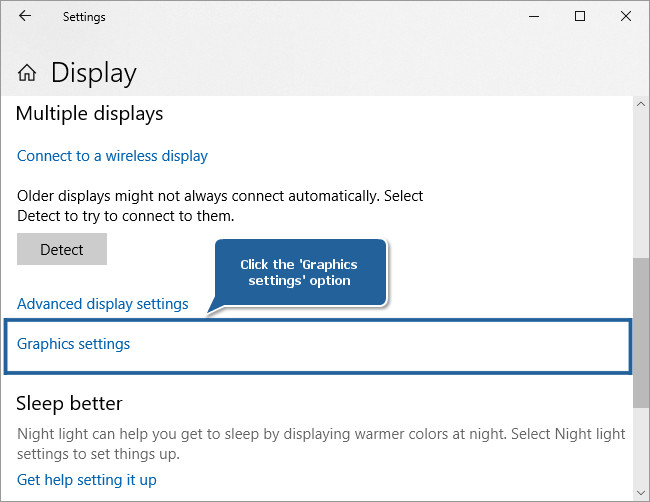
scroll down the page and click the "Graphics settings" option,
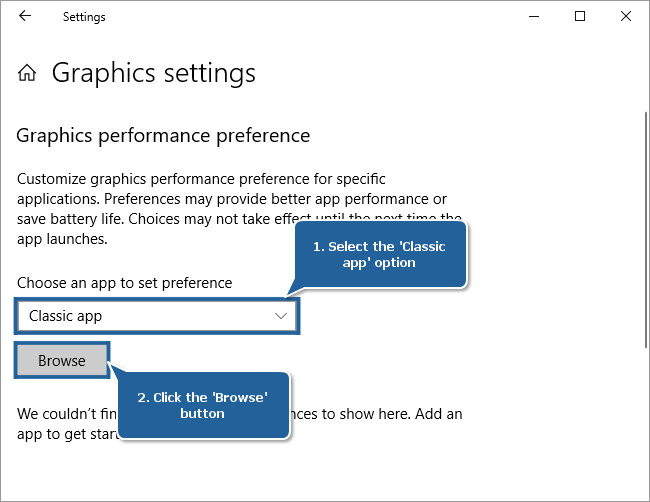
select the "Classic app" option from the drop-down list and click the "Browse" button,
in the Windows Explorer window that opens, select one of the following .exe files: AVSVideoConverter.exe, AVSVideoEditor.exe, AVSVideoConverterHost.exe, AVSVideoReMaker.exe, AVSMediaPlayer.exe or AVSAudioEditor.exe.
If you are using a 32-bit version of Windows, you should add the following .exe files:
- C:\Program Files\AVS4YOU\AVSVideoConverter\AVSVideoConverter.exe
- C:\Program Files\AVS4YOU\AVSVideoEditor\AVSVideoEditor.exe
- C:\Program Files\Common Files\AVSMedia\ActiveX\AVSVideoConverterHost.exe
- C:\Program Files\AVS4YOU\AVSVideoReMaker\AVSVideoReMaker.exe
- C:\Program Files\AVS4YOU\AVSMediaPlayer\AVSMediaPlayer.exe
- C:\Program Files\AVS4YOU\AVSAudioEditor\AVSAudioEditor.exe
If you are using a 64-bit version of Windows, you should add the following .exe files:
- C:\Program Files (x86)\AVS4YOU\AVSVideoConverter\AVSVideoConverter.exe
- C:\Program Files (x86)\AVS4YOU\AVSVideoEditor\AVSVideoEditor.exe
- C:\Program Files (x86)\Common Files\AVSMedia\ActiveX\AVSVideoConverterHost.exe
- C:\Program Files (x86)\AVS4YOU\AVSVideoReMaker\AVSVideoReMaker.exe
- C:\Program Files (x86)\AVS4YOU\AVSMediaPlayer\AVSMediaPlayer.exe
- C:\Program Files (x86)\AVS4YOU\AVSAudioEditor\AVSAudioEditor.exe
Note: for
AVS Video Converter /
AVS Video Editor, you should also add
AVSVideoConverterHost.exe together with
AVSVideoConverter.exe or
AVSVideoEditor.exe.
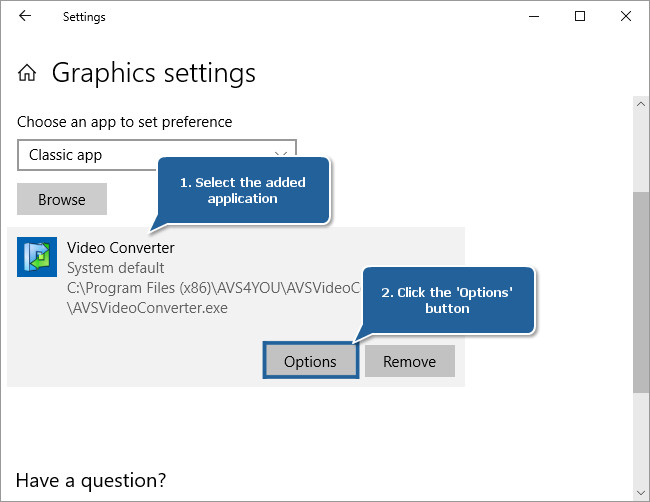
Choose the graphics settings for the added application:
Select the added AVS4YOU application and click the "Options" button below,
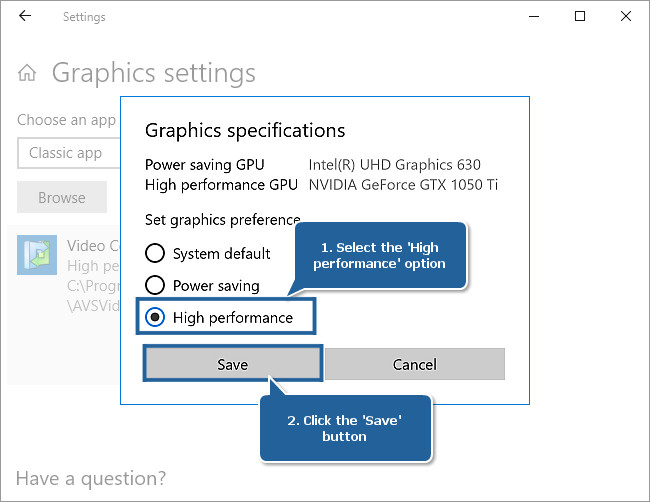
in the "Graphics specifications" window that opens, select the "High performance" radio button and click the "Save" button.
If you further need to use the iGPU (Intel HD Graphics) for AVS4YOU programs again, you will need to make the above settings, but choose a different processor (Power saving). You can also refet to this article.
Repeat necessary steps to add other AVS4YOU applications one by one in the "Display Settings" section of the Windows Settings and choose the graphics processor for each of them.
[Back to the Top]
Version: 12.0.1.650Size: 80.45 MBPlatforms: Windows 10, 8.1, 8, 7, XP, 2003, Vista
(no Mac OS/Linux support)
Download
AVS Video Converter
Registration on AVS4YOU is like buying a single product listed on
www.AVS4YOU.com and getting all other products from our site as a gift. That means you can install and use
ALL OTHER software with the same serial number without additional fees and limitations.
Please note that AVS4YOU programs do not allow you to copy protected material. You may use this software in copying material in which you own the copyright or have obtained permission to copy from the copyright owner.