Category: Без рубрики

There are so many diverse software applications today and choosing suitable audio editor may seem daunting, especially for beginners. In this article, you’ll find the top picks in 2023 for amy operating system — Windows, Mac, and Linux.
1. AVS Audio Editor
AVS Audio Editor is a user-friendly audio editing software that allows users to cut, trim, merge, and mix audio tracks with ease. It offers a wide range of audio effects, filters, and tools for enhancing audio files. With AVS Audio Editor, users can apply various effects such as normalize, amplify, equalize, reverb, and more to their audio tracks. Additionally, it supports multiple audio formats and enables users to record audio from various sources. The software also provides a simple and intuitive interface, making it suitable for both beginners and experienced users.

AVS Audio Editor has garnered positive feedback from users, with a high rating of 4.73/5 based on 100+ reviews. Users appreciate the comprehensive suite of features offered by AVS Audio Editor at a reasonable price point. This editor has been praised for its user-friendly interface and the absence of major faults.
Try all features yourself by downloading AVS Audio Editor. Just click the button below.
2. Adobe Audition
Adobe Audition is a professional audio editing software developed by Adobe Inc. It is used for recording, mixing, editing, and mastering audio content. With a user-friendly interface, it offers a wide range of features such as waveform and multitrack editing, real-time clip stretching, pitch correction, noise reduction, and more. It is widely used by musicians, podcasters, and audio engineers for its powerful tools and seamless integration with other Adobe products like Premiere Pro for video editing.

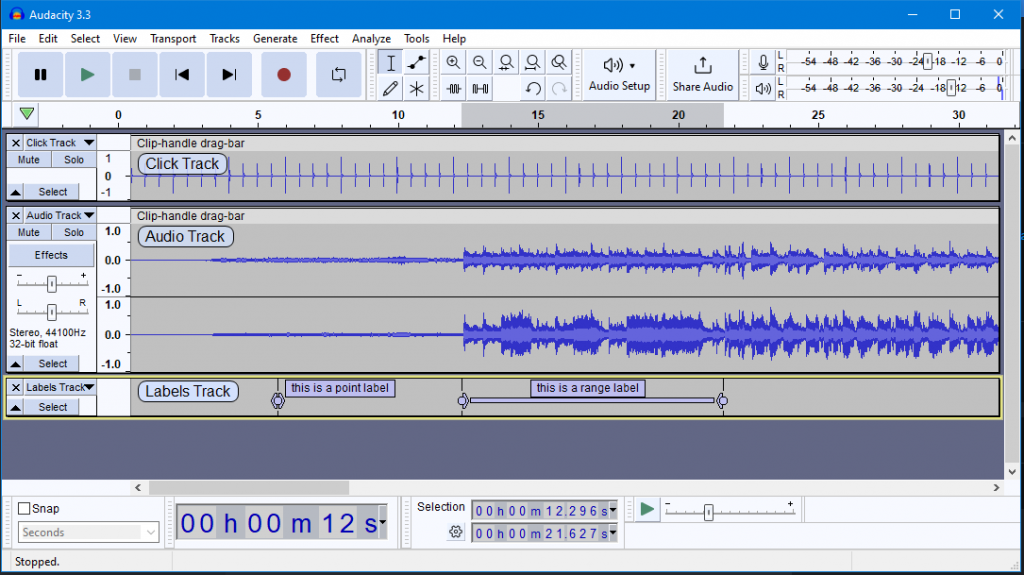
3. Audacity
Audacity is a free, open-source, cross-platform audio software for multi-track recording and editing. It offers a simple and intuitive interface for tasks such as recording live audio, converting tapes and records into digital recordings, editing Ogg Vorbis, MP3, and WAV sound files, and cutting, copying, splicing, and mixing sounds. Audacity also provides various built-in effects, including an amplitude envelope editor, customizable spectrogram mode, and frequency analysis window. It’s widely used by musicians, podcasters, and audio engineers for its versatility and accessibility.
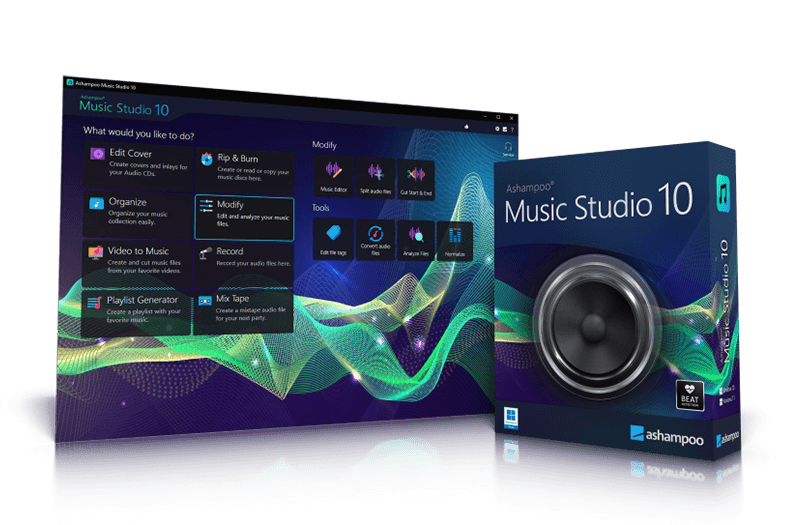
4. Ashampoo Music Studio
Ashampoo Music Studio is a versatile music software that provides various tools for editing, producing, trimming, mixing, and organizing music and audio files. It includes 8 modules for audio editing, track cutting, and burning. The software offers loop support for audio previews, easy rearrangement with title bars, a context menu for quick feature access, and instant split tracks into three segments. It also supports 18 different tag types, allows multiple images per track, and features groups for better clarity. The emphasis is on ease of use, enhanced performance, and logical grouping of features.
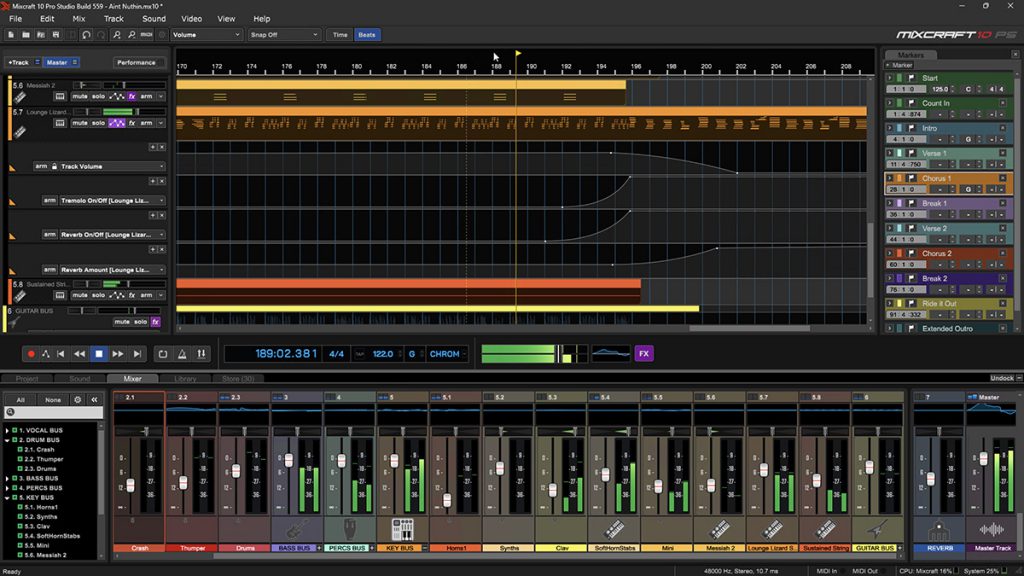
5. Apple Logic Pro
Apple Logic Pro is a powerful digital audio workstation (DAW) designed for professional audio editing and music production. It offers a wide range of features such as multitrack recording, MIDI sequencing, software instruments, audio effects, and more. With its user-friendly interface and extensive library of virtual instruments and loops, Logic Pro is favored by music producers, composers, and audio engineers. It also includes advanced mixing and mastering tools, making it a comprehensive solution for creating high-quality audio content.

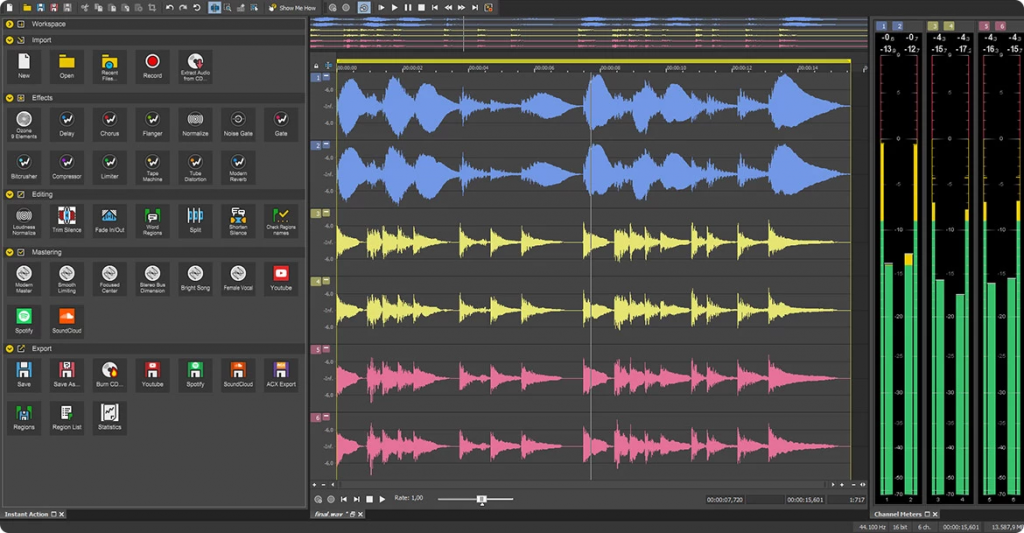
6. Sound Forge
Sound Forge is a professional digital audio editing software developed by Magix. It offers a comprehensive suite of audio editing tools and features that cater to the needs of professional audio engineers, producers, and musicians. Sound Forge provides a user-friendly interface and a wide range of audio processing capabilities, including waveform editing, audio restoration, mastering, and sound design. It is known for its precision editing tools, real-time audio effects, and seamless integration with various hardware and software platforms, making it a popular choice for audio professionals.
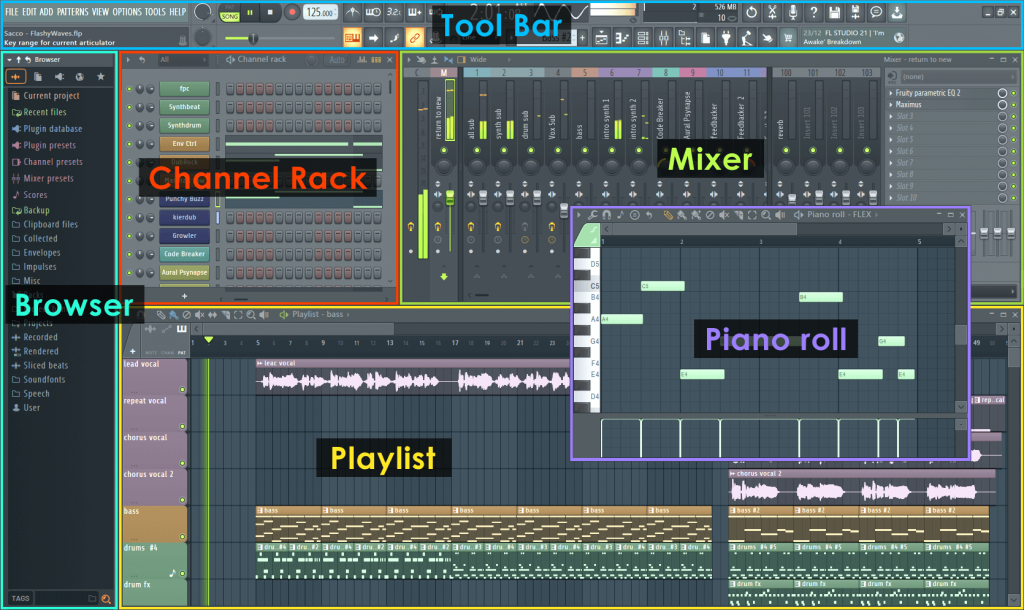
7. FL Studio
FL Studio, formerly known as FruityLoops, is a popular digital audio workstation (DAW) developed by the Belgian company Image-Line. It is renowned for its intuitive interface, robust features, and extensive plugin support. FL Studio offers a wide range of tools for music production, including pattern-based sequencing, a variety of virtual instruments and effects, audio recording and editing, and MIDI support. It is favored by electronic music producers for its versatile workflow and extensive capabilities in creating electronic and hip-hop music.
8. Acoustica
Acoustica is a comprehensive audio editing software known for its user-friendly interface and powerful features. It offers a wide range of tools for recording, editing, mixing, and mastering audio, making it suitable for both beginners and professionals. Acoustica provides multitrack editing, real-time audio processing, and a variety of audio effects and restoration tools. Additionally, it supports audio formats such as WAV, MP3, WMA, and OGG, and integrates seamlessly with third-party VST and DirectX plugins for added flexibility and creativity in audio production.
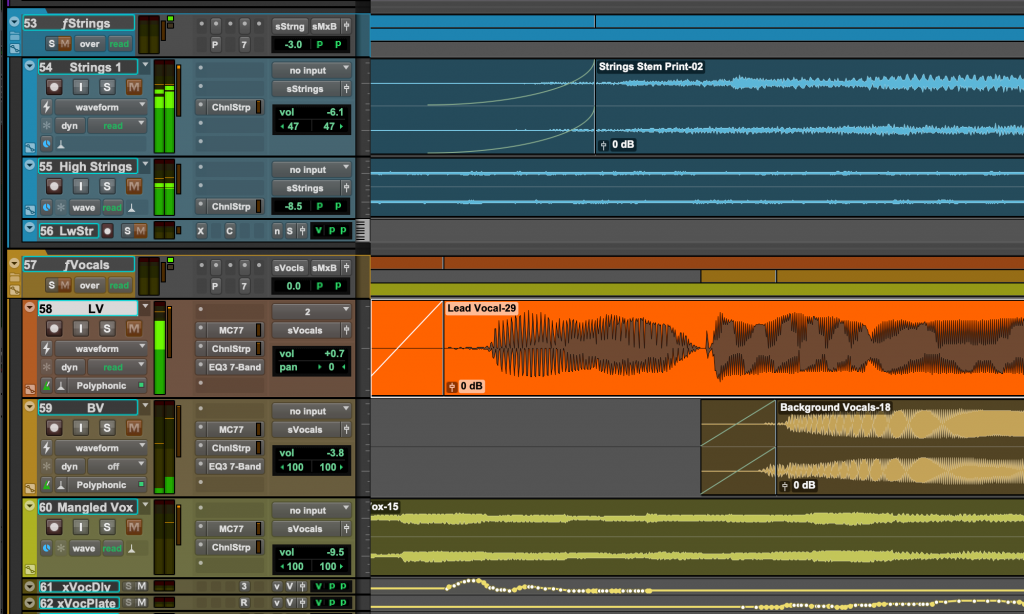
9. Avid Pro Tools
Avid Pro Tools is a professional-grade digital audio workstation (DAW) widely used in the music and film industry for audio editing, recording, mixing, and post-production. It offers a comprehensive set of features including advanced recording capabilities, a wide range of audio effects and plugins, powerful editing tools, and seamless collaboration features. Pro Tools is known for its industry-standard audio quality and compatibility, making it a go-to choice for professional audio engineers, music producers, and sound designers. Its intuitive interface and versatile tools cater to a wide range of audio editing needs.
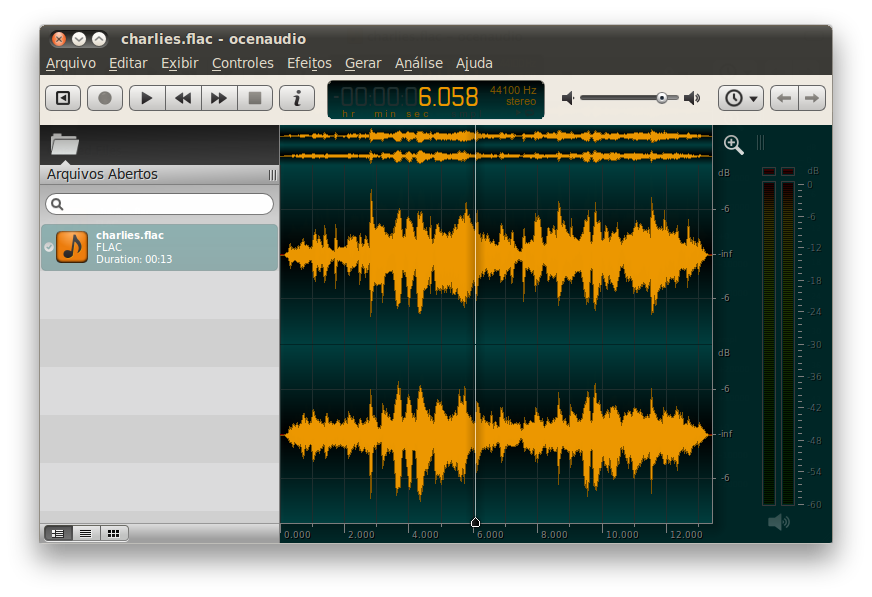
10. Ocenaudio
Ocenaudio is a user-friendly, cross-platform audio editor software that allows users to edit audio files with ease. It supports various audio formats and has a clean interface that makes it easy to navigate. Ocenaudio provides real-time preview of effects, allowing users to apply and adjust effects while listening to the audio. It also offers a range of editing features such as multi-selection, which simplifies the editing process for complex audio files. Overall, Ocenaudio is a versatile and efficient tool for audio editing tasks.
How to choose the best audio editor?
When choosing the best audio editor, consider factors such as the software’s features, ease of use, value for money, and additional integrations. Evaluate basic editing features, the software’s ability to handle live recording editing, analysis, and effects functions. Look for extensive library of plugins and new features to enhance your editing capabilities. Consider the software’s suitability for beginners and professionals, cost, internet access, and the need for audio hardware.
Some top audio editing software options include AVS Audio Editor, Adobe Audition, Audacity, Acoustica, and Avid Pro Tools, offering industry-compliant sound production toolkit, powerful capabilities, and user-friendly interfaces suitable for both beginners and professionals.

Summer is the best season for creating atmospheric video clips with colorful effects. Vacation, BBQ, wedding, leisure time with family and any other long-awaited events can be your sweetest memory.
In this article, we’ll make an overview of the 5 top filters and video effects that you should consider when making a summer video. Applicable with just one click, they’re all available in AVS Video Editor for your Windows PC.
1. Anaglyph 3D
Anaglyph 3D video effect is a visual technique used to create the illusion of three-dimensional depth by superimposing two distinct images, one in red and another in blue, to create a stereoscopic 3D effect when viewed through glasses with the corresponding red and blue filters. This has been a popular method of creating 3D effects, especially in movies and videos, for years. It can be an entertaining and immersive way to experience content and make it feel as if you’re a part of it.

2. Glow
Glow is a post-processing visual effect that adds a soft and radiant glow around the edges of objects or the entire scene. It creates a dreamy, ethereal, or magical look by adding a soft, glowing light to the video. The glow effect can be used to enhance the atmosphere, add a sense of depth, or draw attention to specific elements in the frame. It can be adjusted to vary in intensity, color, and size, depending on the desired effect. Glow effects are commonly used in music videos, fantasy or sci-fi films, and motion graphics to create a visually striking and captivating look.

3. Mosaic
Mosaic video effect is a post-production technique that pixelates part or all of a video by breaking it up into small boxes, creating an image that is reminiscent of a mosaic or a mosaic art piece. Mosaic effect can be used to hide sensitive information, obscure a person’s identity, or simply as a stylistic choice to add an element of mystery to the scene. This effect is a common technique used in video and film production and can be achieved using various video editing software available.

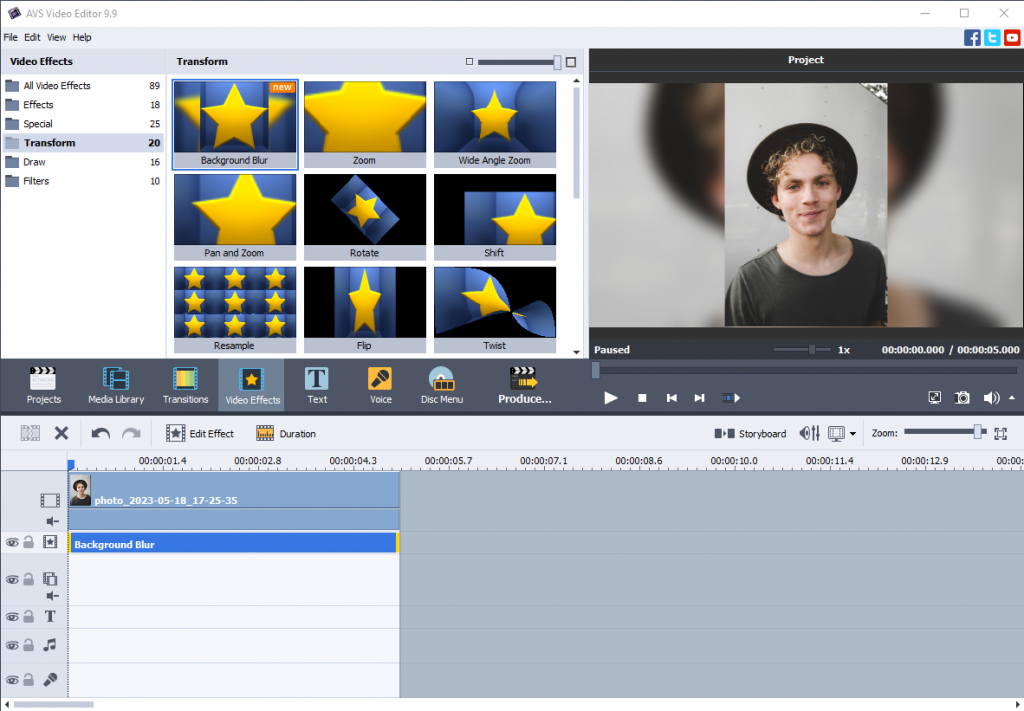
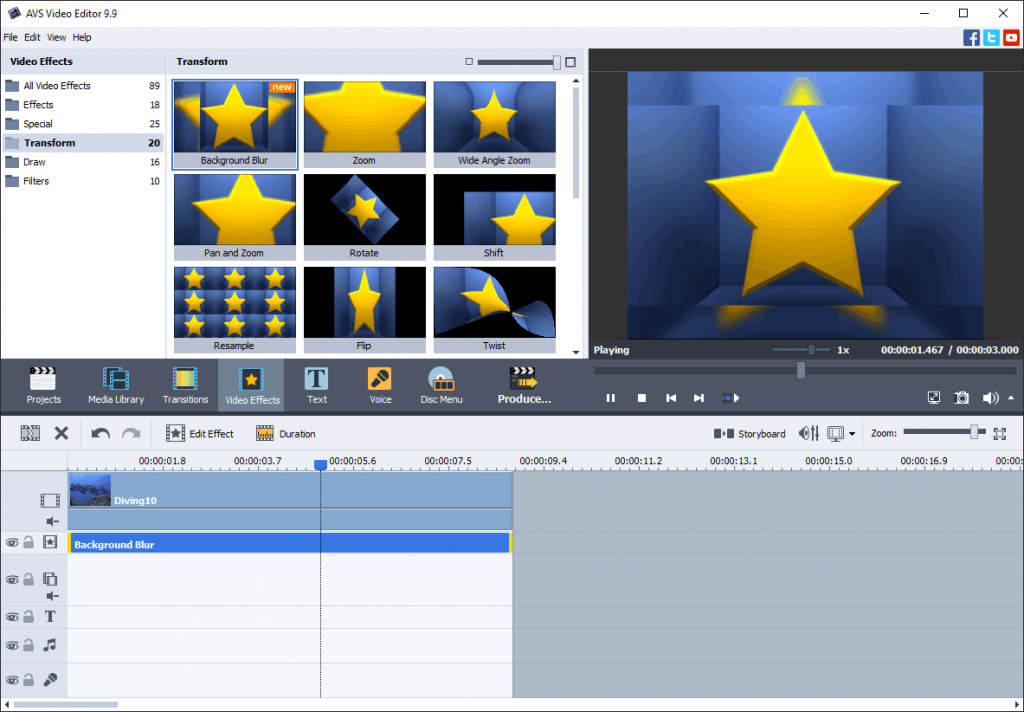
4. Background Blur
Blurring the sides of a vertical video is commonly done to create a cinematic or artistic effect and to reduce distractions from the background. It helps create the illusion of a wider aspect ratio, similar to traditional horizontal videos. As a result, the video appears more visually appealing and cinematic, enhancing the viewing experience.
For example, YouTube is a video sharing platform where most of the clips are horizontally oriented (except for Shorts). Before posting a vertical clip on YouTube, it’s recommended to blur black bars on both sides of a video.
5. Yellow Magenta
This filter applies a combination of yellow and magenta color filters or color grading techniques to alter the appearance of the video. Adding a yellow filter can enhance warm tones and create a more nostalgic or vintage look. Meanwhile, a magenta filter can emphasize red and purple tones, creating a cooler or more dramatic atmosphere.
However, specific usage and interpretation of yellow magenta filters may vary depending on the context and purpose of the video.

Apply stunning effects with AVS Video Editor
Inspired by one of the above mentioned effects? Get AVS Video Editor for Windows and discover the entire collection of available effects and filters.
The entire AVS4YOU multimedia suite is currently available with large discounts up to 70%.
Useful links

We hope you enjoy summertime and make stunning videos. This new version of AVS4YOU will help you unleash creative ideas when editing your recordings. Discover the most important features of this release.
Enhanced support of subtitles
This release includes extended support of subtitles in AVS Video Converter and AVS Media Player (SRT, SRT with EBU-TT, SSA, ASS, SUB, MOI).
New universal MP4 and M4V presets
Multiple similar presets for various devices and hostings are replaced with universal MP4 and M4V presets. They have HD and Full HD quality and higher bitrate.
We also upgraded bitrate in HD/FHD presets for MOV files.
Hardware decoding for Intel Xe graphics cards
Another new feature in this update is the support for hardware decoding on the latest Intel Xe graphics cards: integrated Intel Iris Xe and discrete Intel Arc.
Other updates
- Flexible scheme for running Intel decoders and encoder with hardware acceleration ensuring that there are almost no problems in case of 2 or more video cards.
- Improvements for transitions and colors in the Background Blur effect in AVS Video Editor.
Download the AVS4YOU upgrade today to have all latest features at hand.
Subscription expired?
Save 50% Off on AVS4YOU Multimedia Suite till August 15, 2023. Just redeem this code when purchasing: AVS23YlP.
Useful links

Trends in video production change with at a breathtaking speed in 2020s. As a creator, you should know that shorter clips are conquering streaming platforms and popular social media, such as YouTube, Instagram, TikTok, Likee etc. Today people are overwhelmed with information daily and want videos to be short, concise, and free from unimportant details.
But how to design a video of 15-60 seconds, make it visually appealing and informative? Read on to learn top 5 trends you can’t ignore as a video creator.
1. Blur sides of a vertical video on YouTube
Blurring the sides of a vertical video is commonly done to create a cinematic or artistic effect and to reduce distractions from the background. It helps create the illusion of a wider aspect ratio, similar to traditional horizontal videos. As a result, the video appears more visually appealing and cinematic, enhancing the viewing experience.
For example, YouTube is a video sharing platform where most of the clips are horizontally oriented (except for Shorts). Before posting a vertical clip on YouTube, it’s recommended to blur black bars on both sides of a video. This feature became available in the latest AVS4YOU release.

Please note that blurring the sides of a vertical video is a creative choice and may not be suitable for all types of content. Consider the specific purpose and desired visual effect of your video before deciding whether or not to blur the sides.
2. Create microlearning videos
Microlearning videos are short, focused, and bite-sized video content designed to deliver specific knowledge or information concisely. They usually range from a few seconds to a few minutes in length and are created to provide quick and easily digestible learning experiences.
For example, teach your audience a new guitar chord:

These type of videos tend to have their specific features. Microlearning videos that can go viral are usually:
- Concise and targeted
- Short in duration
- Engaging
- Suitable for quick refreshers and just-in-time learning
- Mobile-friendly
Microlearning videos can be used in various ways, such as employee training, product demonstrations, language learning, software tutorials, and more. They offer a flexible and efficient approach to learning, allowing learners to acquire information in short, focused bursts without overwhelming them with lengthy content.
Want to know more about educational videos? Consider top 12 tips for creating one.
3. Share behind-the-scenes content
A behind-the-scenes video provides a glimpse into the making or production of a film, TV show, music video, commercial, or any other media project. It takes viewers behind the curtain to show them what goes on behind the camera and how the final product is created.
Such videos can generate excitement and anticipation among fans. They offer a unique perspective and provide a deeper understanding of the work that goes into creating a project, fostering a connection between viewers and the content they love.
Also, behind-the-scenes content serves as a promotional tool for media projects. They create buzz, generate interest, and can be shared on social media platforms, websites, and during marketing campaigns.
4. Consider user-generated content (UGC)
User-generated content (UGC) can be customer testimonials or participation in new trendy challenges that appear regularly on YouTube, TikTok, and Instagram.

UGC adds an element of authenticity to videos. Such clips encourages user engagement and participation. When users contribute their own content, such as videos, it creates a sense of community and involvement with the brand or topic.
User-generated content brings diverse perspectives and creativity to videos. People from different backgrounds and experiences can contribute unique content, providing a fresh and varied viewpoint. This variety can make videos more interesting, dynamic, and inclusive. As a result, UGC often goes viral and trendy.
5. Try product teasers
Product teasing videos are short video clips that showcase an upcoming product with the goal of generating excitement and anticipation among customers. These videos typically provide a glimpse of the product without revealing too much, leaving viewers intrigued and wanting to know more.

By releasing a teaser video before the official product launch, you can generate buzz and anticipation among their target audience. For example, split an iPhone unboxing video into two parts — design review and functionality testing. Viewers will be excited to see the second one.
Teaser videos have the potential to go viral on social media platforms, reaching an even wider audience and increasing brand visibility. The suspense created by these videos often prompts viewers to share and discuss them, amplifying the reach and generating organic interest around the product.
Create your trendy content with AVS Video Editor
Inspired by one of these ideas above or have your own? Get AVS Video Editor to create and edit a full-length video on Windows.
Useful links

Summer is a perfect time for vacations, advantures, and great videos. In this article, we gathered some ideas to inspire you during the hot days.
1. Summer vlog series
A summer vlog series is a collection of video logs (vlogs) that a content creator films over the summer. These vlogs typically document the creator’s experiences and adventures during the summer months, which can include anything from travel and vacations to daily life, events, and activities.

People enjoy watching summer vlog series for various reasons. Some watch to get inspiration for their own summer plans, while others simply enjoy following along with the creator’s adventures and seeing what they’re up to. Starting a summer vlog series can be a fun and exciting way to document your summer and share it with others.
2. Travel vlog or road trips
Film a road trip through lesser-known spots along the coast. Rather than hitting up the typical tourist destinations, focus on taking a scenic route and stopping at the hidden gems along the way. Try new local restaurants, visit small towns, and interview locals to really capture the unique culture of the area.

Record each day of the trip, including footage from the car, stops along the way, and any exciting adventures or experiences you have along the route. You can even create a series of videos, each one featuring a different stretch of the journey. By taking the road less traveled, you can showcase a new perspective and offer viewers something unexpected.
3. Beach day or pool day with friends
Pack your beach bag: Gather all the essentials like sunscreen, towels, beach chairs, an umbrella for shade, snacks, water, and your camera. This will definitely be a video with your best summer memories.
Find a comfortable spot on the beach where you can relax and lay out your towel or set up your beach chairs.Film yourself and your friends swimming in the sea, running on the hot sand, playing volleyball or frisbee — the plot options are unlimited.
Sunsets are always better together with seascape — don‘t lose this opportunity!

4. Barbecue or picnic with family
Bring along some snacks, sandwiches, and refreshing drinks. Enjoy a picnic lunch while taking in the beautiful landscape. When filming a picnic video, it’s important to capture the ambiance and atmosphere. To do this, focus on the details. Show closeups of the food, the drinks being poured, and the snacks being passed around.

Tell an engaging story about how a simple picnic can be a great way to spend time with friends or family.Capture the laughter and chatter of people enjoying each other’s company. Use music to add to the mood, and don’t forget to show shots of the surroundings, highlighting the beauty of nature in different angles.
5. Summer fashion or makeup tutorials
Create a video about the easiest summer outfit ideas. For example, beach outfit: This can include a breezy cover-up, a trendy swimsuit, a floppy hat, and some sandals.
Throughout the tutorial, explain how to mix and match different clothing pieces, incorporate accessories, and provide tips on how to adapt these outfits for different body types or personal styles. Be sure to include close-up shots of each outfit and display them on a mannequin or model to give viewers a better idea of how they would look when worn. Remember, the key is to keep it simple, stylish, and suitable for the warm summer weather.

6. DIY summer projects
Share some easy summer DIY ideas with your subscribers. For example, a flower crown: They are a popular accessory for summer festivals, weddings, or simply for adding a whimsical touch to any outfit.

Throughout the tutorial, provide clear instructions, close-up shots, and tips on flower selection, color combinations, and adjusting the crown to fit different head sizes. Encourage viewers to get creative with their flower choices and enjoy the process of making their own unique flower crown.
7. Outdoor sports or activities
Love outdoor sports, such as ultimate frisbee or trail running? Showcase the thrill of trail running in beautiful natural locations or demonstrate the high-energy and team-based outdoor sport.

Alternatively, provide an overview of five different outdoor sports activities that are perfect for enjoying the summer season. Give tips for beginners, emphasize safety measures, and highlight the enjoyment and physical benefits of each sport. Incorporate smooth transitions, high-quality footage, and enthusiastic narration to engage viewers and inspire them to try out these outdoor activities this summer.
8. Music festival or concert experience
Creating a music concert video is a great way to capture the energy and excitement of the event and share it with those who couldn’t attend. No need to capture the entire festival — highlights are enough for making a story.

Focus on the performance by showcasing the most popular and exciting performances of the night. Compile footage of the concert with the band’s music to create a music video mashup of the performance. You can also show the prep work and setup that goes into putting on a concert and even interview the performers.
9. Summer recipe tutorials
Summer is the time of amazing food and you can make a video about dishes you‘re really good at. Show your audience how to make a refreshing and easy salad or homemade ice cream with unique flavors.
Cook up some marinated grilled chicken or meat steaks. Vegans will definitely love vegetable kabobs on the grill and similar summer barbecue recipes.

10. Exploring local attractions or tourist hotspots
No need to visit other continents for a travel video. Have you seen the best places in your city or town? Invite your viewers to have a virtual trip around your region.
Research and identify the local attractions you want to showcase in your video. Create a clear plan that includes the order of visits, estimated time at each location, and any additional information or activities you want to include.

Capture the highlights of each attraction, create a narrative to tie all the attractions together, experiment with different camera angles and shots to make your video visually appealing. Pay attention to audio quality, which gets poorer outdoors due to the wind and industrial noise.
AVS Video Editor for your summer clips
Inspired by one of these ideas above or have your own? Get AVS Video Editor to create and edit a full-length video on Windows.
Useful links

The winner of the affiliate contest that lasted from March 1 to May 31 was the owner of www.couponcode1.com Songbin Chen, who kindly agreed to give the AVS4YOU team an interview where he shares impressions about the contest and tips for other affiliates.

Can you tell us a little bit about your business and the software and digital products you offer?
Sure! I run a digital marketing business where I promote and sell various software and digital products. My focus is primarily on AVS4YOU’s product line, which includes a wide range of multimedia tools such as video editing software, audio converters, and image editing applications. These products cater to the needs of content creators, professionals, and individuals looking to enhance their multimedia experience.
What was the crucial factor that inspired you to participate in AVS4YOU affiliate contest?
The crucial factor that inspired me to participate in the AVS4YOU affiliate contest was the exceptional reputation and quality of AVS4YOU’s products. I had been using their software for a while and was impressed with its features and performance. Additionally, the contest offered an exciting opportunity to not only showcase my marketing skills but also earn valuable rewards and recognition for my efforts.
Can you share strategies and marketing initiatives implemented to boost sales during the contest?
During the contest, I employed a combination of strategies and marketing initiatives to boost sales. Firstly, I created targeted promotional campaigns through various online platforms such as social media, email marketing, and content marketing. I focused on highlighting the unique features and benefits of AVS4YOU’sproducts to attract potential customers. Additionally, I offered exclusive discounts and incentives to incentivize immediate purchases. Constant monitoring and optimization of these campaigns were also crucial to ensure maximum reach and conversion rates.
What is your key to success? And what advice can you give to other affiliates to become a winner?
In my opinion, the key to success in affiliate marketing is a combination of dedication, effective communication, and continuous learning. It’s essential to build a strong rapport with your audience and understand their needs. Providing valuable and genuine recommendations based on your own experience with the products can significantly boost trust and conversions. Furthermore, staying updated with the latest marketing trends and techniques is crucial to adapt and optimize your strategies. My advice to other affiliates would be to focus on building long-term relationships with their audience, constantly track and analyze performance metrics, and always strive for improvement.
What would you recommend AVS4YOU team doing to have a greater outreach to affiliates and make more partners involved in proactive selling of the digital goods?
To have a greater outreach to affiliates and encourage more partners to engage in proactive selling of digital goods, I would recommend AVS4YOU to focus on a few key areas. Firstly, providing comprehensive training and resources to affiliates about the products and their unique selling points would enable them to effectively promote and recommend the software. Additionally, offering attractive commission structures and incentives can motivate affiliates to put in more effort. Regular communication and updates about new product releases, promotions, and marketing materials would also foster a sense of collaboration and engagement among affiliates.
In what way should be affiliates motivated to join the affiliate network so that it grows exponentially?
To motivate affiliates to join the affiliate network and ensure exponential growth, AVS4YOU can implement several strategies. Firstly, providing a user-friendly and transparent registration process would encourage more affiliates to join. Offering competitive commission rates and timely payouts would further incentivize them to actively promote the products. Moreover, organizing regular webinars, training sessions, and networking events can help foster a community spirit and provide opportunities for affiliates to learn and collaborate with each other.
Finally, how do you envisage your further collaboration with AVS4YOU?
Finally, I envision my further collaboration with AVS4YOU to be mutually beneficial and long-lasting. As a dedicated affiliate, I am committed to promoting AVS4YOU’s products and driving sales. I plan to continue exploring innovative marketing strategies and expanding my reach to new audiences. Additionally, I look forward to maintaining open lines of communication with AVS4YOU’s team, exchanging feedback and insights, and working together to optimize marketing campaigns. Ultimately, my goal is to contribute to AVS4YOU’s growth and success while achieving my own business objectives through this collaboration.

Welcome the new version of AVS4YOU multimedia suite with a video effect Background Blur, numerous bug fixes, and extended format support.
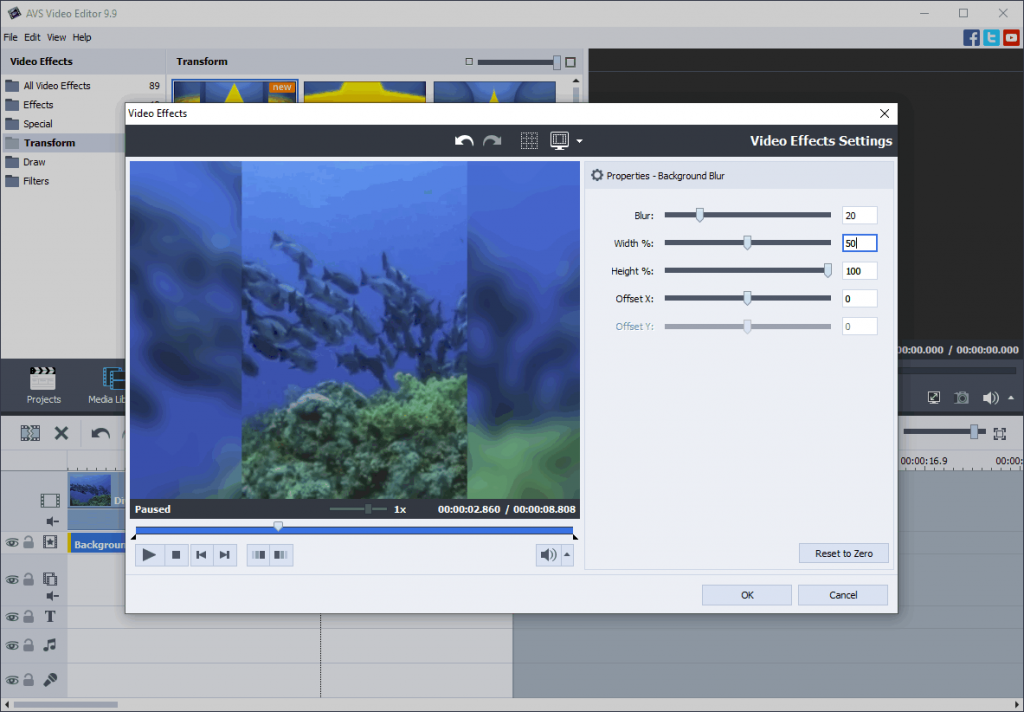
Background Blur effect
Try a new awesome video effect Background Blur where the subject of the photo is in sharp focus, while the background appears blurred and out of focus. This effect is needed to turn a vertical video into a horizontal one, as it helps to remove the black bars on the sides and vice versa.
You can change the blur level and the central zone of the frame (a fraction of the width/height and the X/Y shift).
Extended support of video & audio formats and codecs
From this version, you can open MP4, MOV, and M4V videos with the Opus audio codec. Also, you can import audio tracks from files of these formats.
Here are some other important format and codec support updates:
- Opening clips with the MJPEG format B codec;
- Correct recognition of protected (encrypted) MP4/MOV/M4V files* encv and enca atoms;
- Correct support of rotated MP4/MOV/M4V/3GP video (90, 180, 270 degrees) in AVS Video ReMaker and AVS Audio Editor;
- Opening HEIC and WebP images and using them as watermarks in AVS Photo Editor.
*Please note that content editing and conversion without owner’s consent is illegal in the most countries of the world.
Critical bug fixes & improved UI
In this release, we fixed a critical vulnerability Buffer Overflow which caused the app crash. Therefore, we strongly recommend you to upgrade for the faster and even securer AVS4YOU performance on your Windows PC.
These and many other enhancements deliver a better user experience in the new AVS4YOU version:
- Correct opening of mirrored and rotated JPEG photos from different cameras without additional manipulations;
- Correct displaying of metatags in M4A and M4B audio files;
- Automatic opening of MIX files
- Updated ActiveX components
- Updated colors of inactive scrollbars
Download the new AVS4YOU upgrade today — this will make your video and audio editing more comfortable and secure.
Subscription expired?
Get the unlimited access to AVS4YOU software with a 25% discount till June 1, 2023. Just redeem this code when purchasing: MayRelease
Useful links

MP3 is definitely the most popular music format out there. All players support this extension and people tend to convert any other audio file types to MP3. However, sometimes you need to change this MP3 to WAV, and this article reveals how to do it and when such audio processing can be useful.
MP3 vs WAV head-to-head
Both music formats are extremely popular worldwide and have their strenghts and weaknesses.
MP3 is an omnipresent lossy audio format. It reduces the file size significantly at the optimal quality level in the output files. MP3 gives you an opportunity to modify bit rate, file size and level of audio quality.
WAV is a lossless format with the original sound quality of the recording. This advantage makes WAV files much larger in size compared to nearly every other music extension. Widely supported, it is mostly used for creating music on Audio CDs.
Note: Converting MP3 to WAV will not improve the sound quality. While original WAV files sound better, MP3 and other lossy formats are compressed and their conversion does not restore the original quality.
Why you may need to convert MP3 to WAV?
WAV format is very useful when working with samples for a new track. For example, if you want to use an MP3 sample and play with effects before integrating it to a future audio file, some apps may prefer WAV over the unsupported MP3 format.
Also, when burning a CD it is recommended to convert all tracks to WAV. This use case is especially relevant, if your car does not have Bluetooth connection and you want to listen to music from CD.
Converting MP3 to WAV on Windows
AVS Audio Converter is a free and easy-to-use application to get WAV from MP3 files on Windows. This software is supported on various Windows versions, from Win 11 to XP and Vista.
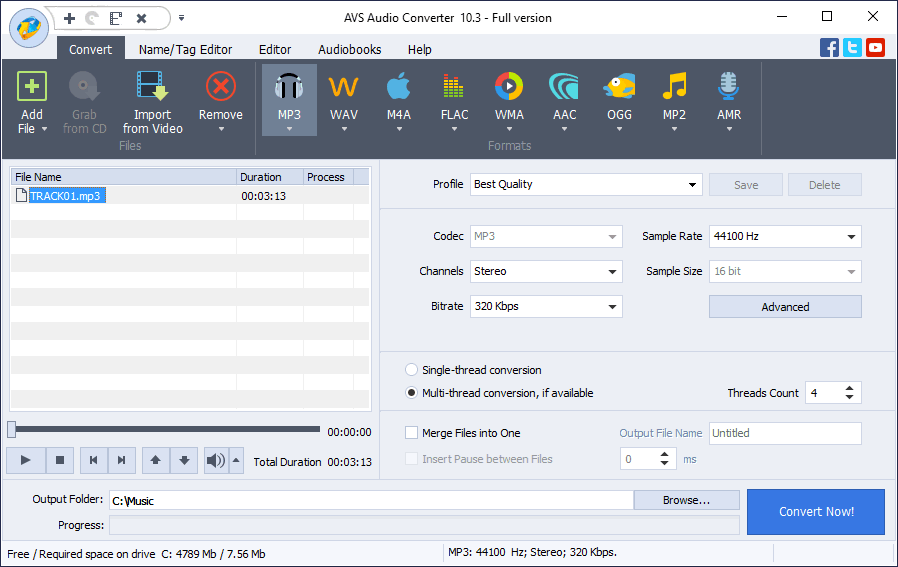
- Upload your MP3 files to AVS Audio Converter.
- Choose WAV as the output format.
- Select one of pre-defined profiles depending on the required quality of the output file or modify its properties yourself.
- If you want to choose more precise properties of an audio file (Coding method, filtering frequency), click Advanced >>. This option is only recommended for experienced users.
- Click Convert Now.
When conversion is completed the following window pops up:
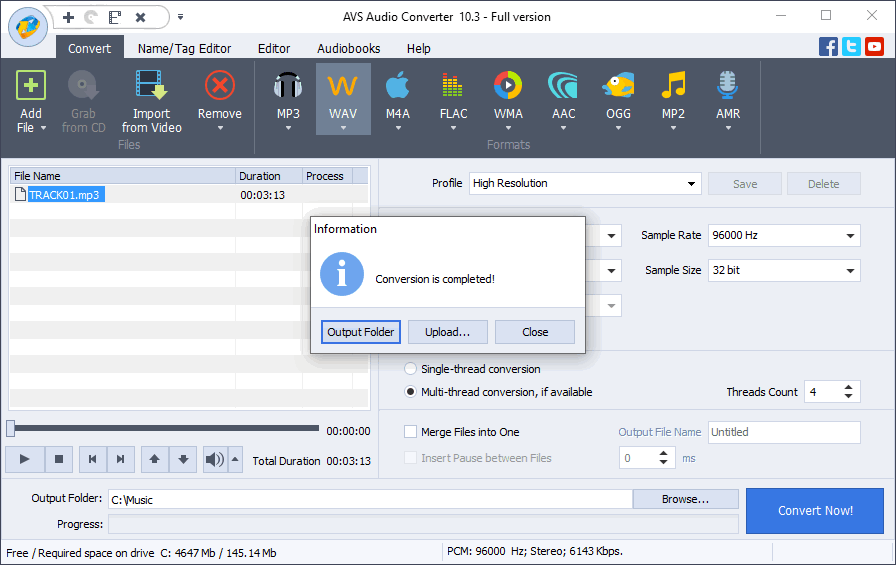
The Output Folder button helps you find the location of a converted file easily.
The Upload button transfers the converted audio to your gadget or digital storage devices.
You can also just close the pop-up by clicking Close and continue conversion of other songs.
Try AVS Audio Converter today — it’s completely free of charge!
How to convert MP3 to WAV online
There are many services for converting music formats without installing any software. CloudConvert is just one of them.
The top advantage on such websites is the ability to convert audio file types on every operating system and in every browser.
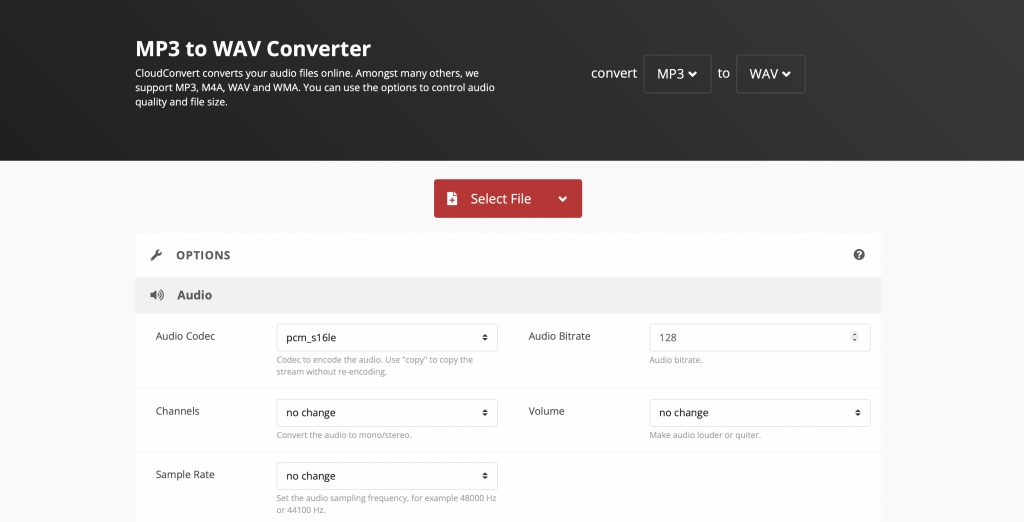
- Upload the MP3 track from your computer or cloud service.
- Click Convert and wait until your files are completely processed.
- Download WAV tracks.
The online approach is convenient and easy. However, some file size limitations and additional charges may occur (such as Premium subscriptions to be able to upload larger MP3 files).
Besides, we do not recommend to upload any personal files on the Internet, since online services are never fully protected from new vulnerabilities and data leaks.
Closing words
As you see, there are some cases when MP3 to WAV conversion is crucial. Fortunately, there are free Windows and online applications around to help you out.
Useful links

Bitrate is one of the vital specifications of video files that can impact the streaming quality to a great extent. That’s why you need to know the meaning of this term and use this knowledge for producing better recordings.
In this guide, we’ll walk you through the bitrate video setting without complex explanations.
What is video bitrate?
Bitrate refers to the amount of data that is used to represent a given file in a digital format. It generally describes the amount of data that is transferred or stored per second, typically measured in kilobits per second (Kbps) or Megabits per second (Mbps). Higher bitrates optimize sound quality at the expense of file size, while lower ones reduce the size of the file but reduce the sound quality. A high bitrate is essential for streamers, as it is what defines the quality of a video.
When discussing data transfer in relation to video broadcasting, uploads and downloads are used as examples. Data that is transferred from your device to the web after the video signal has been exchanged between the encoder for data compression is referred to as uploading. The procedure by which people receive the video to their devices from the web is referred to as downloading.
Whether we’re talking about upload or download speed, bitrates are used to measure both. Higher bitrates produce better-quality video but greater transmission speeds require more data to be processed. A bitrate of 6000 Kbps, for instance, would produce great video quality for a video stream set to 1080p resolution at 60 fps. Less Kbps mean poorer quality.
Here’s the table of the most popular video bitrate setting for your video.
Type | Bitrate |
2160p (4K) | 40,000–65,000 Kbps |
1440p (2K) | 16,000–24,000 Kbps |
1080 (HD) | 8,000–12,000 Kbps |
720p | 5,000–7,500 Kbps |
480p | 2,000–4,000 Kbps |
360p | 1,000–1,500 Kbps |
Want to reduce or improve video bitrate in your clips? Change this setting in AVS Video Editor.
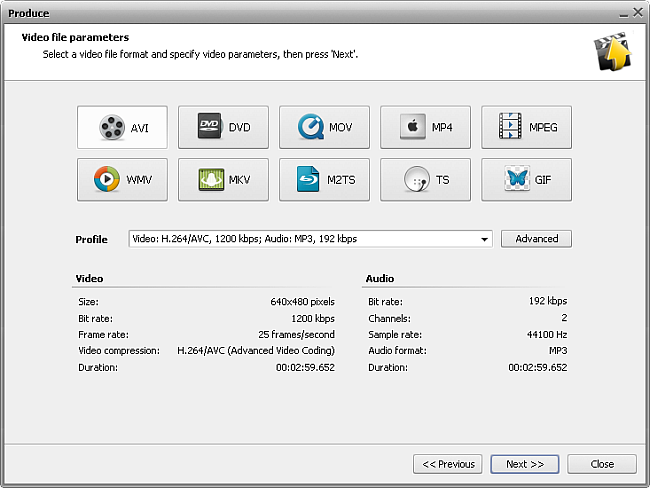
When saving your video, just choose a profile with the desired bitrate value. Click Next >> to save a file.
The entire AVS4YOU multimedia suite is currently available with large discounts up to 70%.
Useful links
M2TS is a filename extension for the Blu-ray disc Audio-Video (BDAV) MPEG-2 Transport Stream container file format. Used to store HD videos on hard drives.
In this article, we’ll cover M2TS specifications, pros and cons, how to open and convert these videos.
Is M2TS a good video format?
M2TS, like any other video format, has benefits and drawbacks that you should be aware of when creating movies.The extension is not as common as MP4, and most likely you’ll see files with M2TS after the dot when you transfer videos from a Blu-ray disc. Note that discs containing movies with protected copyright must not be distributed without the owner’s consent.
M2TS has excellent quality, which makes files larger in size compared to some common extensions designed for online video sharing. The format can be rejected by some players – however, Windows, Mac, and iOS users can use a free converter to get an output MP4.
How to open a M2TS file?
Although the format is less known than its competition, some advanced players support viewing M2TS files.
On Windows, one of the best options is AVS Media Player. It’s free, plays back M2TS and other video formats, audio files, and images.
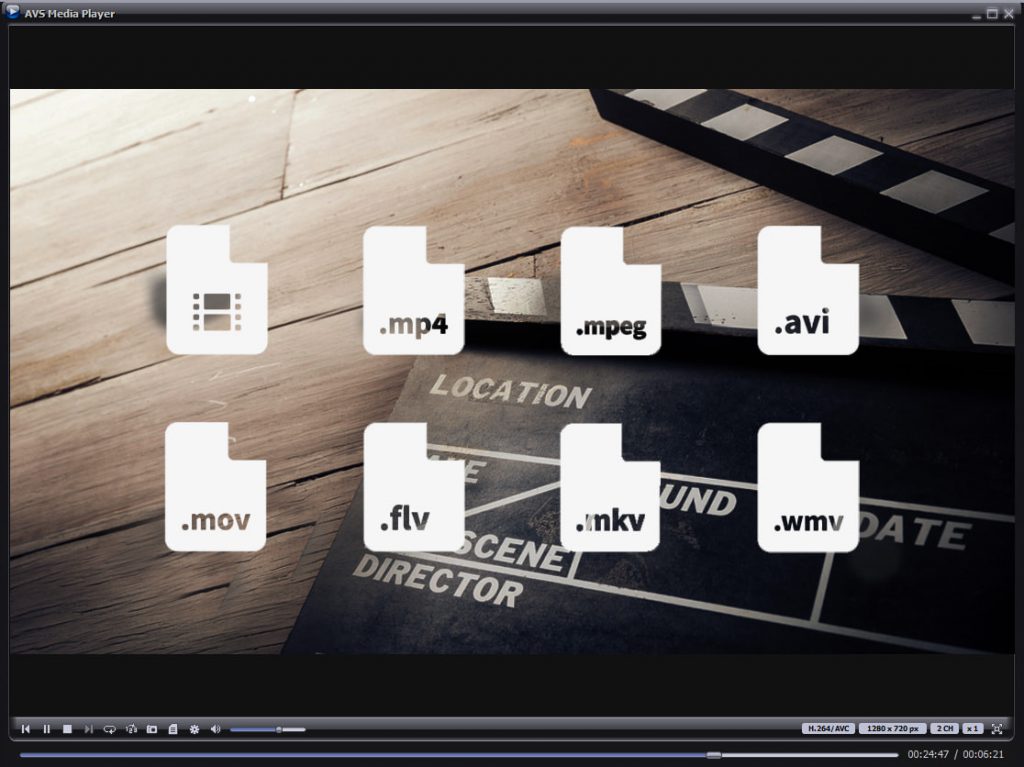
The app is suitable for Windows 11 and previous versions up to XP. Get your media player for different multimedia content:
Another awesome player that opens M2TS is VLC Media Player. Free and cross-platform, it allows viewing files from Blu-ray discs not only on Windows, but on Mac and Linux.
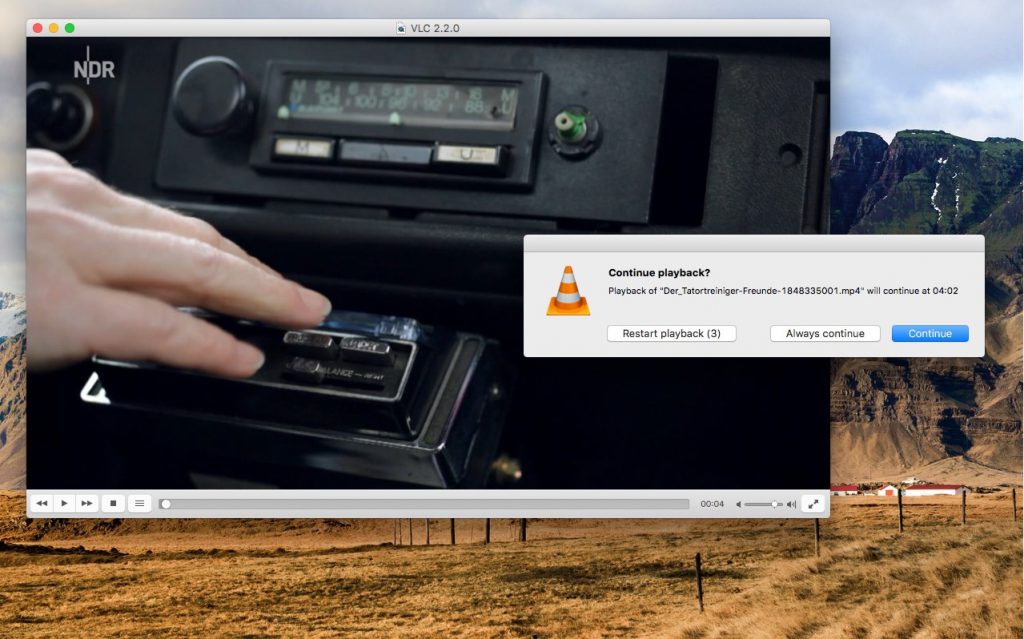
You can also make some minor amendments to the playback (speed up or slow down videos, for instance).
How to convert M2TS to another format?
If you want to change the format of your M2TS video, do not simply rename the file. The file properties will not be changed, whereas your footage could end up being damaged and unreadable.
Convert your movie with free AVS Video Converter for Windows.
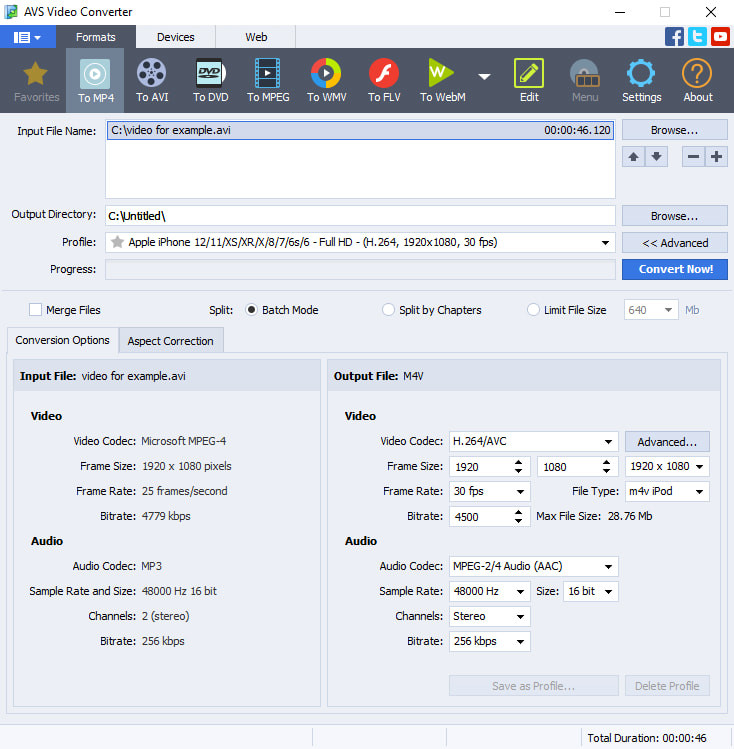
- Upload or drag’n’drop your M2TS video to the AVS Video Converter.
- Choose the output format on the toolbar. MP4 is set by default.
- Open the dropdown list with profiles and choose one with suitable video properties. Optionally, go to Advanced and enter parameters manually (recommended for experienced users).
- Click on Convert Now!
Afterwards, you can open a folder with the output file or upload it to your gadget or digital storage devices.
Get AVS Video Converter for Windows today – it’s free and super easy to use!
Final words
M2TS is a format for storing high-quality movies on Blu-ray discs. This extension is not that commonly used, so to view and share videos you could opt for converting these files to other formats, such as MP4.
Useful links
What is the smallest video format?
What is the MOV format and how to open it?