Category: Без рубрики

Creating engaging video content involves more than just recording footage. It is about mastering the art of cutting and trimming to craft compelling content. One way to enhance your video footage is by perfecting your cuts. Cutting tools are indispensable for many purposes such as trimming away unwanted scenes, slicing clips to keep the narrative crisp, or cropping visuals for a more impressive look. We’ve rounded up the top 10 apps that specialize in cutting and trimming features, helping you achieve seamless, professional-grade edits.
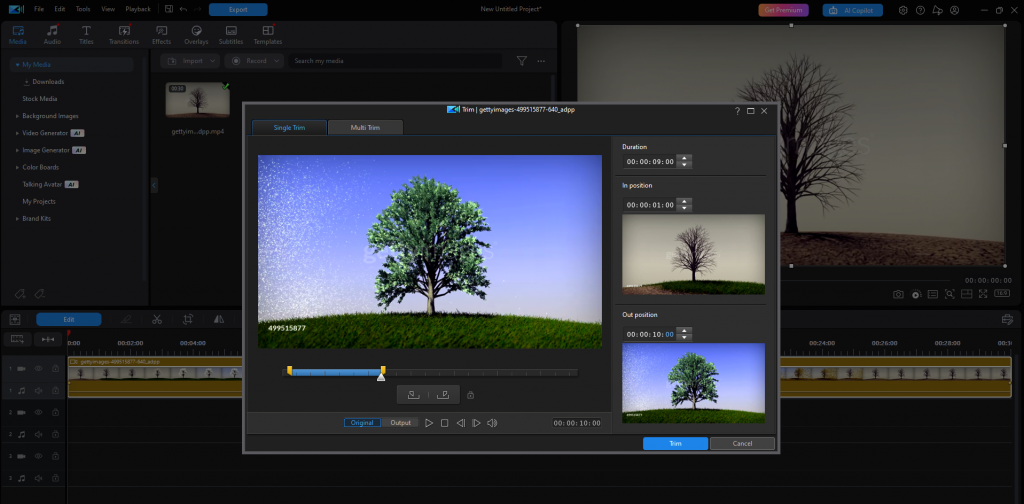
1. AVS Video Editor

AVS Video Editor’s drag-and-drop timeline simplifies cutting tasks and makes editing fun and easy. Its multi-trim option allows users to cut multiple sections simultaneously, perfect for editing lengthy videos. The program also allows to crop video easily. By cropping we mean removal of unwanted outer areas from video footage or changing its dimensions to fit within a certain area. The frame-by-frame playback makes trimming complex sequences easy and accurate.
Pros
- Clean, user-friendly interface, ideal for beginners.
- Fast video processing and rendering, even with HD and 4K videos.
- Affordable subscription model that includes access to the whole AVS4YOU Multimedia Suite
Cons
- Limited advanced features for high-end projects.
- Built exclusively for Windows OS.
2. Adobe Premiere Pro

Adobe Premiere Pro brings a set of professional cutting features. The Ripple Edit lets you trim clips quickly without shifting the entire timeline, while the Rolling Edit enables smooth transitions between scenes. The Razor tool makes cutting specific sections of footage effortless, even in complex multi-track projects.
Pros
- Powerful software with a vast array of trimming tools.
- Perfect for both short clips and full-scale projects.
- Seamlessly integrates with other Adobe Creative Cloud apps.
Cons
- A steep learning curve, especially for beginners.
- High subscription costs can be a barrier for some users.
3. Final Cut Pro
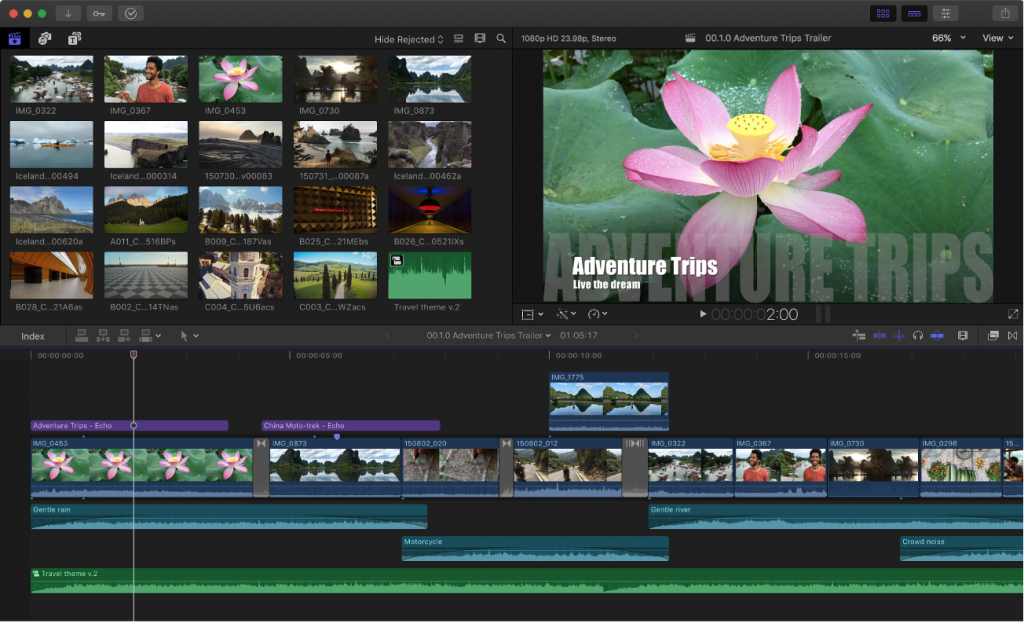
Final Cut Pro’s cutting tools stand out for precision and creative control. The Magnetic Timeline automatically snaps clips together and closes gaps when unnecessary segments are removed. It keeps video sequences clean and organized without the need for manual adjustments. The Blade Tool lets users make precise cuts at any point in a clip, even during playback, so that it is easy to rearrange sections. Trimming tools, which include ripple, roll, slip, and slide edits, offer complete control over timing. As a result, accurate adjustments are made while adding smooth transitions or syncing visuals with audio. Final Cut Pro is a favorite among professionals thanks to its effectiveness and flexibility.
Pros
- Exceptional rendering speed for large projects.
- Intuitive and efficient timeline management.
- One-time purchase with no ongoing subscription costs.
Cons
- Only available for macOS users.
- The advanced features could be hard to use.
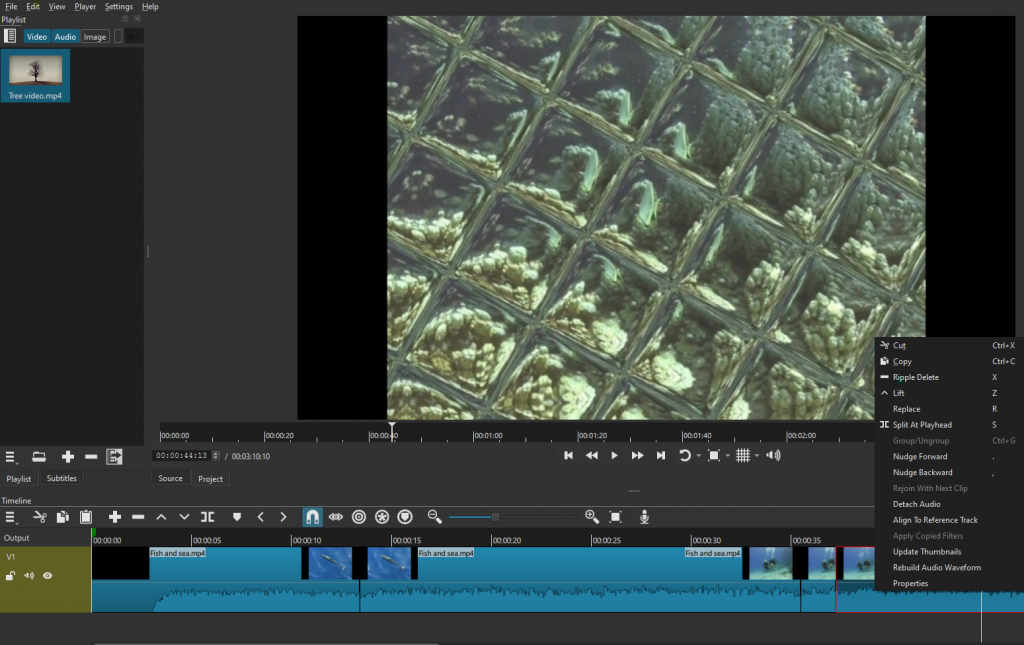
4. DaVinci Resolve
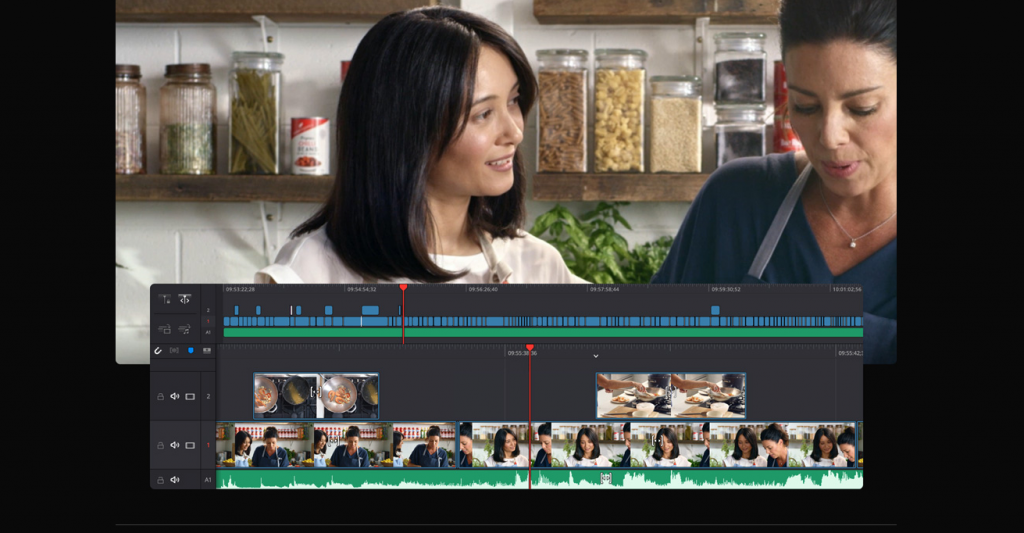
DaVinci Resolve makes cutting video easy with its special Cut Page, designed to help you edit quickly and clearly. It has two timelines, one of which displays the whole project, and the other zooms in so you can make detailed edits without losing your place. You can trim clips using simple drag handles, and the ripple trim tool automatically moves other clips to keep everything in sync. There’s also a Source Tape view that shows all footage in one scrollable strip, so you can find and cut what you need fast. These tools will suit beginners who want a smooth editing experience with high-level precision.
Pros
- Free version includes professional-grade trimming tools.
- Popular in the film industry due to its precise work processes.
- Combines cutting, color grading, and audio editing in one app.
Cons
- High hardware requirements for optimal performance.
- Steep learning curve for novices in video editing.
5. iMovie
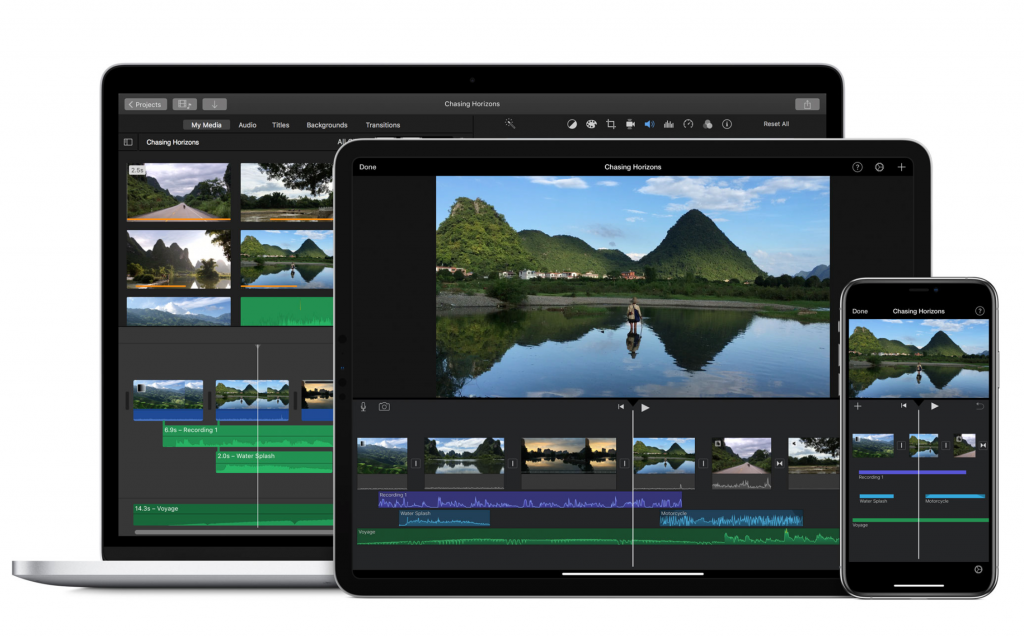
iMovie offers all necessary cutting tools: cutting, trimming, cropping and splitting. With drag-and-drop functionality it is easy to adjust start and end points of clips. There are several options for cropping:
Fit shows the entire image without cropping,
Crop to Fill manually crops video by adjusting the frame,
Ken Burns adds a panning and zooming effect between start and end points.
At the same time, iMovie automatically adjusts the video to maintain aspect ratios, which can limit custom framing. Additionally, it doesn’t support animated cropping or keyframes for dynamic crop transitions.
Pros
- Free for macOS and iOS users.
- Accessible for beginners.
- Creates polished videos for smaller-scale projects.
Cons
- Limited advanced functions for professionals.
- Only available on Apple devices.
6. Filmora
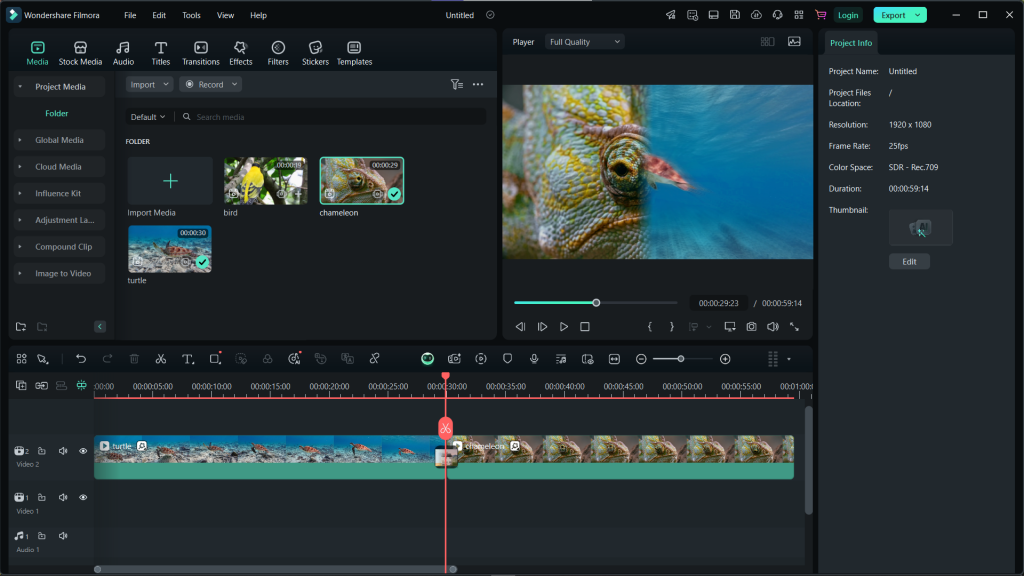
Filmora combines powerful features with intuitive usability. The basic Trim tool lets you quickly shorten or lengthen clips by dragging the edges. It is very useful for removing mistakes or extra footage. For more detailed edits use the Multi-Trim feature allowing you to cut out multiple unwanted parts from the video at once. With an easy-to-use timeline, visual cues, and one-click options, Filmora makes cutting video simple, creative, and beginner-friendly.
Pros
- Affordable compared to other professional tools.
- Regular updates with fresh effects and templates.
- Offers comprehensive tutorials to assist new users.
Cons
- Free version includes watermarks.
- Lacks some advanced tools found in professional software.
7. VSDC Free Video Editor
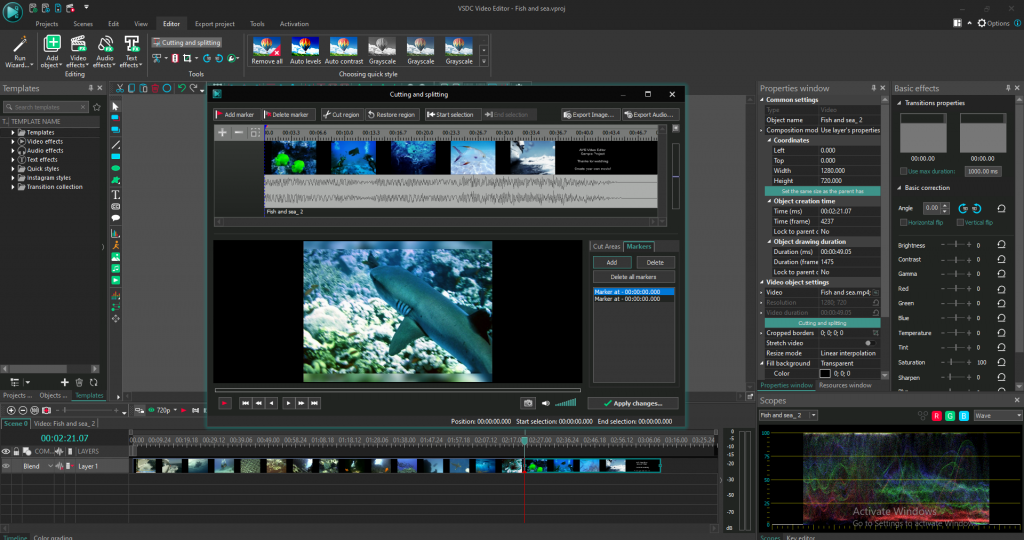
VSDC includes user-friendly cutting tools like Split and Multitrim, allowing beginners to easily edit longer videos. The Split tool divides footage into smaller parts, while the Multitrim option helps remove multiple unwanted segments in one session. If you want even quicker editing, there is Scene Detection feature. It automatically breaks the video into separate scenes based on content changes, making it simpler to trim and organize.
Pros
- Completely free with no watermarks.
- Offers advanced trimming options without extensive system requirements.
- Compatible with older PCs.
Cons
- Less intuitive design for beginners.
- Limited to Windows users.
8. Shotcut
Shotcut offers a precise Trim mode that lets you cut clips accurately. You can easily set in and out points, split clips, and remove unwanted sections without affecting the rest of your project. The ripple editing feature helps maintain timing by automatically shifting clips when you make cuts. For those who want more control, Shotcut also supports codec customization, giving flexibility over formats and export settings during the trimming process.
Pros
- Free and open-source with regular updates.
- No watermarks regardless of export resolution.
- Extensive tutorials available for intermediate users.
Cons
- Slightly outdated design compared to competitors.
- Steeper learning curve for beginners.
9. KineMaster
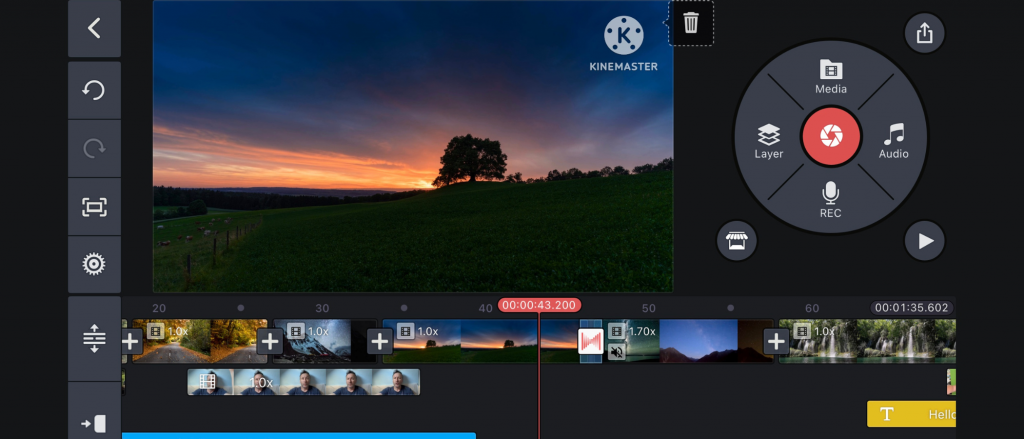
KineMaster offers powerful and intuitive cutting tools designed specifically for mobile devices. With the Clip Trimmer, you can precisely adjust the start and end points of any clip by dragging handles or setting exact timecodes. The ‘Split at Playhead’ tool lets you instantly divide a clip at the current playhead position which is especially useful for removing sections or inserting transitions. KineMaster also includes a built-in crop tool, allowing users to quickly resize or reframe video content to focus on key visuals. These tools make editing smooth and easy right on your phone or tablet.
Pros
- Perfect for fast on-the-go edits.
- User-friendly with desktop-like trimming features.
- Free version includes basic editing tools.
Cons
- Watermarks in free version.
- Limited advanced customization options
10. PowerDirector
PowerDirector can boast of versatile and efficient cutting tools. The Multi-Trim feature allows users to set multiple in and out points and remove several unwanted sections all at once, ideal for editing bulky videos. For making precise edits PowerDirector is packed with the Precision Trimmer ensuring frame-by-frame control. It is easy to fine-tune the exact start and end points of each cut. Additionally, extra movement can be added to static shots using the Pan and Zoom Cropping tool. As a result, the final video files are given more dynamic, cinematic feel.
Pros
- Offers premium cutting features on both PC and mobile.
- Frame-accurate trimming and robust cropping tools.
- Reasonably priced with regular updates.
Cons
- Editing complex projects can be tricky on small screens.
Choose the best video cutter for your needs
Video cutting is an essential part of the editing process, used both for quick edits and creating complex high-quality projects. If you’re new to editing, try beginner-friendly options like AVS Video Editor, iMovie, or KineMaster. For professionals, Adobe Premiere Pro, Final Cut Pro, or DaVinci Resolve might be the better fit. Finally, budget-conscious creators can take advantage of free alternatives like VSDC and Shotcut, which offer powerful editing at no cost. Master the art of cutting with any of these tools and easily enhance your storytelling.
Useful links

High-quality audio is essential for making your work stand out, regardless of the project. For example, producing YouTube videos, recording podcasts, joining virtual meetings, or creating eLearning tutorials all benefit from clear and professional sound. As a result, your content is elevated and your audience remains engaged. In contrast, poor audio can distract listeners and undermine your message. By prioritizing excellent audio, you ensure that your audience stays focused and truly connects with your content, creating a more immersive and impactful experience.
In this article, we will show you how to capture sound from a computer like a pro. From equipment selection and settings configuration to final cleanup of your audio recording, these tips and tricks will give you polished, professional-level audio straight from your computer.
How to choose the right microphone for your computer
The first step to great audio is choosing the right microphone. Not all mics are created equal, and the best one for you depends on your goals and environment.
Types of microphones:
- USB Microphones – Ideal for beginners. Easy to plug in and use without extra equipment.
Recommended: Blue Yeti, Razer Seiren X - XLR Microphones – Preferred by professionals. Require an audio interface but offer superior sound quality.
Recommended: Audio-Technica AT2020, Shure SM7B - Lavalier Microphones – Great for on-the-go or video recordings. Clip-on style, often used in interviews.
Recommended: Rode smartLav+, BOYA BY-M1
Choose a cardioid microphone pattern to focus on sound in front of the mic and reduce background noise from behind or the sides. This is especially important if you’re recording in a non-soundproofed room.
Optimize your recording environment for cleaner sound
Even the best mic won’t perform well in a noisy or echo-filled room. Here’s how to make your space audio-friendly:
Reduce background noise
- Turn off fans, air conditioners, and noisy appliances.
- Record during quiet hours to avoid outside traffic or neighbor noise.
- Use soft materials to absorb sound such as curtains, rugs, pillows, and bookshelves can help.
Soundproofing basics
Foam panels or bass traps effectively reduce echoes and reverberation, while for budget setups, thick blankets or mattresses placed against the wall can work surprisingly well.
Mic placement tips
- Position the microphone 6–12 inches from your mouth.
- Use a pop filter to minimize plosives (hard “P” and “B” sounds).
- Mount the mic on a boom arm or shock mount to prevent picking up desk vibrations or keyboard clicks.
Adjust your audio settings for best sound recording
Before you start recording, it’s important to configure your system for the best possible audio quality. Begin by setting your sample rate to 44.1 kHz or 48 kHz, which are standard rates that provide excellent sound fidelity. For bit depth, choose 16-bit or 24-bit to capture a wide dynamic range and detailed audio.
Next, input gain and levels:
- Check your input levels in your audio software or Windows sound settings.
- Aim for input levels that peak around -12 dB to -6 dB to avoid distortion.
- Refrain from maxing out gain because it amplifies everything, including unwanted noise.
On Windows systems, remember to disable audio enhancements
- Right-click the speaker icon > Sounds > Recording tab.
- Select your microphone > Properties.
- Under the Enhancements tab, disable all sound effects or processing options.
- Switch to the Advanced tab and match sample rate/bit depth.
Best software to capture sound from a computer
To record audio from your computer, you’ll need a reliable recording tool. We recommend AVS Audio Editor, a feature-rich and user-friendly program that supports high-quality audio capture and editing.
How to record audio with AVS Audio Editor
- Open AVS Audio Editor.
- Click Record from the top toolbar.
- Choose your input device (e.g., microphone, stereo mix).
- Adjust the recording volume and monitor input levels.
- Hit Start Recording and speak clearly into your mic.
You can also use AVS Audio Editor to record PC audio (e.g., from streaming content, games, or video calls) by selecting the “Stereo Mix” or system audio option, just make sure it’s enabled in your sound settings.
Audio cleanup and editing tips
Even a well-recorded clip can benefit from post-processing. AVS Audio Editor offers a range of tools to clean up audio and enhance quality.
Key editing features
- Noise removal
Use the “Noise Reduction” tool to clean noise from audio, like hums or static.
- Cut and trim
Remove awkward pauses, false starts, or background interruptions.
- Equalizer and compressor
Balance your frequencies and dynamic range for a more polished sound.
- Effects
Add reverb, pitch correction, or fade-ins/outs for creative touches.
Monitor your audio while recording
Monitoring your audio in real time helps you catch issues early and make live adjustments.
Use headphones
- Plug headphones directly into your audio interface or computer.
- Avoid Bluetooth headphones since they often have latency.
When monitoring your audio, listen carefully for any unexpected noises or buzzing. Check if your voice sounds too quiet or if the audio is clipping. Also, be aware of any echo or room noise that may need to be addressed.
Make adjustments to your mic position or input levels as needed while monitoring.
Maintain your gear
Proper care can extend the life of your audio equipment for years. After each session, gently wipe your microphone with a soft, dry cloth to keep it clean, and store it in a dust-free place or use a protective cover to prevent damage. Avoid exposing your gear to extreme temperatures or humidity, as these conditions can damage components over time.
Regularly inspect your cables and connections for any signs of wear or damage, replacing loose or frayed wires promptly to maintain reliable sound quality. Keeping your audio drivers and recording software like AVS Audio Editor up to date is also essential to ensure smooth performance and compatibility with your system.
Conclusion
Capturing crystal-clear audio on your PC is absolutely achievable with the right setup, tools, and a bit of know-how. From podcasts and voiceovers to gameplay commentary, the steps outlined above will guide you to professional results at home.
Remember: quality audio starts with the right microphone, continues with a good environment and settings, and finishes with smart editing. Don’t be afraid to experiment with different setups to find what works best for your voice and space.
Want to get started now? Download AVS Audio Editor and start creating studio-quality recordings from your PC today!
Useful links
How to remove background noise from audio?
5 essential audio editing tips to improve your videos
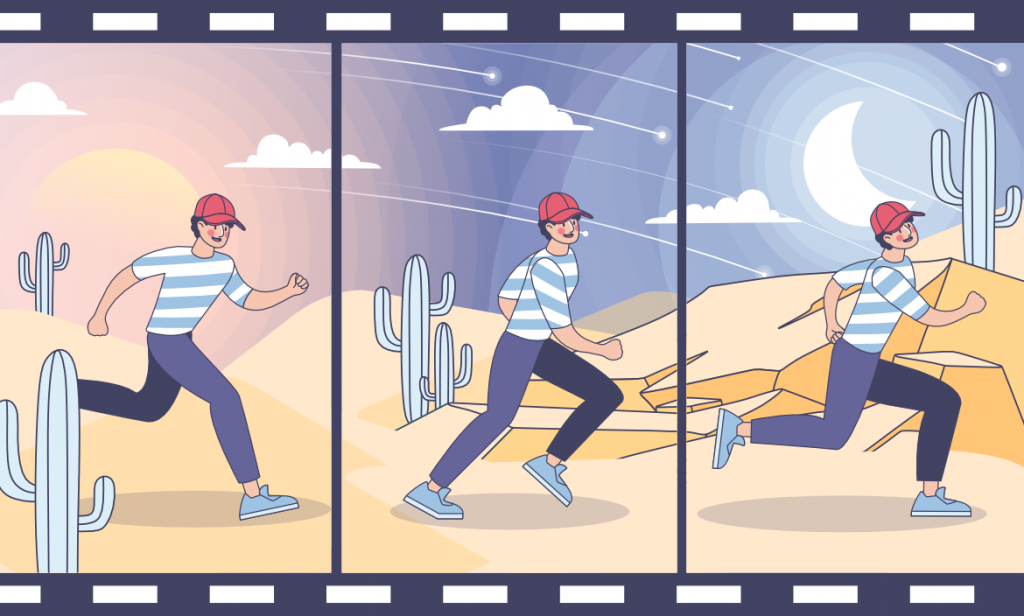
By 2025, timelapse videos have grown into a genre of their own, thanks to the mesmerizing sunsets, buzzing cityscapes, and atmospheric transitions often showcased on Instagram Reels and TikTok. These fast-paced visuals compress hours of footage into seconds, offering a creative and compelling way to tell a story.
But creating a smooth, high-quality timelapse involves much more than just speeding up a clip. Other challenges include camera shake, uneven lighting, and awkward pacing—all can lead to subpar viewer experience. AVS Video Editor helps address all these issues. Its simplicity makes the editing process accessible for casual creators, while its power allows experts transform ordinary clips into stunning pieces of art captured in time.
How to create a timelapse video in AVS Video Editor
1. Importing media into AVS Video Editor
Start by opening AVS Video Editor and clicking the Import button to upload your video files or image sequences.
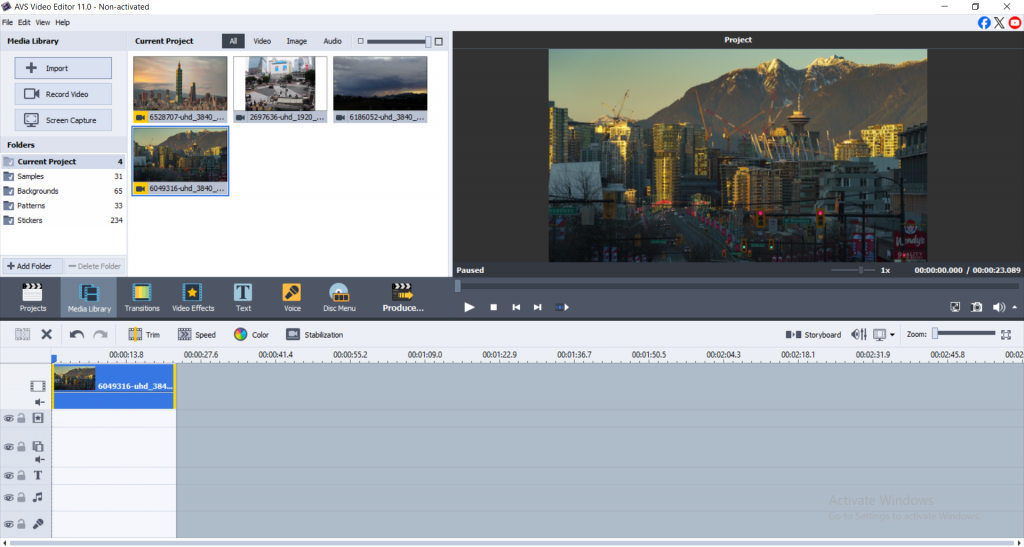
For best results, use high-resolution footage shot on a tripod in well-lit outdoor or brightly lit indoor settings, as timelapse footage typically requires more light.
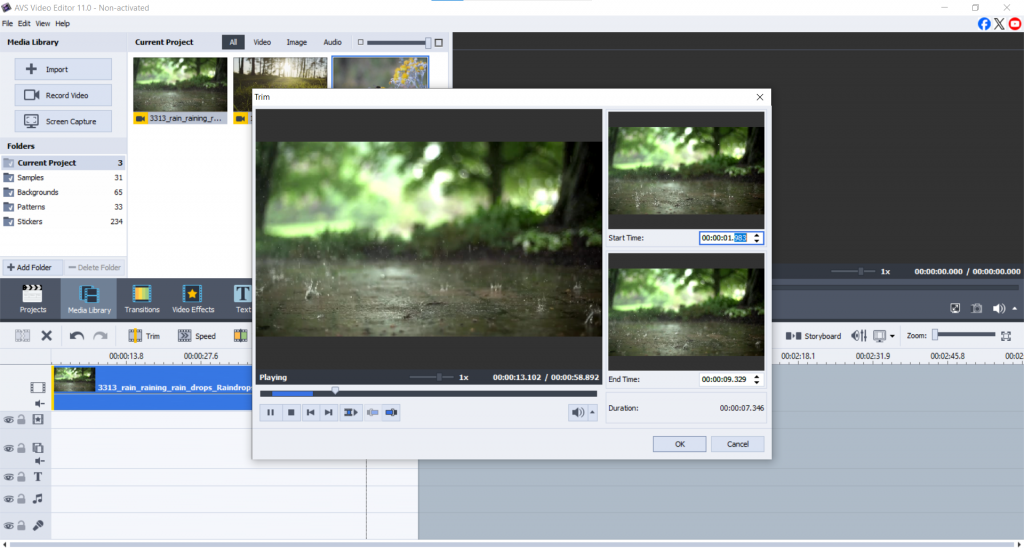
2. Turn your video into a timelapse
To turn a video into a timelapse:
Right-click on the clip in the timeline and select Speed/Duration. Depending on your scene, increase the speed, for example, 500 – 2000%.
- City scenes: Go for a higher speed (1000 – 2000%) to emphasize motion.
- Natural elements (clouds, flowers): Moderate speeds (500-800%) work better to retain detail.
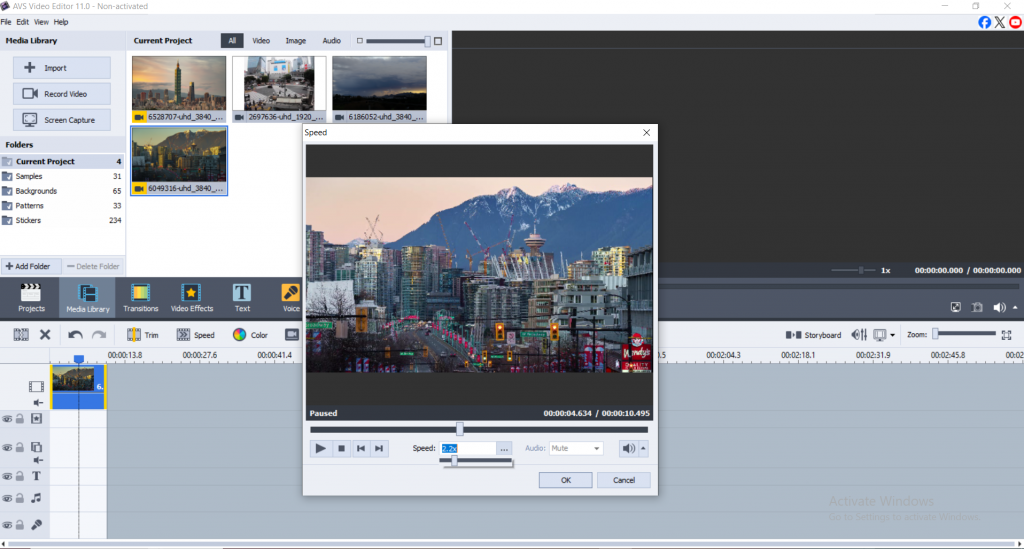
If needed, you can also slow down a timelapse video by lowering the speed percentage. This works great for highlighting slower motions like star trails or sunsets.
3. Add music to your timelapse for maximum impact
Music brings emotion and flow to your timelapse. AVS Video Editor makes audio syncing straightforward:
- Click Add Audio and drag your track onto the timeline.
- Use the waveform to align key video moments with beats in the music.
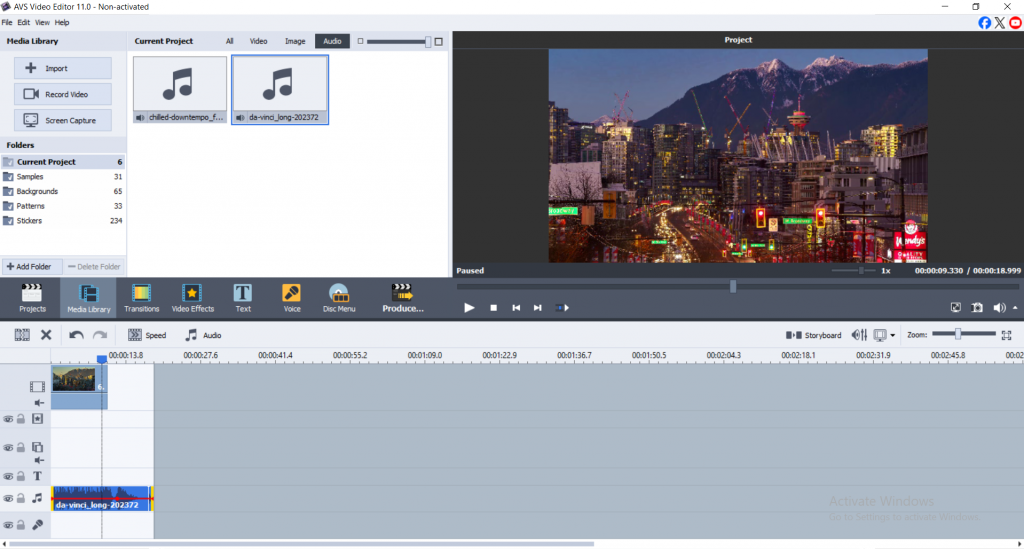
Pick music that fits the theme. Use ambient tracks for nature scenes, or upbeat electronic for urban timelapses.
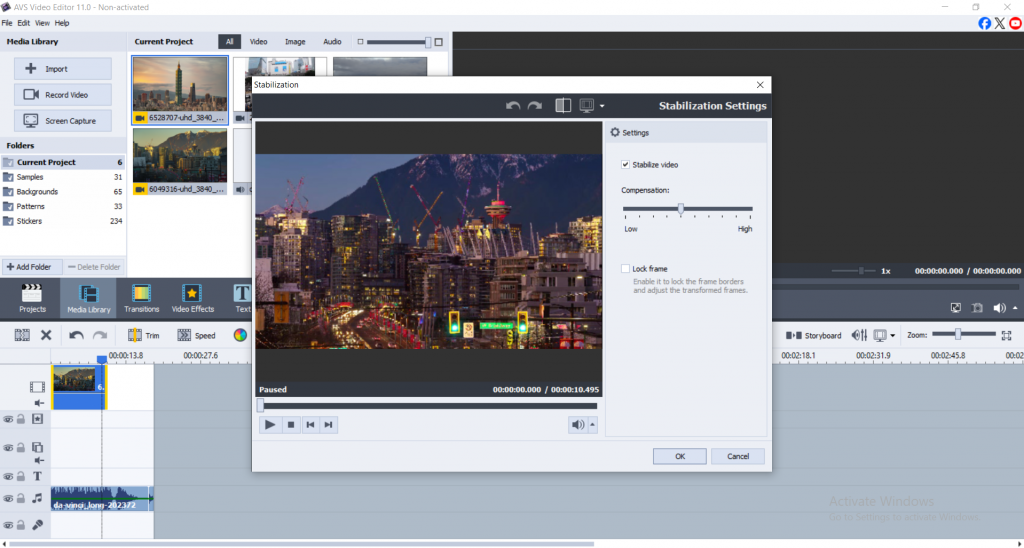
4. Enhance timelapse quality with editing tools
AVS Video Editor comes with built-in tools designed to refine your footage:
Camera shake: The stabilization tool reduces camera shake during post-production.
Brightness and contrast: These adjustments should be made for accuracy, especially when the light condition continuously fluctuates mid-shoot.
Color correction: Filters can be applied or color levels may be manually adjusted to achieve cinematic visuals.
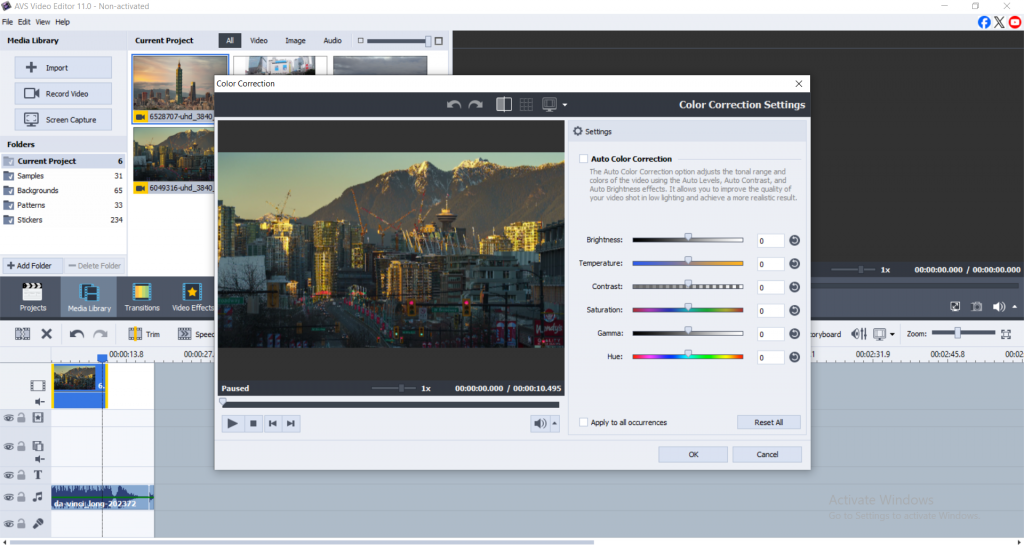
These features help transform ordinary clips when you timelapse a video into something visually compelling.
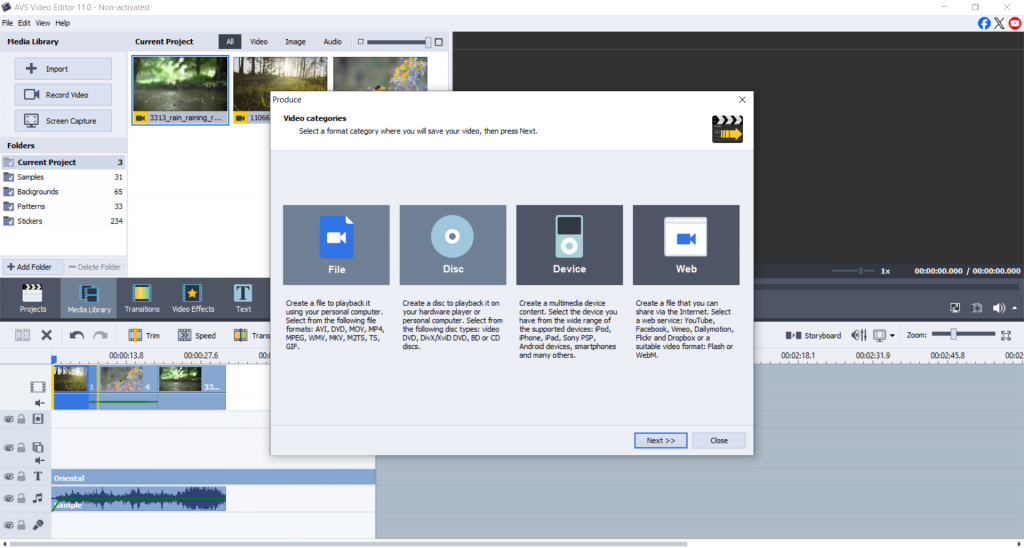
5. Export your timelapse in high resolution for any platform
Once satisfied with your edits:
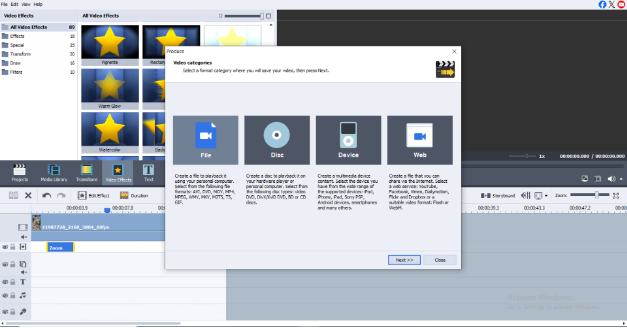
Click on Produce> choose File or Device.
For platforms like YouTube and TikTok select Full HD (1080p) or 4K).
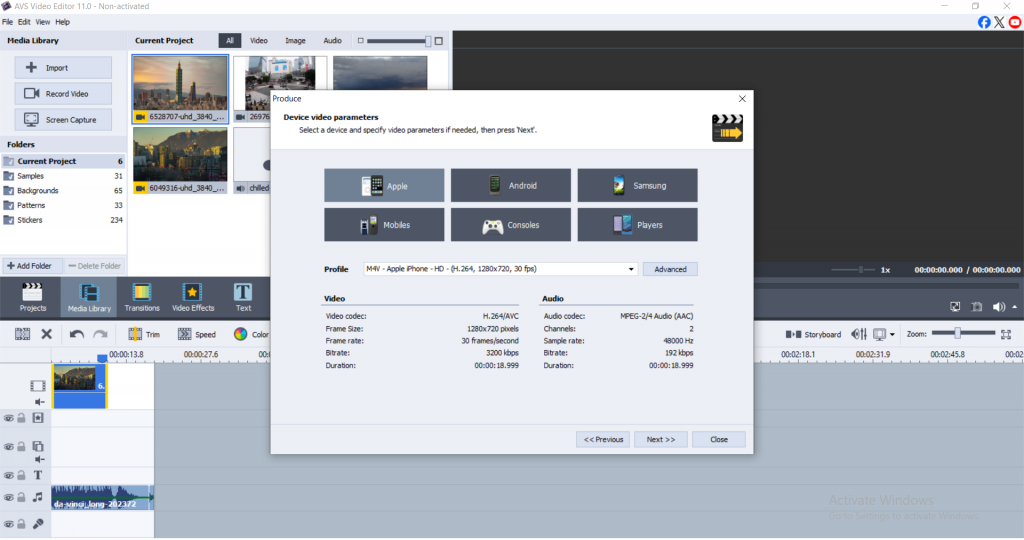
For smooth playback, adjust the bitrate when exporting to MP4 and use the built-in presets for the best results.
Top tips on how to create a timelapse video
1. Control stability when shooting
Use a tripod or gimbal to keep the shot steady, as small movements can look much bigger once the video is sped up.
2. Control lighting
Natural light can change drastically over the course of a few hours, so it’s best to shoot during overcast days or golden hour for softer, more consistent lighting.
3. Remember the frame rate
If you want to slow down parts of your timelapse later, it’s a good idea to shoot at a higher frame rate, like 60 fps. When you’re ready to export the final video, use 24–30 fps to keep the motion smooth and cinematic.
Timelapse video editing techniques for post-production
1. Use filters and transitions as creatively as possible
Cinematic filters are great for setting the mood of your clips. Additionally, smooth transitions such as fades and cross-dissolves can be used to seamlessly connect different parts of your video.
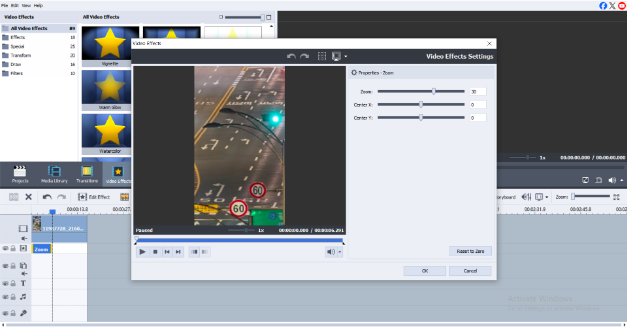
2. Enhance the video with soft zoom effects
Creating engagement through zooming during timelapse enables to improve visual attention.
AVS4YOU zoom tool enables the highlighting of changes such as flowers blooming and so crowd movement with the flowers’ blooming actions.
Set Zoom keyframes to match metered movements or lyrical sections of the audio.
3. Adjust Effects in Relation to Musical Tension
Integrate timing of all visuals such as scene changes, zooms, and cuts.
Mistakes to avoid when creating a timelapse video
1. Shaky footage
Even with stabilization, nothing beats a solid base. Use a tripod and avoid handheld shooting for long durations.
2. Over-editing
Adding too many effects, transitions, or filters can distract. Less is more, so let the timelapse speak for itself.
3. Poor pacing
If the footage is too fast, viewers miss details; too slow, and they lose interest. Test various speeds and ask for feedback.
Conclusion
It’s now easier than ever to turn your unprocessed video into a beautiful timelapse with AVS Video Editor. From importing and speeding up video, to adding music, correcting colors, and exporting in high resolution, the process is simple and easy for beginners to use, but it is also powerful enough for seasoned editors.
This is the ideal moment to start learning how to make a timelapse video, convert a video to a timelapse, or even add zoom effects to your timelapse. Get AVS Video Editor today, play around with the footage, and begin creating narratives that literally move.
Useful links
Timelapse with a twist: adding zoom effect to highlight key moments
5 Timelapse video ideas to level up your video content
Enhance your video storytelling with special effects for mood creation

When you create videos, it is extremely useful to insert text on the screen. This move will make your video look appealing, along with improving its overall effectiveness. You can use captions to point out important information in the videos. Subtitles are equally useful as they help viewers understand the spoken content, regardless of different languages. Moreover, you can show your brand’s name or logo on the video to make sure your brand becomes more memorable and recognizable to viewers.
Overlays with a professional design are pivotal for viewer engagement, ensuring the video is merely available to everyone, and giving it a clean and stunning final touch.
Adding text overlays is not about setting words on the screen. It includes placing them with care, choosing the right fonts, and using animations that smoothly blend with your video’s theme. AVS Video Editor makes it easy to apply caption effects, select fonts, and adjust timing for a smooth, professional look.
This guide explores how to add video overlays in AVS Video Editor, allowing you to make your content neat, compelling, and visually appealing to viewers.
Basics of video text overlays
On-screen phrases are shown on a video to give extra information or clarify the message. They are common in videos on platforms like YouTube, social media, and educational materials.
Overlays are useful tools in many ways. They play a significant role in guiding users to understand the video clearly by providing more information, such as subtitles. This added context enhances the clarity and accessibility of the content.
Different types of text overlays
- Static Caption: This is the most straightforward form where the text stays in one position for a fixed duration. This kind of caption is used when movement isn’t required. It aligns well with things like titles, captions, or adding notes to a video.
- Dynamic Overlays: This refers to captions that change in appearance over time, such as by changing size or content. You can use it to display information that can be combined with the timing of the video. For example, showing what people are saying or giving live commentary while the video plays.
- Animated Titles: This text adds motion to the overlay, such as sliding, fading, or bouncing. Additionally, it can draw attention or anticipate emotions, mainly during transitions or key moments. It may include the beginning of a video or the conclusion, keeping viewers engaged.
How text overlays enhance storytelling and engagement
On-screen captions are very useful for storytelling. They display important information or clarify parts of a video, making the message clear to the audience even when they cannot hear anything. In general, overlays make the content easier to watch and understand.
They are also important for educational or tutorial videos. On social media, animated and dynamic elements help people stay engaged and watch videos for a longer time.
Additionally, these animations show what kind of mood the video depicts, whether it is emotional, formal, or casual, which makes the story better and keeps viewers engaged.
Text in videos makes the message more understandable. It is especially helpful for people who have hearing difficulties or following what is being said. Some viewers may miss parts of the dialogue or find it difficult to follow. By including text, everyone can understand the whole message easily without problems.
How to add text overlays in AVS Video Editor
1. Make a new project and add your video
- Launch the AVS Video Editor and select “New Project” or “Open Project” from the interface.
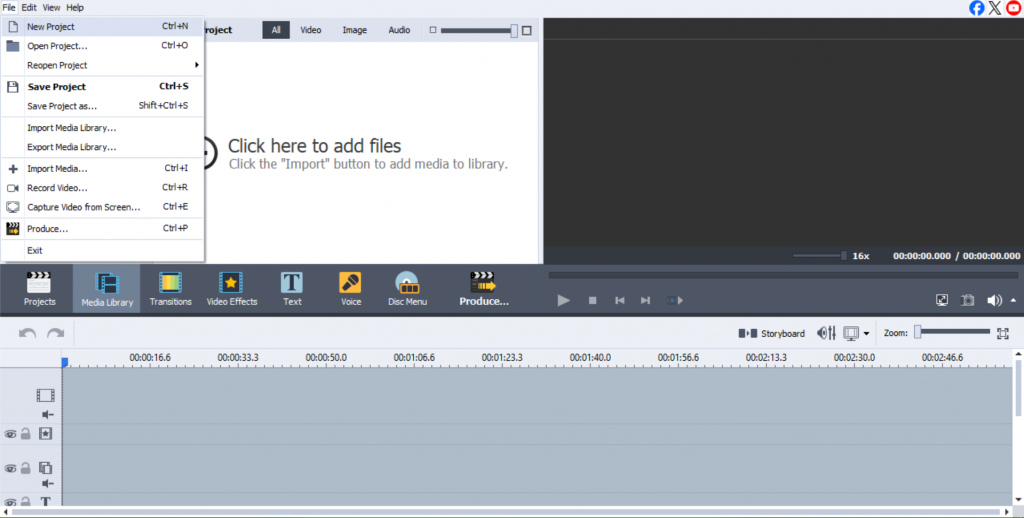
- Import your video by clicking the “Import” button and selecting the video file you want to edit.
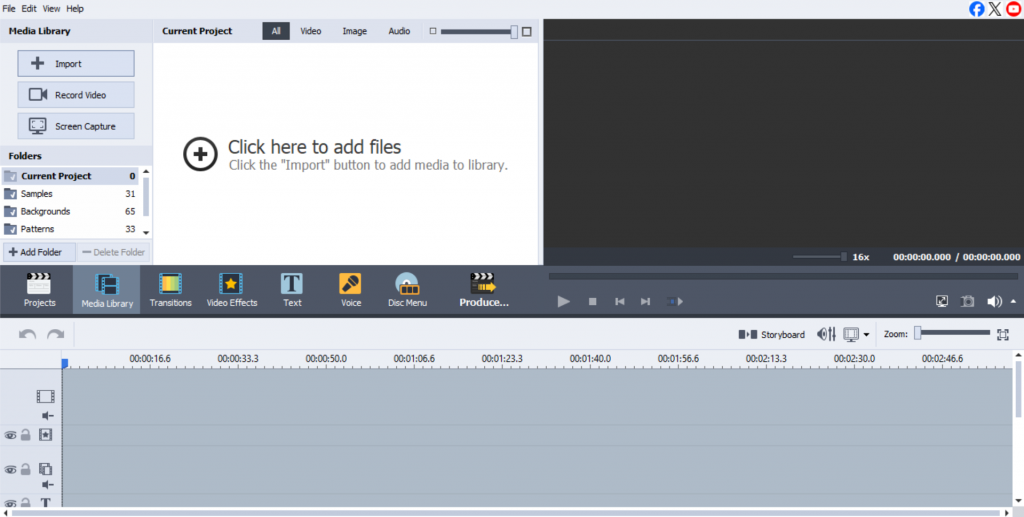
- Once the file is uploaded, drag it to the timeline to begin editing.
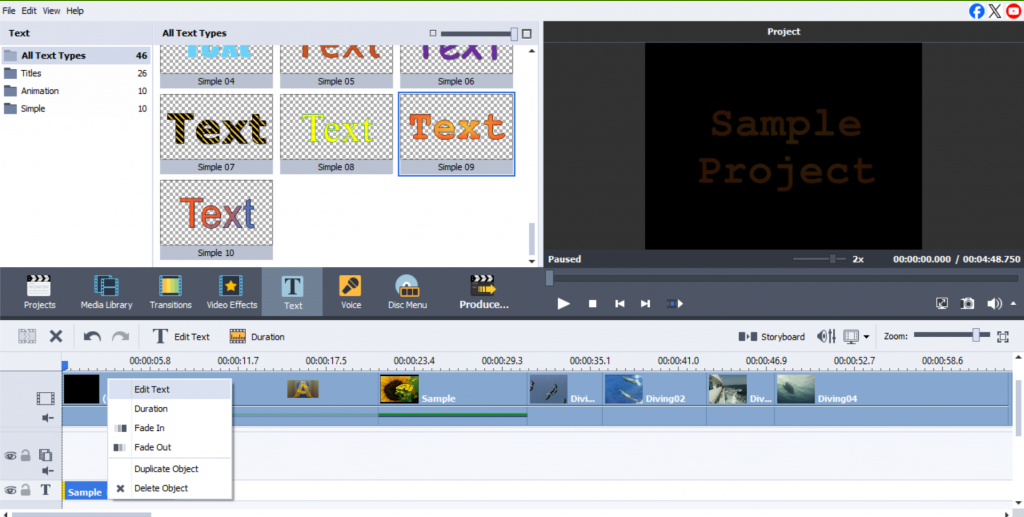
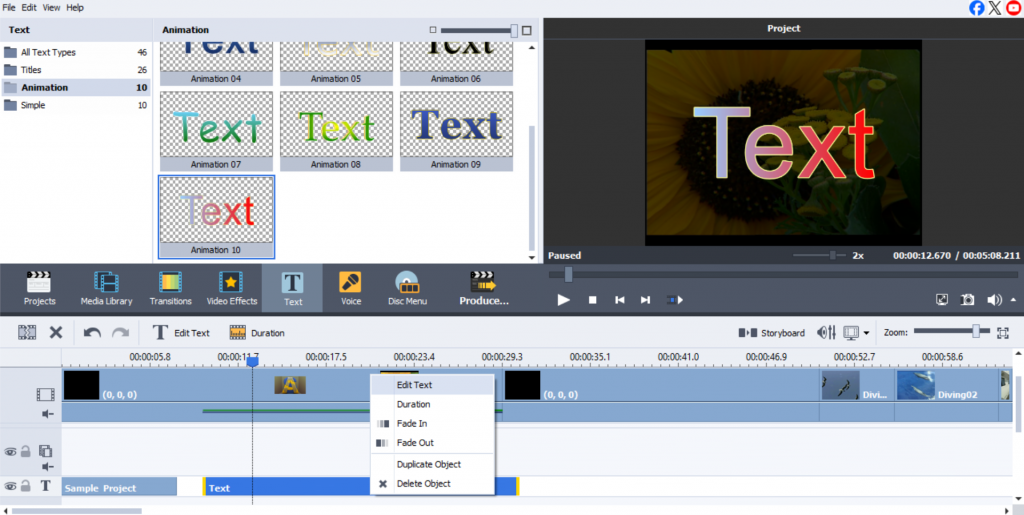
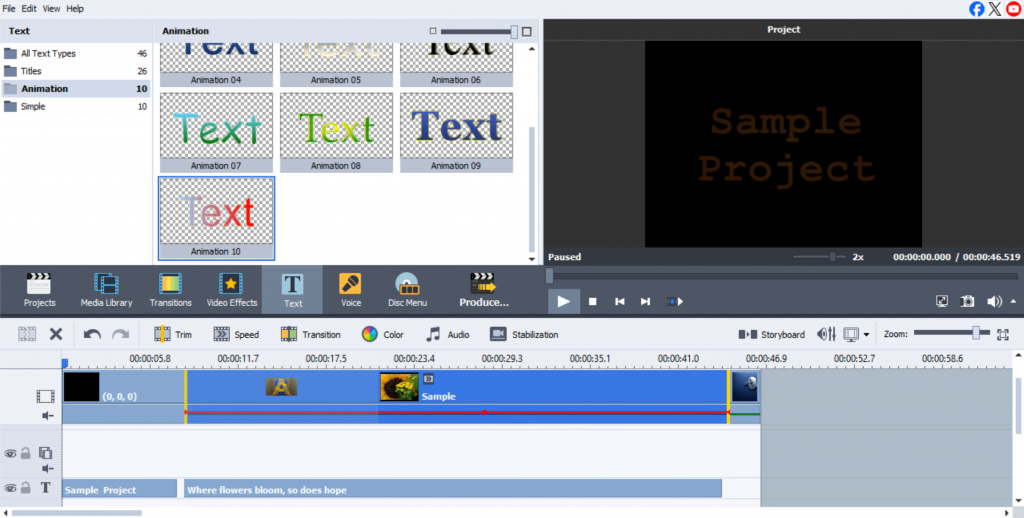
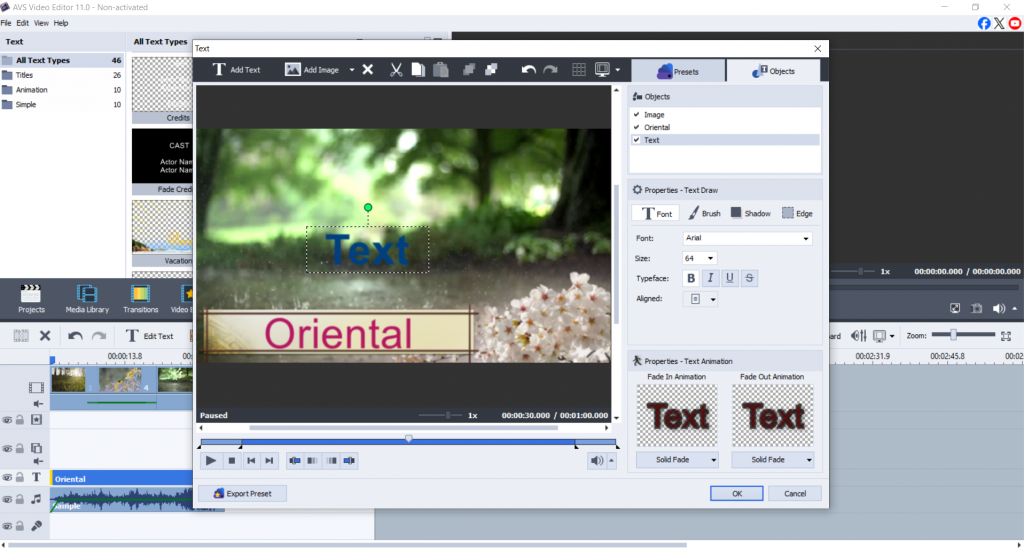
2. Choose the overlay tool
- After uploading the video, find the text tool in the toolbar, marked with a “T”. Upon clicking, a box appears on the video preview window.
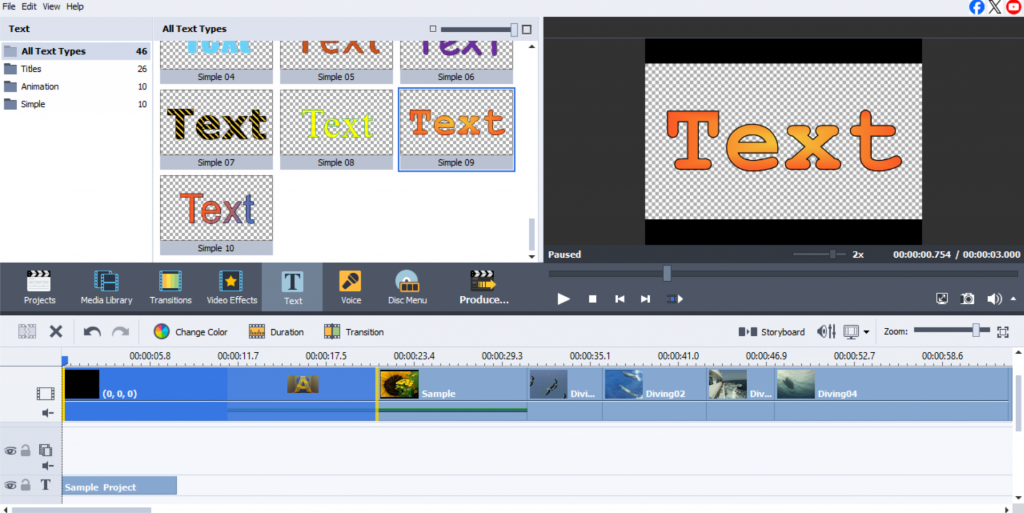
- Here, you can type the desired content and place it wherever you like on the screen.
3. How to add static captions
To add, type directly into the text box and customize it using the font options in the editor toolbar. Choose a font that fits your video’s tone and audience, whether formal or casual. Ensure the caption size is appropriate for readability. Put it on the screen, like the top or bottom, while avoiding the main subject or important visual elements to maintain balance.
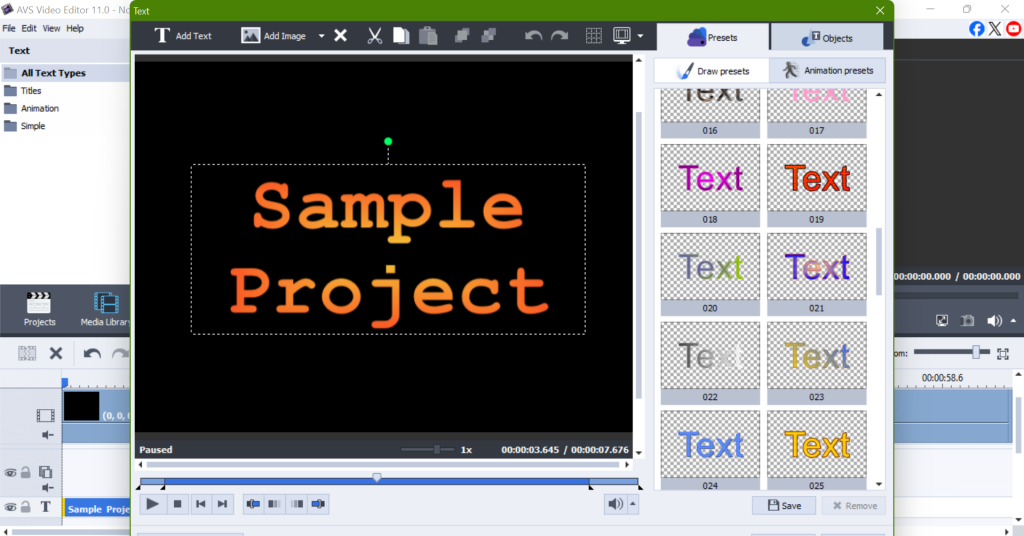
4. Add animated titles with fades in/out
- To do this, select the “Animation” tab within the text editor.
You can use different effects here, such as fading, sliding, or zooming. These effects could make your presentation more interesting. Adding animated titles can capture people’s attention and highlight important points. This can be convenient when you switch from one scene to another or want to focus on key announcements. By using these concepts, your content can become more visible and easier for people to remember.

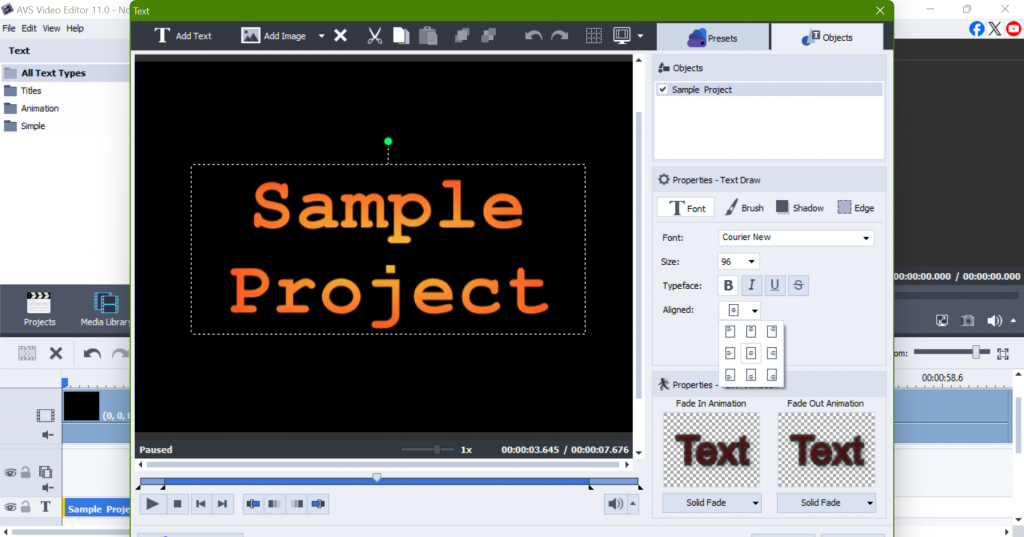
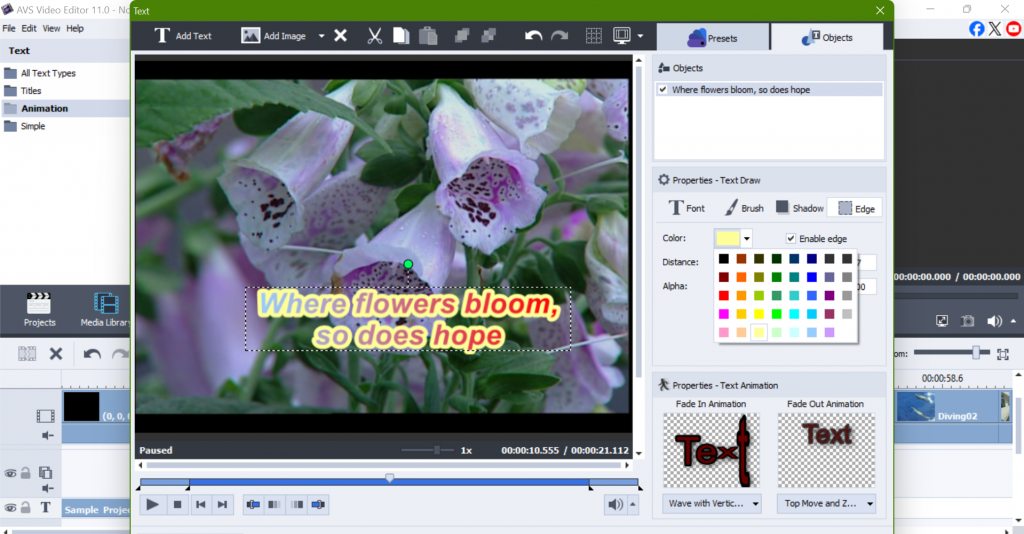
5. Customize style and effects
- Customize the look of your captions by using the text toolbar to adjust the font, size, color, and style.

- Consider adding a shadow to make the caption stand out against the video background. You can also apply a background color behind it to improve legibility, especially when the video’s background is complex or busy.

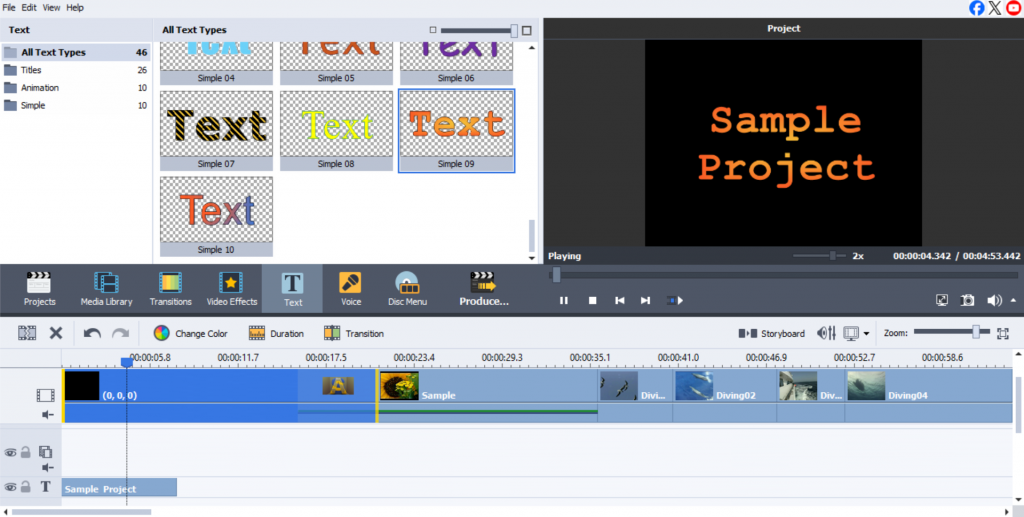
6. How to adjust text timing on screen
- Add it in a key area where it won’t block important images.
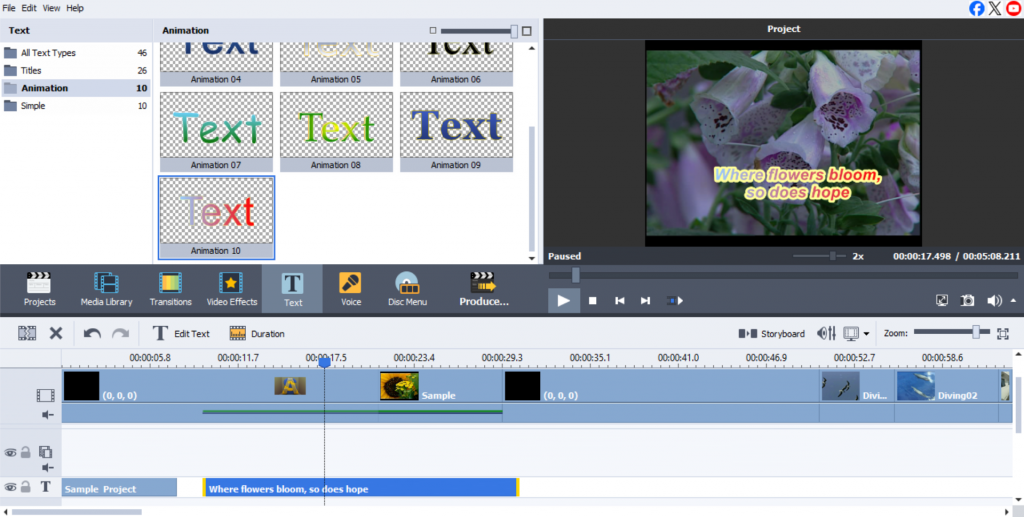
- Move the sides of the text box on the timeline to adjust when it appears. Sync it with key moments in the video for perfect timing.
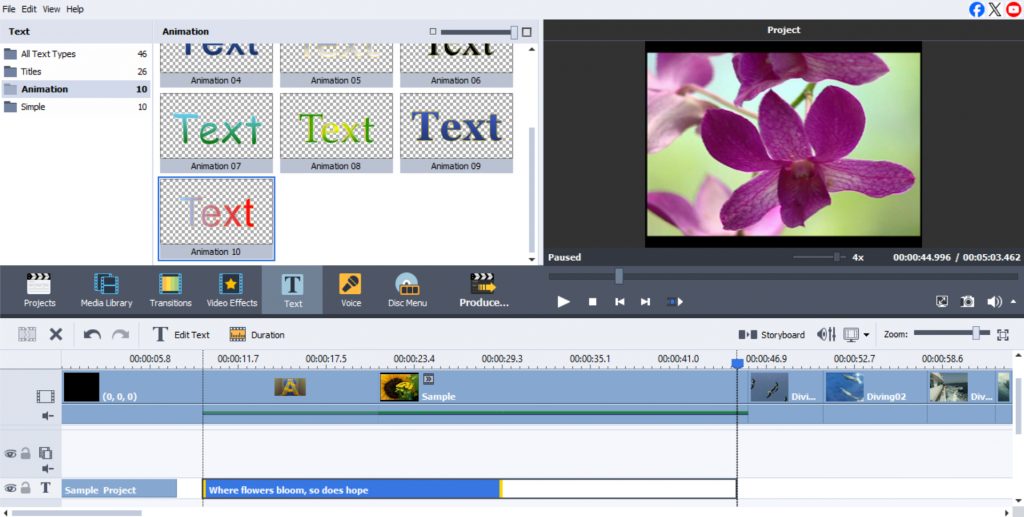
7. Preview and refine overlays
- After placing all elements, preview the video by clicking “Play” in the timeline.
- This helps in assessing the flow of the text with the video’s content. If it overlaps too much with other visual elements or if it’s hard to read, make adjustments. Once satisfied with the placement, timing, and style, save the project.

Tips for creating pro-level text overlays
- Use of typography
Select fonts that meet the style and mood of your video. If the video is formal, pick elegant serif fonts. If your video is natural and fun, select playful sans-serif fonts. Choosing the right font can help set the overall feel of your content.
- Best practices for placement
When placing text, ensure the screen isn’t filled with too much information. Keep it clear and to the point. It should be placed where it is easily readable, without obstructing key visual elements. Ensuring proper placement and timing will enhance the video’s professional appearance.
- Use color and contrast
Ensure there is enough contrast between the caption and the background so that it is easy to read. Usually a dark caption on a light background or a light caption on a dark background makes it simpler to see and understand what is written. If effective contrast is used, it makes reading easier and comfortable for the viewer’s eyes. Consider this when you are designing materials that include text, such as posters, websites, or presentations. A well-done contrast allows the audience to read the information clearly without any discomfort.
- Integrate branding
If creating branded content, consider adding a logo or website to the overlay. It can be discreetly placed in a corner or used as a call to action at the video’s closing.
- Create accessible captions
Make your captions easy for everyone to read by using clear and simple fonts. The letters should be large and clearly visible from the background so that everyone, including those with vision problems, can easily read them. Keep the text evident on the screen long enough for people to read it fully. Do not use fancy fonts that will make the video difficult to understand.
With the help of these tips, you can make your on-screen captions look neat and professional, which will help you reach your video goals and keep viewers entertained. Text overlays, such as subtitles, titles, or captions, are important because they clearly communicate your message while keeping the audience engaged.
Final touch: perfecting your text overlays
When written elements are added to your video, your story becomes clearer and keeps viewers occupied, allowing them to understand the message. You can use a variety of text types, for example, still, moving, or animated. It is essential to put the text correctly and to time it well.
What can further make the text look appealing is using the right font, color, and effects. This makes the text stand out without distracting from the video. Test different styles, animations and effects so that you can bring more creativity to your videos.
AVS Video Editor has the best tools to enhance text overlays and improve your video editing abilities.
Start adding overlays to your videos today and share your creations on social media!
Useful links
How to create a picture-in picture video
How to create a voiceover for your videos

Have you ever watched a video montage that gave you chills or one that made you smile long after it ended? That’s the power of creative editing, an art that blends visuals, music, and emotion.
A video montage is the combination of video segments, images, music, as well as text clips to highlight certain events or create memorable moments for sharing on social media. Be it a birthday summary, vacation recap, or promotional video teaser, montages are undoubtedly one of the most effective ways to capture and hold your audience’s attention.
In case you are looking for a video montage maker that has incredibly simple features yet powerful in performance, AVS Video Editor is a good choice. Being a part of the AVS4YOU Multimedia Suite, it offers everything ranging from simple drag and drop editing to transitions and effects – suitable for both novices and professionals.
Let’s dive into this step-by-step guide on how you can create a video montage that stands out.
How to make a video montage in AVS Video Editor
Step 1: Collect and organize your media
Before accessing AVS Video Editor, it is beneficial to already have all assets prepared. These assets include:
- A set of relevant video files (best if short);
- Contextual images;
- Emotion evoking background music or songs.
Tip: Make subfolders such as “Clips,” “Photos,” and “Audio” for better organization.
AVS Video Editor allows to work with various formats such as MP4, AVI, MOV, WMV etc. therefore, there is no need to convert files before editing.
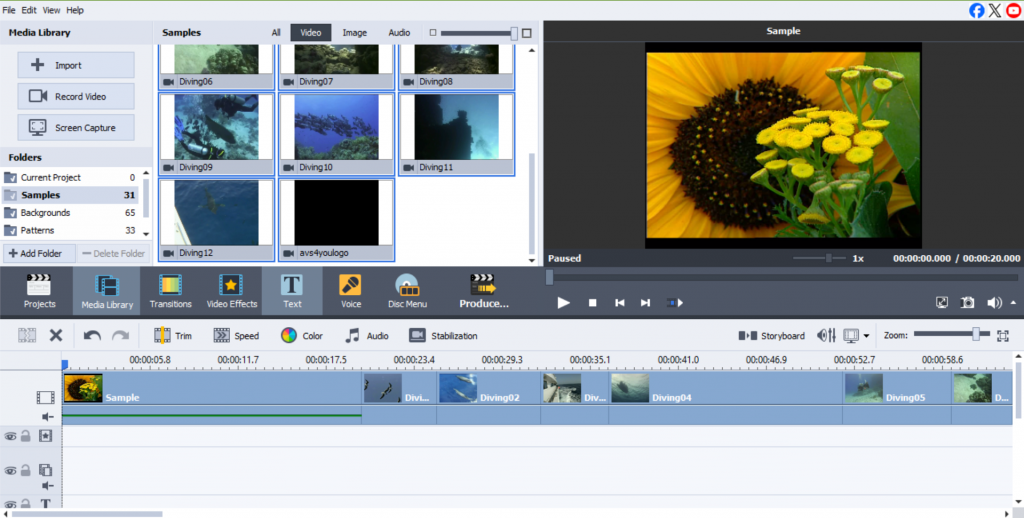
Step 2: Import media into AVS Video Editor
For importing files into AVS Video Editor, click on “Import” in the Media Library part of the program.
• Drag and drop the files you wish to import.
• The program displays video, images, and songs separately so you can find them without getting lost.
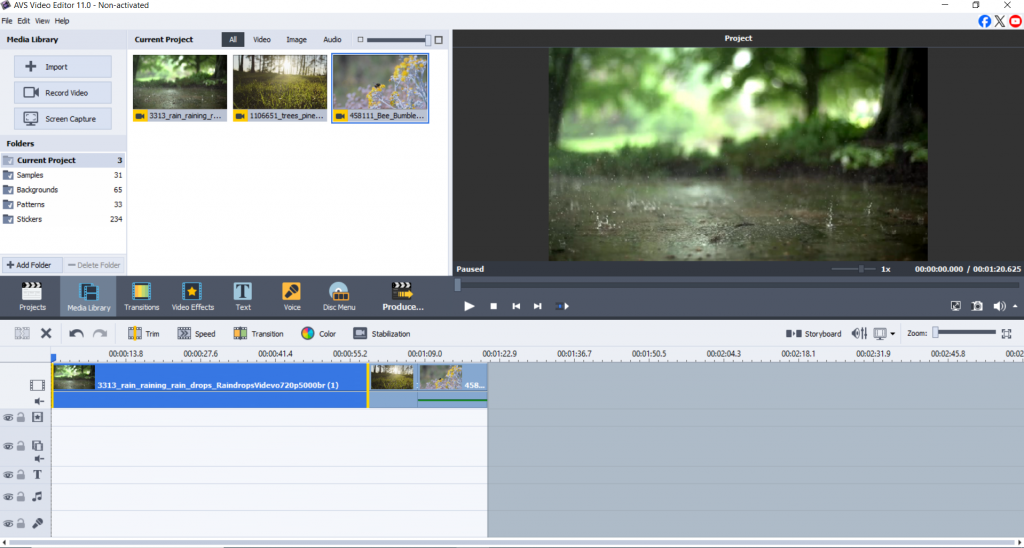
The software’s layout is straightforward but robust, making it ideal for anyone crafting their first video montage.
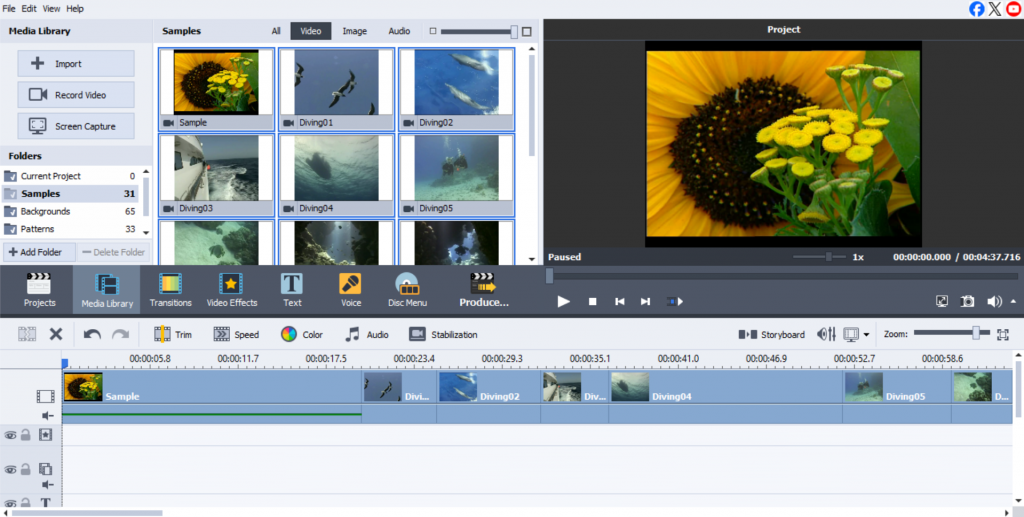
Step 3: Arrange clips on the timeline
Everything is already uploaded? Let’s work on bringing the narrative to life!
- Place the clips onto the primary video timeline.
- Remove parts that do not add value to the footage with the use of the split tool.
- Reorder clips according to the narrative structure: you can do it in chronological order, by themes, or by emotions.
Editing tip: Keeping clips to 3-7 seconds enhances viewer engagement and maintains an energetic pace, resulting in a more captivating montage.
Step 4: Add transitions and effects
Transition elements are necessary so that there are no abrupt changes within the video clips.
To apply them:
• Navigate to the Transitions tab.
• Select taper, wipe, slide, etc.
• Drag and drop each transition element between the respective clips on the Storyboard view.

If you want to go even further, you can apply effects such as slow motion, vintage filters, or color correction using video sections of the module window. Don’t go overboard; subtle approaches tend to work best and are less distracting.
Step 5: Sync music to the video montage
The audio is one of the most essential components of your montage.
- Add your desired audio, and go to Import > Audio.
- Place your audio on the Audio Mix line within the timeline.
- Use fade-outs and fade-ins to smooth the audio flow.
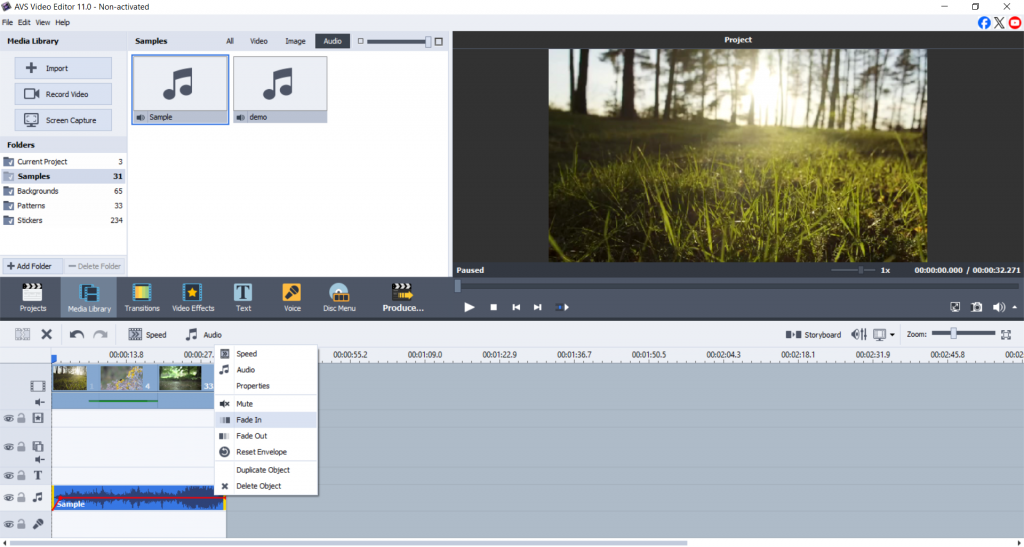
Audio Tip: When there’s voice or narration, lower the music volume. Make sure the background sound is soft and there’s a slight overlap.
Step 6: Add text, titles and captions
It’s easy to apply titles or credits to your video with the right tools.
• Click on the Text button on the menu.
• Select any type of a text template from the template library.
• A title block may be placed on the Text line.
• Change font, size, color, animation settings.
Include cover titles, intermediate captions, and credits to enhance the overall quality.
Font Tip: Use simple, legible fonts. Sans-serif types such as Roboto or Open Sans look great on all screens.
Step 7: Export your video montage
If the montage meets your expectations, finish your work by:
- Tapping “Produce”.
- Picking the chosen format (MP4 works great for every platform).
- Choose recommended resolution for your platform: 1080p for YouTube, 720p for Instagram, etc.
- Hit “Create” and watch your video montage generate.
Choose from various export options, including Facebook, TikTok, and smartphones, to ensure your montage fits any device.
Tips for creating a professional montage
Creating a unique montage to impress your audience can be a piece of cake if you follow these guidelines.
Apply color grading: Set the tone for different clips by visually linking them together. Check out: Handy Colour Correction Tips Everyone Can Use
Avoid changing the pacing too much: Slow parts can feel aimless, and uncoordinated cuts and transitions make it harder to maintain rhythm.
Sail around copyright issues by using royalty-free music from AudioJungle and Bensound.
Create smooth transitions by matching the motion and timing of clips for a seamless blend. Preview before exporting, as watching the entire montage at least once helps catch any glitches or awkward cuts.
Conclusion
A professional video montage doesn’t require expensive software or years of experience. All you need is a great story, the right tools, and a bit of creativity.
With AVS Video Editor, you get a powerful yet beginner-friendly video montage creator that helps you turn raw footage into something memorable. Explore different styles, play with effects, and craft a montage that tells your story your way.
Ready to create your first montage? Download AVS Video Editor
Check out the AVS4YOU Blog for more editing tips and handy tutorials.
Useful links
Blur it out! How to blur a video and protect sensitive information
Enhance your video storytelling with special effects for mood creation
In 2025, video content won’t just be about fast-paced action designed to keep viewers glued to the screen. Instead, it will increasingly aim to evoke emotion, encouraging audiences to empathize with the main characters and experience every moment together with them.
Unsurprisingly, time-lapse videos, used for showcasing change over time, are becoming increasingly popular. But today’s fast-moving online audience craves more than just visuals; they want depth, energy, and a compelling story.
That’s where zoom effects come in.
Zooming may give your timelapse focus and flair when used carefully, turning it into an eye-catching, emotionally impactful narrative. Additionally, even for novices, adding these effects is simple with AVS Video Editor.
The challenges of timelapse videos
Although timelapse videos are fascinating, there are some drawbacks:
- Missing the occasion: Important moments, such a person entering the picture or a street light flashing on, frequently pass by without anyone noticing.
- Visual fatigue: A timelapse may become monotonous or flat if there is no camera movement or variation.
- Lost narrative potential: Because of the hurried pacing, scenes that could have added dramatic or emotional depth may be missed.
Zoom effects are the easiest way to ensure that your audience doesn’t miss these times.
The role of Zoom Effects
Zoom effects are like visual markers when used purposefully. They assist in making still images come to life by directing attention, highlighting emotion, and introducing movement.
Zooming changes the overall impression in the following ways:
1. Draw attention to important details: Zoom in on a single flower as it opens or out to capture the entire garden in bloom. You may precisely direct the viewer’s attention using these effects.
2. Break up monotony: Even a small zoom gives scenes dimension that could otherwise seem flat. It eliminates the need to switch camera angles and maintains the dynamic sense of the movie.
3. Improve narrative: During a sunset timelapse, do you want to highlight a striking change in the sky? A slow zoom-in can strengthen the emotional impact. A surprise in the larger scene may be revealed by a zoom-out.
4. Increase social interaction: Attention-grabbing material is rewarded on today’s platforms. Zoom effects make timelapse films more noticeable on YouTube Shorts, Reels, and TikToks.
Zoom alters the viewer’s perception in addition to what they see.
Step-by-step guide: adding zoom effects using AVS Video Editor
Creating a timelapse with zooming in AVS Video Editor is intuitive and user-friendly. Here’s a step-by-step guide:
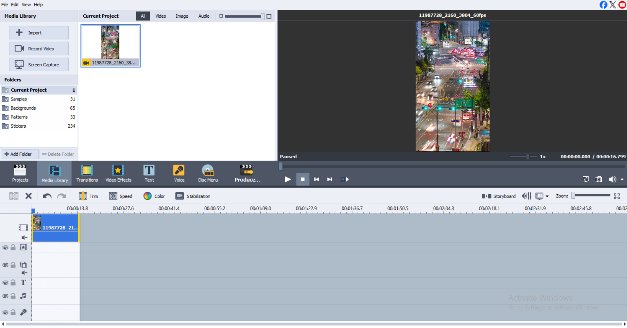
Step 1: Import your timelapse footage
Open AVS Video Editor. Click Import Media Files, choose your footage, and drag it onto the Timeline for editing.
Step 2: Find your story moments
Watch the footage closely. Look for moments of change—someone entering the frame, a cloud passing over the sun, a dramatic shift in color or motion. These are perfect spots to apply zoom effects.
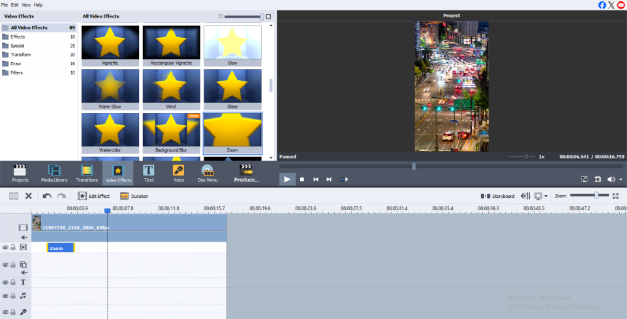
Step 3: Apply zoom to key clips
Click the clip in the Timeline. Go to Video Effects > Zoom. Use the Start and End Points to define how the zoom plays out—do you want to move closer, pull away, or zoom during a specific frame sequence?
Step 4: Customize the feel
- Zoom intensity: Use light zooms for subtle emphasis or stronger ones to create drama.
- Speed: A quick zoom builds tension, while a slow zoom adds calm and intrigue.
- Direction: Zooming in directs focus; zooming out offers context or reveals a twist.
Step 5: Preview and adjust
Before finalizing your edits, click Play to preview the zoom effects in real-time. Watch your zoom effects in action. Make sure they flow smoothly and support the mood and pacing of the video. Adjust timing as needed.
Step 6: Export and share
Once you’re happy with the final cut, go to File > Save Movie, choose your format and resolution, and export. Your video is ready to wow your audience!
Zoom effects in the short-form content ages
Automation, speed, and audience involvement defines the video world of 2025. Zoom effects are particularly pertinent now because of:
- Advanced editing tools: AVS4YOU is among the programs that can now automatically detect motion for zoom applications.
- Dominance of short-form content: Timelapse videos are inherently brief, and further zoom makes them more engaging in vertical formats.
- Layered storytelling: Audiences like content that opens up gradually. The sense of layers and unfolding is reinforced by a zoomed-in timelapse.
You can produce videos in less than 60 seconds that feel contemporary, well-produced, and emotionally impactful by carefully utilizing zoom.
Pro tips for advanced users
- Combine zooms with transitions for extra polish.
- Use layered zooms—a slow zoom with crossfade can create dramatic elegance.
- Pair zooms with sound design (like subtle music swells) for emotional synergy.
- Use AVS4YOU timeline tools to stagger effects, creating rhythm.
Conclusion: Produce storytelling timelapse videos
In 2025, zoom effects are not merely optional; they are necessary if you are producing timelapse footage. They give a stunning image direction, tempo, and emotional impact. These cinematic elements are simple, quick, and efficient to apply with AVS Video Editor.
Are you prepared to elevate your videos to new heights? Get AVS Video Editor, experiment with zoom effects, and create a memorable visual narrative for your timelapse.
Useful links

In the digital age, video content is everywhere—from social media platforms to business presentations. However, sometimes, a video may contain sensitive or private information that shouldn’t be visible to the public. Whether you’re creating a tutorial, a vlog, or a professional video, blurring certain parts of a video is crucial for privacy protection.
Blurring a video helps obscure faces, personal details, confidential documents, and other sensitive content, ensuring compliance with privacy regulations and protecting individuals’ identities. This technique is essential for content creators, journalists, businesses, and educators who share videos online.
In this article, we’ll walk you through the process of blurring a video using AVS Video Editor. Whether you need to blur faces in a video, blur text or documents, or even blur the backgroundina video, this guide will help you achieve professional results effortlessly.
Why blur a video?
Blurring a video isn’t just a stylistic effect—it serves an important purpose in maintaining privacy and legal compliance. Here are some key reasons why you might need to blur a video:
1. Protecting personal privacy
In vlogs, interviews, or event recordings, individuals’ faces may appear unintentionally. Blurring faces ensures privacy, especially when recording in public spaces.
2. Hiding confidential information
Documents, phone numbers, email addresses, and financial details can sometimes be visible in a recorded video. If such content is leaked, it could result in security risks.
3. Obscuring license plates & addresses
When filming outdoors, cars and house numbers may be visible. Blurring these details is crucial to prevent unauthorized use of personal information.
4. Enhancing compliance with data protection laws
Laws like the GDPR (General Data Protection Regulation) and CCPA (California Consumer Privacy Act) enforce strict guidelines on personal data protection. Content creators need to be mindful of these regulations when sharing videos.
5. Professional & ethical content editing
For journalists, educators, and corporate video editors, blurring ensures ethical reporting and content production by keeping sensitive data hidden.
From YouTube tutorials to workplace training videos, using a blur effect can help protect privacy while maintaining professional video standards.
How to blur a video using AVS Video Editor
AVS Video Editor is a powerful yet user-friendly tool that makes blurring video content simple. Follow these steps to blur any part of a video effectively:
Step 1: Install AVS Video Editor
If you haven’t installed AVS Video Editor yet, download it from the official website:
Once installed, launch the software and get ready to edit your video.
Step 2: Import your video
- Open AVS Video Editor.
- Click on Import media files to add the video you want to edit.
- Drag the imported video onto the Timeline at the bottom of the screen.

Step 3: Apply the blur effect
Now, let’s add the blur effect to the desired section of your video:
- Click on the Video Effects tab in the top menu.
- Select Blur from the list of available effects.
- Drag the blur effect onto the video clip in the Timeline.
- A settings window will appear—adjust the blur strength and select the area you want to blur.

Blurring a Specific Object or Face
To blur a face, object, or text, go to the Video Overlay tab, select a Mask (Rectangle, Ellipse, or Polygon), and position it over the area you want to obscure. Resize and move the mask as needed, ensuring only the selected portion is blurred while the rest of the image remains clear.

Adjusting the Blur Effect
Modify the blur strength by adjusting the Blur Level (0-100) or, for Gaussian Blur, set the Size (0-50) for a softer effect. If using Motion Blur, tweak the Angle (-180° to 180°) and Distance (1-100 pixels) to match movement direction. You can also apply Fade-in/Fade-out effects to make the blur appear and disappear smoothly over time.

Step 4: Preview and fine-tune the blur
- Click Play in the preview window to check the blur effect.
- If needed, adjust the blur intensity, size, and position.
- Ensure that the blurred area remains consistent throughout the video.

Step 5: Save and export your video
Once satisfied with the results:
- Click Export or Save Movie.
- Click on the button Produce and choose the desired video format (MP4, AVI, MOV, etc.).
- Select the resolution and quality settings.
- Click Save to render the final video.

Now, your video is ready for sharing—with sensitive information securely blurred!
Additional tips for effective blurring
Blurring a video requires precision, especially when dealing with moving objects or text. Here are some expert tips to improve your results:
1. Use motion tracking for moving objects
If the object you want to blur moves throughout the video (e.g., a person’s face), use motion tracking:
- Enable Keyframe Animation in the Blur Effect settings.
- Adjust the blur position frame by frame to follow the object smoothly.
2. Adjust blur opacity for realistic effects
Instead of using 100% opacity, a slightly transparent blur effect looks more natural, especially for documents and screens.
3. Apply multiple blur areas in one video
Need to blur multiple faces or text sections? AVS Video Editor allows you to add multiple blur masks within the same video clip.
4. Experiment with different blur types
Depending on the content, try different types of blur:
- Gaussian Blur for smooth effects.
- Pixelated Blur for a stronger censorship look.
- Motion Blur for fast-moving content.
Ready to experiment with blur?
Blurring sensitive information in a video is essential for privacy protection, professional content creation, and compliance with legal guidelines. Whether you’re blurring a face, license plate, or document, AVS Video Editor provides an easy and effective way to apply blur effects seamlessly.
By following the step-by-step guide above, you can quickly and efficiently edit your videos while ensuring personal and confidential data remains hidden.
Ready to blur your videos like a pro?
Download AVS Video Editor today and start creating secure, high-quality content!
For more video editing tutorials and tips, check out the AVS4YOU Blog.
Useful links
How to create a video collage?
Enhance your video storytelling with special effects for mood creation

Timelapse videos have taken the digital world by storm, captivating audiences with mesmerizing visuals that compress hours, days, or even months into just a few seconds. These videos are an excellent tool for storytelling, offering a unique way to showcase movement, transformation, and progress over time.
But what is a timelapse video? Simply put, it is a technique where a series of images are captured at set intervals and then played back at a higher speed, creating a fast-motion effect. Whether you’re a content creator, marketer, or just someone looking to add a creative touch to your videos, timelapse can enhance engagement and bring your content to life.
In this article, we’ll explore five creative timelapse video ideas that can help you produce stunning visual stories.
1. Capturing the pulse of the city
There’s something mesmerizing about watching a city come to life in fast motion—cars weaving through traffic, pedestrians bustling along sidewalks, and neon lights flickering on as night falls. A well-crafted cityscape timelapse can transform an ordinary urban setting into a dynamic, cinematic masterpiece.
How to get the best shots
- Find the right vantage point – Rooftops, bridges, or busy intersections offer fantastic perspectives.
- Stabilize your camera – A tripod is essential for smooth, shake-free footage.
- Pick the right interval – A shot every 1-5 seconds works best to capture movement fluidly.
- Time it well – Golden hour (sunrise or sunset) adds dramatic lighting shifts that enhance the effect.
Bringing it to life with AVS Video Editor
- Adjust the playback speed to create the perfect flow.
- Use the stabilization tool to smooth out any minor shakes.
- Enhance colors and contrast to make city lights pop.

Where to Use It? Great for travel vlogs, social media content, or promotional videos showcasing a city’s energy.
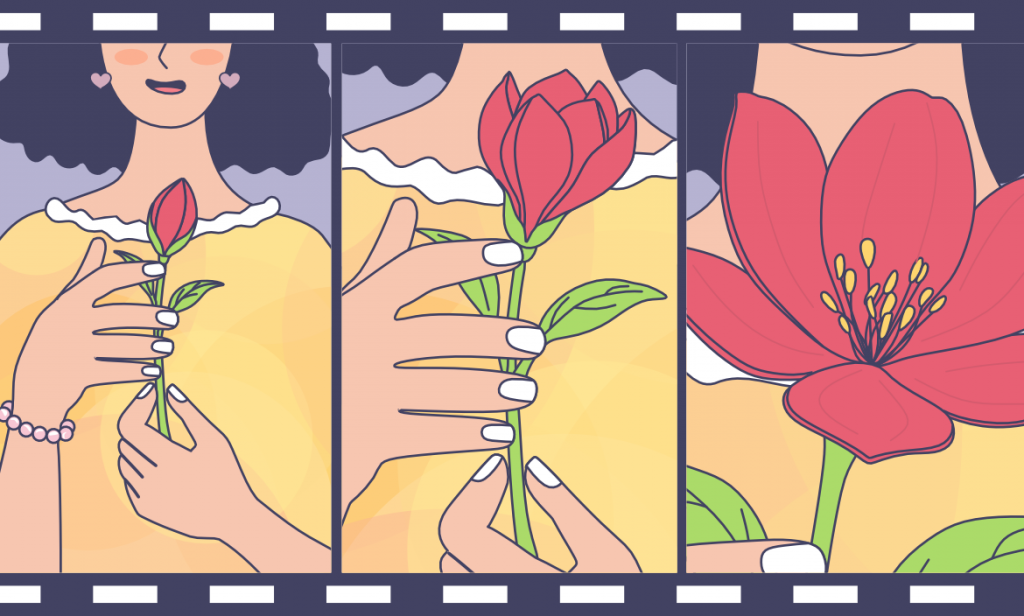
2. The magic of nature in motion
Nature never stays still, but its transformations are often too slow for the naked eye to fully appreciate. Timelapse lets you capture the movement of clouds drifting, flowers blooming, waves crashing, or even the dramatic shifts in weather over time.
How to get stunning footage
- Choose your subject – Skies, forests, rivers, or gardens make fantastic scenes.
- Adjust the interval – Slow changes, like flower blooming, need longer gaps (10-30 seconds between shots).
- Mind the light – Use an ND filter to balance exposure, especially in bright daylight.
Editing for a natural flow
- Enhance the color and contrast for richer visuals.
- Adjust speed settings to emphasize movement.
- Layer in relaxing background music for a soothing effect.

Where to Use It? Perfect for relaxation videos, travel documentaries, or educational content about nature.
3. Creating eye-catching product videos
Watching a product take shape—from raw ingredients to a finished dish, or from scattered parts to a completed gadget—can be oddly satisfying. Timelapse turns everyday processes into engaging visual stories that grab attention instantly.
How to make it work
- Pick a process with clear steps – Cooking, painting, DIY crafts, or product assembly.
- Keep the setup consistent – Use a fixed camera angle and even lighting for a professional look.
- Speed it up just right – Capture each stage without losing important details.
Editing for maximum impact
- Add text overlays to highlight key steps.
- Enhance brightness and sharpness to make details pop.

Where to Use It? Ideal for marketing, tutorial videos, and engaging social media content.
4. Bringing DIY and creative projects to life
Whether you’re painting a mural, knitting a scarf, or renovating a room, timelapse is the perfect way to show progress in a visually compelling way. Seeing a project evolve from start to finish in a matter of seconds keeps viewers engaged and entertained.
How to capture the process
- Frame it well – A top-down or wide-angle shot works best.
- Use consistent lighting – Avoid shadows shifting drastically during the recording.
- Set a suitable interval – For slow projects like painting, an interval of 15-30 seconds works well.
Editing for a smooth transition
- Add background music to keep the energy up.
- Apply smooth transitions between different stages.

Where to Use It? Great for artists, crafters, home improvement enthusiasts, and DIY bloggers.
5. The flow of traffic and transportation
Few things are as visually striking in timelapse as the controlled chaos of moving traffic—headlights forming streaks at night, trains gliding into stations, or airplanes crisscrossing the sky. This type of timelapse transforms everyday commutes into an artistic spectacle.
How to nail the shot
- Pick an interesting location – Overpasses, busy highways, airports, or train stations work best.
- Shoot at night for stunning light trails – Car headlights and taillights create beautiful streaks.
- Set a short interval – 1-2 seconds keeps the motion smooth and fluid.
Editing to enhance the effect
- Add motion blur to amplify the speed effect.
- Use split and trim tools to remove unnecessary footage.
- Adjust contrast and saturation to make light trails stand out.

Where to Use It? Perfect for urban lifestyle content, music videos, or travel montages.
Conclusion
Timelapse videos are a powerful way to transform ordinary moments into visually stunning content. Whether capturing the energy of a bustling city, the beauty of nature, or the progress of a creative project, timelapse adds depth, motion, and excitement to any video. It’s an excellent tool for storytelling, making your content more dynamic and engaging for viewers.
With AVS Video Editor, creating professional-looking timelapse videos is easy and accessible. From speed adjustments and stabilization to color correction and special effects, the software provides all the tools you need to bring your ideas to life.
Ready to elevate your video content? Try out these timelapse ideas today!
What’s next?
Explore AVS Video Editor – Visit AVS4YOU to discover powerful editing features and tutorials.
Share Your Work – Have a timelapse video you’re proud of? Post it on social media using #MadeWithAVS!
Stay Inspired – Check out our blog for more video editing tips and creative ideas!

Video storytelling is the art of conveying a message, idea, or narrative using video content. Unlike traditional storytelling, which relies solely on words, video storytelling combines visuals, audio, and emotions to create a compelling experience for the audience. This technique is widely used across various industries, including marketing, education, social media, and entertainment, making it one of the most effective ways to communicate ideas.
In today’s digital world, video storytelling plays a crucial role in capturing attention. Studies show that people are more likely to remember information presented in video format compared to text. Whether you’re a content creator, a marketer, or someone who simply wants to share personal stories, mastering video storytelling can elevate your content and engage your audience more effectively.
Elements of good video storytelling
Creating an impactful video story involves more than just recording footage—it requires structure, emotion, and engagement. Here are the key elements that make a great video story:
Structure: the story arc
A well-structured story follows a clear beginning, middle, and end:
- Beginning: Introduce the characters, setting, and main idea. Hook your audience within the first few seconds.
- Middle: Develop the story with challenges, conflicts, or interesting details that keep viewers engaged.
- End: Provide a satisfying resolution or takeaway that leaves a lasting impression.
Characters: making it relatable
Whether it’s a brand, a person, or a fictional character, having a strong character helps the audience connect with your story. Viewers should be able to see themselves in the narrative, making the content more engaging and memorable.
Conflict: keeping the audience hooked
Conflict doesn’t necessarily mean dramatic tension—it can be a problem that needs solving, a challenge to overcome, or a journey of growth. Conflict keeps viewers interested and invested in the outcome of the story.
Resolution: A strong conclusion
Every great story needs a conclusion that ties everything together. Whether it’s an emotional moment, a call to action, or a key lesson, the ending should leave a lasting impact.
Emotion: The heart of storytelling
The best stories evoke emotions—whether it’s joy, inspiration, sadness, or excitement. Music, color grading, voiceovers, and pacing all contribute to creating an emotional connection with your audience.
Why video storytelling works
Video storytelling is one of the most powerful communication tools because it engages multiple senses and emotions. Here’s why it’s so effective:
1. Visual appeal
People process visuals faster than text, making video a highly engaging medium. Using high-quality visuals, animations, and effects can make your story more compelling.
2. Emotional connection
Studies show that people remember stories better than facts alone. Video has the power to make audiences feel something, which increases retention and impact.
3. Engagement and shareability
Videos with strong storytelling elements are more likely to be shared on social media, increasing reach and engagement. According to research, video content generates 1200% more shares than text and image-based content combined.
4. Effective for marketing and branding
Brands that use storytelling in their videos create stronger emotional bonds with their customers. Emotional storytelling in marketing can increase conversion rates and brand loyalty.
How to use video storytelling with AVS4YOU tools
AVS4YOU offers a complete multimedia suite that helps users create professional-looking storytelling videos with ease. Here’s how you can use AVS4YOU tools to enhance your video storytelling:
1. AVS Video Editor
A well-structured video keeps viewers engaged from start to finish. AVS Video Editor offers an intuitive interface and powerful features to help you shape your story with ease:
- Timeline-based editing: Arrange clips, images, and effects seamlessly using a drag-and-drop interface.
- Smooth transitions: Use fade-ins, crossfades, and dynamic transitions to maintain a natural flow between scenes.
- Color grading & filters: Adjust brightness, contrast, and color tones to set the mood of your story.
- Text and captions: Add subtitles or on-screen text to highlight key messages.
- Video effects: Apply cinematic effects, overlays, and animations to enhance storytelling.
2. AVS Audio Editor
Sound is a crucial part of storytelling, setting the emotional tone and immersing viewers in the experience. With AVS Audio Editor, you can refine your audio for a polished, professional result:
- Voiceovers: Record and edit narrations to guide your audience through the story.
- Background music: Add music that complements the mood of your video, whether uplifting, dramatic, or calming.
- Sound effects: Enhance realism with ambient sounds, transitions, and creative audio effects.
- Noise reduction: Remove background noise for clear, high-quality sound.
- Audio mixing: Balance music, dialogue, and effects to maintain clarity and impact.
3. AVS Video Converter
Once your video is complete, it’s essential to optimize it for different platforms to maximize reach and engagement. AVS Video Converter ensures your story looks great no matter where it’s shared:
- Format conversion: Convert videos to formats compatible with YouTube, Instagram, Facebook, and presentations.
- Quality optimization: Maintain high resolution while compressing file sizes for smooth playback.
- Device compatibility: Export videos optimized for mobile, tablets, TVs, and desktops.
- Batch conversion: Process multiple videos at once, saving time and effort.
Practical tips for effective video storytelling
1. Plan your story before filming
Start with a script or outline to ensure your story flows smoothly. Define key points and plan shots in advance to avoid unnecessary reshoots. Even a simple storyboard can help you visualize your scenes and make filming more efficient. A well-thought-out plan also helps maintain consistency in tone and message.
2. Keep it concise and engaging
Attention spans are short—deliver your message clearly and avoid unnecessary details. Get to the heart of the story quickly, and keep scenes tight to maintain momentum. If a shot or line doesn’t add value, consider cutting it. Every second should contribute to the story, keeping your audience interested from start to finish.
3. Focus on strong visuals
Use high-quality footage, creative angles, and engaging visuals to tell your story effectively. Pay attention to lighting, framing, and movement to make your video visually appealing. Even simple adjustments, like better composition or camera placement, can make a big difference. A mix of wide, medium, and close-up shots adds variety and depth to your storytelling.
4. Use music and sound for emotional impact
Choose a soundtrack that complements the mood of your video. Background music sets the tone, while sound effects and voiceovers help immerse your audience. Make sure to balance audio levels so that dialogue remains clear and background sounds enhance rather than distract. Well-placed silence can also be powerful, emphasizing key moments in your story.
5. Edit with purpose
Every edit should serve the story. Use smooth transitions, cut unnecessary footage, and ensure dynamic pacing to keep the audience engaged. Color grading, text overlays, and effects can enhance storytelling, but avoid overdoing it—subtlety often works best. Review your final edit with fresh eyes, ensuring that every element contributes to a cohesive and engaging narrative.
Conclusion
Video storytelling is a powerful way to connect with audiences, evoke emotions, and make content more memorable. Whether you’re creating a marketing campaign, a personal vlog, or a social media video, mastering storytelling techniques can set your content apart.
With AVS4YOU’s video editing tools, you can easily craft professional and engaging stories without advanced technical skills. From structuring your narrative in AVS Video Editor to enhancing sound in AVS Audio Editor and optimizing for different platforms using AVS Video Converter, AVS4YOU provides everything you need to create impactful video stories.
Try AVS4YOU now and create your own storytelling masterpiece!
Useful links:
Enhance your video storytelling with special effects for mood creation

Despite the popularity of online streaming services, they aren’t one-size-fits-all solutions. Your favorite content isn’t always available, making an offline media player a better option. The same is true if you need to play movies and TV series in different file formats.
Keep reading to discover the best free video players for Mac and Windows. Note that while we’re covering free players, you can get more features with a paid version.
Free Media Players for Mac Users
Let’s start by exploring the best Mac video player apps.
Elmedia Player
Elmedia is a modern Mac media player designed specifically for Apple computers. With H264 codec support and playback multiple formats (e.g. MP4, FLV, MKV, and M4V), it’s the best video player for Mac. Moreover, users can watch videos in up to 8K quality.
You can use Elmedia with AirPlay, DLNA, and Chromecast, allowing for easy consumption on all operating systems. The drag-and-drop feature allows you to quickly add files to your playlist, and 4K casting is supported via Roku, Apple TV, Sony, Panasonic, and many other TV systems.
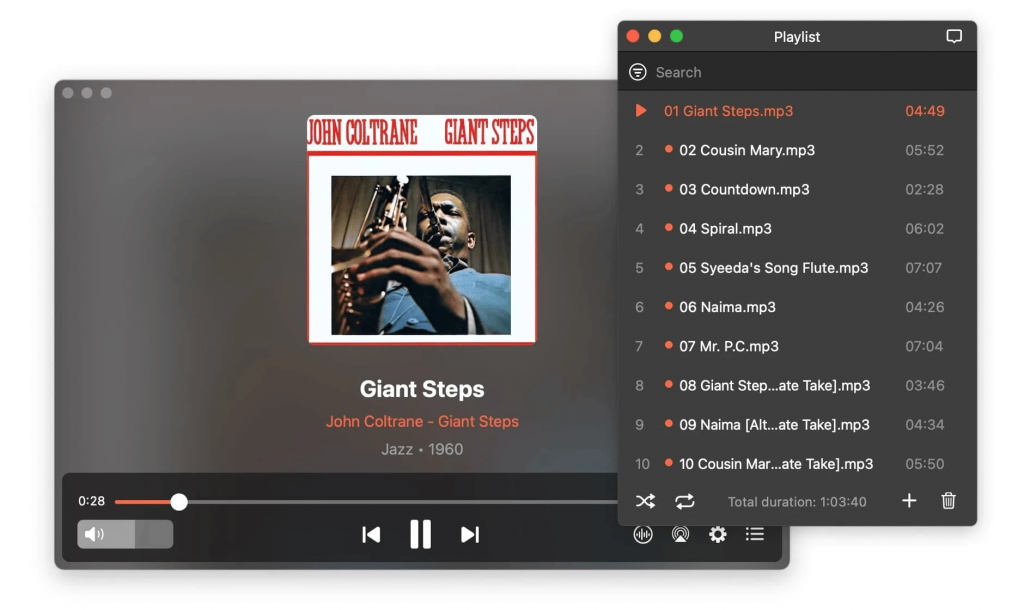
Elmedia’s free video player lets you change the aspect ratio and pin your player to the top of other running apps. The app has advanced subtitles; it’s compatible with SMIL, SRT, and SSA. Furthermore, Elmedia is integrated with OpenSubtitles.com for easy searching.
Another advantage of Elmedia is that it’s one of the only media players with SWF playback support. Besides the free version, you can upgrade to Elmedia PRO for $19.99.
Key Features:
- Seamless video and audio playback in multiple formats
- Supports streaming of 4K videos to compatible devices
- Tools to help you optimize and manage your playlists
- Comprehensive playback controls (e.g., subtitles and speed)
Pros:
- Easy-to-navigate and intuitive app interface
- Extensive file format compatibility
- Easy playback and a smooth performance
- No in-app ads
- Regular updates and strong customer support
Cons:
- Some advanced features are available in the Pro version
IINA
IINA is an open-source Mac video player, and its modern interface is a joy to navigate. Besides playing your favorite content, IINA offers a visually appealing interface. You can play your videos in a pop-out window, allowing you to browse the internet or work while also watching a TV show or movie.
With IINA, you can play online and offline content. Watch YouTube playlists, local files, and online streams in the same place. The app is available as a download for your Mac, and if needed, you can download browser extensions instead.
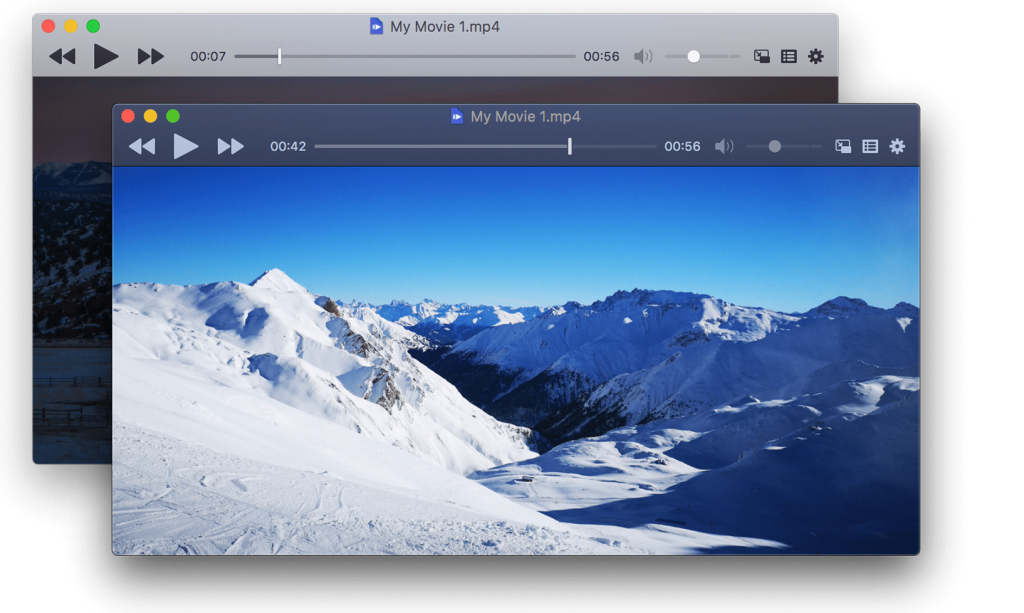
IINA is available in 20+ languages, including English, Arabic, French, German, and Korean. Choose between light and dark mode for an optimal viewing experience at all times of the day. The app works with trackpad and mouse gestures, and the interface is also easy to customize.
Some of the app’s other handy features include user-friendly cascading menus and subtitle download opportunities.
Key Features
- Support for a wide range of video and audio
- Support for 4K and online streaming, as well as other forms of content
- Integration with the Touch Bar, allowing for more optimal browsing
Pros:
- Free and open-source
- Robust subtitle handling
- Thumbnail preview when scrubbing through videos
Cons:
- There are not many advanced settings
Top Video Players for Windows in 2025
In addition to media players for macOS, you’ll find plenty of free video players for Windows. Let’s now look at some of the best options. Like the previous section, we’ll outline the key pros and cons.
AVS Media Player
AVS Media Player is available for numerous versions of Windows, including 11, 10, 8, Vista, and XP. You can play videos in multiple formats, too, such as MP4, OGG, MPEG, and MKV. The app supports Dolby Surround Sound, giving you the best possible listening experience. Use this feature whether you want to watch something at home on your own or bring around a group of friends.

It’s also possible to consume audio content in various file types, including MP3, WAV, and FLAC. You can utilize numerous audio visualization features, helping you optimize your settings accordingly.
AVS Media Player lets you take snapshots if you feel like it’s necessary. Furthermore, you can choose if you wish to watch your videos with subtitles or not. Another key advantage of using this software is that you can view images in formats like JPEG and PNG. So, if you wish to share your memories with others, this might be the most ideal option.
Key Features
- Seamlessly play audio and videos with almost any file extension
- An easy-to-navigate design, regardless of your version of Windows
- Create and manage playlists with minimal effort
Pros:
- Completely free to use
- Lightweight software that performs quickly
- Good audio enhancement features, such as surround sound
Cons:
- Resource-intensive; can consume significant amounts of computer RAM
KMPlayer
KMPlayer is arguably the best Windows video player, and you can play all video formats. Regardless of whether you have something old or new, this is the place where you can use it effectively. Examples of formats you can play include MKV, OGG, and WMV.
KMPlayer supports over 40 languages, including English, Korean, Afrikaans, Japanese, Italian, and Vietnamese. The app has built-in codecs of the highest quality, too, meaning that you get the best possible video quality. These include h.264 and h.265.
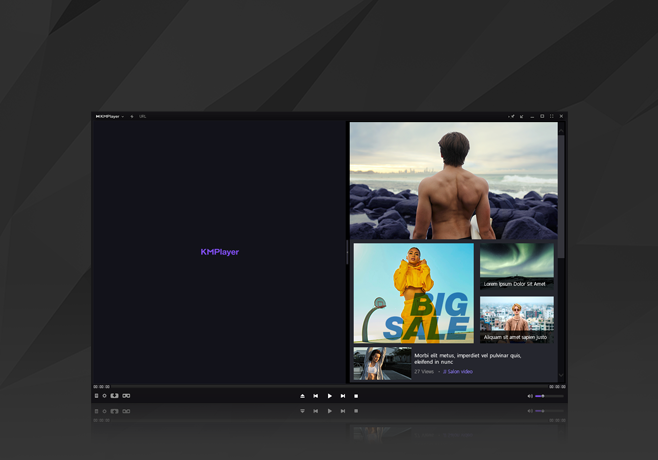
When using KMPlayer, you get complete control over your playback. Besides resizing the imagery, it’s also possible to add post-processing effects. On top of that, you can stream from YouTube and not just your own local media. To do so, simply enter the URL.
You can play 3K and 4K videos with KMPlayer, in addition to ultra HD (UHD) content. The media player also supports 3D video playback.
Key Features
- The ability to play all video formats and file types, whether online or offline
- Support for 3D, 4K, and UHD video content
- Built-in, high-quality codecs for seamless playback
Pros:
- Comprehensive playback features for all videos
- Excellent video quality
- A fully-customizable interface
- Streaming for YouTube videos
Cons:
- The interface is not beginner-friendly and can be quite complex
- The free version has ads, which can feel intrusive
Conclusion
Having read this guide, you should now know all about the best free video players for Mac and Windows. Regardless of your operating system, you’ll find plenty of tools with unique features. You can customize your playback in a way that suits you, and it’s also possible to play multiple file formats in many cases.
Each app differs in terms of usability, and you should pick something that fits your preferences. Ensuring that it uses your preferred playback and customization options is also essential for a better user experience. Though many features are free, you might need to pay for more premium options.