
What is a recap video?
A recap video is a concise summary that captures the main points and highlights of an event. These videos can be used for various types of events, such as conferences, trade shows, webinars, or even teambuilding activities. By showcasing the magic of your event, recap videos have several benefits:
- Cost-Effectiveness: Recap videos leverage existing event content, making them a budget-friendly option.
- Increased Visibility: Shareable across digital platforms, these videos boost brand awareness and visibility.
- Audience Engagement: Remind attendees of their experience, encouraging them to watch on-demand content and sign up for future events.
- Attract Sponsors and Partners: Well-crafted recap videos can attract sponsors and partners for future events.
Considering these promising benefits, no surprise that vloggers and social media managers stick to recap videos.
How to prepare video material?
When shooting another video, let your creativity guide you. These are just common tips that may help plan out the future recap video.

Strong Start: Begin with an attention-grabbing moment from the event. Use dynamic shots or impactful sound bites to engage viewers right away.
Storytelling: Organize your video like a story. Highlight key moments, transitions, and emotions. Create a narrative flow that keeps viewers interested.
B-Roll Footage: Mix event footage with B-roll (additional shots) to add context and variety. B-roll can include venue shots, behind-the-scenes glimpses, or close-ups of details.
Music Selection: Choose background music that complements the mood of your recap. Upbeat tunes work well for energetic events, while softer melodies suit more reflective occasions.
Text Overlays: Use text overlays sparingly but effectively. Add captions, event names, or speaker introductions to enhance understanding.
Color Grading: Apply consistent color grading to your clips. This helps unify the visual style and gives your video a professional look.
Call to Action (CTA): End your recap with a clear call to action. Encourage viewers to subscribe, visit your website, or attend the next event.
Remember, concise storytelling and visual appeal are key to creating memorable recap videos.
Creating a recap video in AVS Video Editor
AVS Video Editor is a video editing software for Windows that excels in creating engaging recap videos. Our application offers an intuitive interface, making it accessible for beginners and experienced editors alike.
Step 1. Open AVS Video Editor and click Import to add your event footage, photos, and audio.
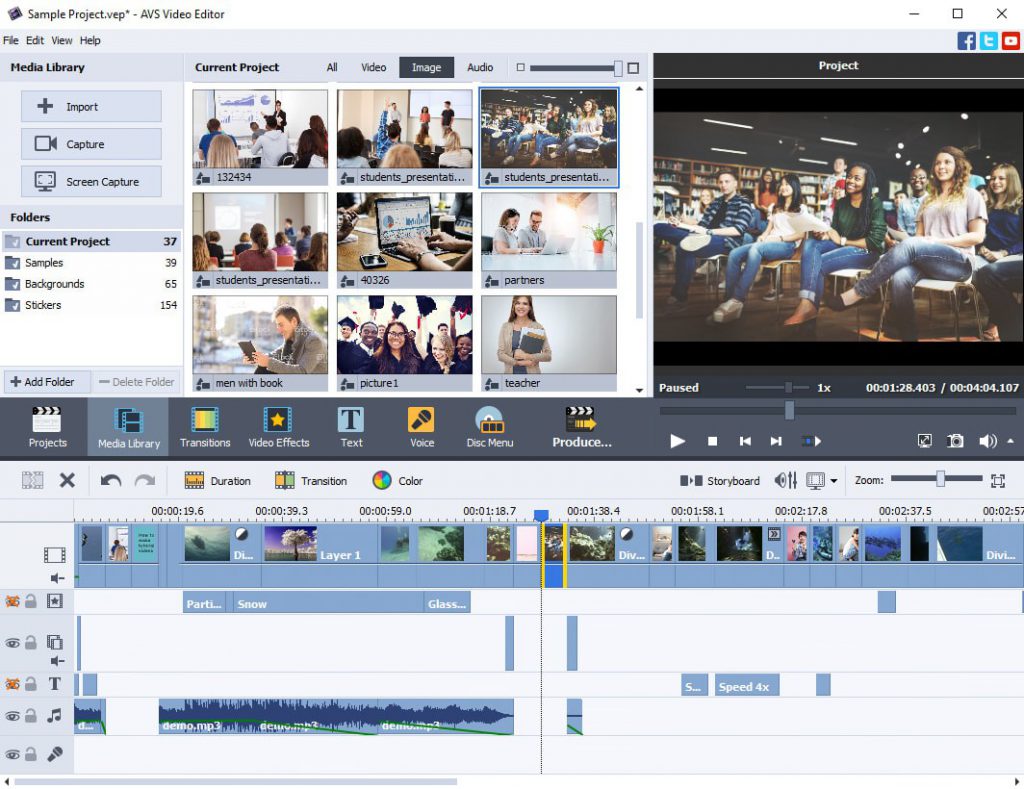
Step 2. Drag and drop your videos and photos onto the timeline and arrange their order.
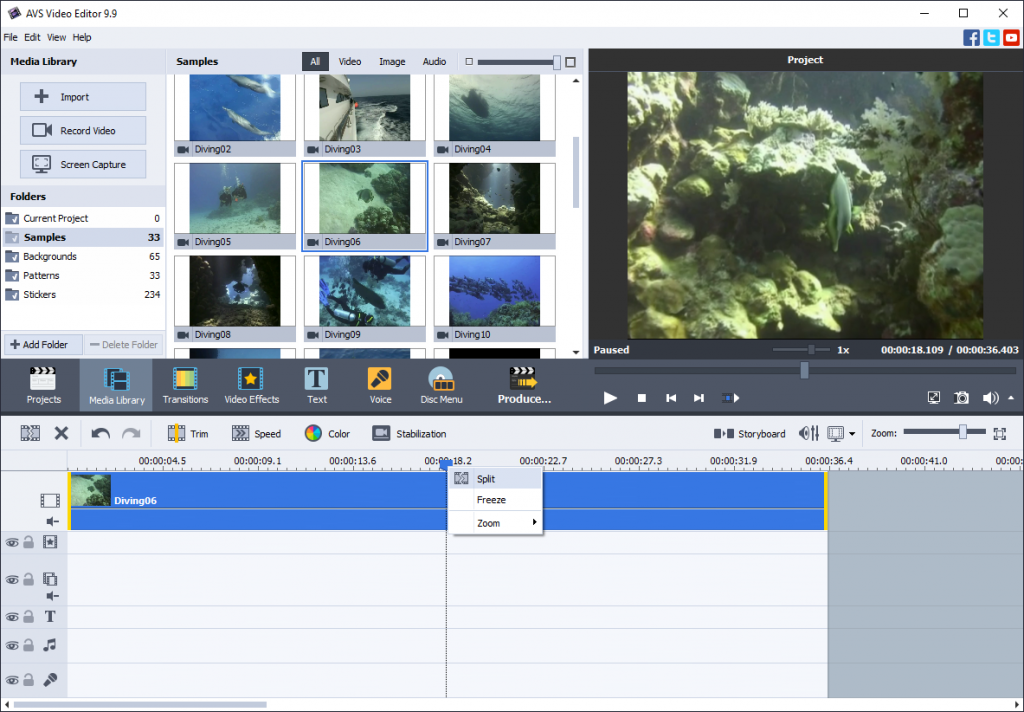
Step 3. Trim clips to the desired length. Select a video on the timeline, click Trim, and move the clip’s borders internally to cut off the beginning or the last seconds of a clip.

If necessary, you can split videos by right-clicking them on the timeline and choosing Split. Afterwards, you can cut off the unwanted parts of your footages.
Step 4. Adjust color correction (Brightness, Temperature, Contrast, Saturation, Gamma, and Hue settings).
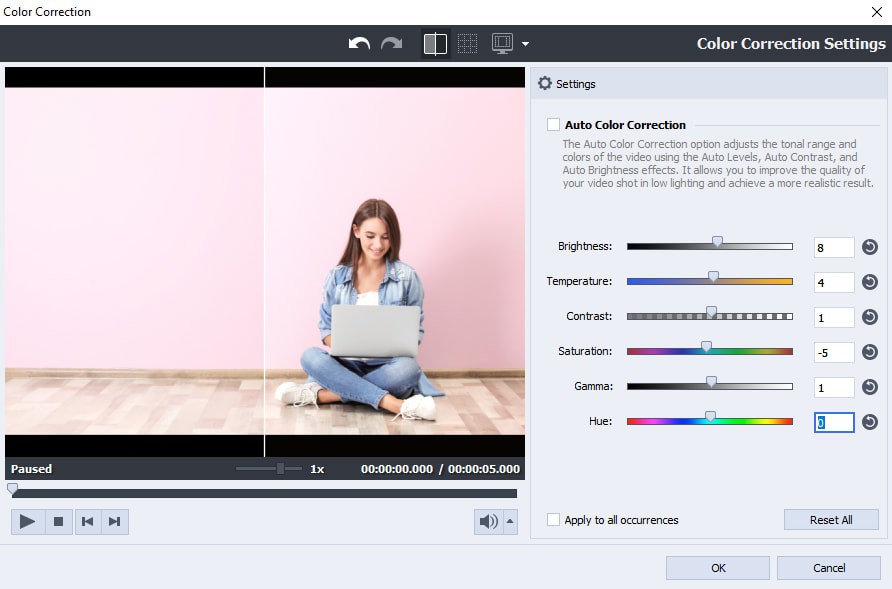
Add captions to describe what’s happening on the screen. Besides, consider including subtitles to your video.

Add background music, adjust volume, and apply fades. In this article, you can learn more audio editing basics in video projects.
Step 5. Export your recap video.

Start creating appealing recap videos for your home library or social media today with AVS Video Editor.
The entire AVS4YOU suite with converters and editors for video, photo, and audio is available with massive discounts up to 70%.