Category: Без рубрики

The holiday season is all about sharing joy and exchanging gifts, and AVS4YOU Team has also prepared some special treats just for you!
Advent Countdown
Visit the AVS4YOU Advent Countdown to enjoy generous discounts, valuable gifts, and exciting offers from our partners.
12-Project Holiday Video Checklist
Looking for a fun way to spend your free time? We’ve made a 12-Project Holiday Video Checklist to keep you busy and inspired! These short, easy-to-complete projects using AVS4YOU software let you create a festive collection of shareable videos by the end of the season.
Here’s a sneak peek of what you can create:
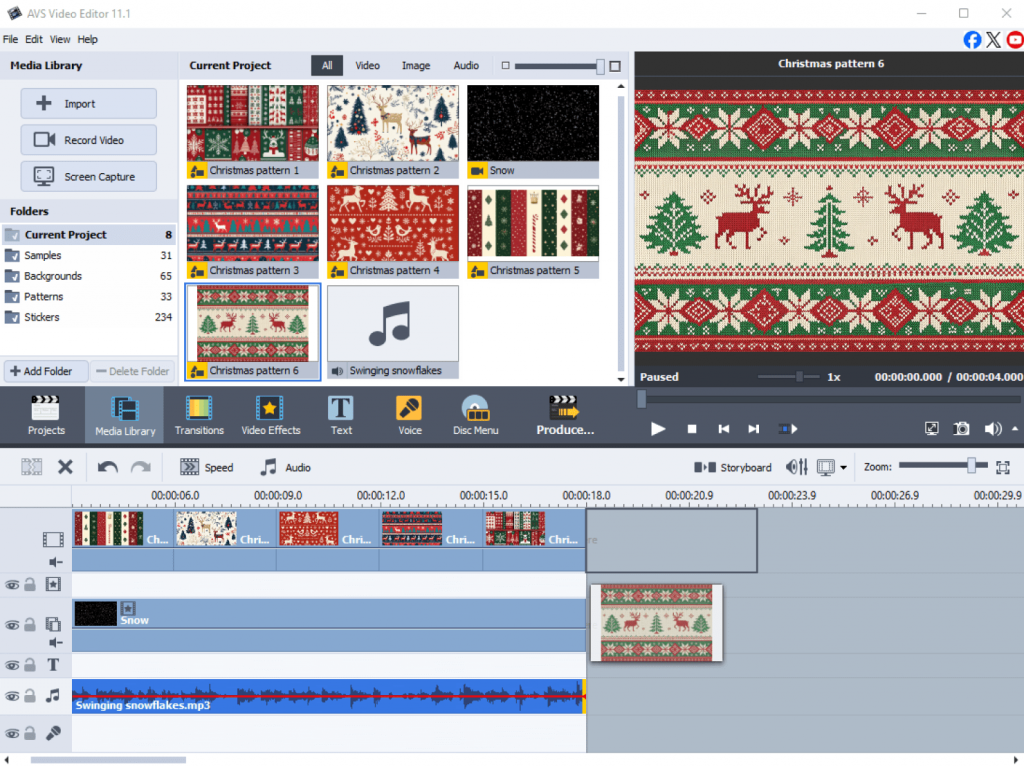
1. Festive Intro Video: 5–10 seconds of snow, holiday colors, and music to kick off your clips.
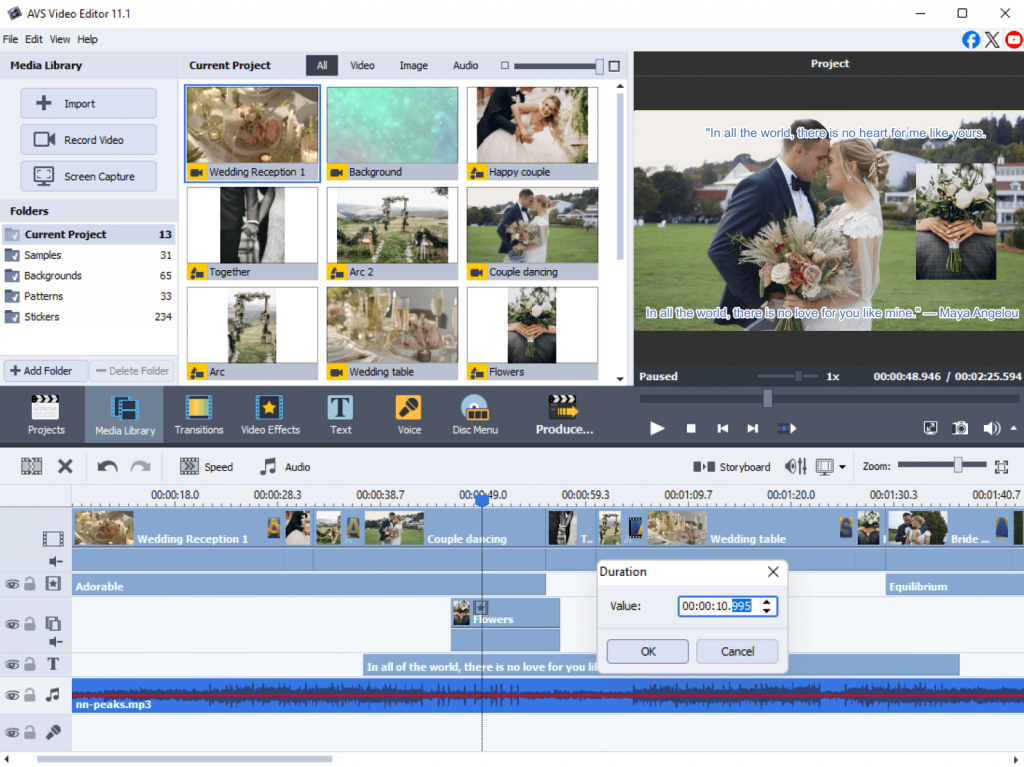
2. Holiday Slideshow: combine photos, smooth transitions, captions, and cheerful tunes.

3. Gift Wrapping Tutorial: record step-by-step tips with text overlays and fun effects.

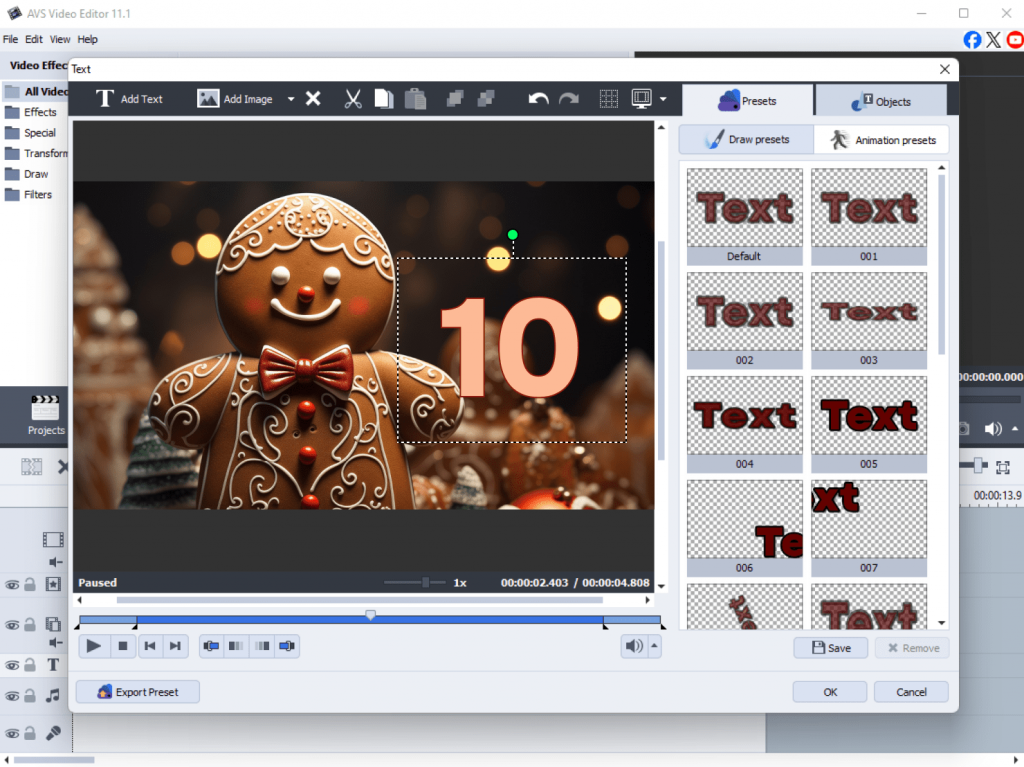
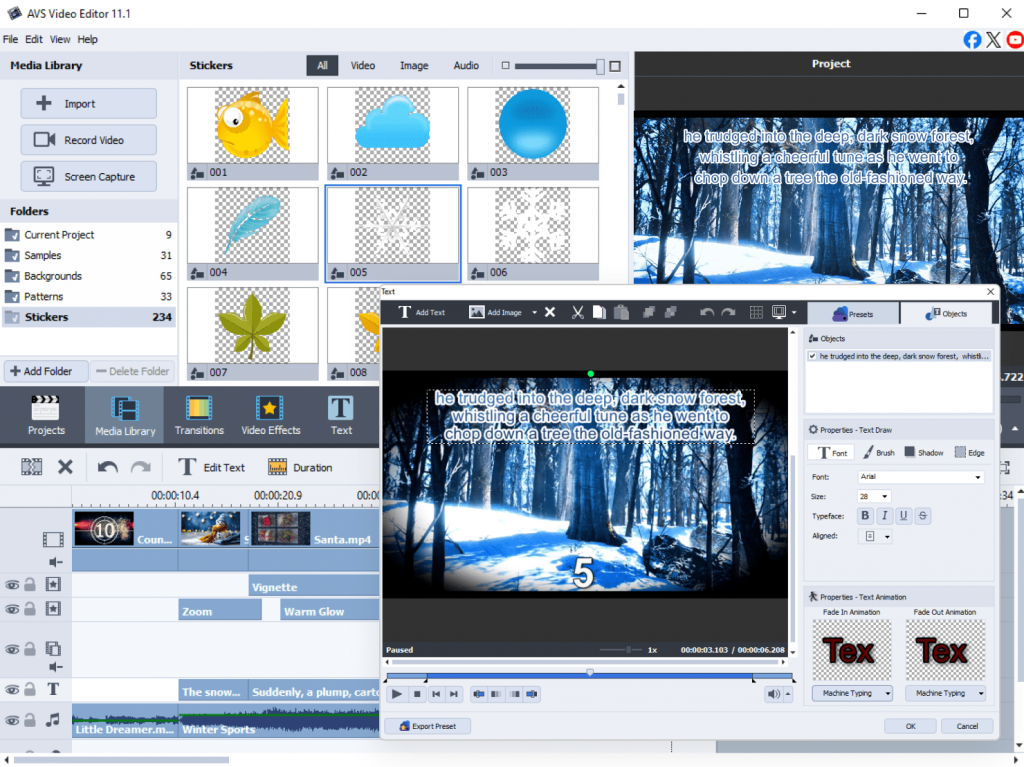
4. Christmas Countdown: use animated numbers and icons for a fun pre-Christmas countdown.
5. Festive Music Remix: layer and remix your favorite holiday songs.

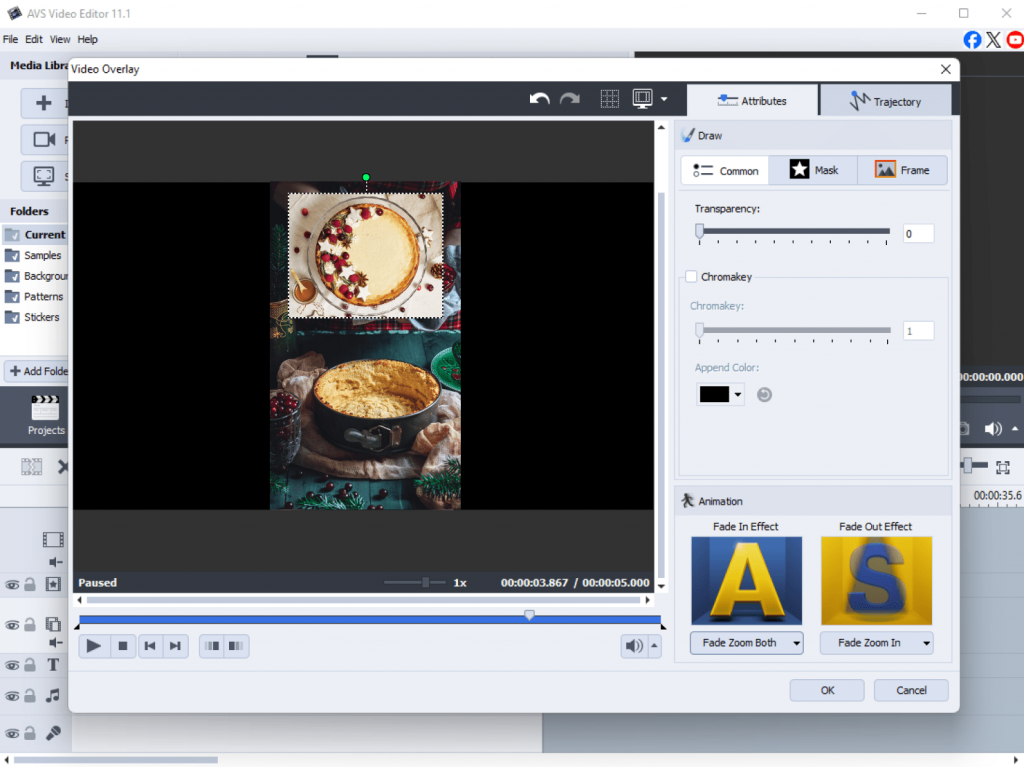
6. Recipe Shorts: show how to make Christmas cookies, drinks, or treats.
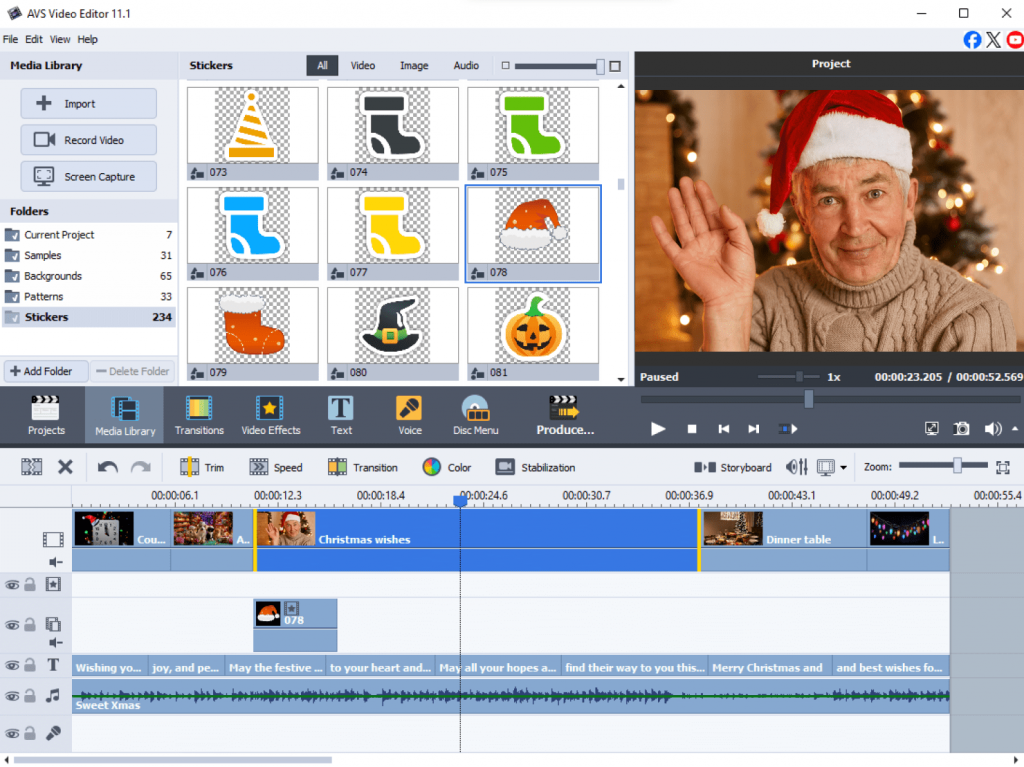
7. Holiday Greetings: personalized videos with images, text, and seasonal animations.
8. Winter Timelapse: capture snowfall, decorations, or winter scenes in fast-motion for a captivating effect.

9. DIY Decoration Tutorial: step-by-step guides for festive decorations.

10. Christmas Story Animation: 30–60 second animated stories with characters and music.
11. Gift Reveal Video: film unboxing or surprises with fun effects and transitions.
12. New Year Teaser: short social media clips to hype the upcoming year.
You can download the full Holiday Video Checklist here and start completing projects one by one. It’s a fun way to experiment, learn, and make your holidays more creative.
Tip: You can follow this checklist day by day, or pick and choose projects that match your mood and available time.
Don’t forget — sharing is part of the fun! Post your creations on social media, tag your friends, and encourage them to join the celebration. With AVS4YOU, you can make this New Year not just memorable, but truly magical.
AVS4YOU Exclusive Offer
As we welcome 2026, we want to thank you for your creativity, passion, and support throughout the year. Your incredible projects, from videos to music mixes, inspire us to keep improving our software.
May the new year be filled with fresh inspiration, unforgettable moments, and fantastic videos!
To celebrate, blog readers get 50% off AVS4YOU Unlimited Subscription. It’s our way of saying thank you and giving you an excellent opportunity to create without limits.
Merry Christmas, Happy New Year and happy creating!
AVS4YOU Team

Christmas is in the air, and nothing sets the mood better than joyful, uplifting music. While streaming platforms are full of ready-made playlists, there’s something magical about creating your own mix. Whether you’re planning a festive party, editing a Christmas video, or adding a soundtrack to your greetings, a personalized playlist makes your project stand out.
So, how do you turn a handful of songs into a smooth, professional-sounding mix? It’s easier than you might think! With AVS Audio Editor, you can seamlessly combine tracks, add special sound effects, and craft a winter masterpiece without any audio engineering skills.
Let’s explore how to create a stunning sound mix and spread some cheer!
Step 1: Pick audio files for your mix
The first step is to choose audio files you’d like to include in your mix. Pick jolly songs from your personal collection. Combine them with royalty-free tracks downloaded from websites such as Free Music Archive or Pixabay Music. Alternatively, you may use background instrumentals that fit your theme, for instance, jazz carols, lo-fi Christmas beats, or orchestral classics.
Just make sure that no authors’ rights are violated.
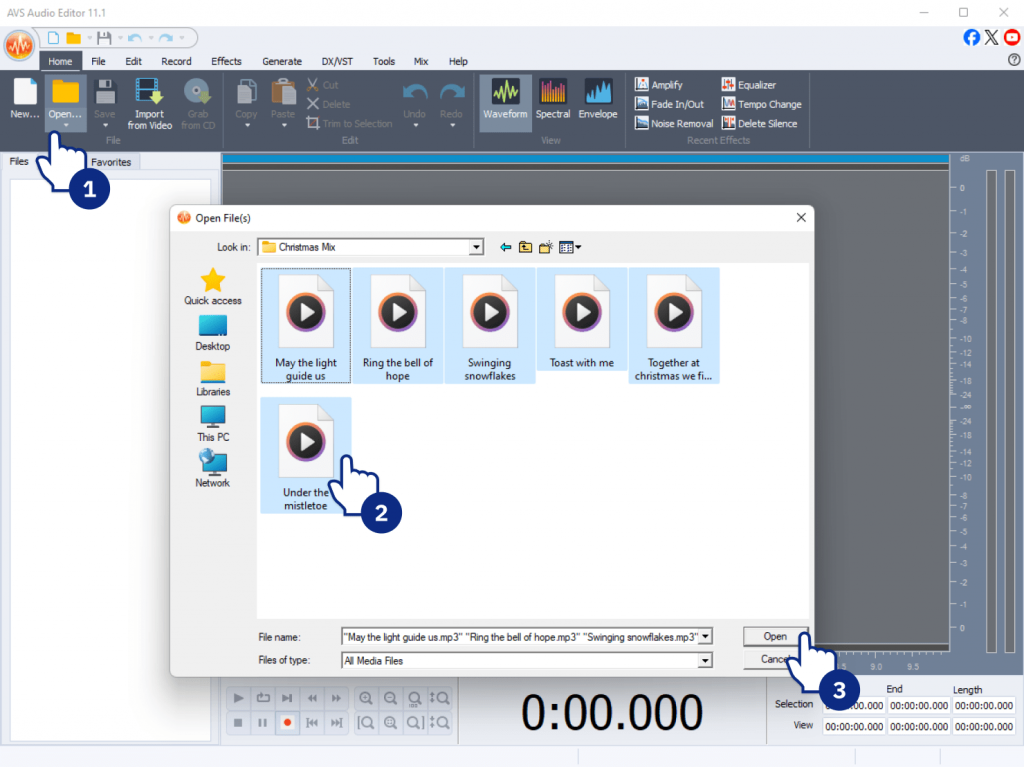
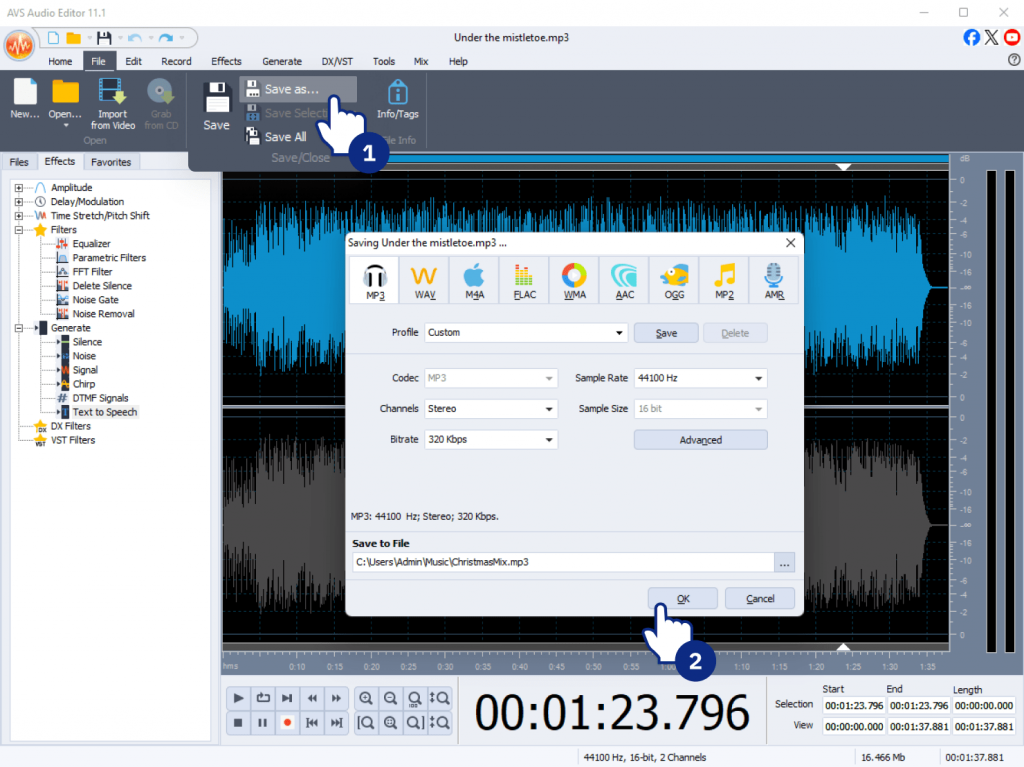
Tip: AVS Audio Editor supports a wide range of formats, including MP3, WAV, M4A, FLAC, WMA, and OGG, so you can easily work with multiple tracks in different formats.
Step 2: Mix and edit like a pro
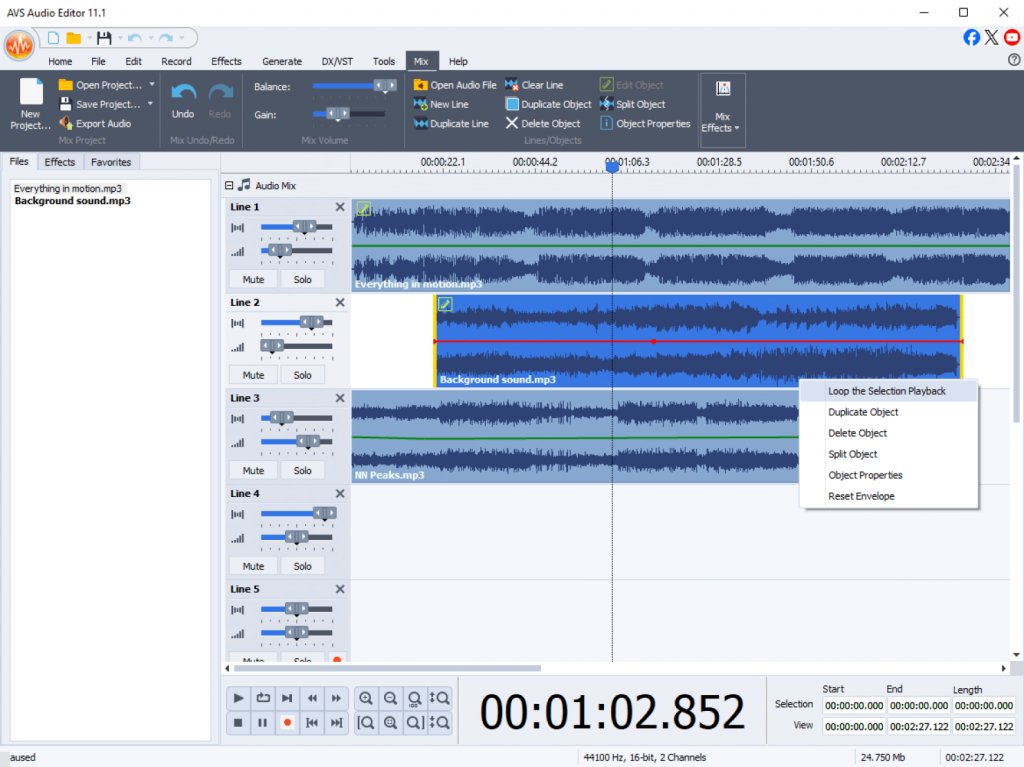
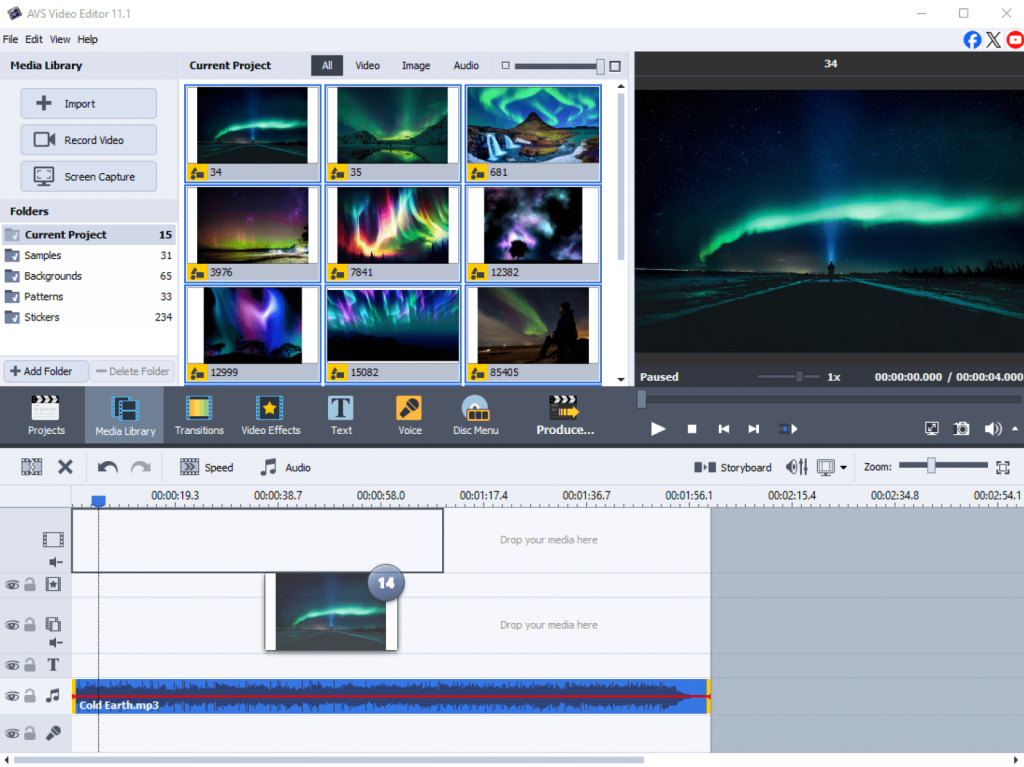
Now the fun begins. The multi-track timeline in AVS Audio Editor is your canvas, and you’re the artist. Follow these simple steps to effortlessly mix various audio tracks.
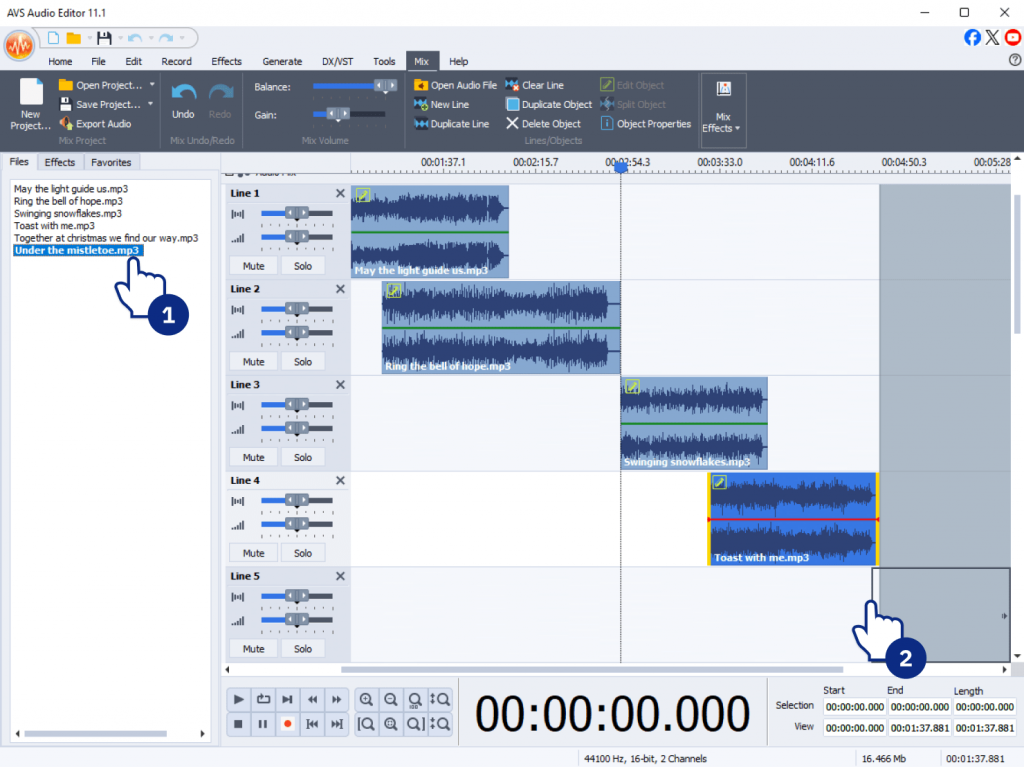
1. Arrange and balance your tracks
Drag the files to the timeline, placing them in the desired order. They may overlap each other or play one after the other. Keep the sound levels even so that all tracks play smoothly together.
2. Add smooth transitions between songs
Use fade-in and fade-out effects to link songs naturally and keep the energy steady. They’re available in Effects → Fade In/Fade Out.
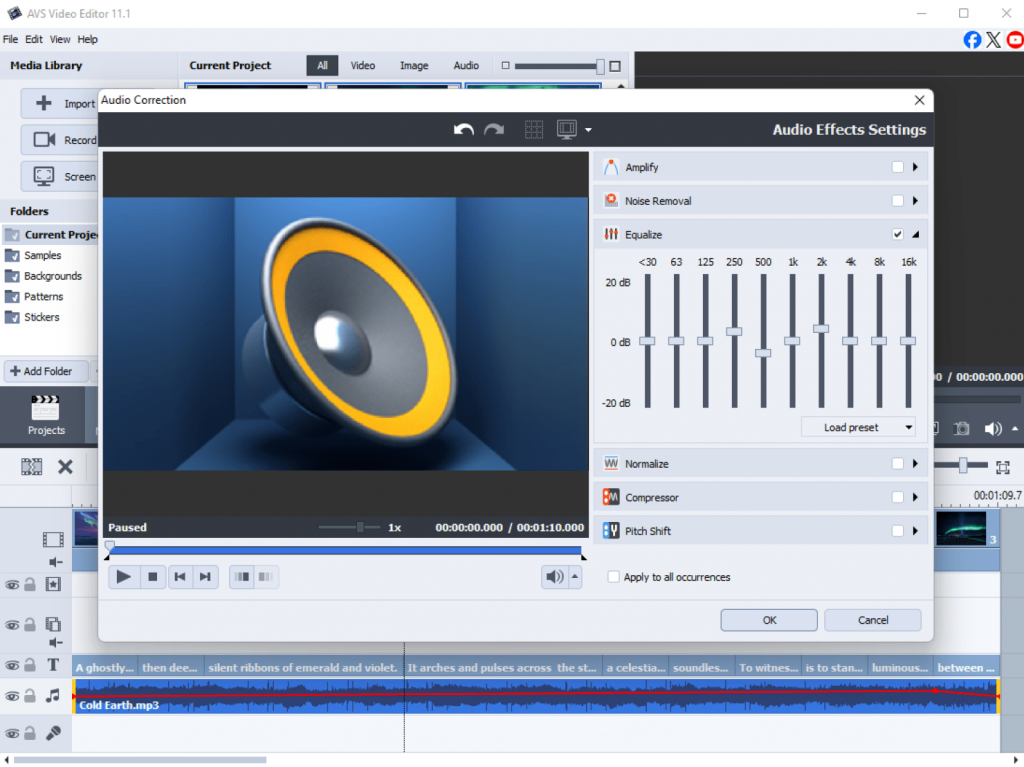
3. Polish your sound with equalizer and filters
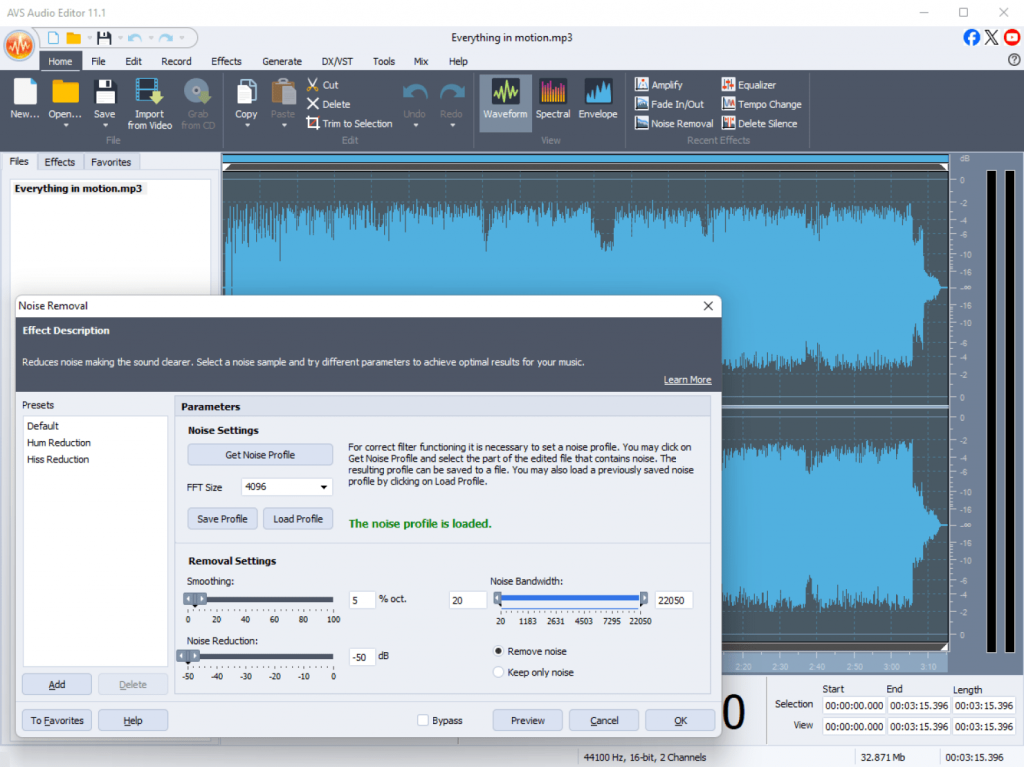
Use the Equalizer to adjust bass and treble for a richer, warmer tone. Apply noise reduction or normalization to maintain the volume even across all songs.
4. Edit with precision
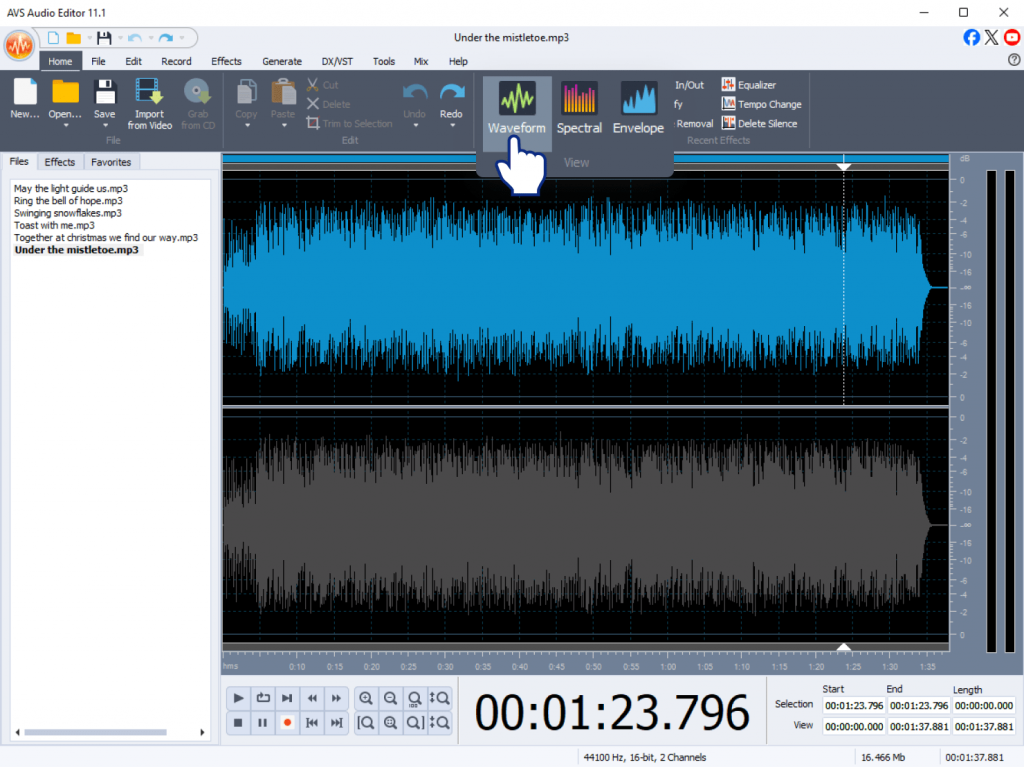
The visual waveform display in AVS Audio Editor helps you see every beat and cut precisely where needed. You can remove silences, split tracks, or synchronize beats visually.
Step 3: Add a festive touch
To make your mix sparkle with holiday spirit, experiment with a few creative effects:
- Sound effects – add gentle bells, jingles, or chimes between transitions to highlight the cheerful mood.
- Ambient sounds –include background fireplace crackles, snowstorm wind, or crowd cheer for atmosphere.
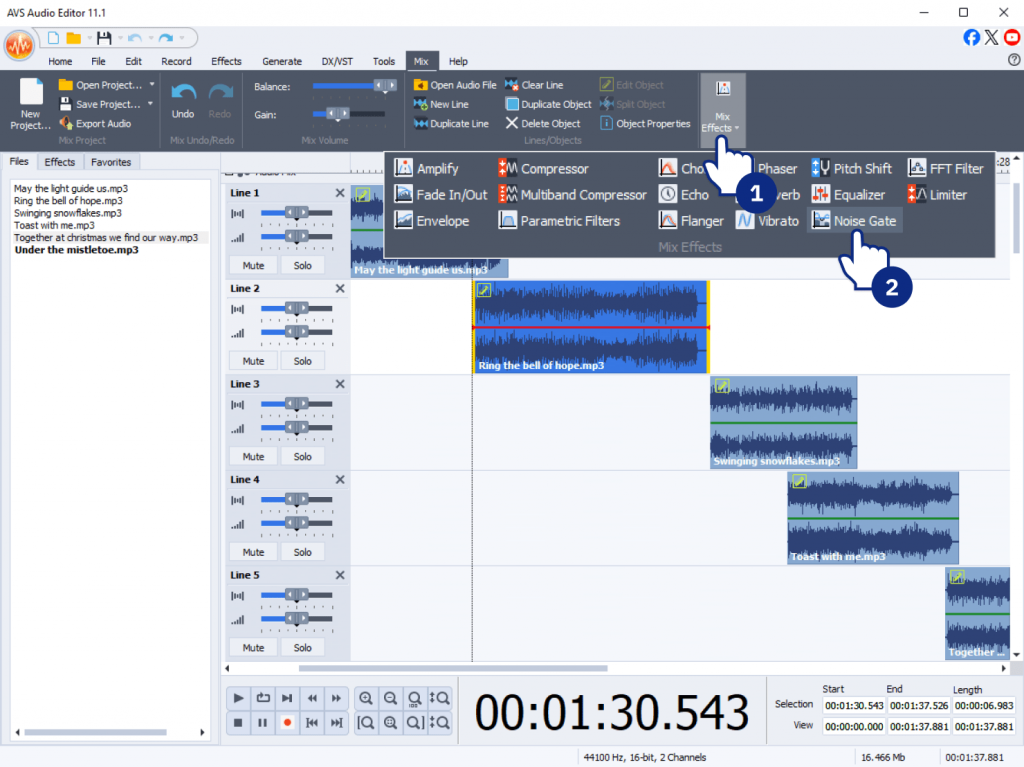
- Echo and reverb give your songs a warm, spacious sound, great for carols or instrumental versions.
- Voice greetingsare a short personalized message such as “Merry Christmas from our team!” or “Happy Holidays!”. Record and overlay it on your mix.
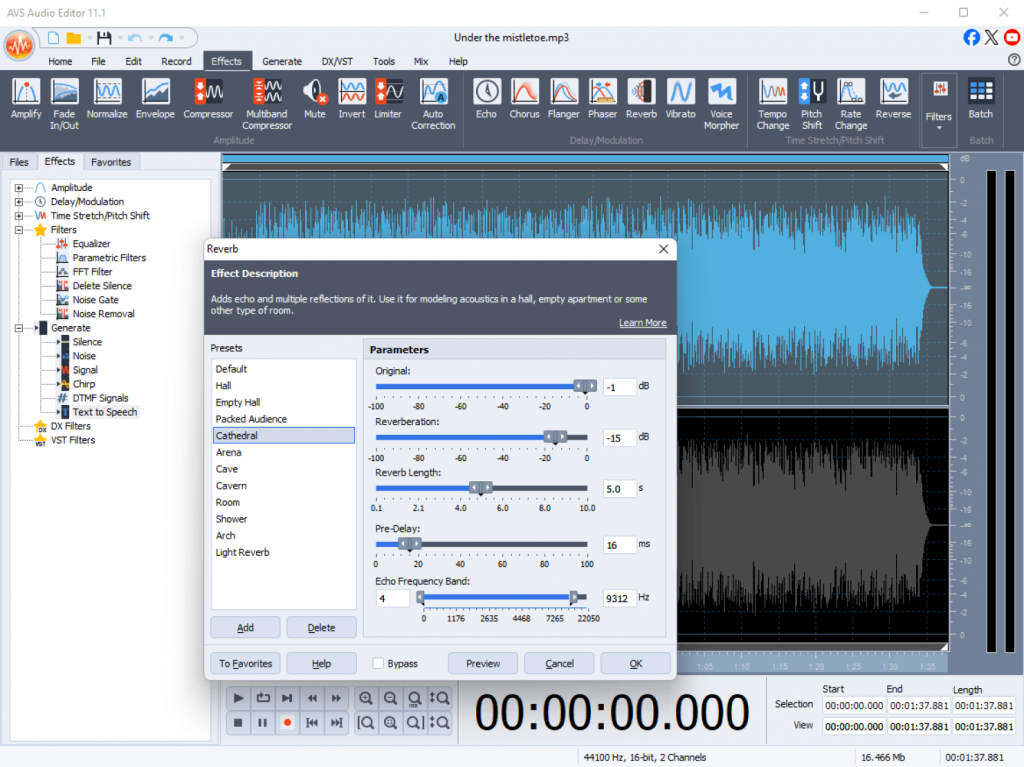
All these options can be applied directly within AVS Audio Editor using the Effects and Mix panels.
Step 4: Save and share your mix
Once you’re satisfied with the result, it’s time to export your mix and share it with the world. Go to File → Save As, and choose your preferred format. MP3 is best for sharing online or sending by email, whereas WAV or FLAC ensures maximum sound quality. Export in M4A for mobile-friendly playback.
If you want to convert your output file into different formats, use AVS Audio Converter.
The final step is to share your ready mix on YouTube, social media, or attach it to your digital greeting cards.
Your custom soundtrack is now ready to bring joy wherever it plays!
Bonus tips for creating exceptional mixes
1. Kick off with a mood-setter
Start with a track that hooks your audience from the very first note.
2. Create a narrative
Arrange songs to tell a story or follow the energy arc of a celebratory event.
3. Use themed loops
Short loops of bells, choirs, or jingles can punctuate your mix and make it more dynamic.
4. Experiment with mashups
Combine elements from two songs to create your own unique versions of beloved melodies.
5. Keep it concise
A 20–30 minute mix is ideal for most parties or online playlists.
Alternative mixing software options
If you want to explore other tools alongside AVS Audio Editor, here are some worthy alternatives:
- Audacity, a free, open-source, versatile audio editor with a strong plugin library.

- FL Studio, a professional-grade software for advanced music production and remixing.

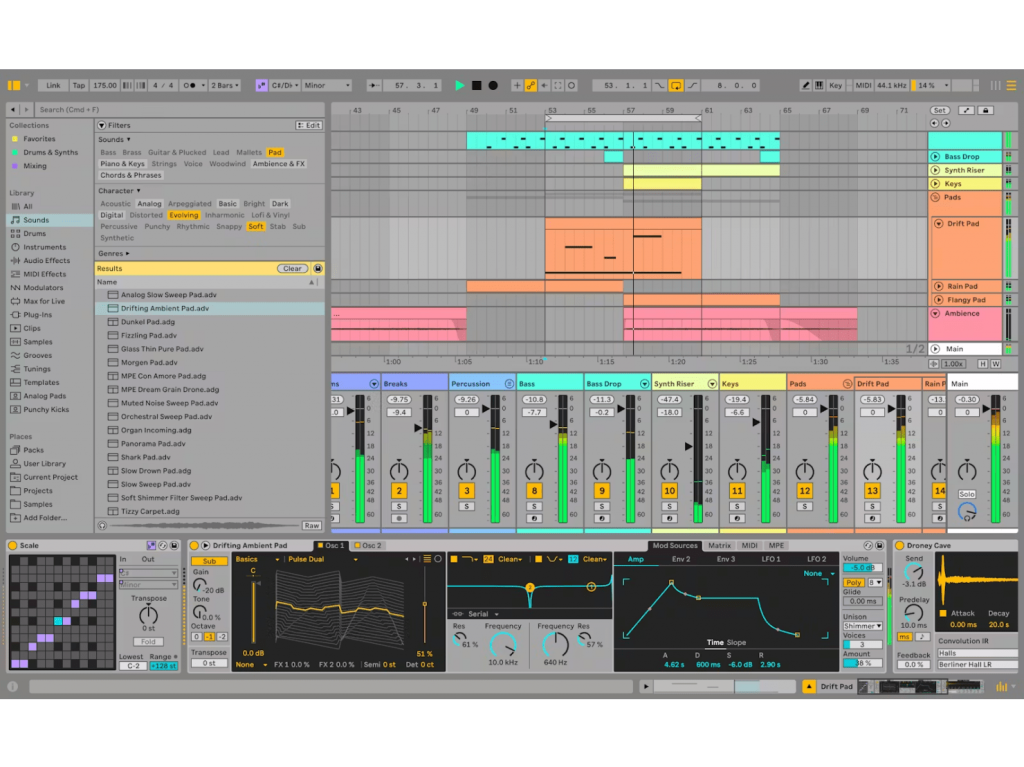
- Ableton Live, an intuitive platform perfect for layering instruments, vocals, and creating dynamic mixes.
While these tools are excellent, AVS Audio Editor stands out for its simplicity, intuitive interface, and the ability to quickly create polished mixes without a steep learning curve.
Start mixing today
Bring your holiday music to life and make every celebration shine. With AVS Audio Editor, you can craft mixes that capture the magic, layering your favorite songs, adding jingles, and tweaking every beat to match the spirit of the season. Whether you’re creating custom Christmas playlists, remixes for a party, or background tracks for your online content, your mixes will fill every moment with warmth, energy, and joy.
Make this end-of-year season truly unforgettable! Start crafting your joyful mixes now and enjoy 30% off AVS4YOU Unlimited Subscription!
Useful links

Are you ready to dive into the world of multimedia editing but feel a bit overwhelmed by complex software? Meet AVS4YOU Multimedia Suite, your reliable creative assistant. This all-in-one software package is designed to handle video edits, audio enhancements, and even to make slideshows, all from one convenient suite. What’s more, it’s built with beginners in mind. You don’t need to be a tech wizard to start creating polished and professional-looking projects.
This guide aims to show you how straightforward it can be. In the next five simple steps, you’ll go from a complete newcomer to someone who can confidently navigate the suite and complete basic tasks. Let’s get you started on your creative journey!
Step 1: Install and explore the interface
The first step on your editing journey is to install the software onto your computer. This process is quick and user-friendly.
How to Download and Install AVS4YOU software
- First of all, visit the official AVS4YOU website where you can download each program separately or the whole suite. The setup package encompasses a wide range of apps including some freeware such as AVS Image Converter, AVS Document Converter, AVS Registry Cleaner, and others.
- Once downloaded, open the file and follow the on-screen setup wizard. It will guide you through the simple installation process, which only takes a few minutes.
Overview of the main dashboard:
- After installation, you won’t find a single “dashboard.” Instead, look for the AVS4YOU program group in your Start Menu. Here, you’ll see all the individual applications listed, for example, AVS Video Editor, AVS Audio Editor, and AVS Video Converter.
- To start, simply click on the program you want to use, and it will open in its own window. Each one has a clean, intuitive interface.
Beginner tips:
- Pin for easy access: Right-click on the programs you think you’ll use most and “Pin to Start” or “Pin to Taskbar” for quick launching later.
- Don’t be afraid to click: The best way to learn is by exploring. Click on different menus and buttons in each program to see what they do. You can’t break anything!
Step 2: Start with a simple video edit
Let’s jump into the most popular feature: video editing. Starting with a simple project will build your confidence quickly.
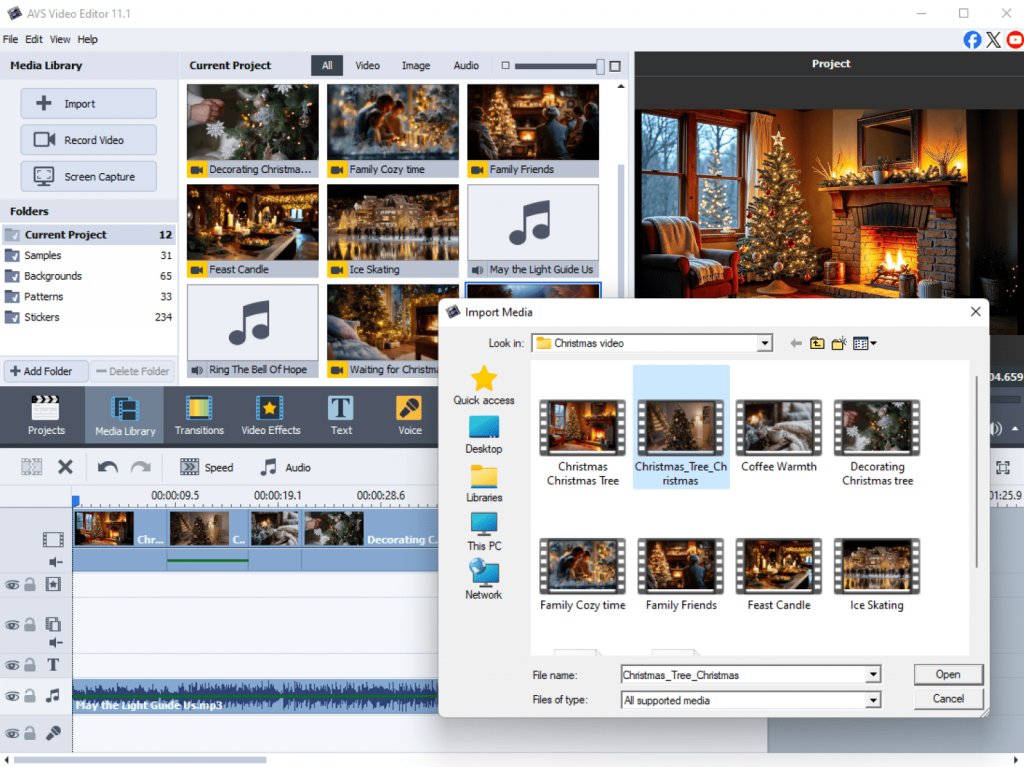
Import your video
Open AVS Video Editor and start a new project. Click the “Import” button or simply drag and drop your video files from your computer directly into the media library panel.
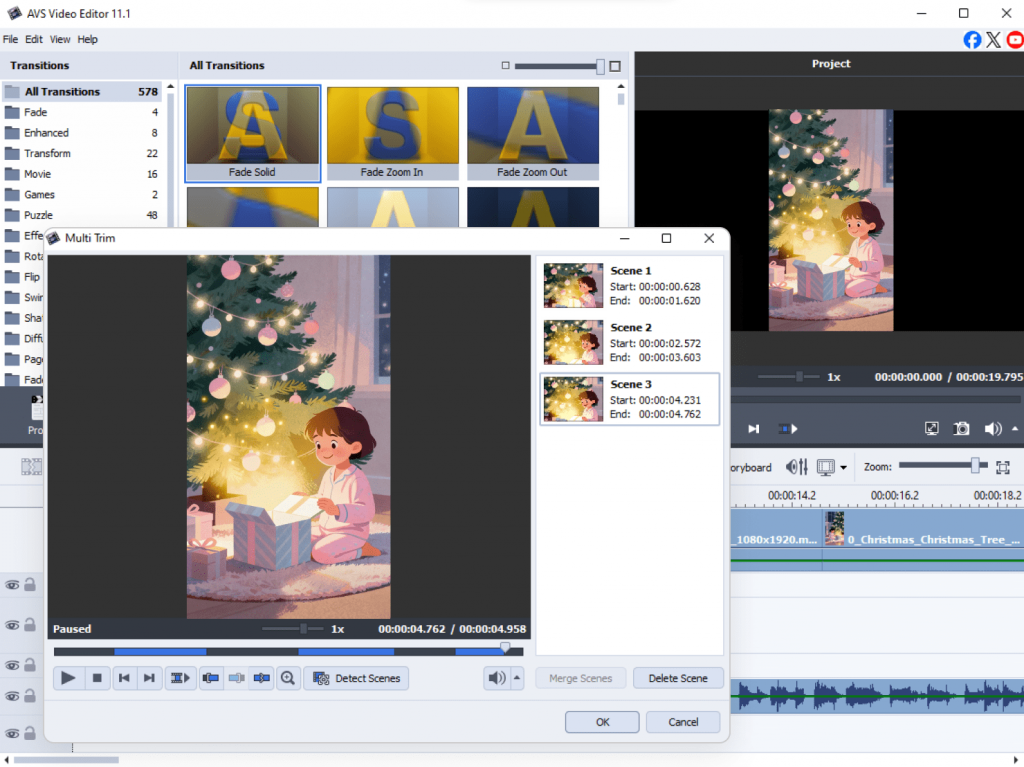
Trim and cut
Drag your video clip down to the timeline at the bottom of the screen. Simply set “In” and “Out” points on your timeline to define the section you want to keep, and then apply the trim function to remove unwanted parts.
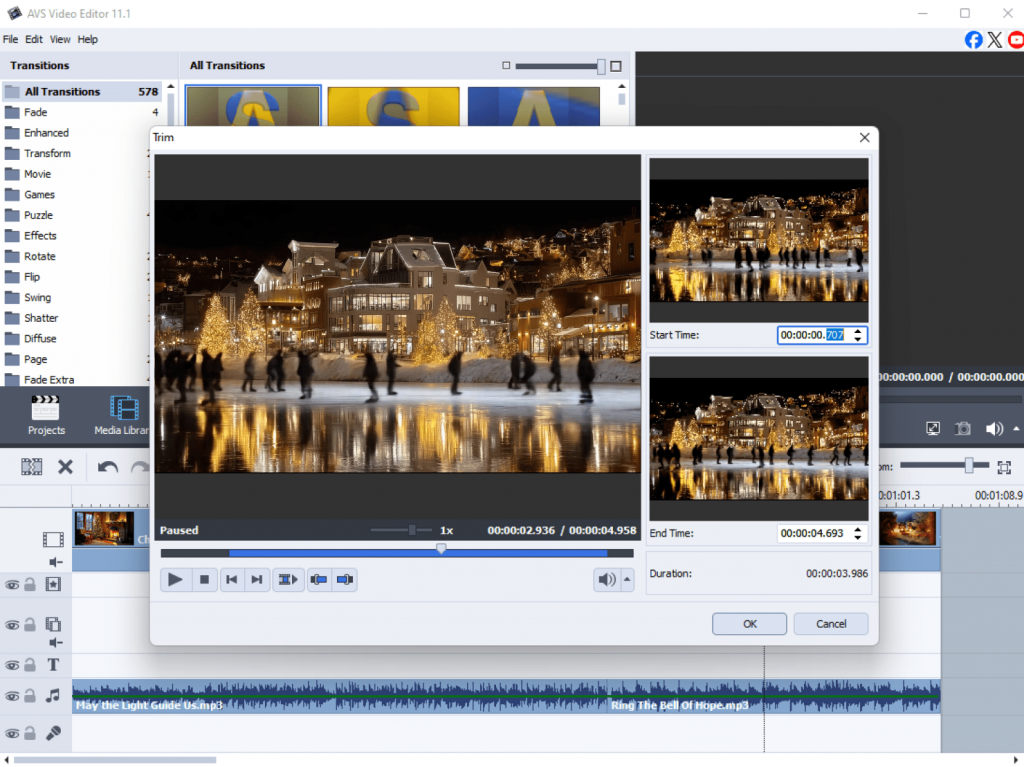
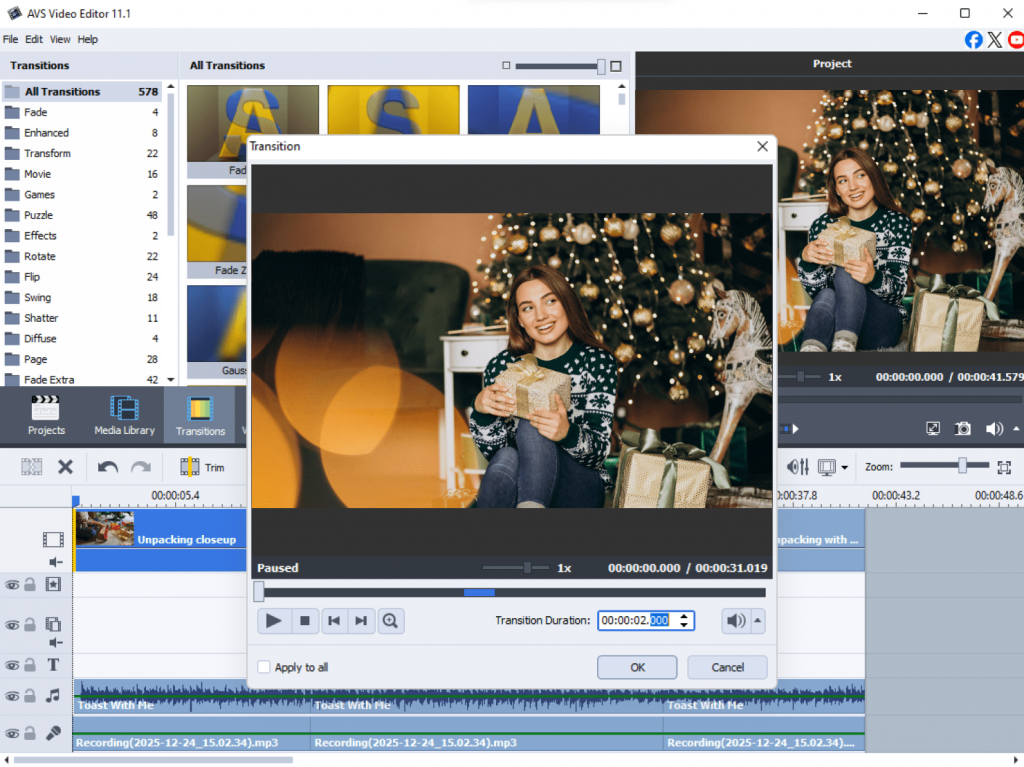
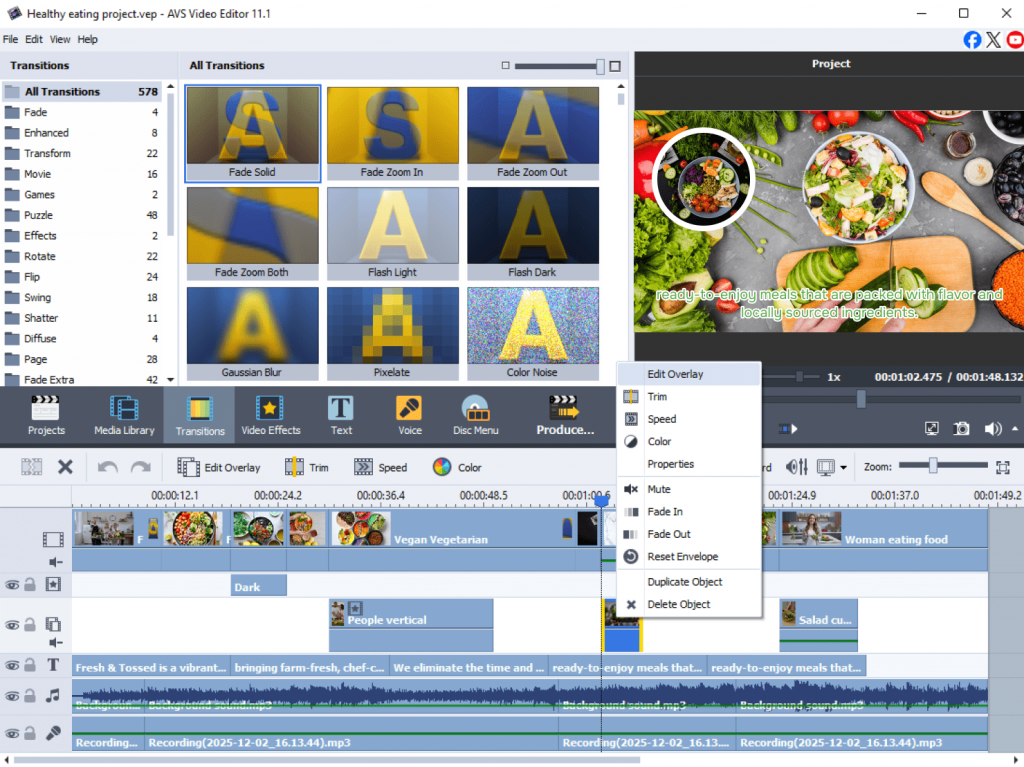
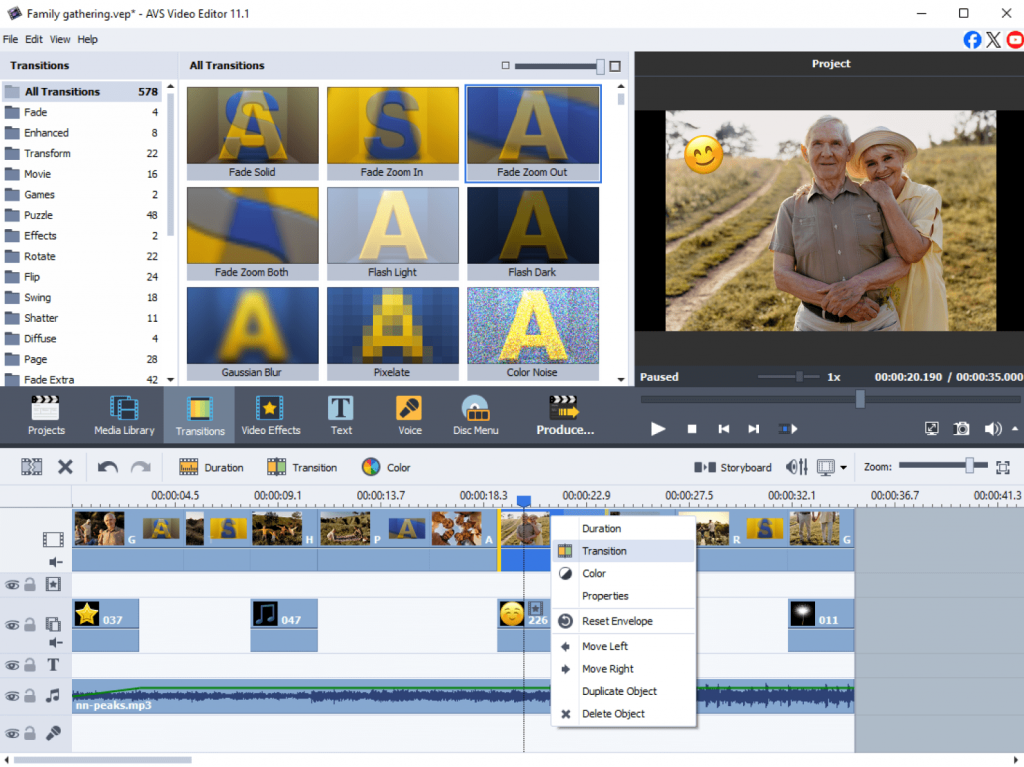
Add transitions
To make cuts between clips smoother, use transitions. Find the “Transitions” tab, choose one you like (such as different variations of Fade, Move, Rotate, etc. ), and drag it between two clips on your timeline.
Export project
Once you’re happy, click the “Produce” button. You can save your video for now. We’ll cover export options in more detail in Step 5.
Beginner Tips:
- Start small: Practice with a short clip, like a 30-second phone video, for your first project.
- Use the timeline: The timeline is where the magic happens. Get comfortable with zooming in and out and moving clips along it.
Step 3: Enhance audio easily
Great video needs great audio. You can prepare your favourite audio track or create an audio mix in AVS Audio Editor for adding it later as background music in AVS Video Editor. AVS Audio Editor allows you to polish and improve your sound in a few clicks. Here are some basic enhancement edits for a start:
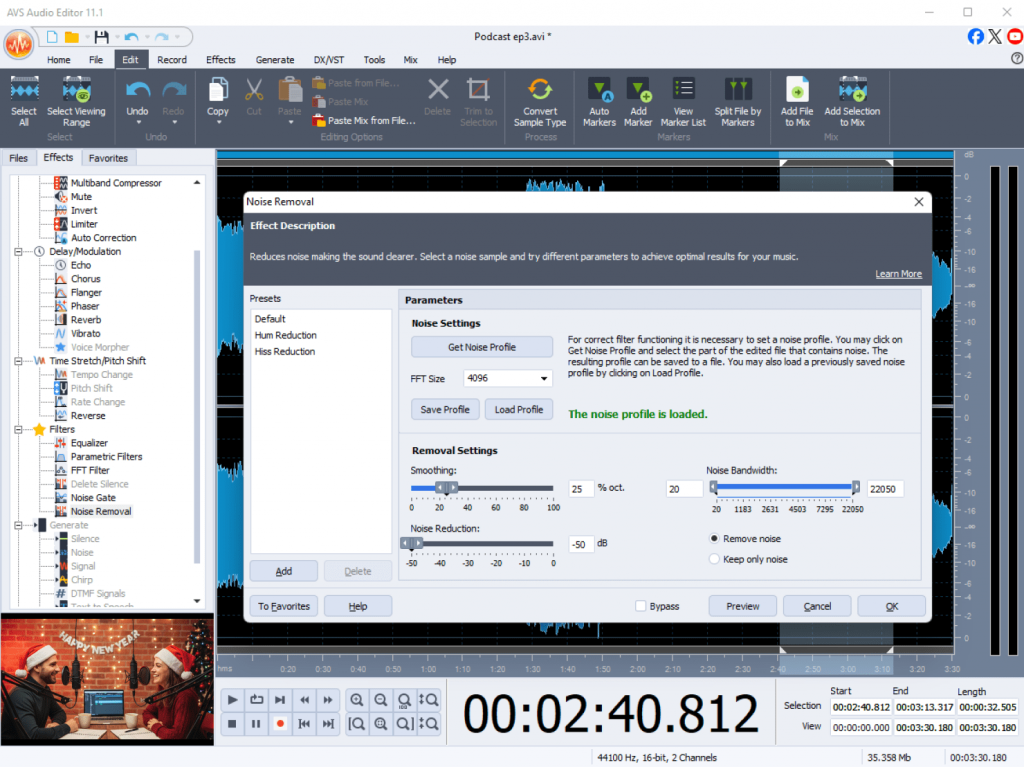
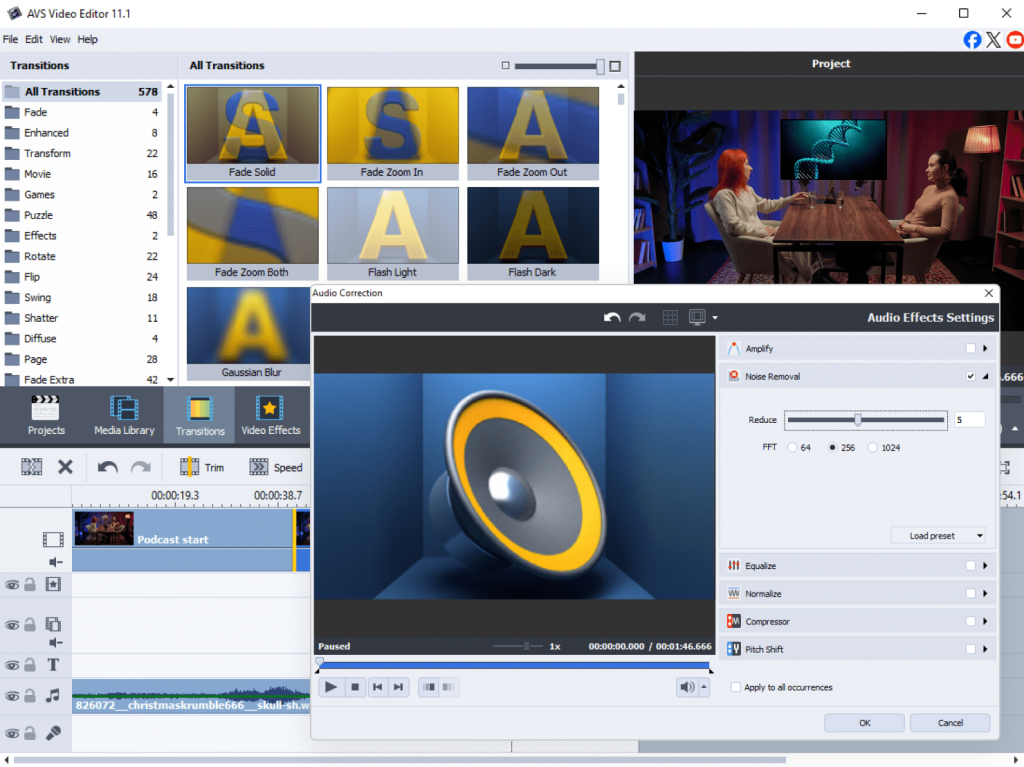
Basics of noise removal
Import an audio file or extract the audio from a video file. If you hear a constant hum or background hiss, look for the “Noise Removal” effect. Applying it will significantly clean up your audio.
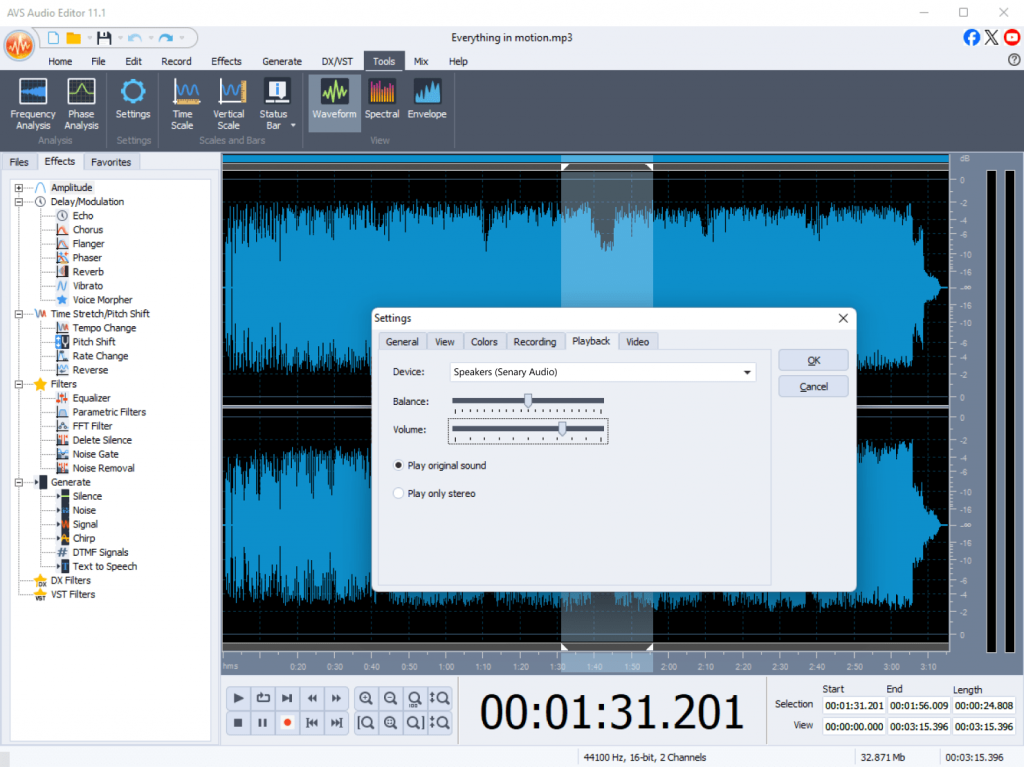
Adjust volume
To make quiet audio louder or loud audio softer, press the “Volume” button. There is a slider to increase or decrease the decibel (dB) level to your liking.
Add background music
Want to add a music track? Import your audio file and drag it to a separate audio track on the timeline. You can then adjust its length and volume so it doesn’t overpower the main dialogue.
Beginner tips:
- Listen with headphones: To catch subtle background noises, always edit your audio while wearing headphones.
- Adjust music levels: A good rule of thumb is to set your background music about 10-15 dB lower than your main vocal audio.
Step 4: Create a slideshow or presentation
If you have plenty of photos and don’t know how to organize them beautifully, create a slideshow or a presentation in AVS Video Editor. It is one of the best ways to capture your cherished memories of a trip, a birthday party, vacations, and so on.
Combine your photos
Import your photos to the media library. Then, drag them onto the timeline in the order you want them to appear.
Add text and captions
To add a title slide or caption to a specific photo, click on the “Text” button, type your message, and customize the font, color, and size. Drag the text block over your chosen photo on the timeline.

Choosing background music
Just like video or image files, import a music file and place it on the audio track. Adjust the duration of the slideshow to match the length of your song.
Beginner tips:
- Don’t use long text messages: Avoid writing long paragraphs on your slides. Use concise text and a large, easy-to-read font. A single powerful word or a short, meaningful caption is often more effective.
- Balance your audio tracks: To make your voiceover stand out, fade the background music beneath the narration and bring it back up once it’s finished. This results in a smooth and professional audio balance.
Step 5: Save and export in the right format
Ready to share your creation? Choose from a range of ready-made presets optimized for different devices and platforms, and publish your video online simpler than ever.
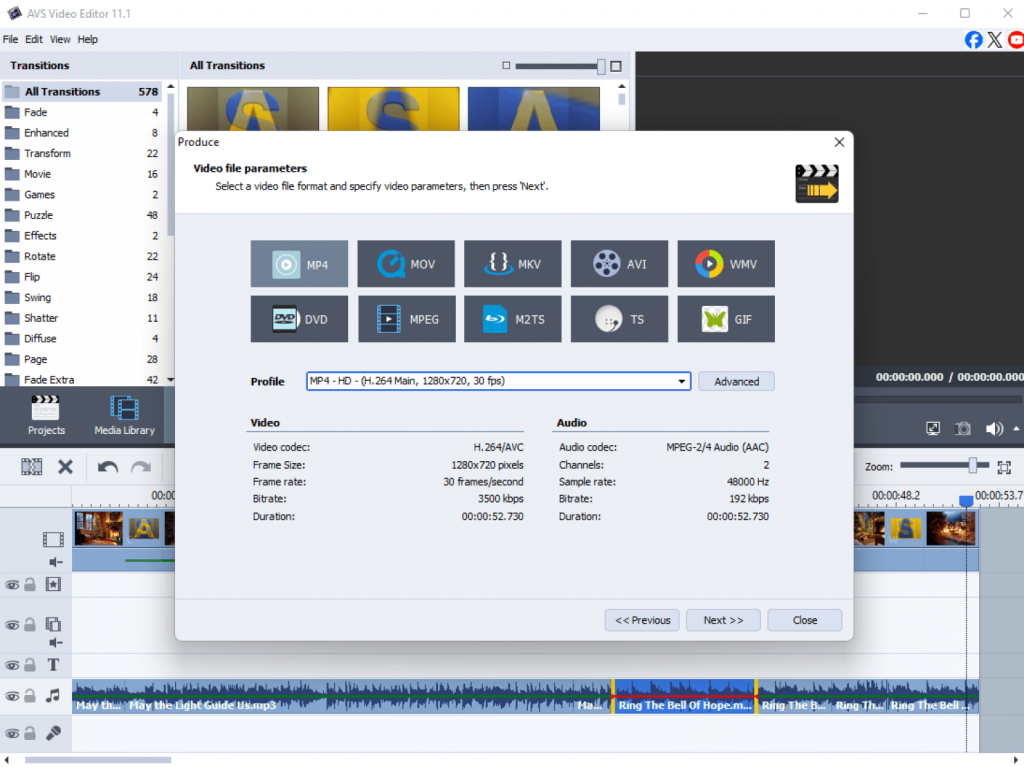
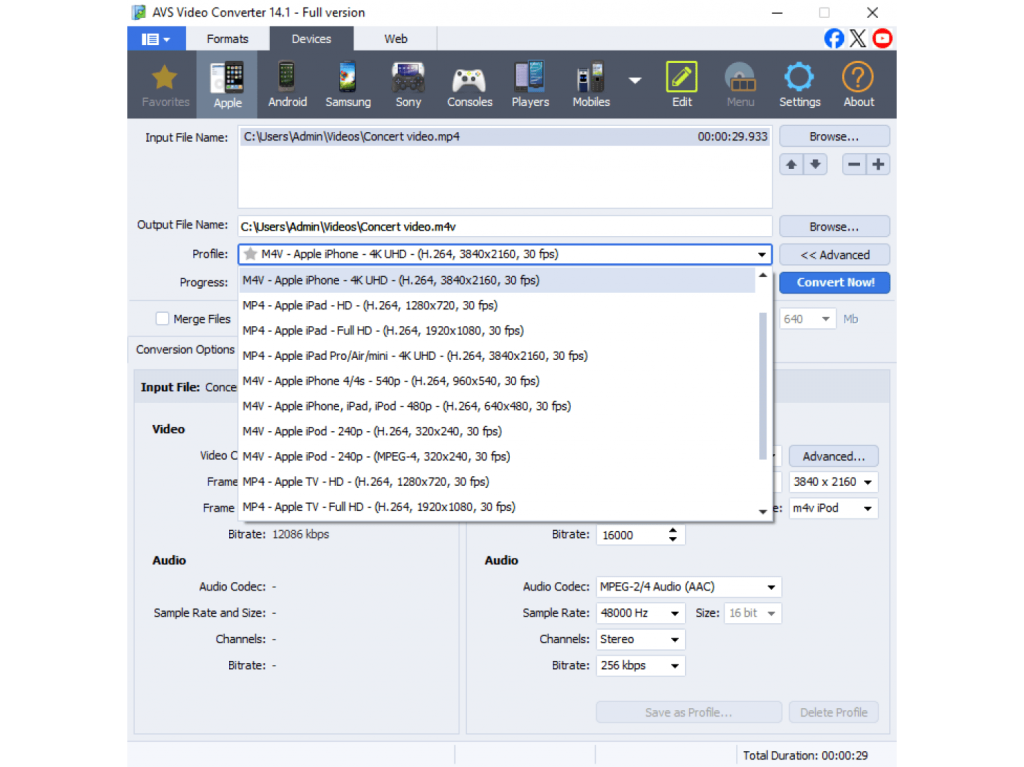
How to select the correct format:
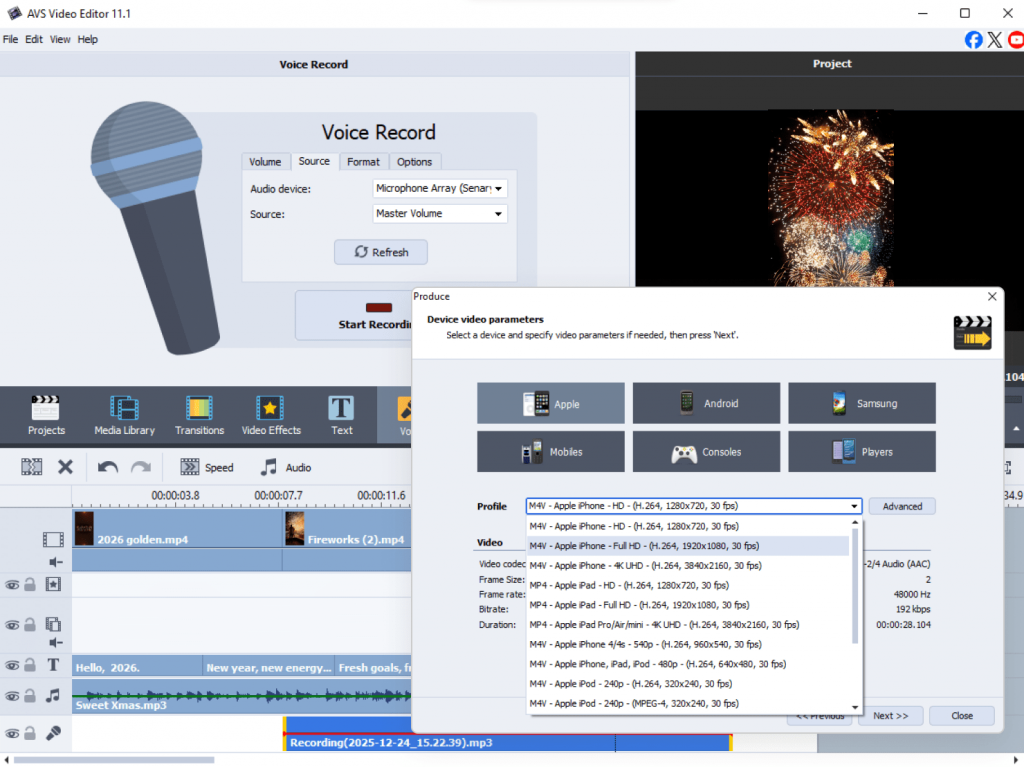
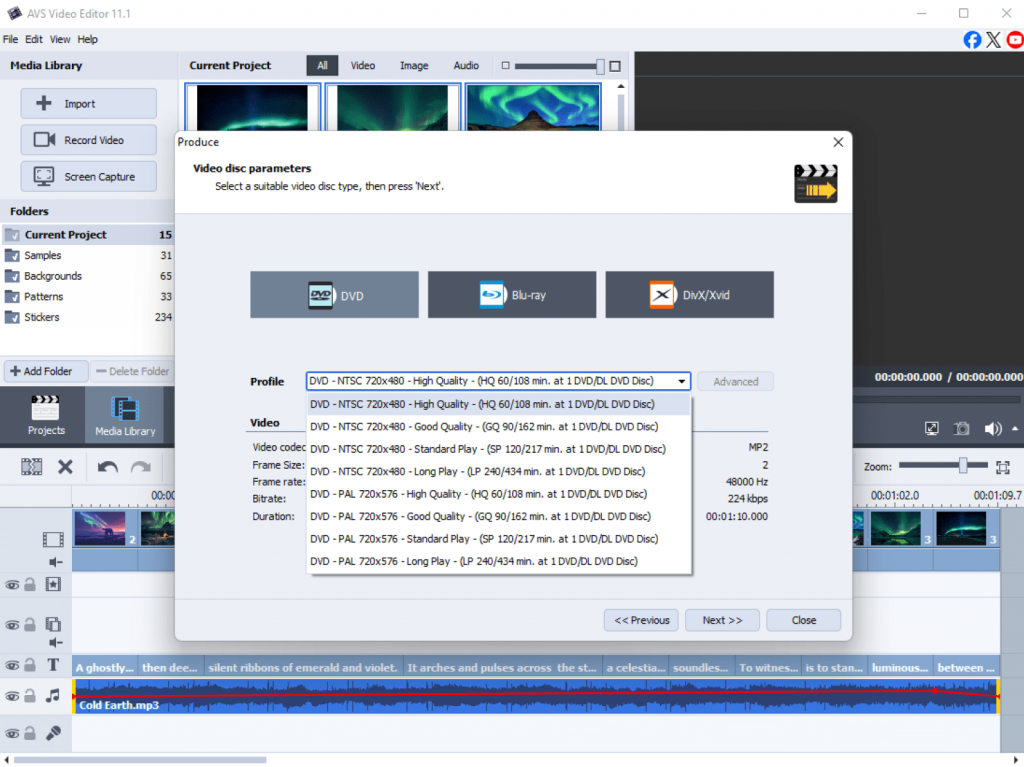
Click the “Produce” button. You will be presented with a list of profiles and formats.
- For YouTube/Vimeo: Choose MP4 (H.264) format with a 1080p resolution. This is the standard for online video platforms.
- For Instagram: For stories, use a vertical resolution like 1080×1920. For feed posts, a square (1080×1080) or vertical format works best.
- For smartphones and tablets: Go to the “Devices” tab and select your specific model for the optimal settings.
- For archiving or DVD playback: Select the “Disc” profile to create a DVD-compatible video file.
A note on the AVS4YOU Watermark
If you use a free version of the software, a watermark will be added to you output files. To remove it, you will need to purchase a subscription giving access to all features without limitations.
Beginner Tips:
- Stick with MP4: When in doubt, MP4 format is the best choice for almost all uses, from social media to personal playback.
- For maximum quality: If you want the highest quality for storage, you can choose a less compressed format such as AVI, but be aware that the file size will be very large.
- Check the file size: If you need to send a video via email or message, choose a lower resolution (for example, 720p) to keep the file size lightweight.
From beginner to creator. Keep going!
And there you have it! You’ve successfully navigated AVS4YOU Multimedia Suite in five easy steps. We started by installing the software and getting familiar with the interface, then moved on to hands-on projects from simple video editing to audio enhancement, and creating a slideshow. Finally, you learned how to correctly save and export your work for any purpose.
Remember, every expert was once a beginner. The key is to keep experimenting. Try adding a filter to your next video, or playing with different audio effects. The more you use the tools, the more comfortable and creative you will become. Now that you’ve mastered the basics, we encourage you to dive deeper. Explore the advanced effects, color correction tools, and more. Your creative journey has just begun.
Useful links

In the fast-paced digital world, content creation has become an essential skill for everyone, from small business owners and social media managers to bloggers and educators. High-quality visuals, engaging videos, and clear audio help build a professional image and keep audiences engaged. Yet, creating great content often requires combining multiple programs: one for editing videos, another for audio, and a third for converting files.
AVS4YOU Multimedia Suite stands out from competitors who offer only a single tool for each task. It’s an all-in-one software package designed for easy video and audio editing, screen recording, and file conversion. AVS4YOU provides everything you need to create and polish your content in one place. It handles various tasks such as preparing a YouTube video, a podcast episode, a video slideshow, demos and tutorials, and more.
This blog post will cover the top five ways to use AVS4YOU software for content creation with handy tips.
1. Edit videos for social media like a pro
Short, dynamic videos dominate social media, from Instagram Reels to YouTube Shorts and TikTok clips. With AVS Video Editor, creators easily turn raw footage into polished, shareable videos.
How to use it:
- Trim and merge clips to create smooth sequences.
- Add transitions, filters, and visual effects to produce captivating content.
- Insert captions or subtitles for accessibility and engagement.
- Export directly in formats optimized for social platforms MP4 or MOV.
Example:
A travel blogger is dedicated to compile short clips filmed during a trip. Add upbeat background music, insert text overlays, and share it on Instagram within minutes.
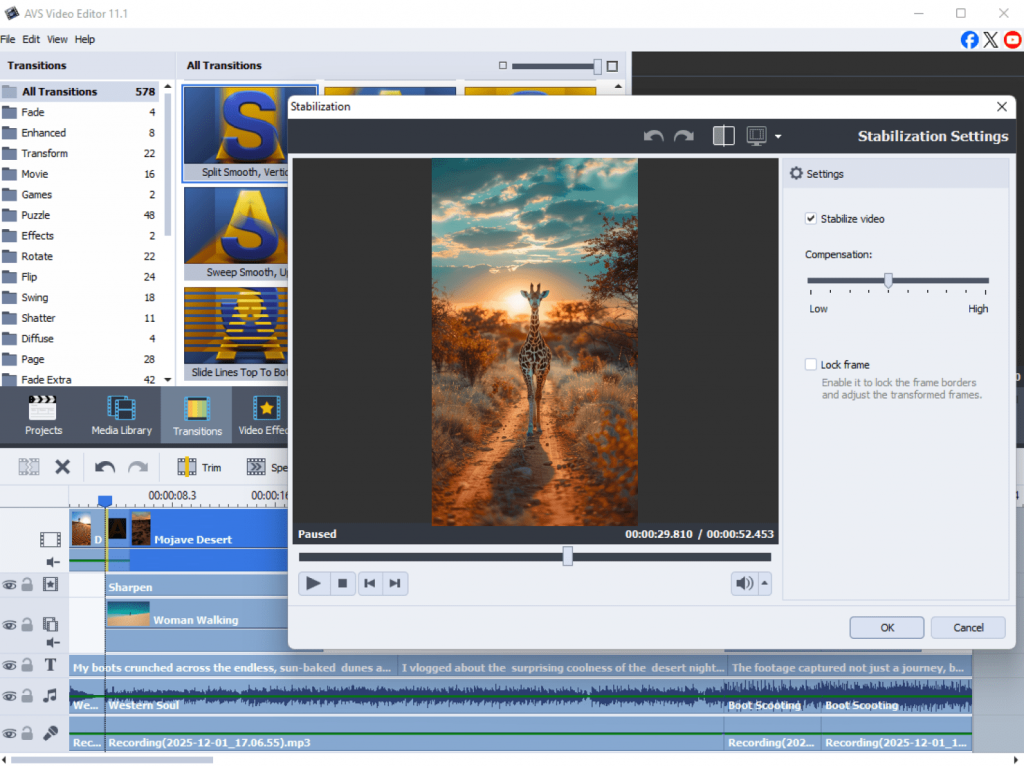
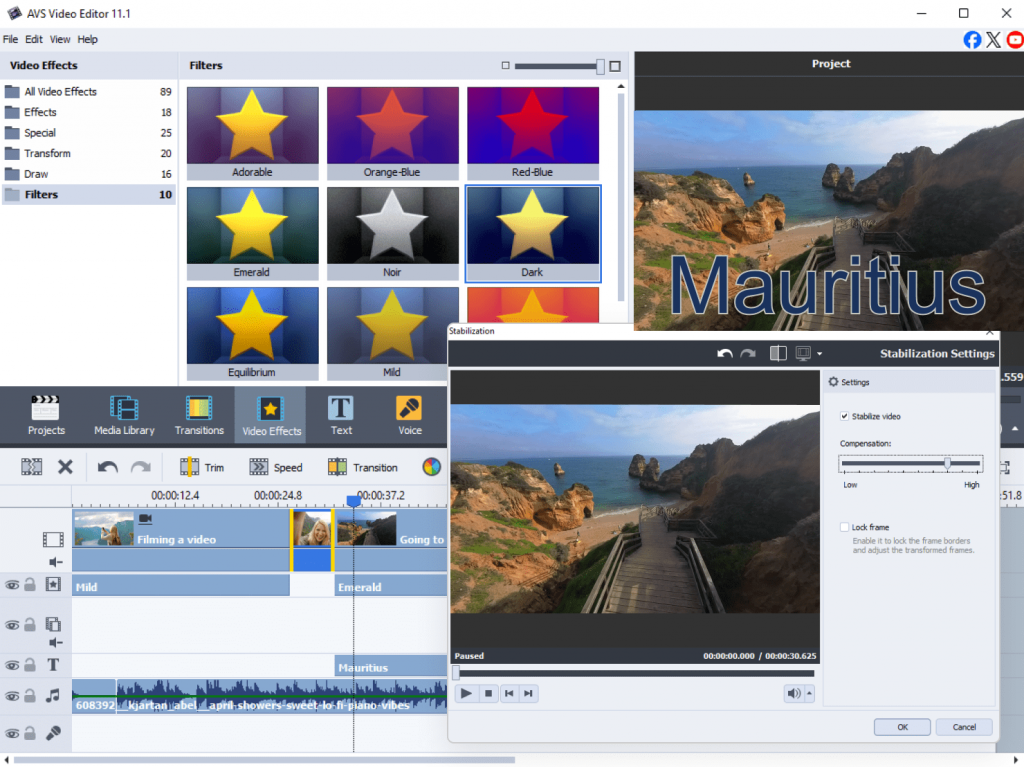
Pro tip: Use Video Stabilization to fix shaky footage and ensure a professional look.
2. Enhance audio and create podcasts
Good sound can make or break a project. For producing podcasts, YouTube voiceovers, or marketing videos, AVS Audio Editor and AVS Audio Converter offer powerful yet intuitive tools.
How to use it:
- Remove background noise and unwanted hiss.
- Apply equalization and compression to improve clarity.
- Mix multiple tracks or record new audio directly.
- Export in popular formats MP3, WAV, or FLAC.
Example:
A podcaster has recorded an interview, but needs to clean up the sound using noise reduction, and balance guest and host voices for a crisp, studio-quality result.
Pro tip: Use Audio Effects Library to add fade-ins, reverb, or echo for a more dynamic sound.
3. Create slideshows and presentations
Visual storytelling is essential for business pitches, social posts, or personal projects. AVS Video Editor lets you combine photos, video clips, and audio into eye-catching presentations in minutes.
How to use it:
- Import images and arrange them in sequence.
- Add animated transitions, music, and text captions.
- Choose from various backgrounds, stickers and patterns.
- Save the final result in MP4 choosing a “video for a slideshow” profile.
Example:
A small business team creates a slideshow showcasing products, match it with background music, and use it for a social media ad or trade show presentation.
Pro tip: Keep each slide under 5 seconds for better audience engagement.
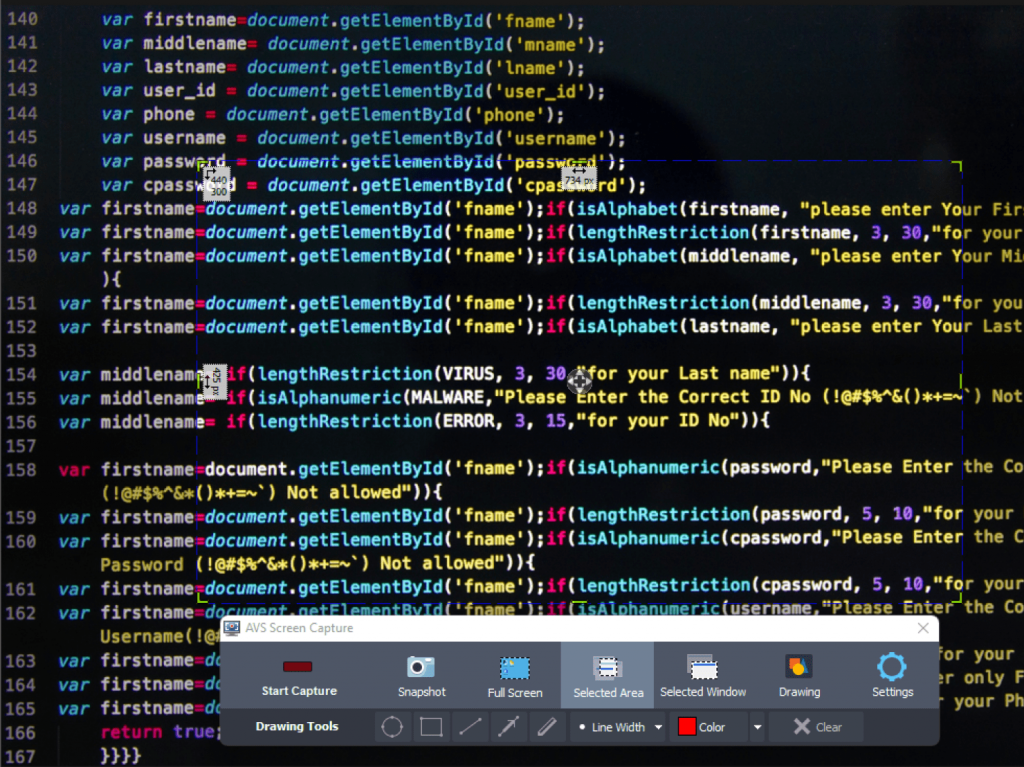
4. Record tutorials and demos
Screen recording is a must-have for making educational videos, product demos, or internal training materials. AVS Screen Recorder, implemented in AVS Video Editor, makes it easy to capture desktop screen, webcam, or both simultaneously.
How to use it:
- Record full screen or a selected area.
- Capture system audio and microphone input together.
- Add cursor highlights and on-screen annotations.
- Save in HD formats ready for upload to YouTube or other platforms.
Example:
A software trainer will record a step-by-step tutorial with audio, then edit the recording adding titles and transitions.
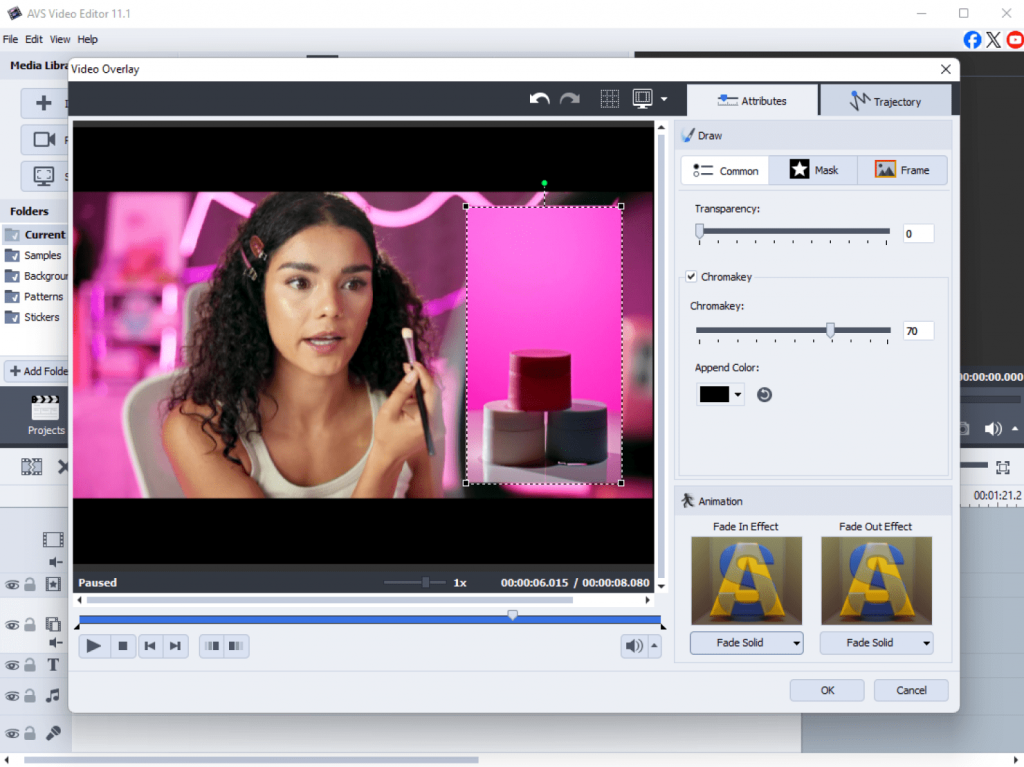
Pro tip: Use picture-in-picture mode to show both your screen and your face for producing more interactive tutorials.
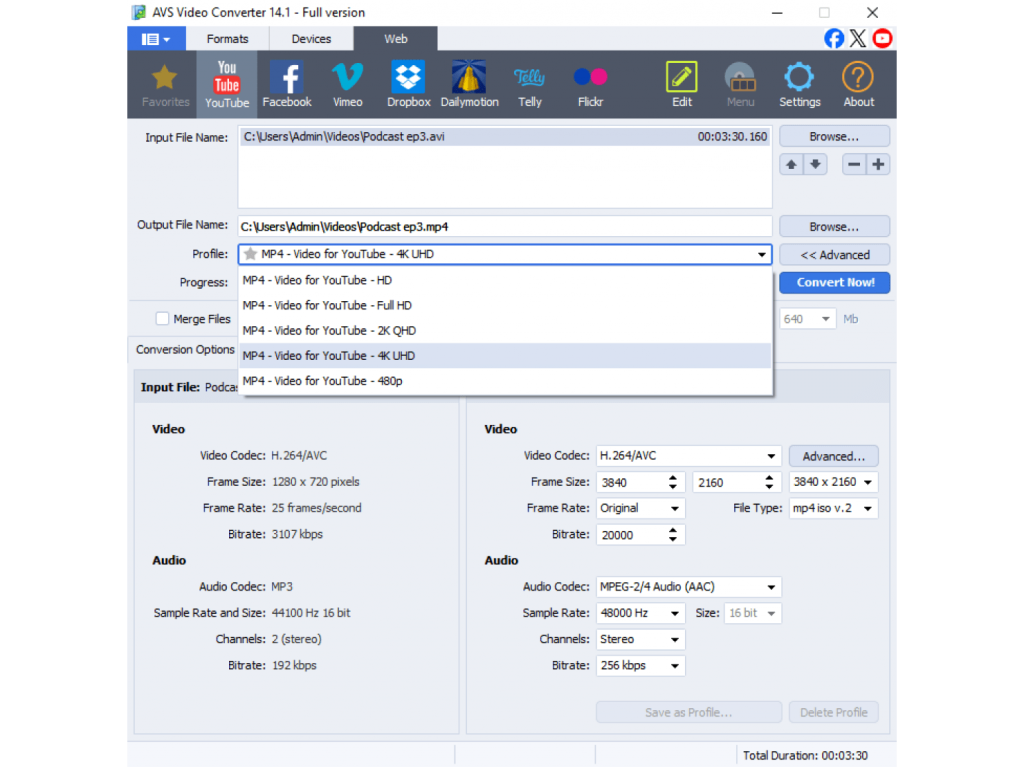
5. Convert and optimize media files
File compatibility issues may slow down even the most creative projects. With AVS Video Converter and AVS Audio Converter, you are empowered to make your files compatible for playback on any device or platform.
How to use it:
- Convert between all key formats: MP4, AVI, MOV, WMV, MP3, FLAC, etc.
- Use ready-made presets for smartphones, tablets, and social media platforms.
- Compress files without losing quality to save storage space.
- Convert multiple files at once using a batch mode.
Example:
A YouTuber converts large raw footage into smaller, high-quality MP4 files for upload or sharing with collaborators.
Pro tip: Choose device-specific presets (for instance, “For YouTube” or “For iPhone”) to get optimal quality and playback performance.
A Powerful toolkit at your fingertips
Why juggle multiple programs? With AVS4YOU Multimedia Suite, you have everything you need to craft compelling content from start to finish. Edit videos, enhance audio, create slideshows, record your screen, and convert files seamlessly within a single, cohesive toolkit.
Designed for creators of all kinds, it combines powerful features with an easy-to-use interface, saving you time and elevating your work.
Take your content to the next level with AVS4YOU.
Useful links

Every project starts with an idea that, with the right tools, can turn into a professional multimedia project. However, the journey from concept to final result can be rocky. You start with boundless inspiration, but soon face the realities of disorganized notes, messy drafts, and the technical problems of production. This often leads to “a creative block” where brilliant concepts get stuck in the planning phase, never to see the light of day.
So, how can you overcome these issues without a multitude of disconnected apps? What about using ONLYOFFICE and AVS4YOU software together? The two platforms perfectly complement each other: ONLYOFFICE helps organize ideas, write scripts, and plan projects, while AVS4YOU transforms those plans into high-quality videos, podcasts, and slideshows. Together, they transform ideas into stunning projects easier and faster than ever before. This article will offer you some real use cases how to combine the apps efficiently and implement them in your workflow.
1. Brainstorming and planning with ONLYOFFICE Editors
Every project starts with planning. You need to shape your idea, define your message, calculate costs, and define the end goal. ONLYOFFICE provides all the tools to do that in one place.
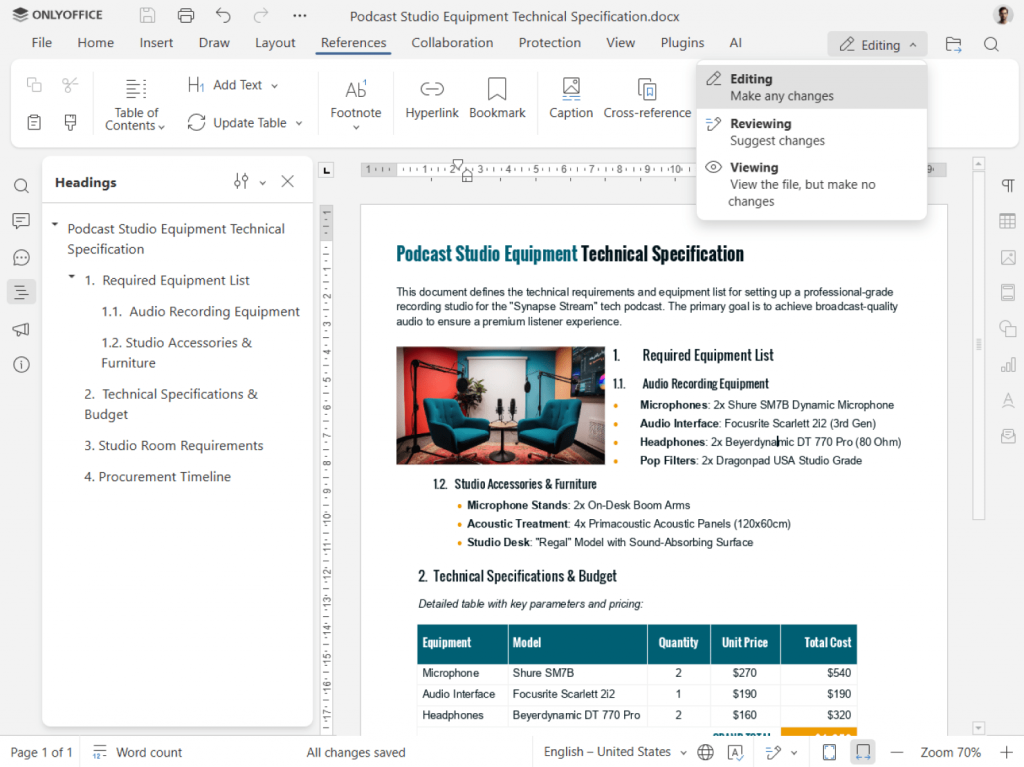
With ONLYOFFICE Docs, you can:
- Brainstorm ideas in real time with the Document Editor, creating outlines, drafts, and scripts.
- Manage production details using Spreadsheets for scheduling, budgeting, or content calendars.
- Design visual storyboards or slide decks in Presentations to visualize project flow.
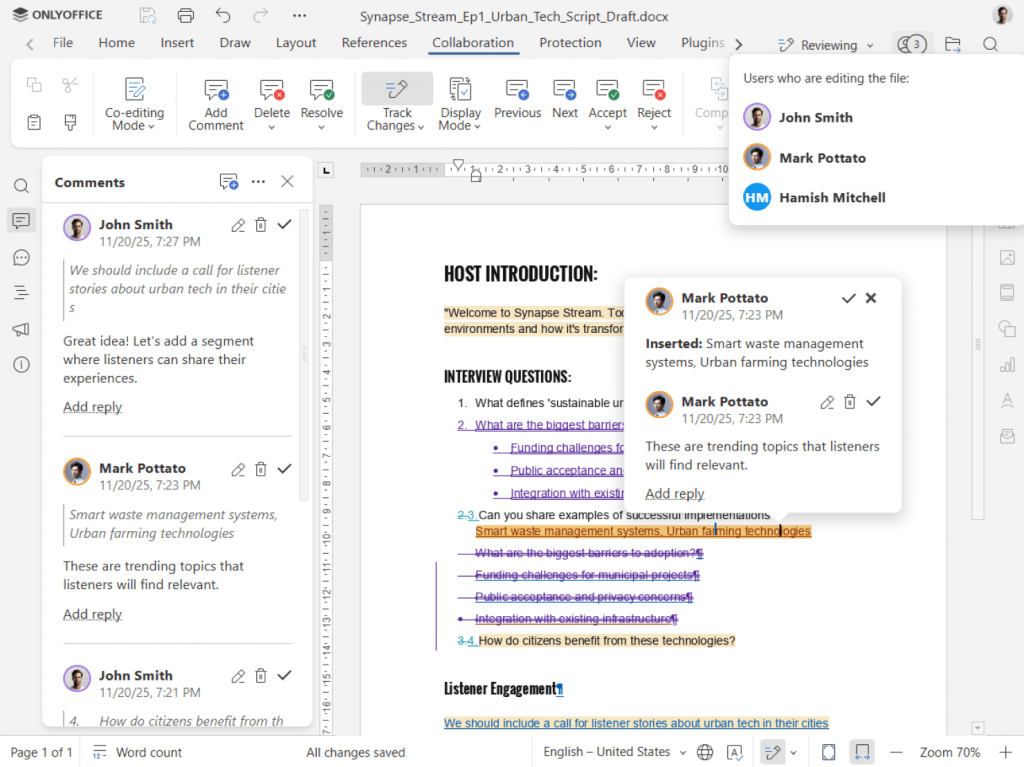
- Collaborate seamlessly with teammates by co-editing documents, tracking changes, and leaving comments.*
- Use AI writing assistants to improve clarity, summarize research, or auto-generate initial drafts.
*For working collaboratively on documents with your team, you have to connect ONLYOFFICE Desktop Editors to your favourite cloud (Nextcloud, ownCloud, Liferay, Moodle, Seafile) or create a free account of ONLYOFFICE DocSpace.
Imagine you’re working on a YouTube series or a brand explainer video. In ONLYOFFICE, your team can draft the script, share ideas in comments, plan the shot list, and create the voiceover text. Every update appears instantly, so everyone stays on the same page without endless file exchanges.
ONLYOFFICE is more than just a document editor. It is a creative document hub that streamlines your workflow effectively. Its collaborative features improve communication between team members and save significant time in developing and executing actionable work plans.
Example planning workflow in ONLYOFFICE:
- Brainstorm ideas and save them in a shared document.
- Create a script using AI writing assistants for improving structure and tone, checking spelling, and correcting grammar mistakes.
- Make a list of all key dates and deadlines in a spreadsheet.
- Develop presentation slides for storyboarding or pitching.
By the end of this stage in ONLYOFFICE, you would have a detailed roadmap ready for production.
2. Create studio-quality audio/video content with AVS4YOU
Once the planning is done, it’s time to move from concept to creation. That’s when AVS4YOU steps in. It empowers users to make educational videos, corporate promos, tutorials, or podcasts with ease.
Here’s what you can do with it:
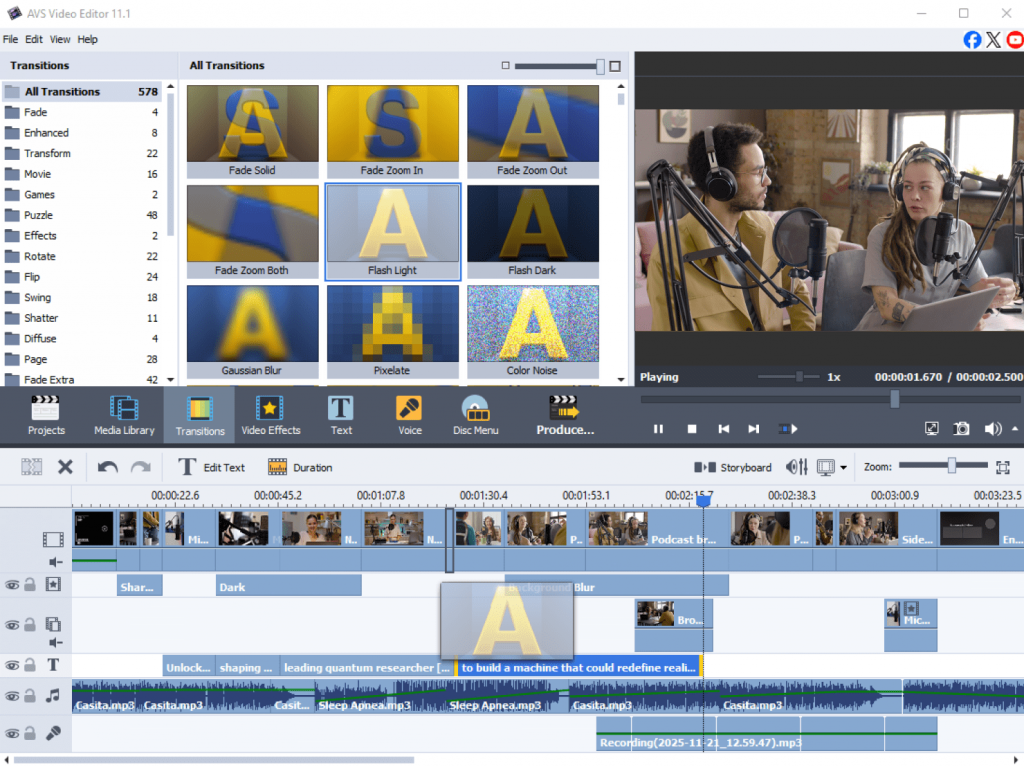
- AVS Video Editor: Cut, trim, and enhance footage. Capture on-screen activity in high resolution for demos, software tutorials, and training videos. Add transitions, text overlays, color corrections, and stylish effects.
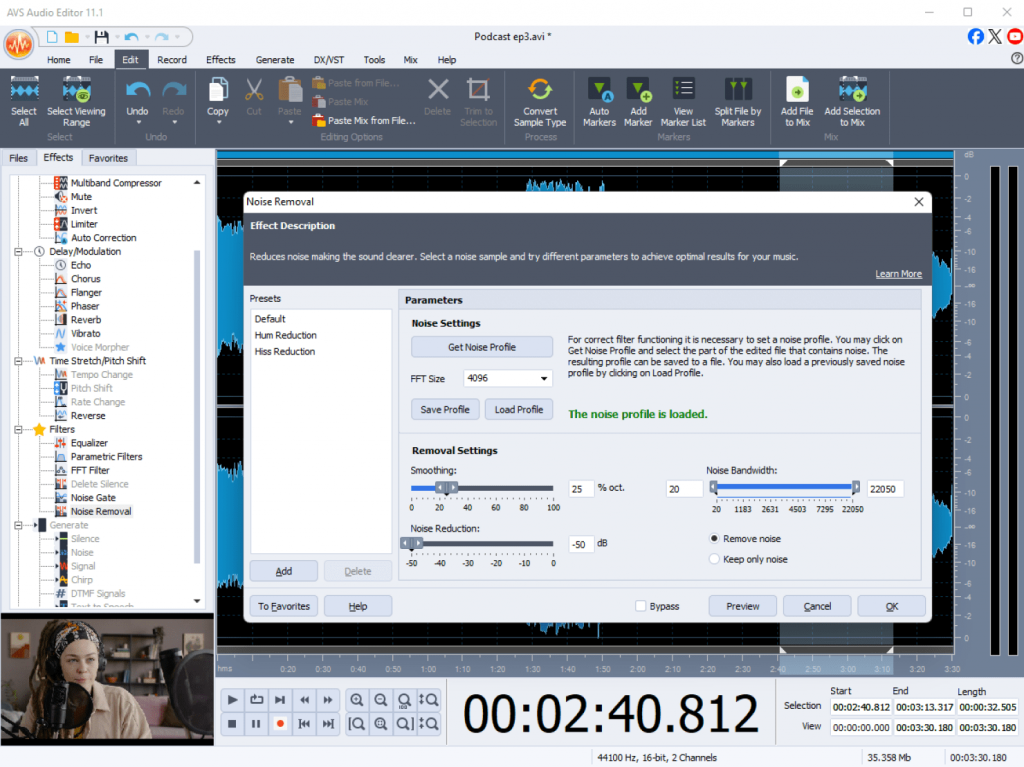
- AVS Audio Editor: Improve audio quality, remove background noise, and balance sound levels, create audio mixes and record audio from various inputs.
- AVS Video Converter: Export your projects in any popular format and resolution for web, mobile, or TV.
AVS4YOU is built for creators who want to achieve professional results without a studio or advanced editing skills. The interface is intuitive, the workflow is fast, and the output looks impressive.
Real-world scenarios
- YouTuber: Plan a video script in ONLYOFFICE, then use AVS Video Editor to capture footage and edit it, and improve sound in AVS Audio Editor.
- Podcaster: Write the episode outline and voiceover script in ONLYOFFICE, record audio, then use AVS Audio Editor to polish the sound and mix in background music.
- Marketing team: Build a campaign plan in ONLYOFFICE, film promotional clips, and merge everything into a cohesive brand video using AVS Video Editor.
AVS4YOU suite stands out for its wide format compatibility and professional output quality. You can produce videos for YouTube, Instagram, or corporate presentations hassle-free without large investments in equipment and software. Freelancers, educators, marketers love AVS4YOU programs for their versatility and simplicity.
3. See it in action: From doc to final cut
Let’s look at a complete workflow example.
A small design agency wants to create a tutorial on “How to Present Visual Ideas to Clients.” They start in ONLYOFFICE:
- The copywriter drafts the script in a shared document.
- The designer adds storyboards as embedded images.
- The manager uses spreadsheets to track filming dates and asset deadlines.
Once everything is approved, the team switches to AVS4YOU suite. They record the tutorial, combine clips in AVS Video Editor, and refine audio recordings with AVS Audio Editor.
After adding final touches such as transitions, subtitles, and a music track, they export the project in HD and upload it on YouTube and social media.
What started as a rough concept on paper now looks as a smooth video project, fully aligned with the team’s vision. The process was faster, communication clearer, and the final result more professional, all thanks to the smart use of ONLYOFFICE and AVS4YOU tools.
4. Why this combination works
ONLYOFFICE and AVS4YOU applications complement each other allowing you to turn ideas into stylish videos. This software combination helps you save time, increase productivity, and achieve high-quality results effortlessly.
By combining them, you unlock key advantages:
- Seamless transition: Move effortlessly from writing and planning in ONLYOFFICE to editing and producing in AVS4YOU.
- Unlocked creativity: Minimize technical distractions and concentrate on what matters, focus your energy on storytelling and creative impact.
- Professional polish: Leverage the strengths of both suites to produce captivating content for your audiences.
Wrapping up
Creativity thrives when ideas flow freely from concept to completion. ONLYOFFICE offers you smart AI-driven tools for shaping ideas, document editing, and collaboration, better communication between team members. AVS4YOU empowers you to create professional-grade audio files and videos bringing your ideas to life.
Together, they facilitate content creation so that every creator, marketer, or educator can craft engaging content regardless of their technical background.
Start your next multimedia project today:
- Plan and write with ONLYOFFICE
- Edit and produce with AVS4YOU Multimedia Suite
Create with confidence, boost productivity, and let your work speak for itself.

Freelancing gives you independence, but also the responsibility to handle every part of your business. You’re the marketer, designer, editor, accountant, and project manager all in one. To stay efficient, freelancers rely on the right mix of digital tools that help them create, edit, and collaborate seamlessly.
From editing videos and converting files to recording audio and managing contracts, we’ve rounded up the best freelancer apps for every task. Each category includes three practical tools, with AVS4YOU and ONLYOFFICE among the most versatile solutions available today.
Video capture
Video capture software lets freelancers record tutorials, demos, client walkthroughs, or promotional content. Whether you need to share your screen, record a webinar, or create a training course, these tools save time and deliver professional-grade content.
1. AVS Video Editor (AVS4YOU)
A lightweight, user-friendly editor with built-in screen recorder that captures desktop actions, webcam feeds, and voiceovers in HD.

Pros:
- Record your screen and webcam simultaneously.
- Customizable area selection and frame rate.
- Option to record with or without audio.
- Drawing tools to highlight key elements.
Cons:
- Available only for Windows.
Best for: Freelancers creating tutorials, app demos, and training materials effortlessly.
2. OBS Studio
A free, open-source app popular among streamers and educators for screen recording and live broadcasting.
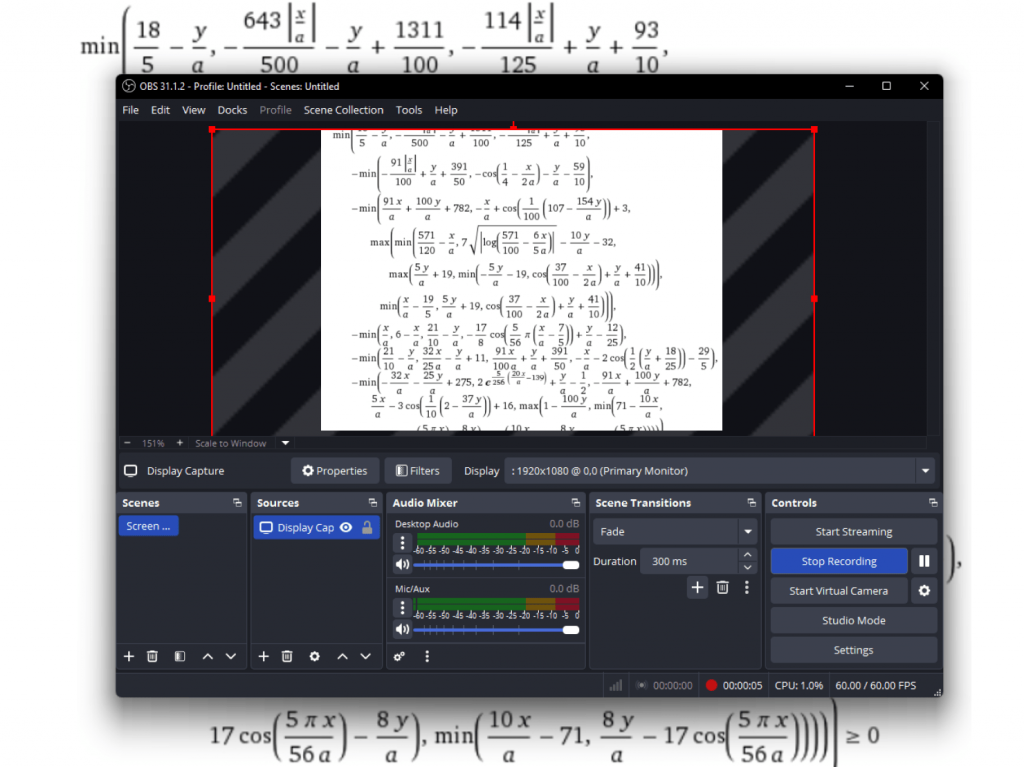
Pros:
- Completely free and customizable.
- Works on Windows, macOS, and Linux.
- Supports multi-source mixing (screen, webcam, audio).
Cons:
- Complex configuration for beginners.
- No built-in video editor.
Best for: Freelancers making webinars, online courses, or live sessions who need advanced controls.
3. Camtasia
A professional-grade screen recorder with integrated video editing and visual effects.
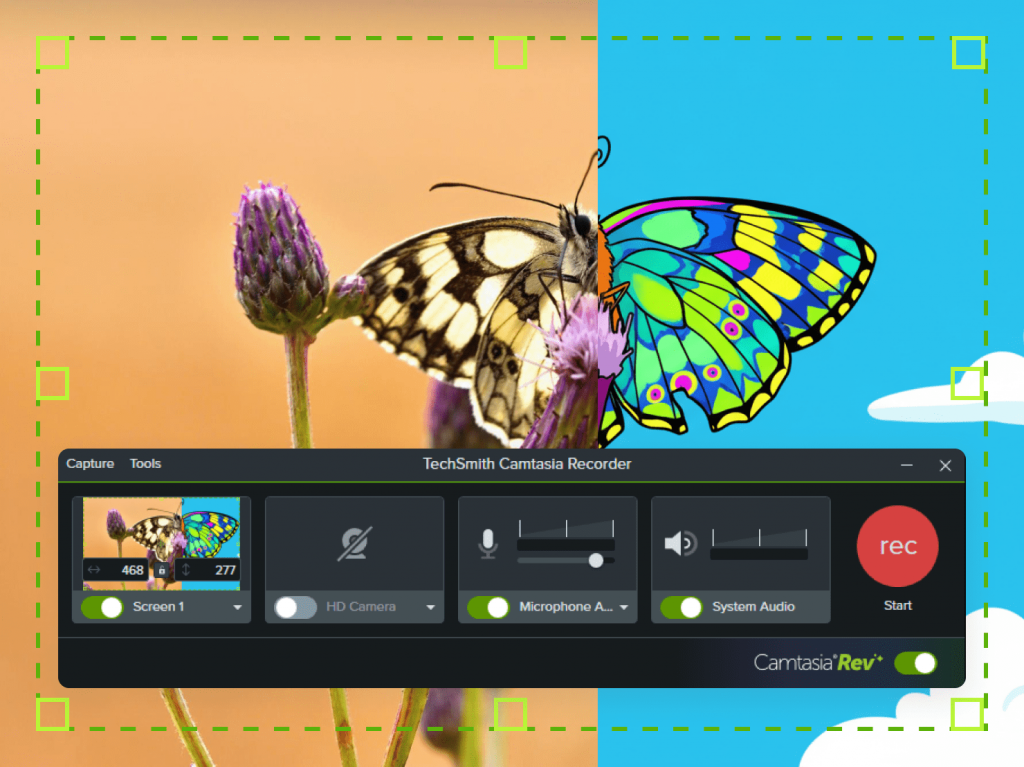
Pros:
- Simple drag-and-drop editing interface.
- Great library of transitions, annotations, and cursor effects.
- Instant export to multiple platforms.
Cons:
- Relatively expensive.
- Requires good system performance.
Best for: Coaches, educators, and consultants creating high-quality training or marketing videos.
Generate images with AI
AI image generation tools help freelancers speed up visual creation from social graphics and mockups to concept art and ad materials.
1. Runway ML
A creative AI platform offering text-to-image, video editing, and motion design powered by machine learning.
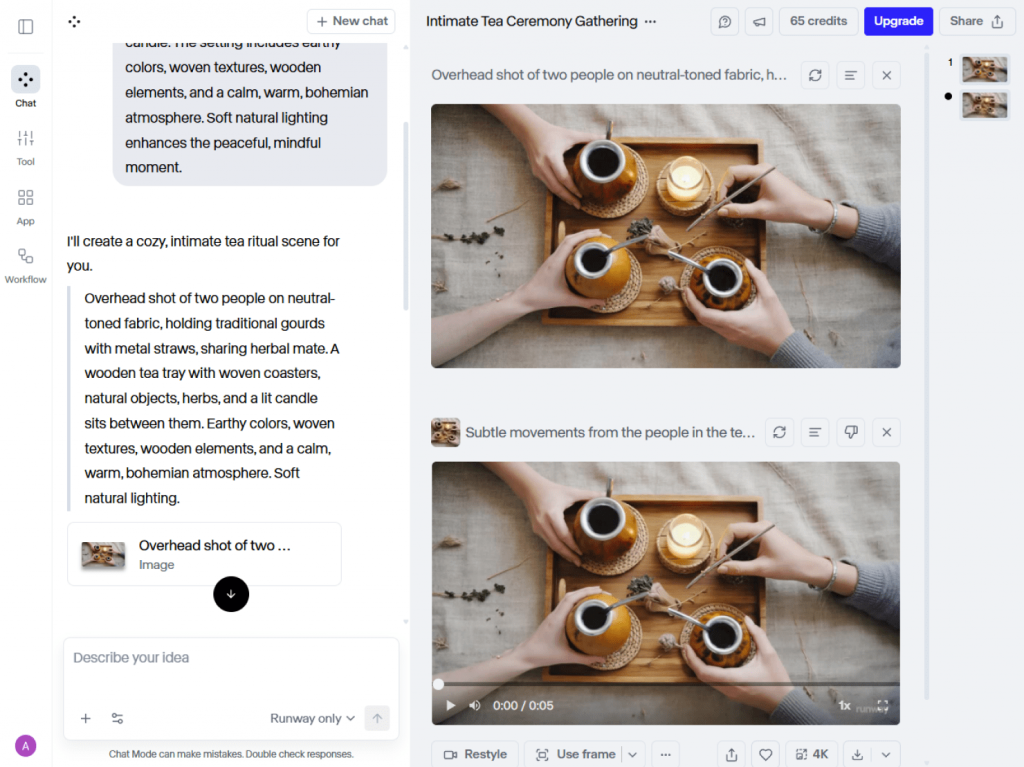
Pros:
- Intuitive interface with fast rendering.
- Includes AI background removal and video tools.
- Cloud-based, no need for powerful hardware.
Cons:
- Requires stable internet connection.
- Subscription-based pricing.
Best for: Designers, marketers, and video freelancers who use AI to enhance productivity.
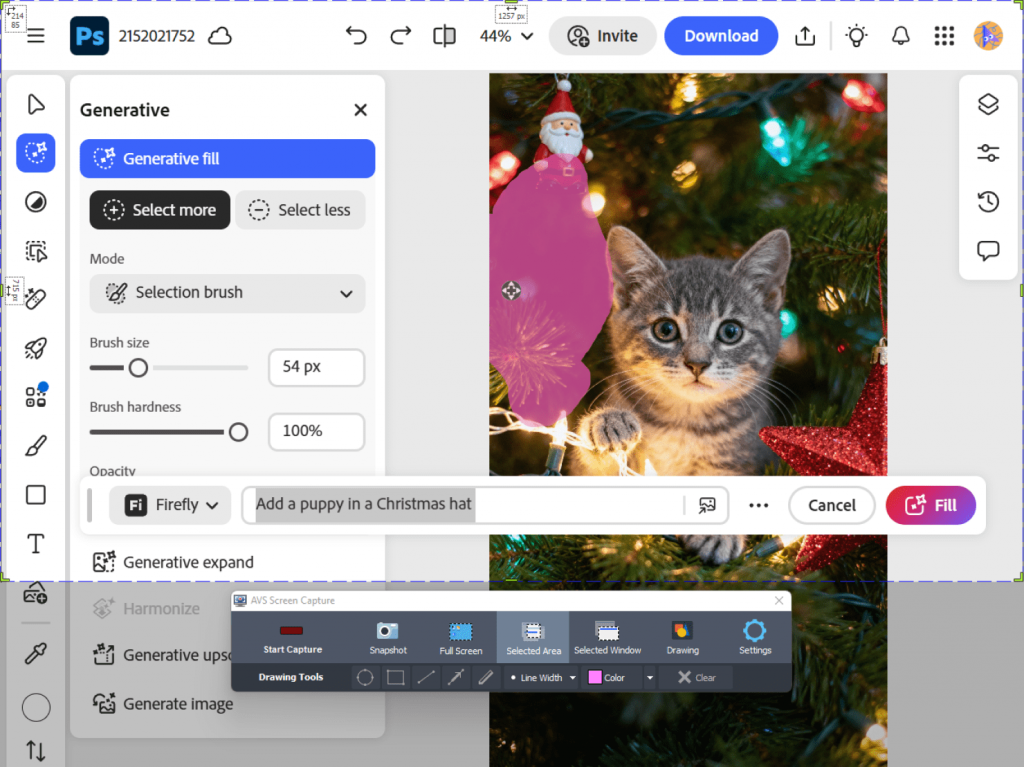
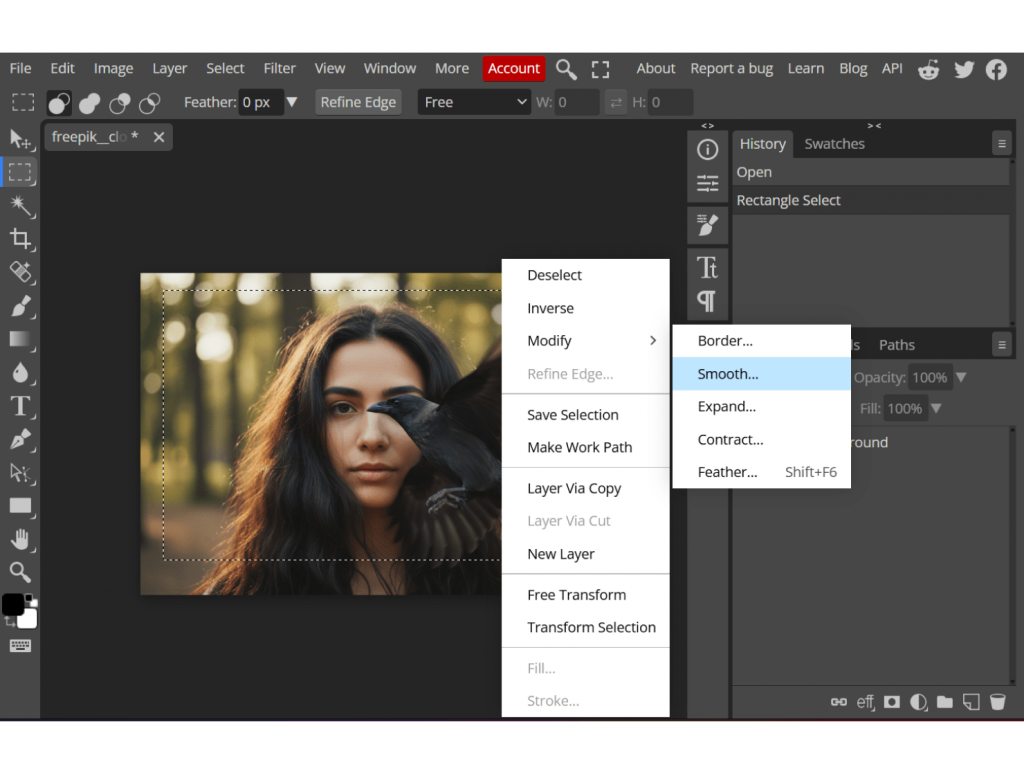
2. Adobe Firefly
With Adobe’s AI art generator integrated into Photoshop and Illustrator, users can create images simply by using prompts.
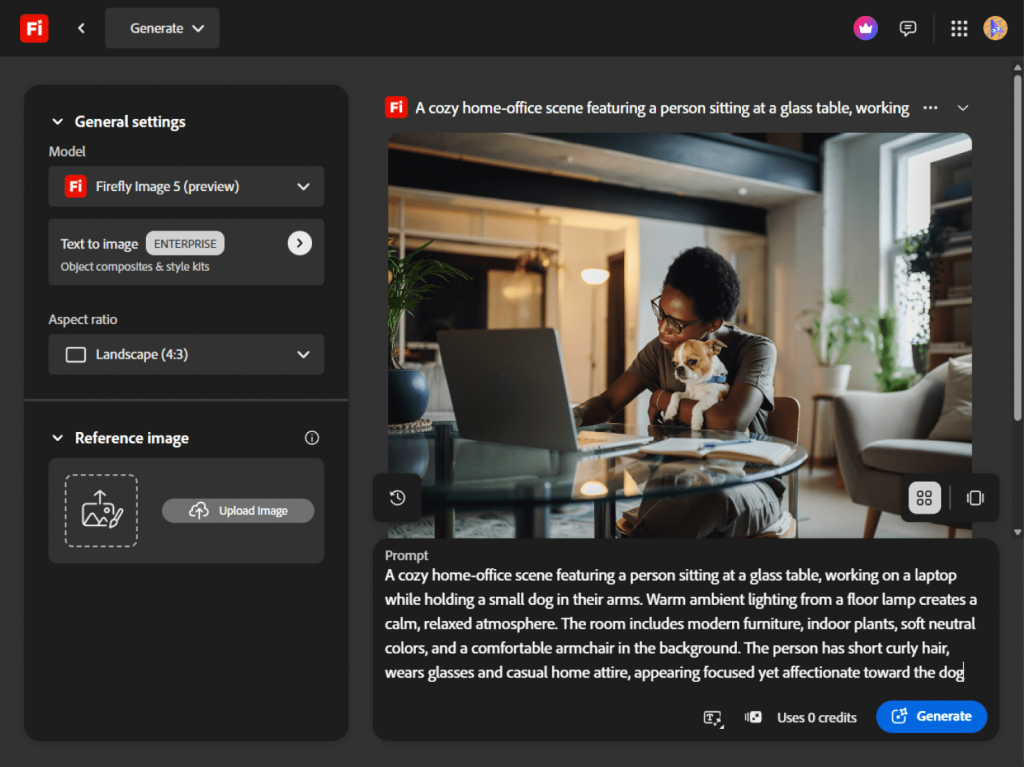
Pros:
- Produces splendid, realistic images.
- Seamless connection to Adobe Creative Cloud.
- Suitable for business use.
Cons:
- Available only to Adobe users.
- Limited free access.
Best for: Experienced creators who already use Adobe tools for brand or design work.
3. Canva AI Image Generator
Canva offers a built-in AI tool for creating images directly within its platform.
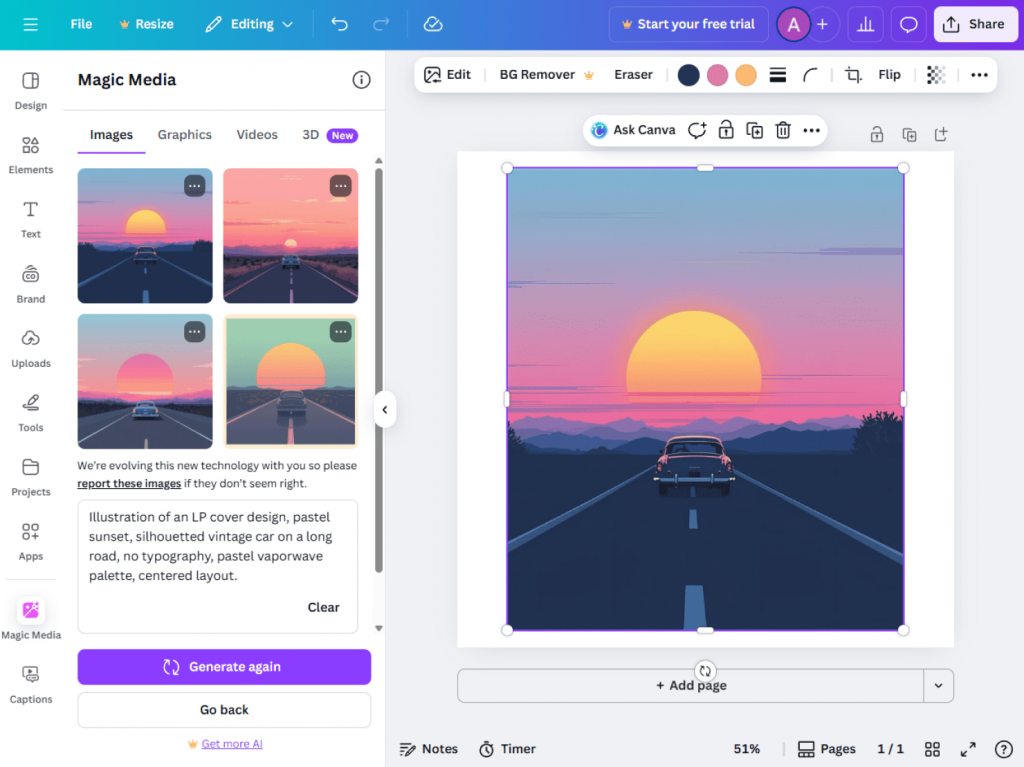
Pros:
- Easy to use for non-designers.
- Speedy results for presentations and posts.
- Works within Canva’s familiar templates.
Cons:
- Less control over detail and style.
- No watermark in premium plans only.
Best for: Freelancers crafting visual content for marketing campaigns and social media.
Photo editing
From product photos to social media banners, top-grade visuals create a lasting first impression. Powerful photo editing tools help freelancers enhance images instantly while keeping a professional look.
1. Adobe Photoshop
The gold standard for professional image editing and compositing.
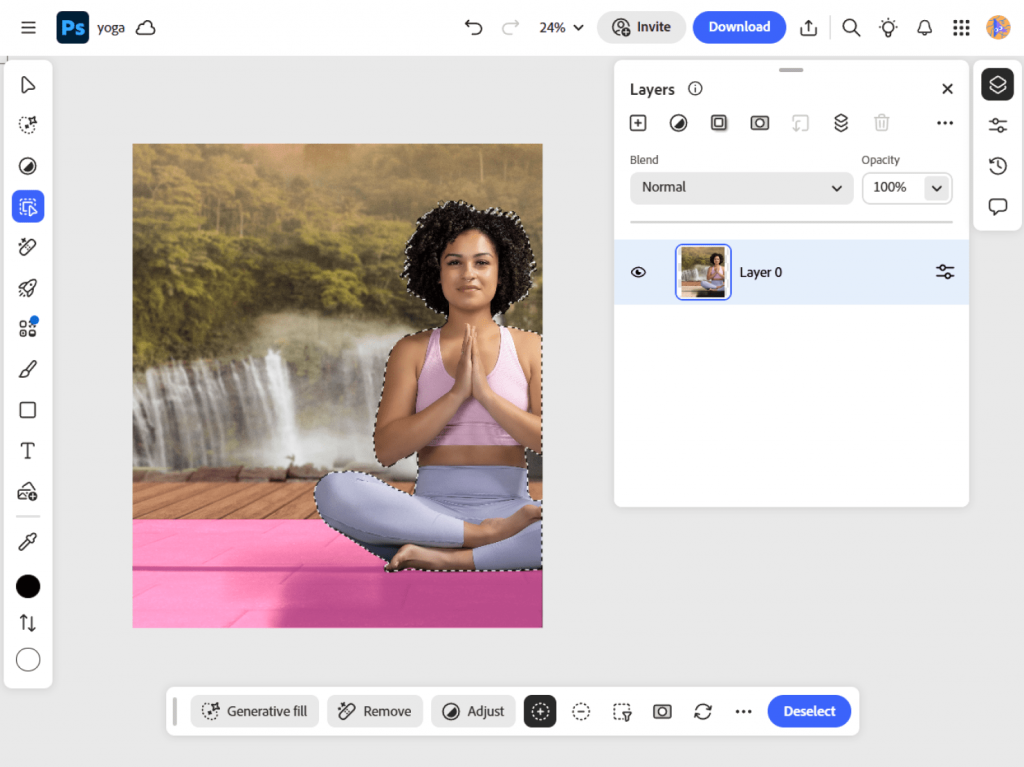
Pros:
- Extensive toolset for retouching and design.
- Supports complex layering and masking.
- Integration with Adobe Creative Cloud.
Cons:
- Expensive monthly plan.
- Requires strong hardware and learning time.
Best for: Professional photographers, designers, and agencies who want unlimited editing power and customization.
2. Canva
An intuitive online design platform with drag-and-drop editing, numerous templates, and integrated photo editing tools.
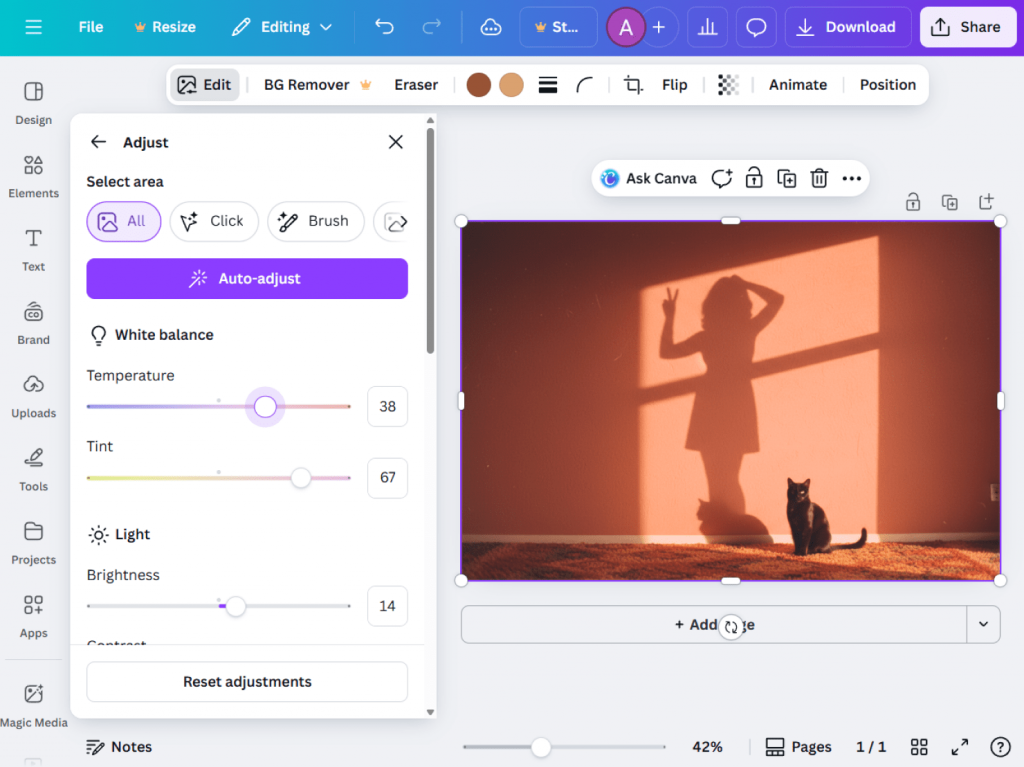
Pros:
- Extremely easy to learn and use
- Vast template library
- Collaborative features
- Free version available.
Cons:
- Limited true photo editing capabilities
- Subscription needed for premium features
- Less creative control than professional editors.
Best for : Social media managers, marketers, and non-designers who need to create professional creative materials quickly.
3. Photopea
A free online photo editor compatible with Photoshop formats (PSD, XCF, Sketch).
Pros:
- Browser-based and accessible anywhere.
- No installation required.
- Works with multiple file types.
Cons:
- Slower on large files.
- Contains in-app ads.
Best for: Freelancers needing quick edits or mockups on the go.
Audio recording and editing
Clear, balanced audio is essential for professional videos, podcasts, and voiceovers. It lets freelancers deliver content that impresses clients, reduces editing headaches, and supports a professional workflow.
1. AVS Audio Editor (AVS4YOU)
A powerful audio editing tool for trimming, mixing, and enhancing recordings.
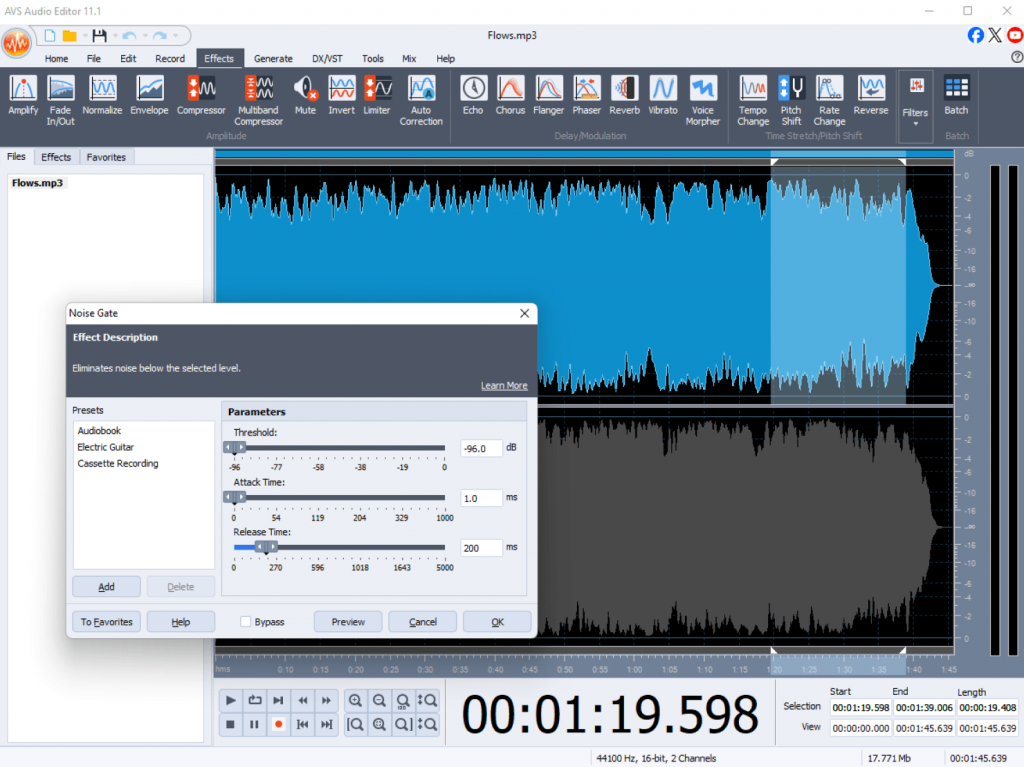
Pros:
- Simple waveform interface.
- Noise reduction, equalizer, and a rich effects library.
- Supports all key audio formats.
Cons:
- Windows-only.
- Basic multitrack workflow
Best for: Voiceover artists, podcasters, and freelancers looking to polish audio swiftly and effortlessly.
2. Audacity
A popular free, open-source DAW for recording and editing audio.
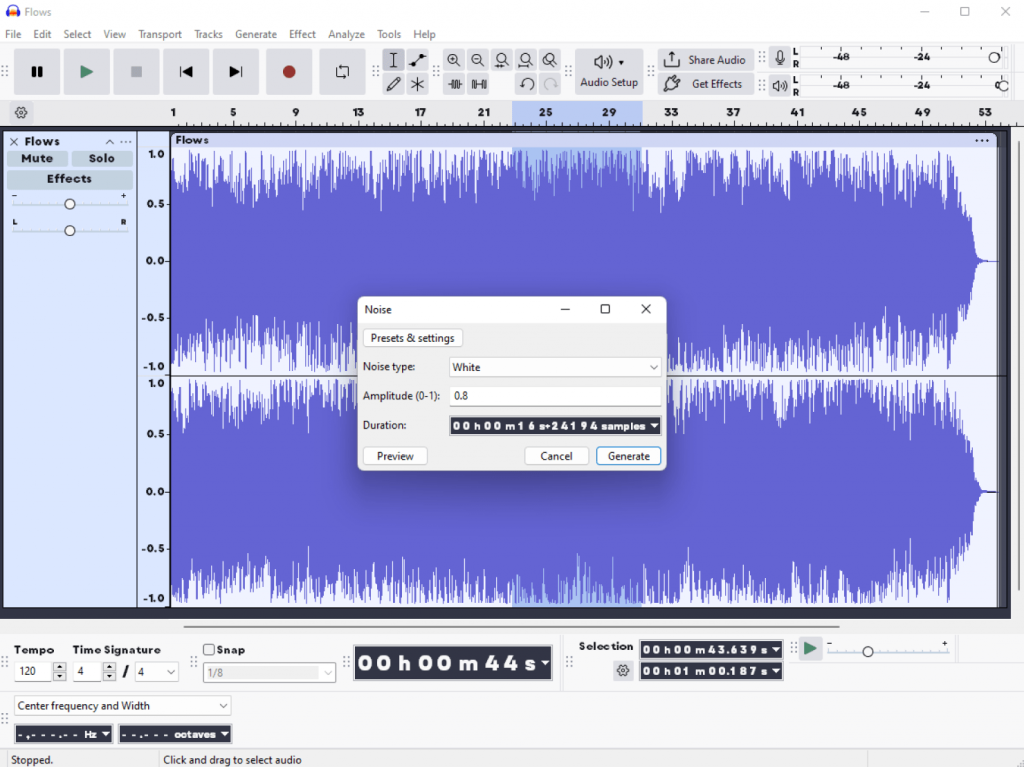
Pros:
- Multitrack support and plug-in ecosystem.
- Free and lightweight.
- Works across all major OS.
Cons:
- Outdated interface.
- No built-in effects preview.
Best for: Beginners or small-scale producers seeking a cost-free solution.
3. Adobe Audition
A professional DAW (Digital Audio Workstation) with high-end sound repair and mixing tools.
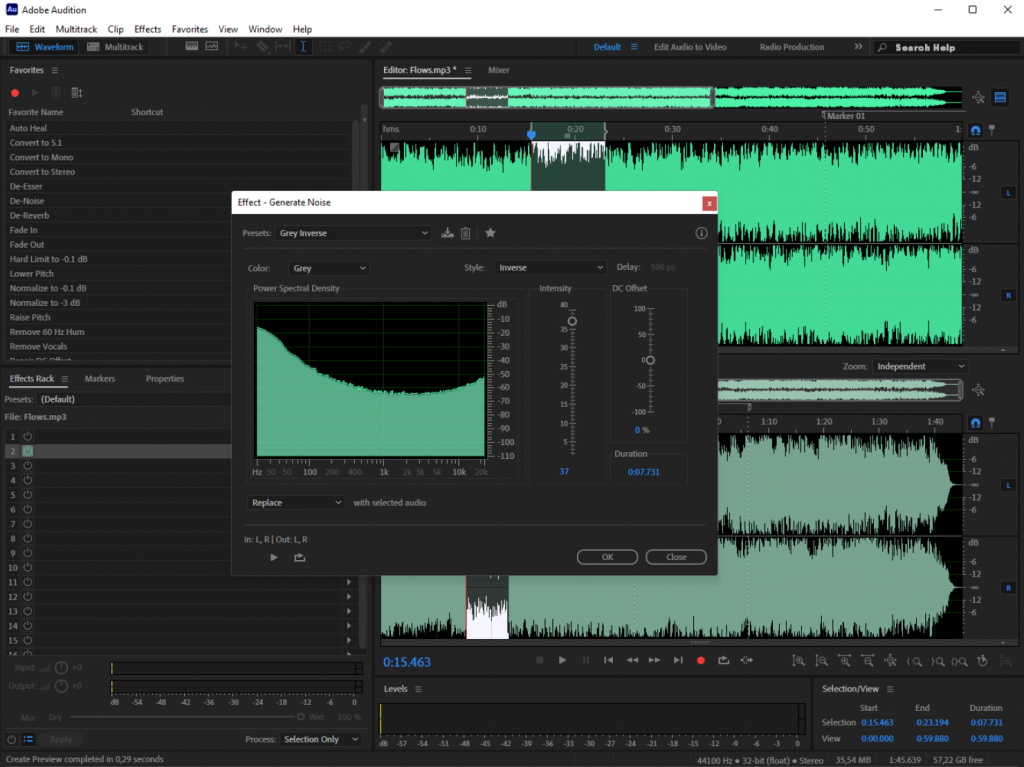
Pros:
- Advanced noise reduction and restoration.
- Real-time editing and mixing.
- Integrates with Premiere Pro.
Cons:
- Steep learning curve.
- Subscription cost.
Best for: Video editors, sound designers, and professional podcasters who require flawless post-production and mastering
Document editing and collaboration
Freelancers use document tools every day for proposals, contracts, and invoices. Collaborative features make it simple to work with clients or team members, reducing errors and speeding up tasks.
1. ONLYOFFICE
A secure office suite with word processing, spreadsheets, and presentations plus real-time collaboration. It is powered with AI features for writing, summarization, translation, correcting spelling and grammar mistakes, and more.
Pros:
- All-in-one platform for document creation and editing.
- Real-time co-authoring and version control.
- Strong data protection
- Seamless compatibility with Microsoft Office formats (.docx, .xlsx, .pptx)
- Cloud and desktop versions available.
Cons:
- Some advanced formatting may require setup.
- Requires stable internet connection for full collaboration features.
- Some advanced tools are limited to paid plans.
Best for: Freelancers collaborating with clients or small teams across multiple projects.
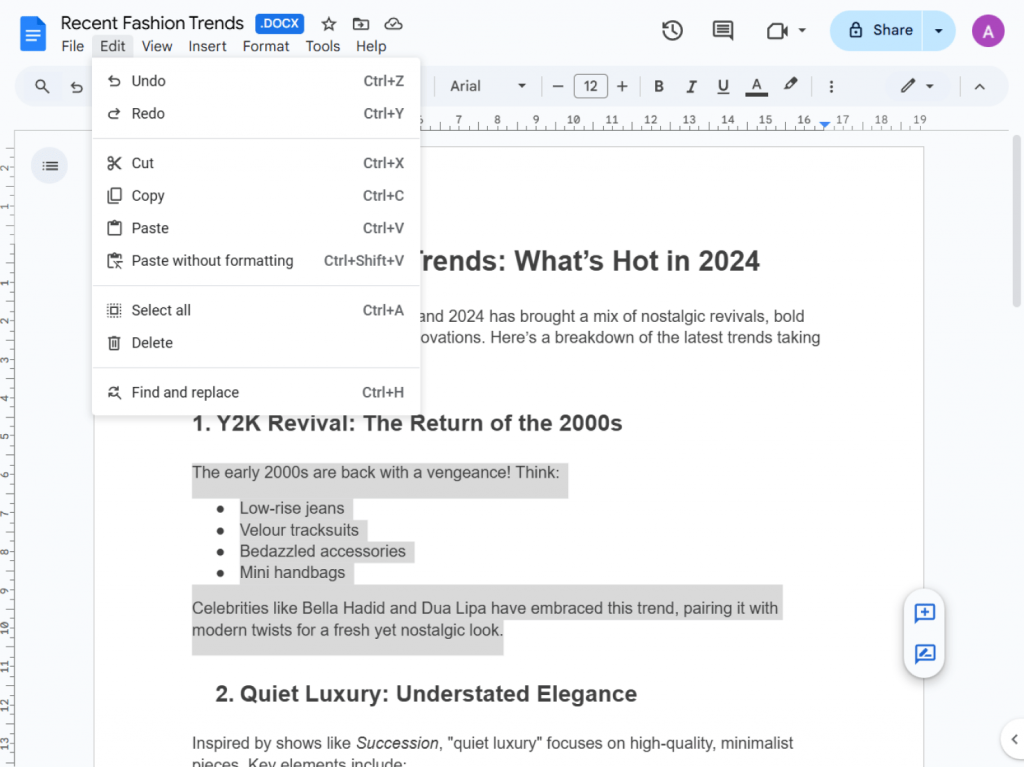
2. Google Docs
A free online document editor from Google Workspace.
Pros:
- Works on any browser or device.
- Free with a Google account.
- Real-time comments, suggestions, and version history.
- Automatic cloud storage and backup.
- Easy sharing and permission control.
Cons:
- Basic layout and formatting tools compared to desktop editors.
- Internet connection needed for real-time editing.
- Limited advanced document design or publishing features.
- Potential privacy concerns when storing sensitive information on Google’s cloud.
- Offline mode can be unreliable at times.
Best for: Remote freelancers working with clients on collaboration platforms.
3. Microsoft Word (Online)
Cloud version of the classic Microsoft Word with integrated OneDrive support.
Pros:
- Familiar interface and formatting power.
- Real-time co-authoring and collaboration.
- Automatic cloud backup via OneDrive.
- Integration with other Microsoft 365 apps (Excel, PowerPoint, Teams, Outlook).
- Strong reliability and performance.
.
Cons:
- Requires Microsoft 365 subscription for full features.
- Some advanced desktop functions (macros, add-ins, mail merge) are missing.
- Can be slower or less responsive with large documents.
- Privacy concerns for users storing sensitive data on Microsoft’s cloud.
Best for: Professionals who rely on Microsoft Office compatibility.
Video editing and creation
Video content allows freelancers to promote services, present portfolios, and engage audiences. With the right editor, they can create compelling videos without spending hours on editing.
1. AVS Video Editor (AVS4YOU)
A versatile video editor that allows to record, edit, and enhance footage.
Pros:
- Drag-and-drop timeline editing.
- Built-in effects, transitions, and titles.
- Convenient export for social platforms.
Cons:
- Windows-only.
- Lacks AI-powered features..
Best for: Freelancers creating marketing videos, tutorials, or vlogs hassle-free.
2. DaVinci Resolve
A free, professional-grade video editor combining editing, color correction, and sound design.
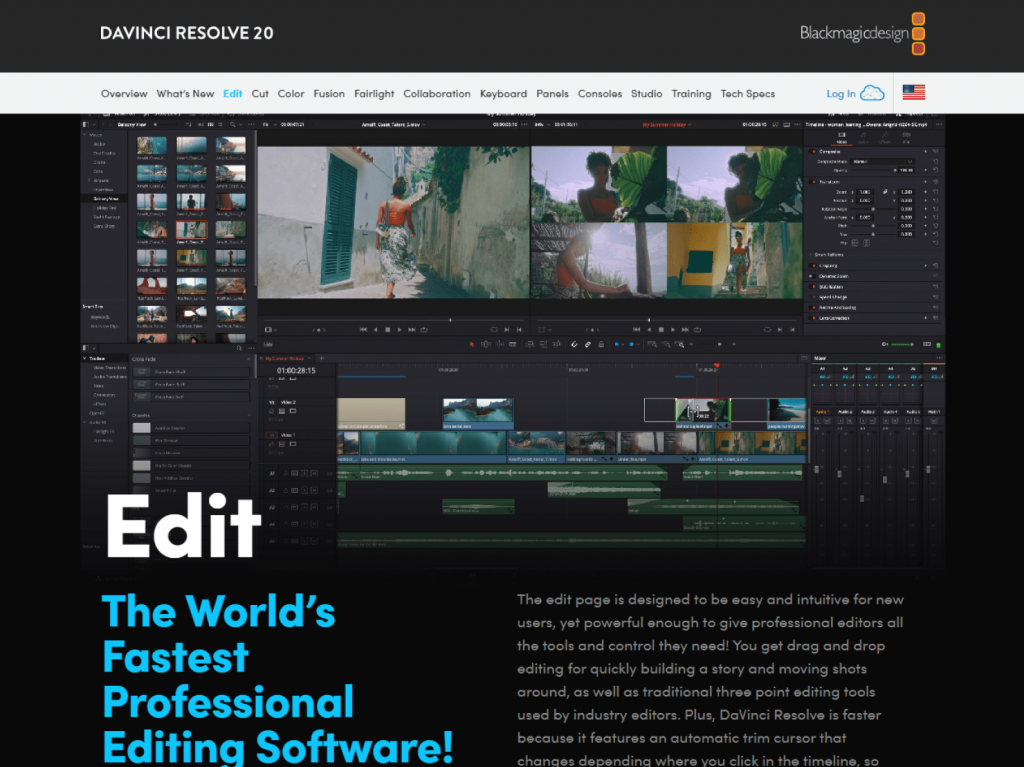
Pros:
- Industry-level color grading.
- Free version with extensive features.
Cons:
- Steep learning curve.
- Demands powerful hardware.
Best for: Experienced editors and filmmakers who aim to craft cinematic videos.
3. CapCut
A lightweight video editor available for desktop and mobile.
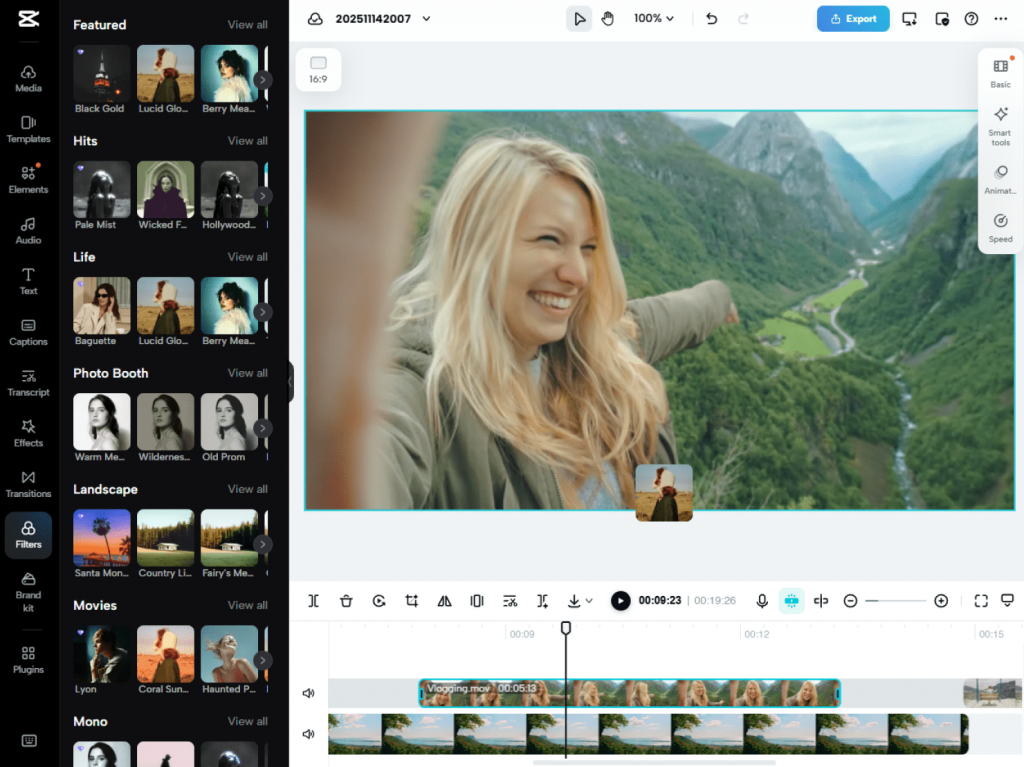
Pros:
- Easy templates and filters.
- Great for vertical and short-form videos.
Cons:
- Fewer advanced timeline controls.
Best for: Social media managers, influencers, and small business freelancers.
Media Converters
Freelancers often need to upload or share files in specific formats. Media converters easily change video, audio, and image formats for various platforms and clients.
1. AVS Video Converter (AVS4YOU)
A free powerful video converter supporting all major video formats and basic edits.
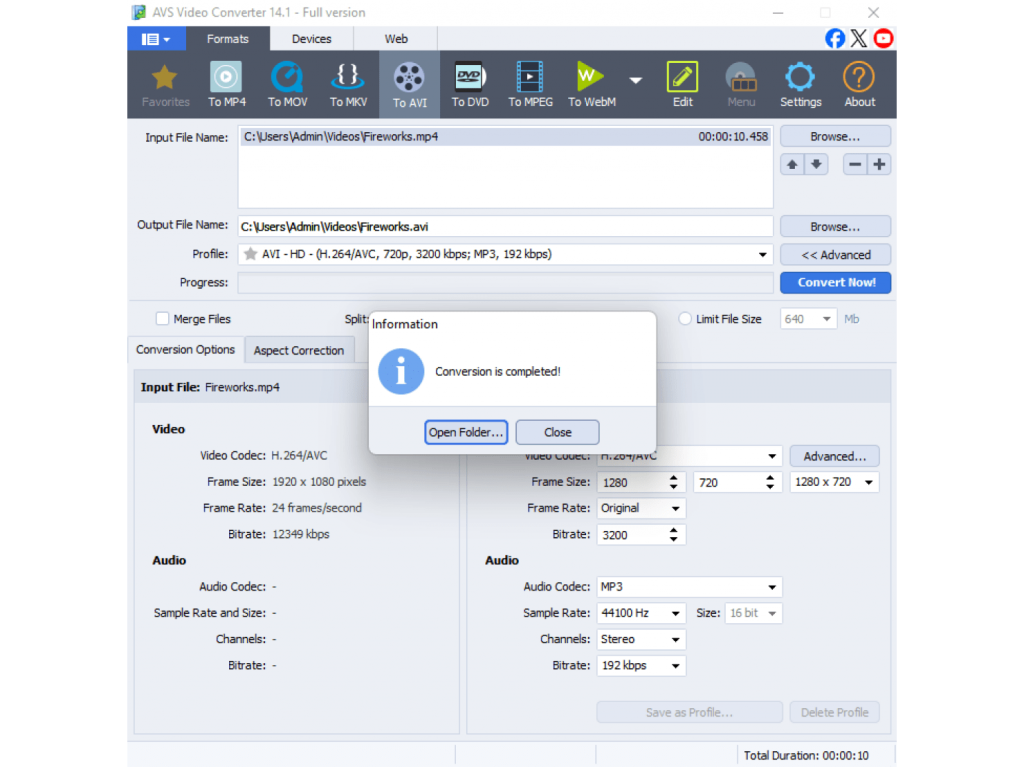
Pros:
- Converts all key video files.
- Presets for devices (iPhone, Android, YouTube).
- Batch processing and fast conversion.
Cons:
- Windows-only.
Best for: Freelancers who regularly exchange files with clients and work across different formats and platforms.
2. HandBrake
A simple, open-source program for video compression and conversion.

Pros:
- Free, cross-platform, and efficient.
- Great compression with minimal quality loss.
Cons:
- No audio conversion.
- Basic interface.
Best for: Tech-savvy freelancers who often prepare media for online publishing.
3. Any Video Converter
A simple converter with additional download and DVD features.
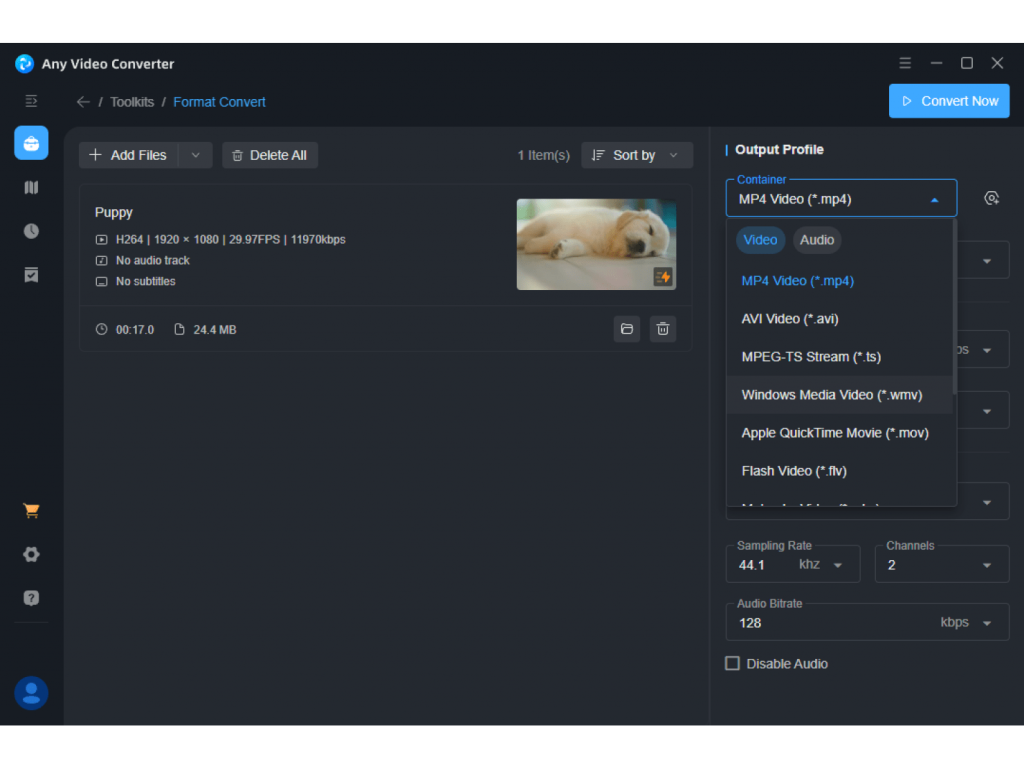
Pros:
- Supports a wide range of file types.
- Speedy conversions and device presets.
Cons:
- Free version includes ads.
Best for: Freelancers looking to convert videos fast without complex settings.
Final Thoughts
For freelancers, productivity isn’t just about speed. It’s about delivering superb work with minimal hassle. When choosing software, consider your workflow, budget, and technical needs. A graphic designer may rely on Adobe Photoshop, while a consultant might use AVS4YOU Multimedia Suite and ONLYOFFICE Docs for daily tasks.
The best toolkit feels intuitive, fits your workflow, and helps you create great content efficiently. Expensive software isn’t always better as many free or trial versions offer everything you need. Explore your options, test the tools, and invest in those that truly improve your efficiency, quality, and profitability. The right software doesn’t just help you complete projects, it helps you build a stronger, more sustainable freelance business.

If you’re a vlogger, a podcaster, or a small business owner, you already know how important engaging content is. AVS4YOU Multimedia Suite simplifies the entire creative process from editing and recording to mixing and sharing. It’s a complete set of 5 multimedia tools that helps you craft professional-looking projects without the steep learning curve or expensive software.
In this article, we’ve gathered seven inspiring project ideas that show just how versatile AVS4YOU can be. Each one comes with practical tips to help you turn raw footage, photos, or recordings into polished creations, even if you’re just getting started with multimedia editing.
1. Create a memorable slideshow
The best way to capture memories of special events, family gatherings, or holidays is to make a stunning slideshow. AVS Video Editor empowers you to easily combine images, add background music, and use smooth transitions for a professional touch. Text captions will mark key moments while stickers or overlays will add an extra flair.
Tips:
- Choose music that matches the mood of your photos.
- Experiment with fade-in and fade-out transitions to maintain flow.
- Use the export presets to easily share your slideshow on YouTube, Instagram, or as a video file for family and friends.
2. Edit a travel blog video
Document your adventures by turning your travel footage into a cinematic video. Import clips directly into AVS Video Editor, trim unnecessary parts, and experiment with effects from a rich media library for setting a special mood.
Enhance the visuals with color correction tools, stabilize shaky footage, and add background music that reflects the atmosphere of your trip. Overlay text or map animations to mark each destination.
Tips:
- Use video stabilization to fix handheld shots.
- Apply color filters to unify footage from different locations.
- Combine short clips for a fast-paced, compelling story that fits social media formats.
3. Make a promotional or social media video ad
If you’re a small business owner or a content creator, you can use AVS4YOU to design eye-catching promotional videos. Create short, dynamic clips for Instagram, TikTok, or YouTube, and other popular platforms.
Add animated text overlays and your company’s logo, highlight key product features, and synchronize visuals with upbeat music. The ready-made effects help you design professional ads quickly.
Tips:
- Keep your ad under 60 seconds for social media impact.
- Use bold fonts and contrasting colors for text overlays.
- Try split-screen layouts to show product use and branding together.
4. Record a tutorial or how-to video
Want to share your skills with others? Use AVS Video Editor to capture your desktop activity and create step-by-step tutorials or educational videos.
After recording, open your footage in the program to trim, add a voiceover, and insert annotations or arrows to emphasize important steps. You can also include a picture-in-picture view of yourself explaining the process.
Tips:
- Record your voice in a quiet room using AVS Audio Editor.
- Add intro and outro clips to make your tutorials look well-crafted.
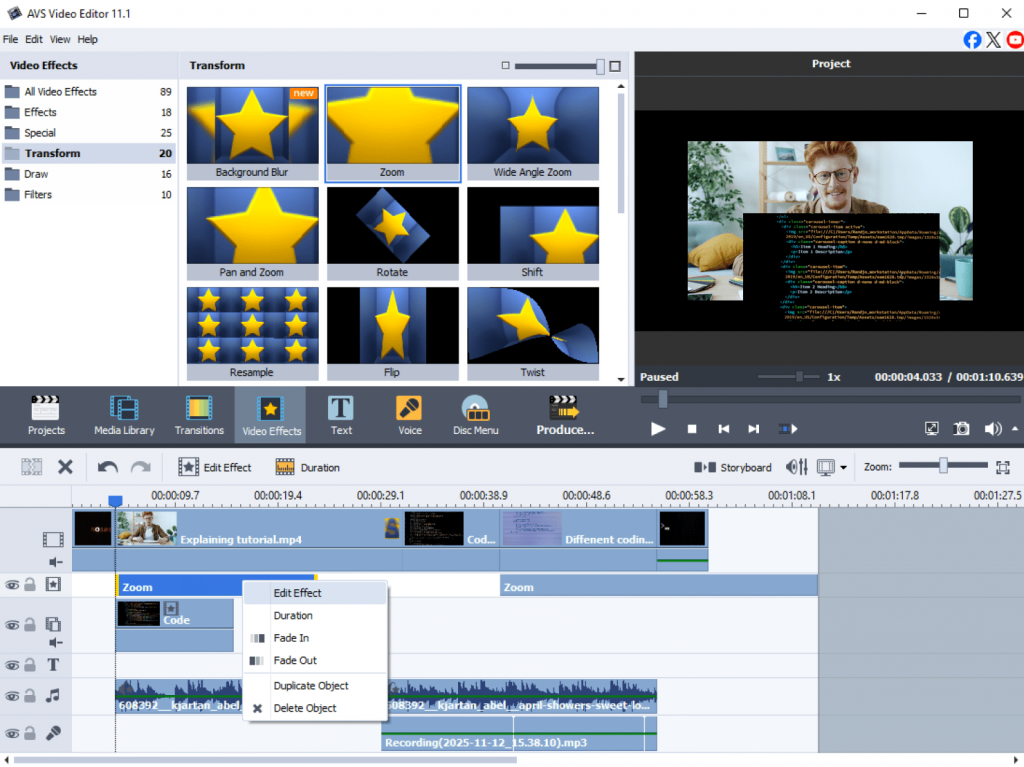
- Use zoom and drawing tools to highlight key actions.
5. Produce a podcast or audio project
Whether it’s storytelling, interviews, or discussions, AVS Audio Editor allows you to create podcasts fast and easily. Record clean audio, remove background noise, and balance sound levels with ease.
You can also mix background music, insert sound effects, and export your podcast in multiple audio formats.
Tips:
- Use the Noise Removal feature to clean up recordings.
- Add gentle background music to enhance the listening experience.
- Save different versions (e.g., MP3, WAV) for streaming and archiving.
6. Craft a wedding or event video montage
Relive your most precious moments by creating a romantic wedding video or a memorable event montage. Combine video clips and photos, choose heartfelt background music, and use transitions, filters, and overlaysto enhance the emotional impact.
Add text titles for introductions or quotes and include slow-motion effects for touching moments like the first dance or cake cutting.
Tips:
- Mix photos and videos for more dynamic storytelling.
- Experiment withfilters and cinematic color tones.
- End the video with a short thank-you message or credits.
7. Experiment with creative personal projects
AVS4YOU empowers users to make different creative projects for any occasion. Mix video, audio, and images in new ways to create art films, lyric videos, or mood reels.
Try layering effects, changing playback speed, or combining voiceovers with visuals to test your artistic side. With so many editing options, you can create something uniquely yours.
Tips:
- Use time-lapse effects for originality.
- Combine soundscapes and visuals to express mood or emotion.
- Save project templates to build upon your creative ideas later.
Unlock your creativity with AVS4YOU
AVS4YOU Multimedia Suite offers endless possibilities for anyone eager to explore multimedia creation. From emotional slideshows and high-quality podcasts to travel videos and tutorials, these seven projects are just a starting point.
With intuitive tools and powerful editing features, AVS4YOU helps you create, edit, and share your ideas effortlessly.
Download the suite today and start creating your stunning project.
Useful Links
Introduction
Birthday videos have become a digital tradition. Instead of giving only physical gifts, people now create short, heartfelt videos that celebrate special moments, friendships, and milestones. They often combine personal photos, video clips, touching messages, and fun music, creating a unique keepsake that can be shared at parties or posted on social media.
The reason for their popularity is obvious. They feel personal, emotional, and sincere. However, creating such a personalized gift may be challenging and tiresome. It takes time and efforts to cut clips, adjust transitions, sync music, and make everything flow smoothly.
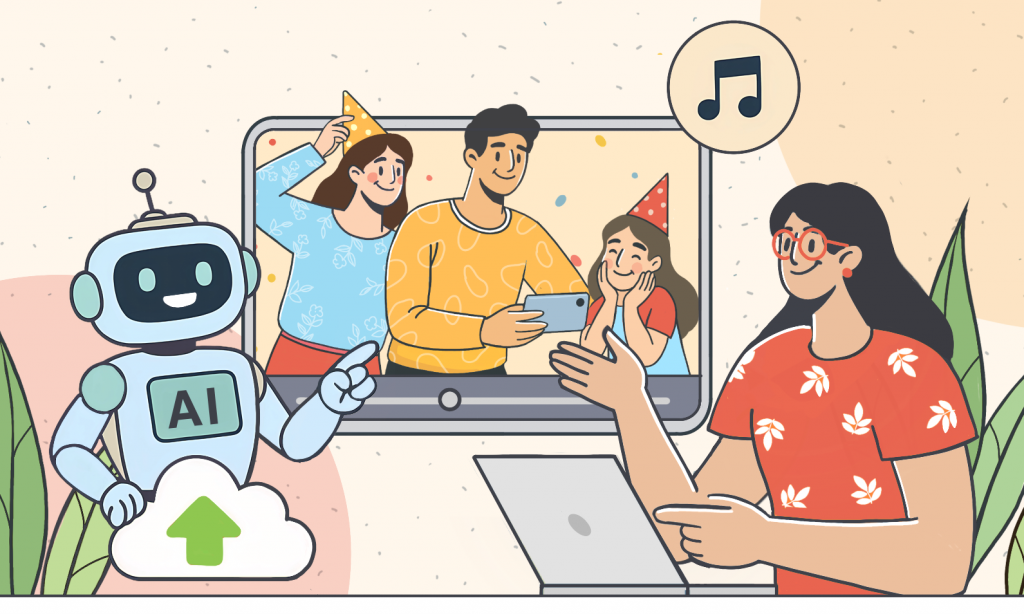
This is where artificial intelligence steps in. AI-powered video creation tools now automate many tasks, from editing and adding transitions to music selection, and even turning text into video content. With just a few clicks, you produce a stunning video gift without professional editing skills.
In this article, we’ll look at some of the best AI tools that make creating birthday videos simple and enjoyable.
How AI helps with birthday video creation
Traditional video editing can be intimidating, especially for people who have never worked with professional software. AI tools are built to solve that problem. They take care of the complex tasks behind the scenes when you focus entirely on creativity.
Here’s why AI-based video making programs stand out:
- Time-saving automation
Instant templates, auto-editing, and AI transitions speed up production.
- Personalization
From face recognition to auto-generated slideshows and voiceovers, AI allows to create tailored videos.
- Music intelligence
Many platforms suggest or automatically sync music to match the mood of your video.
- Accessibility for beginners
Even without editing knowledge, you can create professional-grade video content.
- Cross-platform flexibility
Plenty of tools are available online, on desktop, and mobile apps, so you are capable of crafting videos anywhere.
With these benefits, AI video makers are becoming the go-to option for quick yet meaningful birthday surprises.
Top AI tools for automating birthday videos
Have a look at our selection of AI-powered platforms that excel in their ease of use, intelligent features, and suitability for creating memorable birthday videos.
1. Magisto (Online & mobile)
Magisto has long been a popular choice for casual video creators. It highlights storytelling above all. Just upload your clips and photos, pick a theme, and choose background music. The AI then creates a video that matches the emotional tone you want.
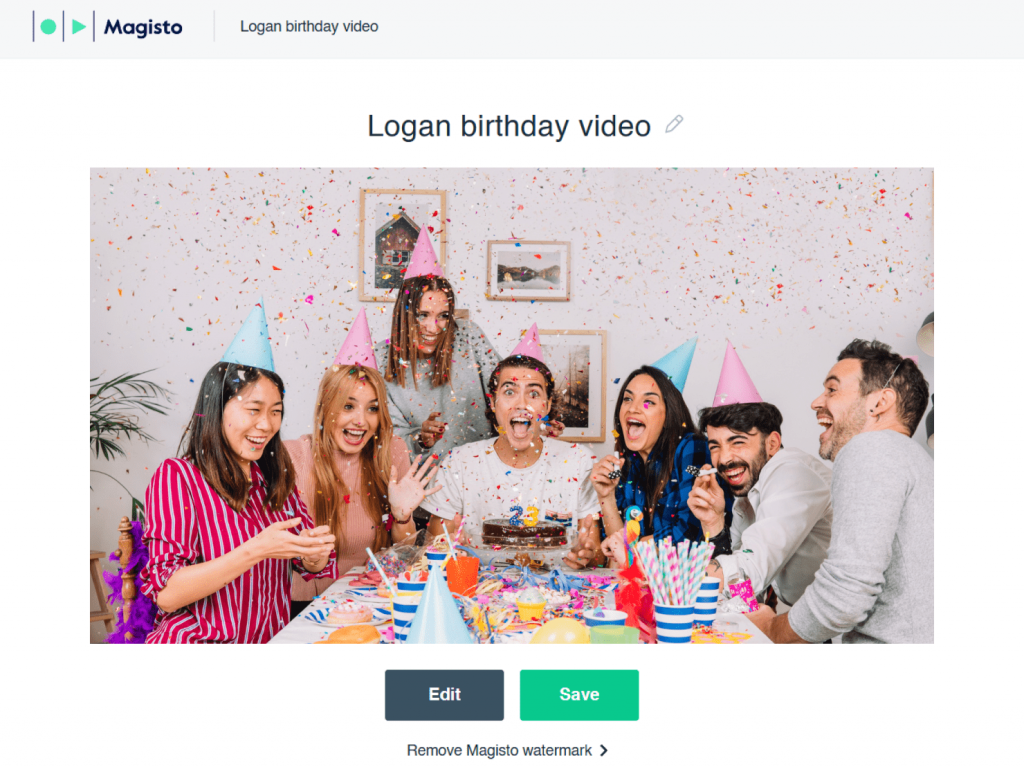
Key features:
- Automatic editing with transitions and effects.
- AI-powered video styles for different moods (fun, emotional, cinematic).
- Music library with smart syncing.
Ease of use
Extremely beginner-friendly — just a few steps from upload to final result.
Pricing: Free basic plan; premium subscriptions for advanced features.
Best for: Users who want a fast, emotional video without fussing over details.
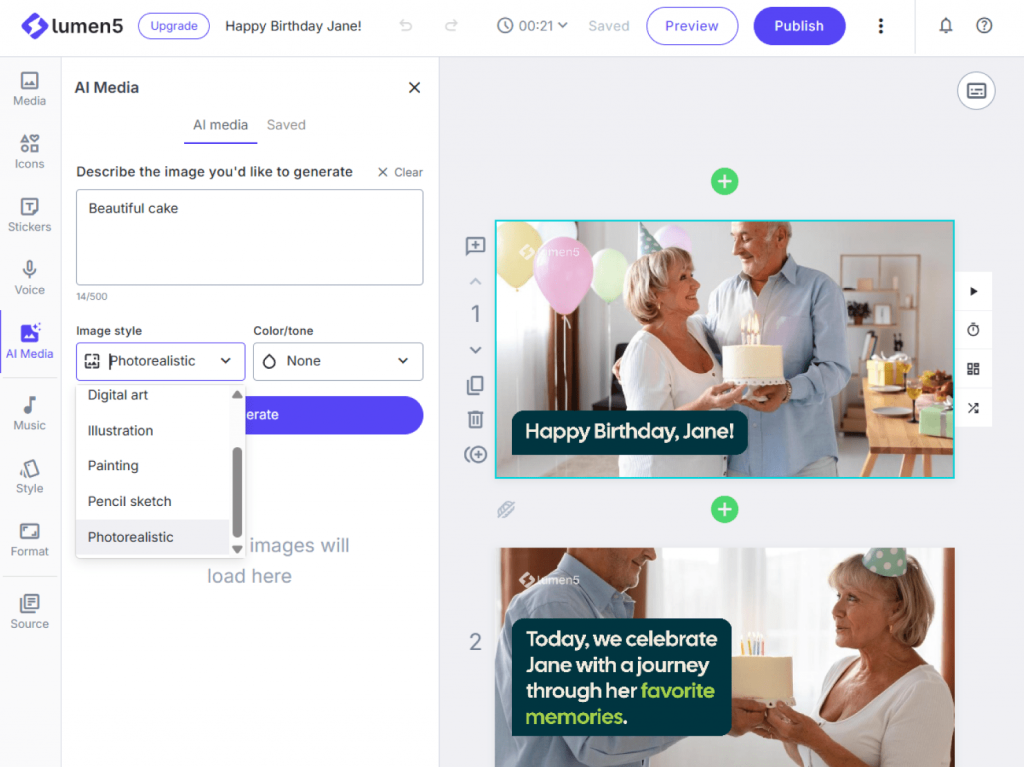
2. Pictory (Online)
Pictory takes a different approach from most AI editors. The platform is dedicated to and optimized for creating video content from text, rather than just editing photos and clips. Its text-to-video feature is worth trying if you want to add birthday wishes, captions, or funny anecdotes as part of the video. The AI automatically tailors text to visuals and music.
Key features:
- AI-powered text-to-video generation.
- Smart summarization for long clips (turns them into short highlights).
- A large library of stock visuals and music.
Ease of use: Best for storytellers who need to combine text with visuals.
Pricing: Free trial; paid plans with more customization.
Best for: Adding written messages and narration to birthday videos.
3. Animoto (Online)
Animoto has built its reputation on template-based editing. It is a great option for users who want to achieve flawless results with minimal effort. There is a vast collection of ready-to-use templates, many designed specifically for celebrations including birthdays.
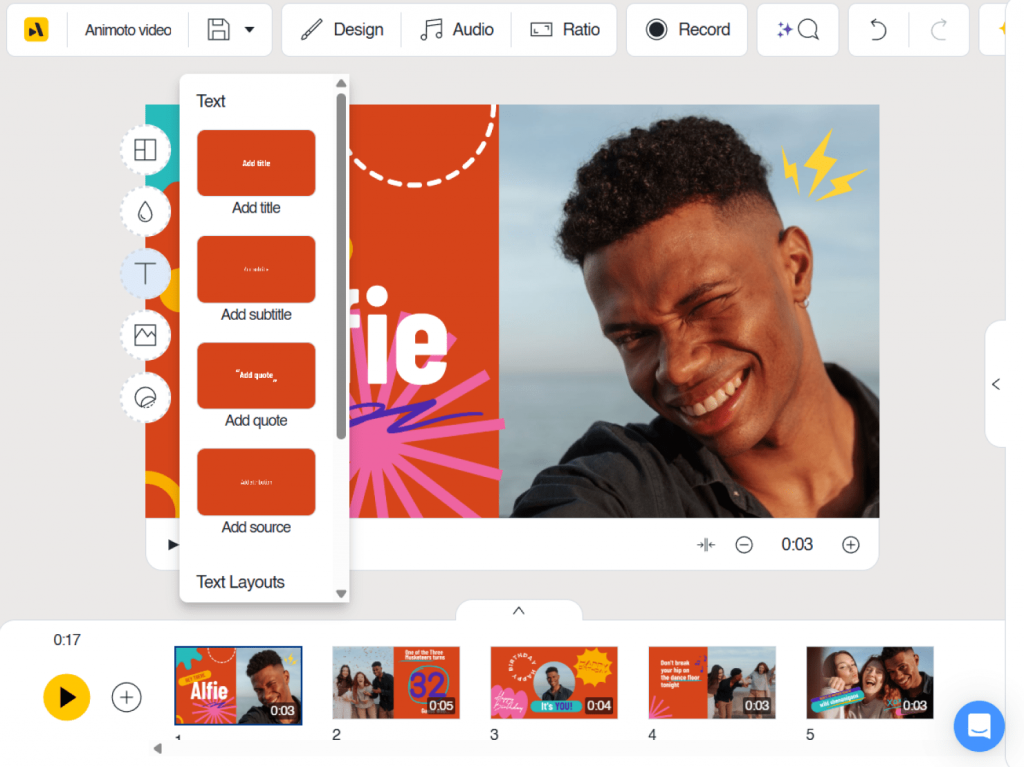
Key features:
- A drag-and-drop editor with guided workflows.
- Automatic music syncing and pacing.
- A rich library of themed templates.
Ease of use: Extremely simple, especially for first-time creators.
Pricing: Free trial; subscription plans available.
Best for: Quick, stylish videos using pre-designed templates.
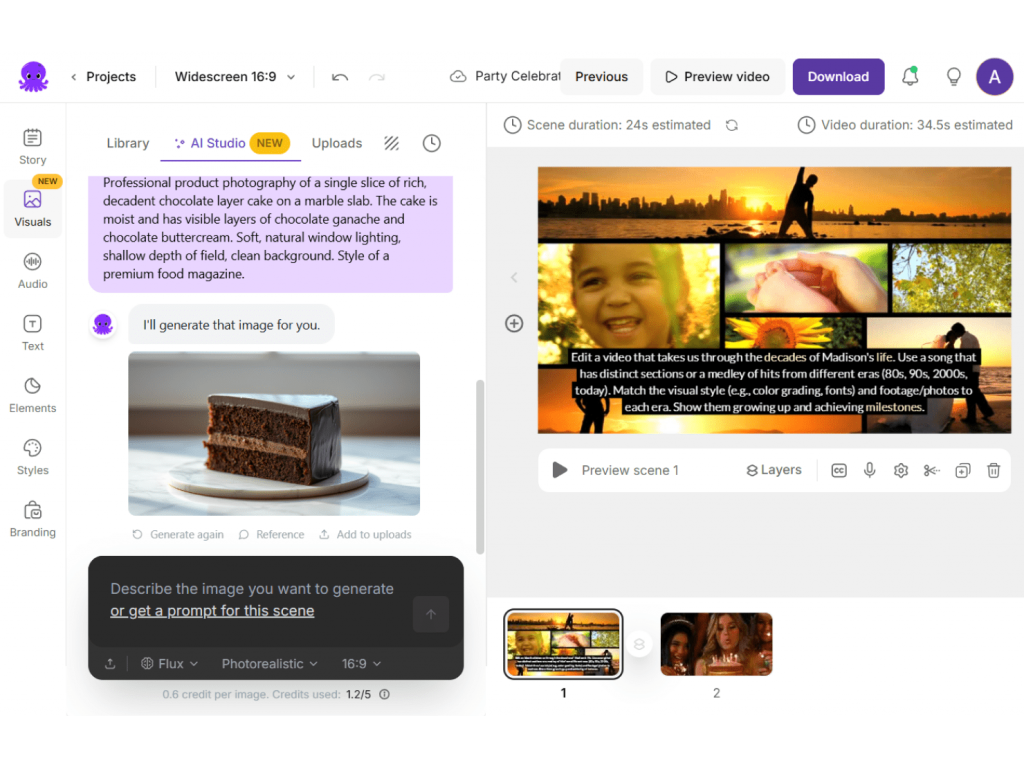
4. Runway (Desktop & online)
Runway is a more advanced software, best suited for users who aim to explore their creativity. It includes traditional editing tools with cutting-edge AI features. It’s not just an editor but a creative platform. Runway’s AI allows users to remove backgrounds, generate visuals, and automate tasks that usually require professional skill.
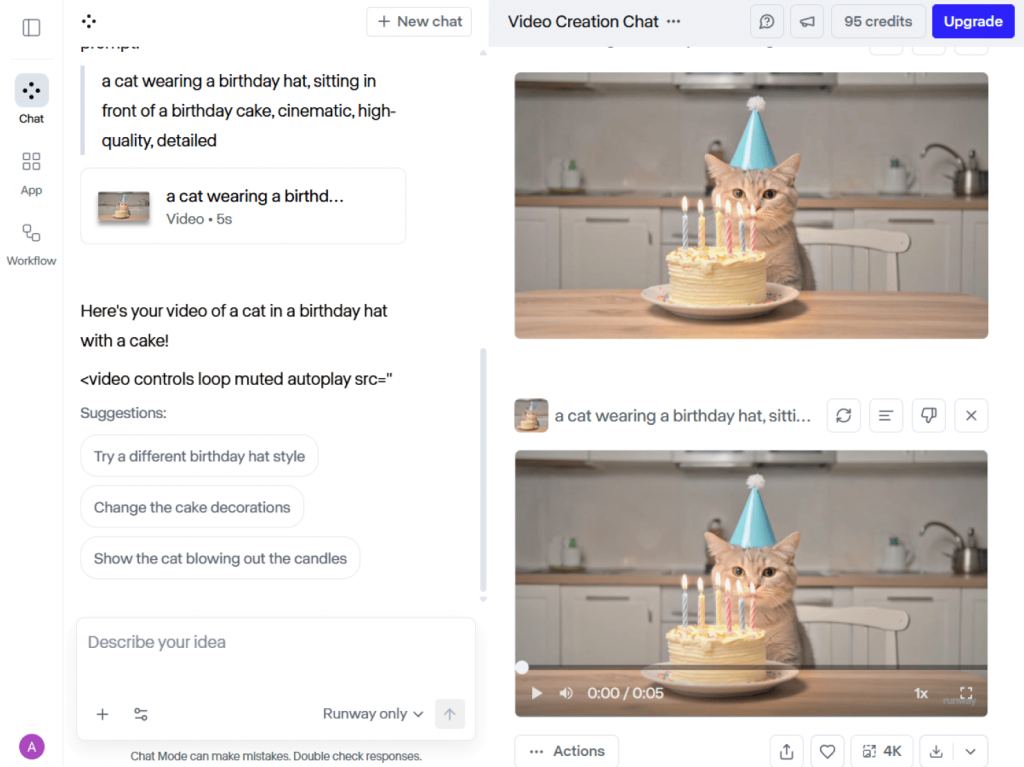
Key features:
- AI-powered background removal.
- Automatic masking and object tracking.
- Video editing automation with advanced controls.
Ease of use: More powerful than beginner solutions, but still accessible.
Pricing: Free tier; paid plans unlock advanced tools.
Best for: Creative users that make cinematic birthday videos with professional flair.
5. Kapwing AI Tools (Online)
Kapwing is known as a reliable platform for quick, shareable content. Its AI tools are particularly useful for making social media-friendly birthday videos. Kapwing’s AI tools specialize in adapting content for different platforms: Instagram, TikTok, YouTube, or Facebook.
Key features:
- Auto-subtitles in multiple languages.
- Smart resizing for social media.
- Background noise removal and clean audio tools.
Ease of use: Simple drag-and-drop interface with AI automation.
Pricing: Free basic plan; premium subscription for full features.
Best for: Birthday videos intended for social media sharing.
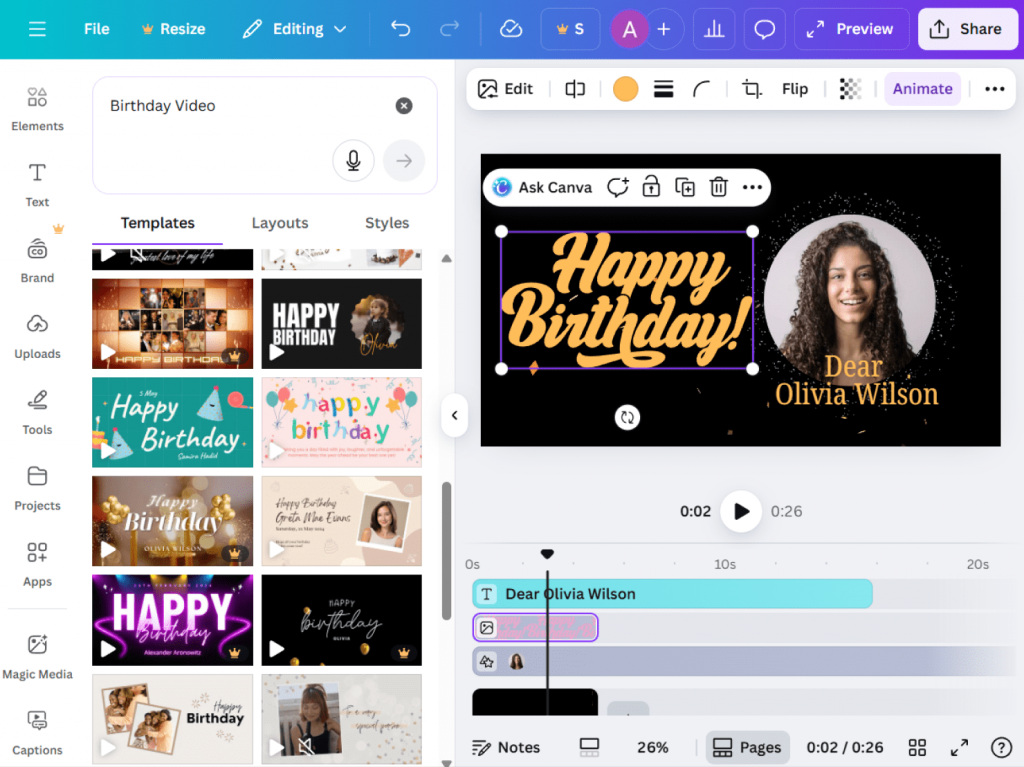
6. Canva AI Video Maker (Online & Mobile)
Canva is already a household name in design, and its AI video maker extends that simplicity to video creation. Canva offers a huge variety of birthday-specific templates, stickers, and animations, all enhanced by AI support.

Key features:
- Celebration-themed templates with drag-and-drop editing.
- AI text generation for captions or messages.
- Easy integration of photos, stickers, and graphics.
Ease of use: Extremely user-friendly, a real find for beginners.
Pricing: Free and premium versions.
Best for: Visually creative, personalized videos with fun graphics.
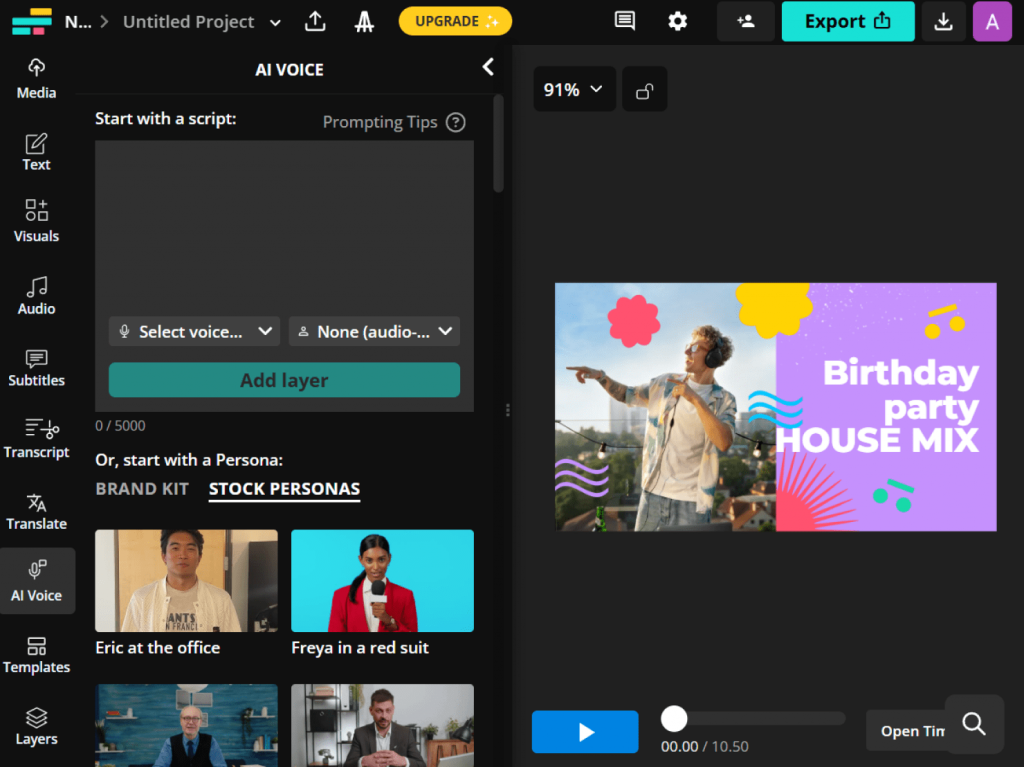
7. Lumen5 (Mobile & online)
Lumen5 is designed for turning text into engaging video stories, but it also works well for crafting personal birthday videos. Its AI storytelling engine transforms scripts, captions, or even blog posts into short video content. It is the easiest way to give a friend’s story a personal makeover.
Key features:
- Text-to-video automation.
- Stock visuals and music suggestions.
- Storyboard-driven design.
Ease of use: Beginner-friendly thanks to its interactive guides.
Pricing: Free trial with paid upgrades.
Best for: Story-driven birthday videos with a personal touch.
Quick tips for making the best AI birthday video
Even the best AI tools shine brightest when combined with a little creativity. Here are some basic tips:
Tip 1. Choose personal photos and clips
Highlight cherished memories, not just random images.
Tip 2. Add captivating text
Quotes, wishes, or funny jokes transform a video into something special.
Tip 3. Pick music carefully
A cheerful track can lift the mood; a slower one makes it emotional.
Tip 4. Keep it short
1–3 minutes is enough for holding attention and impact.
Tip 5. Customize templates
Adding individual flair to ready-made designs gives your video a unique personality.
Wrap-up: Make birthday videos in minutes with AI magic
AI has completely changed the way we create birthday videos. What once took hours of editing can now be done in minutes, thanks to smart automation. Magisto and Animoto let you edit footage effortlessly, while Runway and Kapwing provide advanced creative capabilities. Meanwhile, Pictory and Lumen5 platforms permit you to turn text into powerful stories, and Canva makes design fun and accessible.
AI-powered birthday video makers help create something memorable even without editing experience, from a short, funny video for a friend to a heartfelt professional-grade montage for a family member.
So the next time you want to give a thoughtful, personalized gift, try one of these AI tools and let us know which one you think is the best.
Useful links

Introduction
Birthdays are no longer just about cakes and candles.They’re about memories that can be shared instantly and cherished forever. Personalized birthday videos have become one of the most creative and meaningful ways to celebrate someone’s special day. They’re social media-friendly, easy to send, and make a truly unique gift. In this blog post, we’ll examine the best birthday video makers, covering both free and premium options, so you can find the best solution for your needs.
Why birthday video makers are worth using
A birthday video turns ordinary greetings into lasting keepsakes.Their main benefits include:
- Emotional impact
A video made with love let the birthday person feel truly cherished.
- Easy sharing
Upload to Instagram, TikTok, YouTube, or simply share via messaging apps.
- Preserve memories
Save your precious memories in a video to enjoy forever.
Key features to look for in a birthday video maker
Modern video makers easily handle such tasks as preparing a surprise montage for a friend, collecting video wishes from family, or highlighting a reel of someone’s best moments. Look for software that provides:
- Ease of use
Drag-and-drop timelines and pre-made templates simplify the process.
- Templates & effects
Animations, stickers, and themed templates add a festive feel.
- Editing tools
Trim, merge, add transitions, and overlay text for impressive results.
- Music & audio
Import your own audio files or choose from built-in libraries.
- Output formats
Make sure you can export in high-quality formats suitable for social media or playback on TV.
- Sharing options
Some tools allow direct uploads to YouTube, Facebook, and Instagram.
Best free birthday video makers
If you’re looking for a free birthday video maker, here are some of the top picks for 2025:
1. Canva
- Features: Ready-to-use birthday templates, drag-and-drop editing, stock photos and music.
- Pros: Extremely user-friendly; great for beginners.
- Cons: Limited advanced editing; free plan has fewer premium assets.
- Best for: Quick and stylish videos with minimal effort.
2. Kapwing
- Features: Online video editor with trimming, text, subtitles, and templates.
- Pros: No software download needed; good for collaborative editing.
- Cons: Free plan has export limits and watermark.
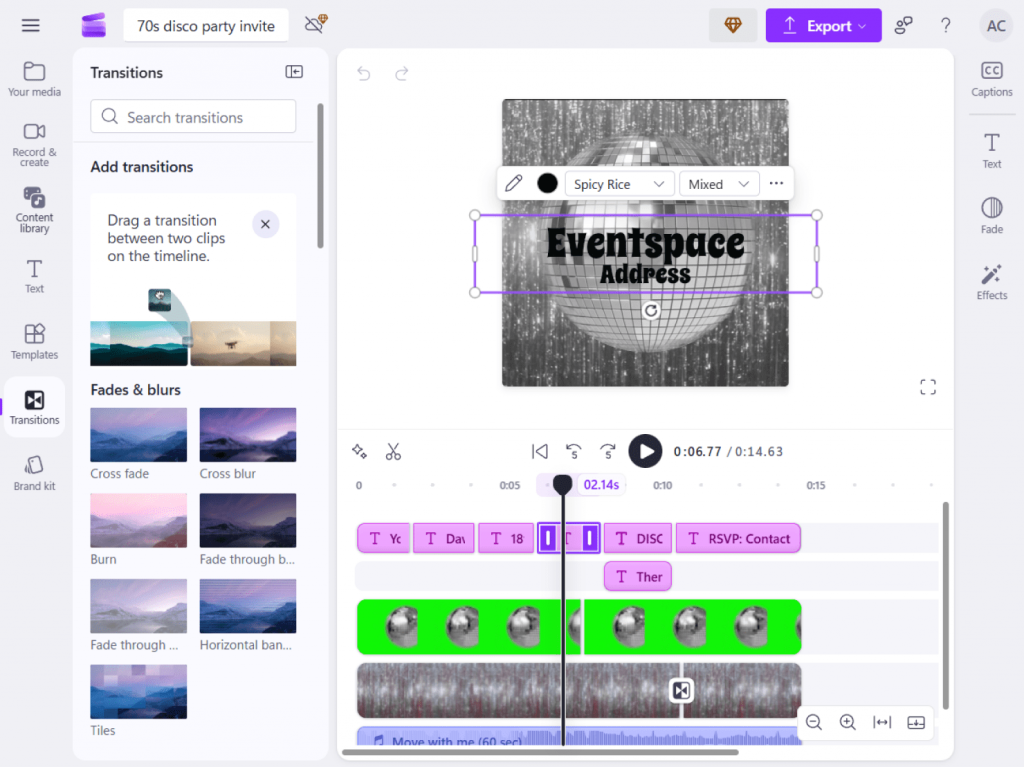
- Best for: Fun, shareable birthday clips.
3. Clipchamp (Free Plan)
- Features: Basic editing tools, templates, music, and text overlays.
- Pros: Integrated with Microsoft; easy sharing.
- Cons: Some exports are watermarked; limited advanced tools.
- Best for: Windows users who want a simple editor.
Best paid & easy-to-use birthday video makers
To produce a professional-quality, watermark-free birthday video, consider working with one of these premium editors:
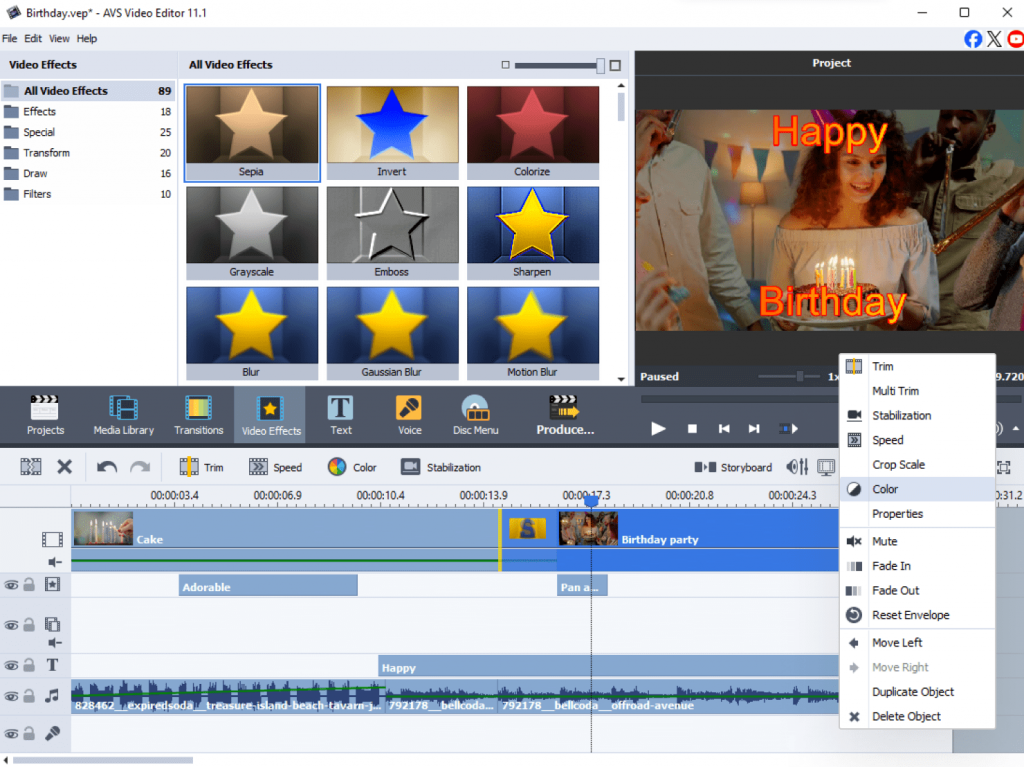
- Features: Over 300 effects and transitions, trimming, merging, rotating, chroma key, and video stabilization. Includes slideshow maker, screen capture, and video recording.
- Pros: Powerful yet beginner-friendly; supports multiple formats.
- Cons: Windows-only.
- Best for: Users who want a reliable all-in-one solution without limitations.
2. Movavi Video Editor Plus
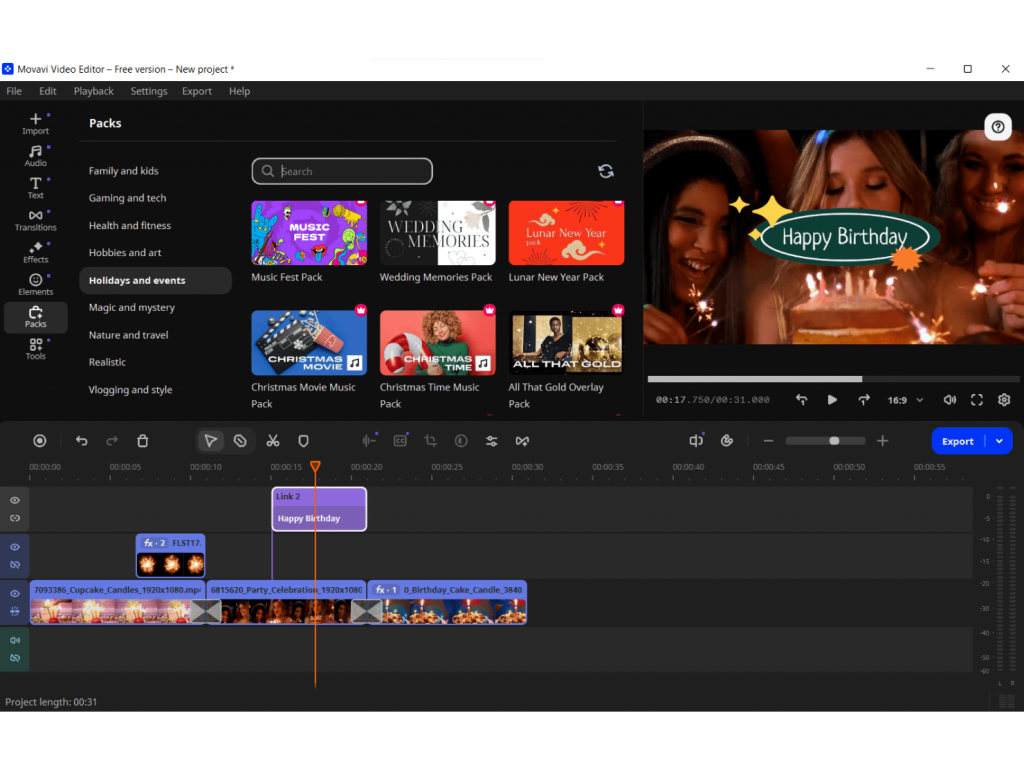
- Features: A rich library of templates, transitions, stickers, built-in stock music.
- Pros: Intuitive interface, strong balance of simplicity and power.
- Cons: Paid license required for full access.
- Best for: Quick and classy birthday videos.
3. Adobe Premiere Elements
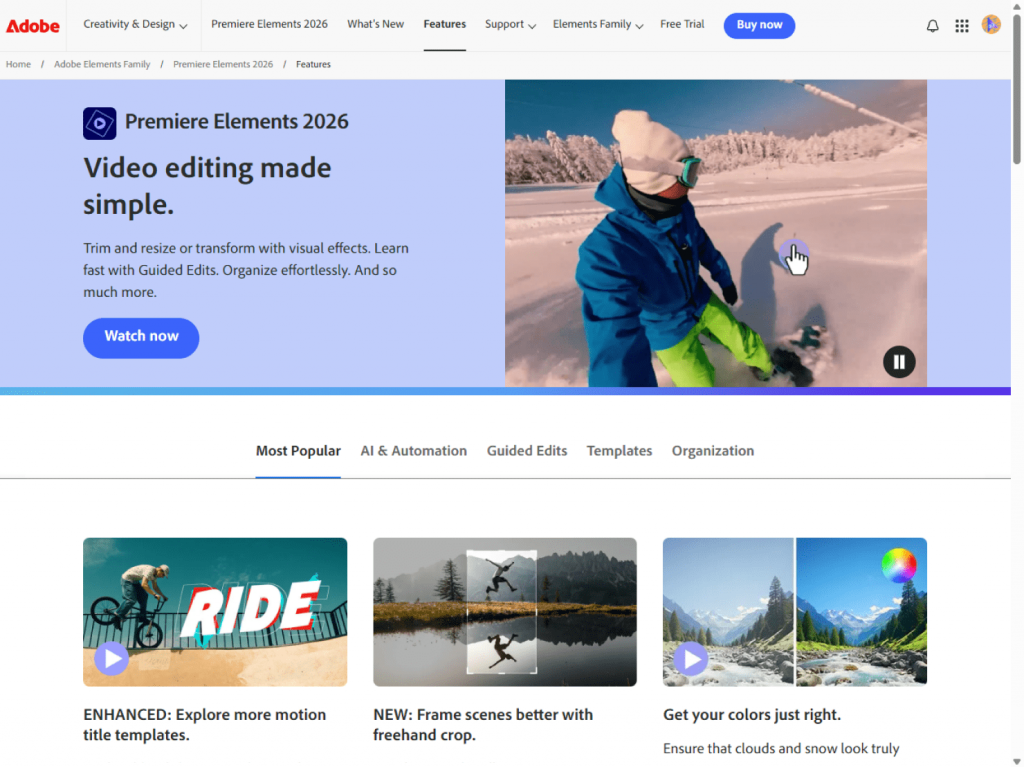
- Features: Guided editing, advanced trimming, transitions, and effects.
- Pros: Professional-quality results with simplified workflows.
- Cons: Higher price; not as lightweight as other options.
- Best for: Users looking for advanced editing features.
Tips for creating a stunning birthday video
- Pick a theme
Choose a tone: funny, emotional, or energetic. Picking a vibe that matches the birthday person is the secret to a video they’ll love and remember.
- Use personal touches
Include funny jokes, childhood photos, or voice notes from friends and family. These small details make the video unique and meaningful.
- Keep it concise
Keep your video between 3–5 minutes to hook your viewers and hold their attention till the end. If it is too long, the video might be dragging and boring. If it is too short, you may miss important moments.
- Choose music wisely
Pick songs that fit the mood and reflect the person’s tastes. Upbeat tunes work well for energetic videos, while soft melodies suit emotional or nostalgic themes.
- Add smooth transitions and effects
Simple fades, text overlays, or light animations help your video look stylish without overwhelming the content.
- Check pacing and flow
Organize your clips so the story flows naturally, combining images, video clips, and messages from loved ones.
- Export in HD
High-quality video are more enjoyable to watch on any device: phones, tablets, or TVs.
Which birthday video maker to choose?
The best software is the one that brings your creativity to life. Your choice depends on your goals, budget, and editing experience.
- Use a free birthday video maker if you are creating a casual, touching video for social media or a private message, and you value speed and simplicity above all else. These tools are good for last-minute projects that still carry a powerful emotional touch.
- Invest in a paid tool if you are crafting a major gift, a video to be shown at a birthday party, or a detailed montage that you want to maintain in the highest quality. This is the choice for those who want professional quality, more options, and no restrictions.
Final thoughtsand recommendations
A personalized birthday video is a uniquely thoughtful gift. You don’t need professional skills to create one. Just use your own photos, video clips, and warm greetings. The key is to make it personal so that the birthday person will cherish and rewatch it for years. Get started with user-friendly free editors, for example, Canva or Kapwing, or level up your creation with a powerful paid video maker such as AVS Video Editor.
Want to make your own birthday video in minutes?
Try AVS Video Editor, a powerful video maker, packed with everything you need to create impressive birthday videos with a wow effect.
Useful links

Birthdays are more than just a date on the calendar. They’re a chance to wrap someone in love and show them how much they mean to you. Let’s be real: a birthday text or card is nice, but commonplace. What about a personalized video? It is a gift your dearest and nearest will truly cherish, be it a surprise for your mom, a laugh-filled tribute for your best friend, or a heartfelt thank you for a mentor.
Ready to create something truly touching? Don’t worry if you’ve never edited a video before. We’ll walk you through the entire process using AVS Video Editor, a powerful and easy to use video editing software. After reading this guide you will be able to create a festive video with ease. Let’s get started!
Step 1: Plan your birthday video
Feeling excited to start? Awesome! Let’s do a quick five-minute planning session first to make the editing process a breeze. First of all, you have to decide if the tone of your birthday video should be hilarious, tender, or energetic.
Once it is done, gather all the necessary materials: photos, short video clips, and greetings from family members and friends, and put them in one folder. Trust us, this keeps things organized. We recommend a runtime of 3-5 minutes. This is long enough to cover all the highlights but short enough to hold everyone’s attention.
Pro Tip: The fastest way to save time is to sketch a simple outline. You can organize video clips chronologically or group moments by theme: “family trips,” “school years,” “achievements”, etc.. The prep work saves lots of time and simplifies the editing flow in general.
Step 2: Import photos and clips into AVS Video Editor
Now that your plan and materials are ready, it’s time to bring them to life in AVS Video Editor. Make sure that you have already downloaded and installed AVS Video Editor from our official website.
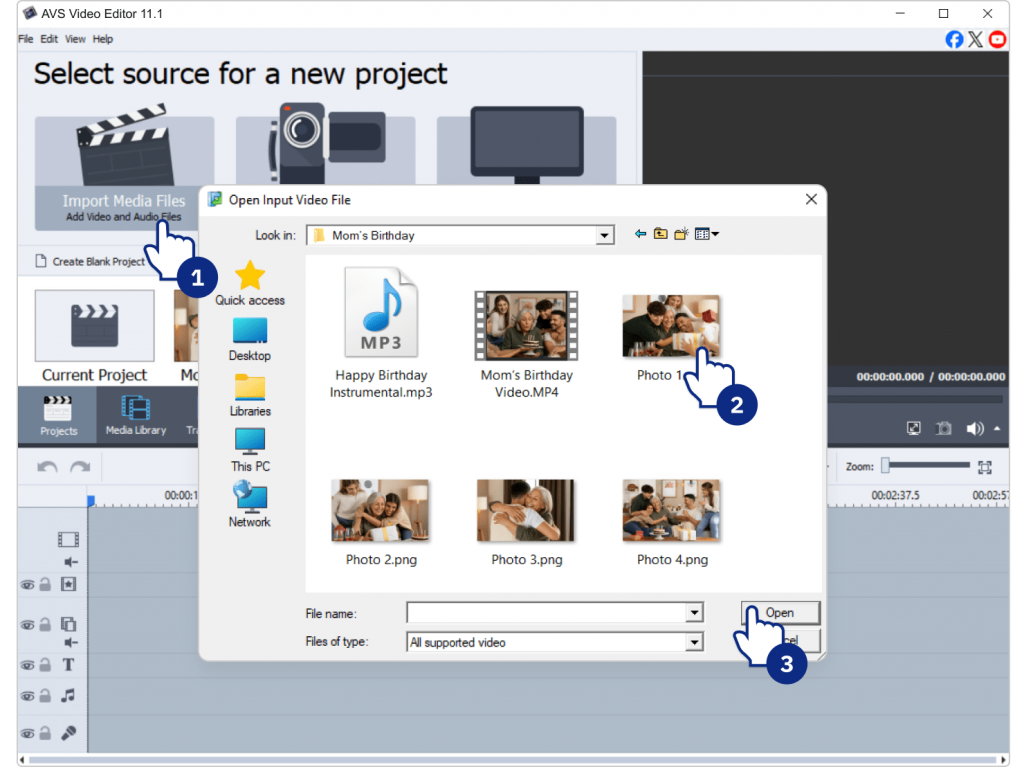
- Launch the program and click Import Media Files to add your photos and videos.
- Drag them onto the Timeline in the order you prefer, either chronological or thematic.

Tip: Before you start, organize your media into folders such as childhood photos, party clips or vacation videos. A clear folder structure helps you quickly find what you need and keeps your editing smooth. Another trick is to rename files with short descriptive titles (“graduation,” “birthday 2012”) so you instantly recognize them on the timeline.
Step 3: Add music
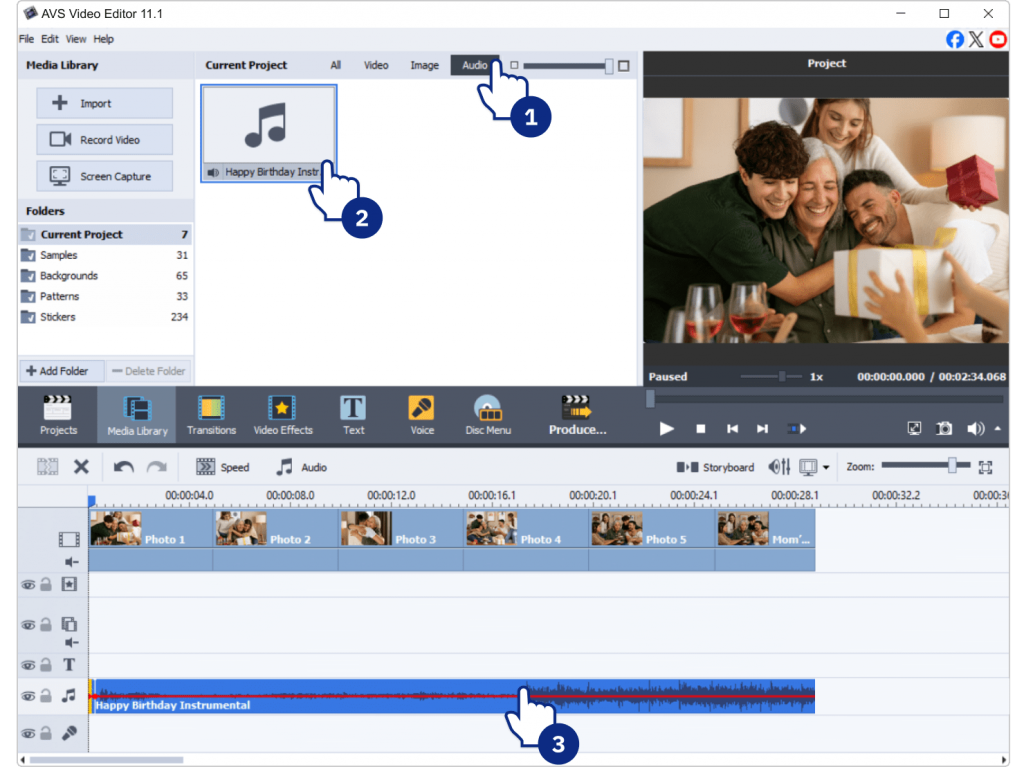
Music sets the mood of your birthday video. Here’s how to add it in AVS Video Editor:
- Go to the Audio tab and import your chosen track(s).
- Drag the track onto the audio line below your video clips.
Choosing the right soundtrack is paramount, as the genre and tempo directly influence the viewer’s experience. Think about the person’s character and the mood you want to set:
- For energetic, fun celebrations opt for upbeat pop, rock, or electronic songs that deliver joy and excitement.
- For heartfelt, family-centered tributes select soft, sentimental music, for example, acoustic ballads or pieces of classical music to evoke warmth and nostalgia.
- To craft a vibrant mix combine songs to match different segments of the video.
Optional: Use AVS Audio Editor to trim, mix, or adjust songs before adding them.
Step 4: Enhance with transitions and effects
Transitions smooth the flow between clips and photos, while effects make your video eye-catching.
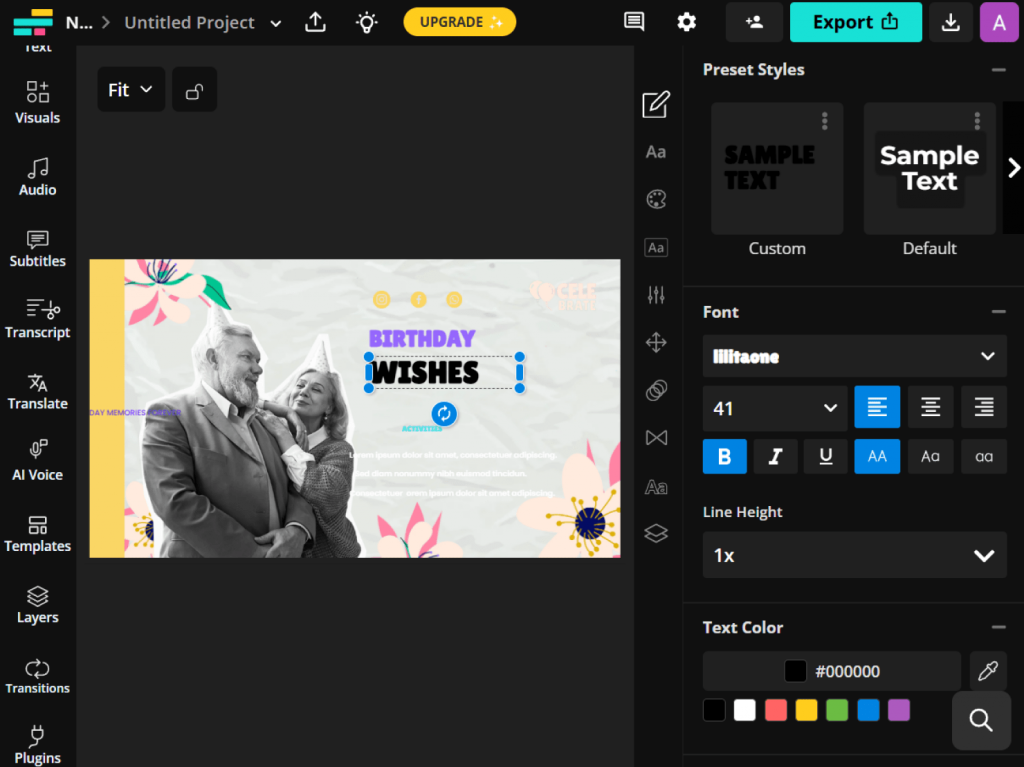
- Go to the Transitions tab and drag effects between clips (e.g., fade, dissolve, page flip).
- Add Text Overlays for birthday wishes, names, or funny captions.
- Experiment with Filters (black-and-white for nostalgia, bright filters for parties).
- Try Slow Motion for dramatic or funny moments.
Less is more. Choose 2–3 transition styles and use them throughout the entire video.
Step 5: Add a personal touch
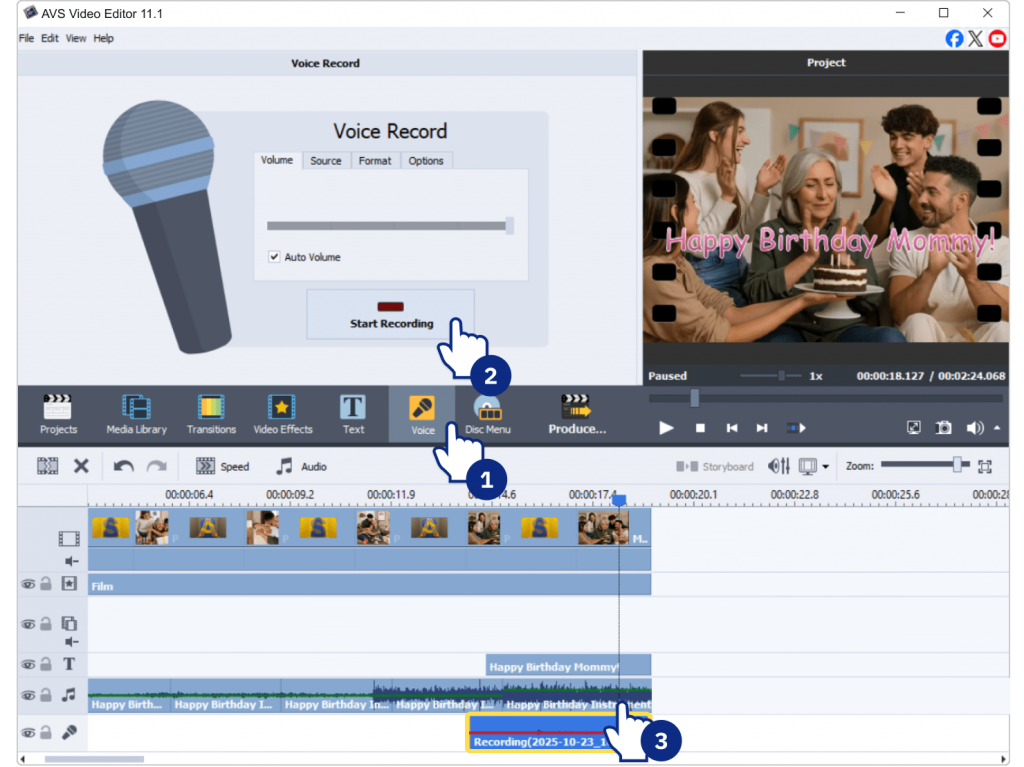
This is where your video birthday greeting becomes truly unique.
- Voiceover: Record a birthday message directly in AVS Video Editor or polish it in AVS Audio Editor.
- Inside jokes: Add fun text captions only the birthday person will understand.
- Closing message: End with a heartfelt note or a group greeting clip.
Tip: Balance audio carefully so that your voiceover isn’t drowned out by the background music.
Step 6: Export and share your birthday video
When your project is ready, it’s time to save and share.
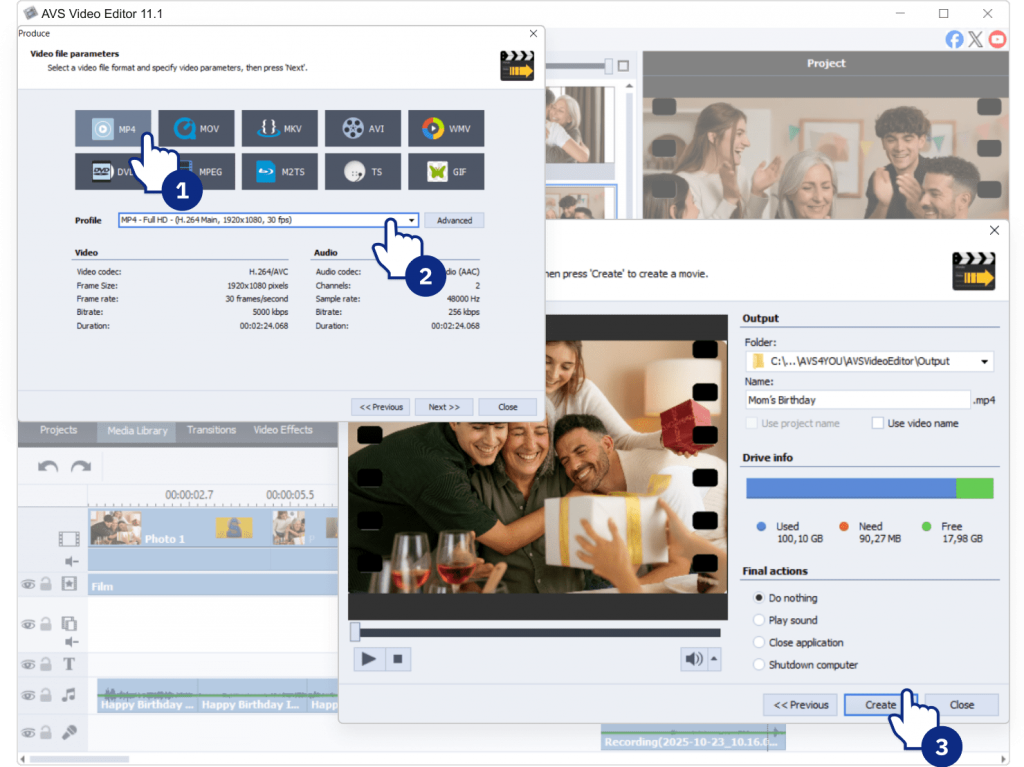
- Click Produce.
- Choose your format (MP4 for universal playback, DVD for a physical gift).
- Adjust resolution.1080p works great for most purposes.
- Save the file.
After exporting, you have a variety of wonderful ways to present your video and delight the guest of honor. Here are some of them:
- At the party: For a grand show, play the video directly on a big screen or TV.
- Social media: Upload it to YouTube, Facebook, or Instagram to celebrate with friends and family far and wide.
- Private link: For a more personal and intimate touch, upload the file to a cloud storage service (Google Drive or Dropbox) and share a private link.
Extra tips for a great birthday video
- Use high-quality source material: Select clear, high-resolution images and clips to avoid blurry or pixelated footage.
- Mix the pacing: Build a compelling narrative by interweaving faster, energetic sequences and slower, more emotional moments.
- Keep audio balanced: Ensure the music volume complements but never overpowers any important narration or natural sound from the clips.
- Always test a preview: Watch your entire video before exporting to catch any errors.
The final step to a heartfelt birthday video
A well-made birthday video is more than just a slideshow. It’s a collection of memories, emotions, and shared experiences brought to life with music and effects. Unlike store-bought gifts, it’s personal, unique, and timeless.
In this guide you have learned how to create a stunning birthday video from start to finish. Undoubtedly, your gift is going to be memorable, warm and touching that will absolutely wow your loved one. Remember, the most important ingredient is the love and memories you pour into it. The only thing left to do is to start creating.
Put your creativity into action with AVS Video Editor known for its great balance of power and ease-of-use.
Download AVS Video Editor to start crafting your one-of-a-kind gift right away.