
Are you ready to dive into the world of multimedia editing but feel a bit overwhelmed by complex software? Meet AVS4YOU Multimedia Suite, your reliable creative assistant. This all-in-one software package is designed to handle video edits, audio enhancements, and even to make slideshows, all from one convenient suite. What’s more, it’s built with beginners in mind. You don’t need to be a tech wizard to start creating polished and professional-looking projects.
This guide aims to show you how straightforward it can be. In the next five simple steps, you’ll go from a complete newcomer to someone who can confidently navigate the suite and complete basic tasks. Let’s get you started on your creative journey!
Step 1: Install and explore the interface
The first step on your editing journey is to install the software onto your computer. This process is quick and user-friendly.
How to Download and Install AVS4YOU software
- First of all, visit the official AVS4YOU website where you can download each program separately or the whole suite. The setup package encompasses a wide range of apps including some freeware such as AVS Image Converter, AVS Document Converter, AVS Registry Cleaner, and others.
- Once downloaded, open the file and follow the on-screen setup wizard. It will guide you through the simple installation process, which only takes a few minutes.
Overview of the main dashboard:
- After installation, you won’t find a single “dashboard.” Instead, look for the AVS4YOU program group in your Start Menu. Here, you’ll see all the individual applications listed, for example, AVS Video Editor, AVS Audio Editor, and AVS Video Converter.
- To start, simply click on the program you want to use, and it will open in its own window. Each one has a clean, intuitive interface.
Beginner tips:
- Pin for easy access: Right-click on the programs you think you’ll use most and “Pin to Start” or “Pin to Taskbar” for quick launching later.
- Don’t be afraid to click: The best way to learn is by exploring. Click on different menus and buttons in each program to see what they do. You can’t break anything!
Step 2: Start with a simple video edit
Let’s jump into the most popular feature: video editing. Starting with a simple project will build your confidence quickly.
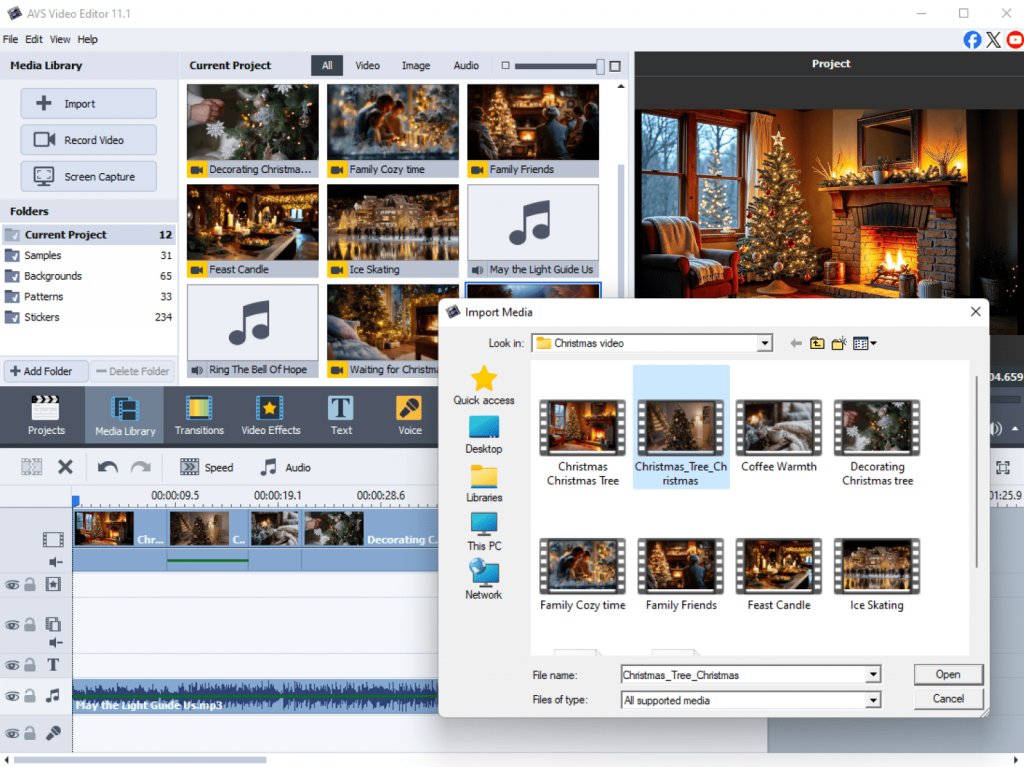
Import your video
Open AVS Video Editor and start a new project. Click the “Import” button or simply drag and drop your video files from your computer directly into the media library panel.
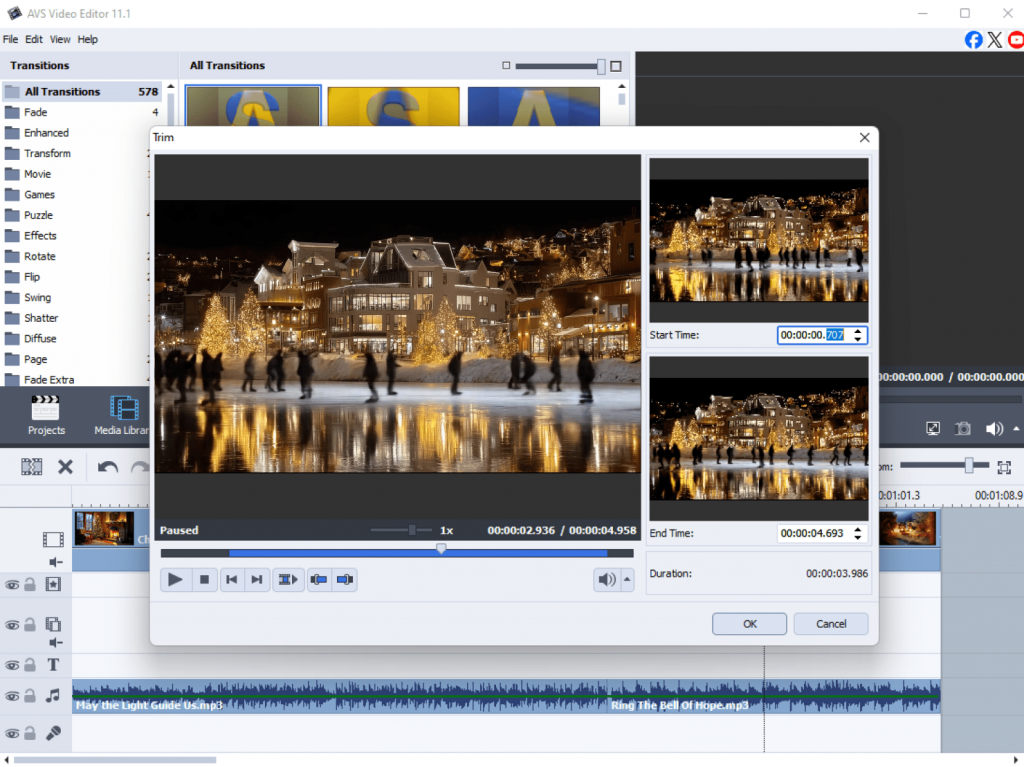
Trim and cut
Drag your video clip down to the timeline at the bottom of the screen. Simply set “In” and “Out” points on your timeline to define the section you want to keep, and then apply the trim function to remove unwanted parts.
Add transitions
To make cuts between clips smoother, use transitions. Find the “Transitions” tab, choose one you like (such as different variations of Fade, Move, Rotate, etc. ), and drag it between two clips on your timeline.
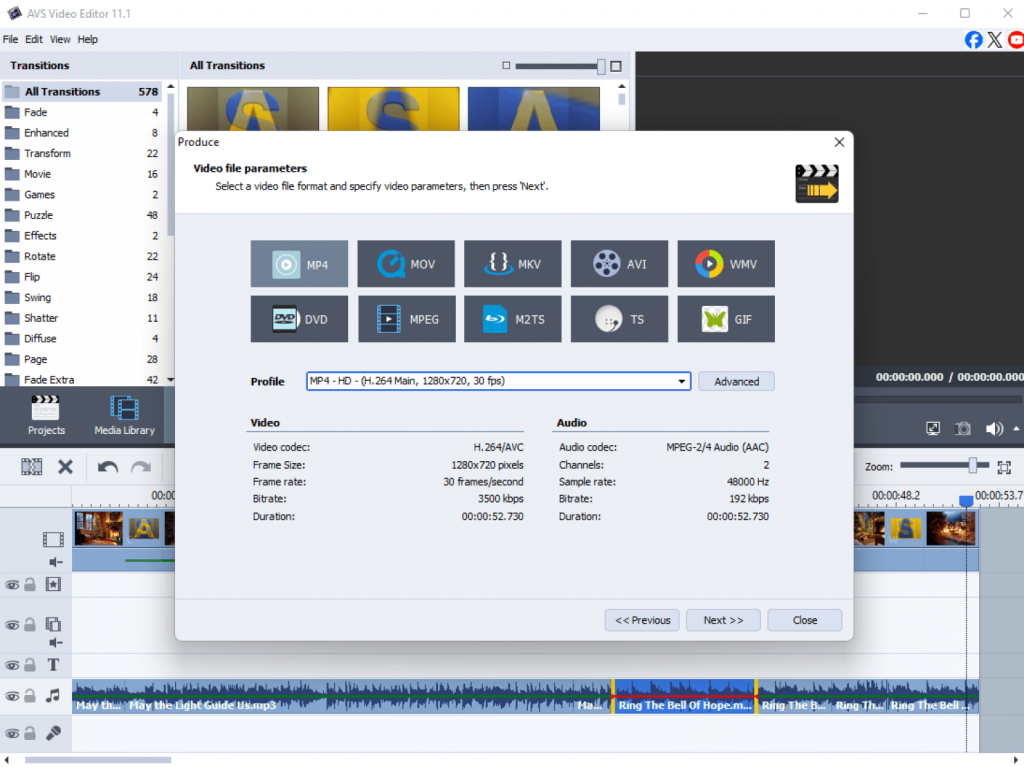
Export project
Once you’re happy, click the “Produce” button. You can save your video for now. We’ll cover export options in more detail in Step 5.
Beginner Tips:
- Start small: Practice with a short clip, like a 30-second phone video, for your first project.
- Use the timeline: The timeline is where the magic happens. Get comfortable with zooming in and out and moving clips along it.
Step 3: Enhance audio easily
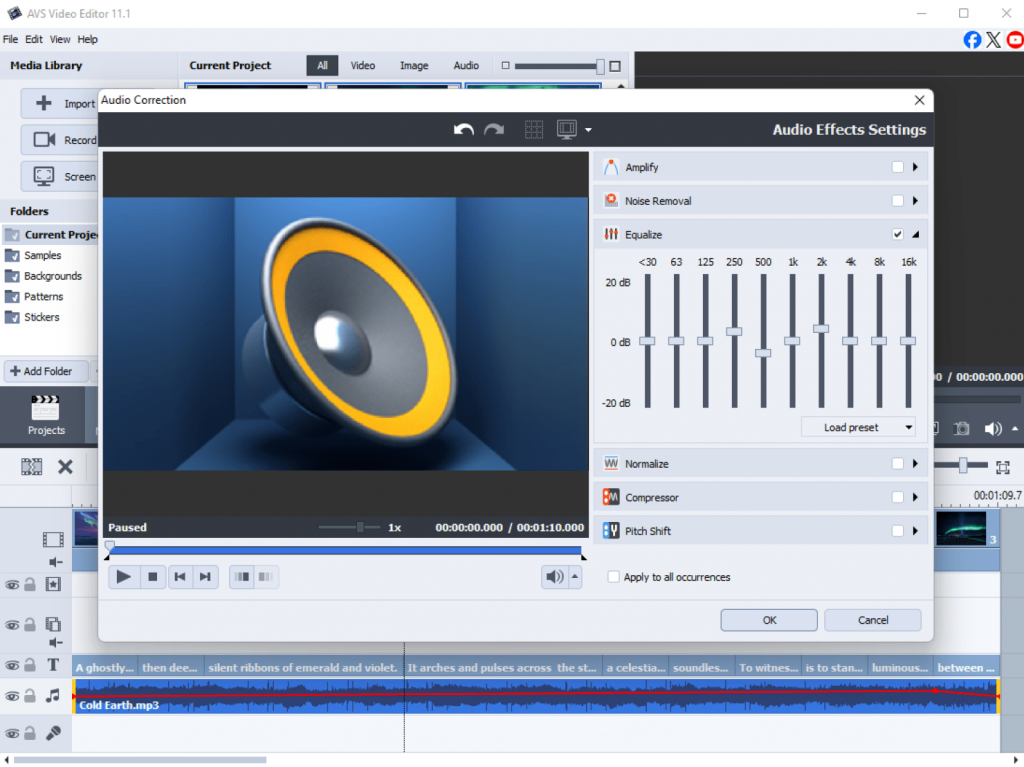
Great video needs great audio. You can prepare your favourite audio track or create an audio mix in AVS Audio Editor for adding it later as background music in AVS Video Editor. AVS Audio Editor allows you to polish and improve your sound in a few clicks. Here are some basic enhancement edits for a start:
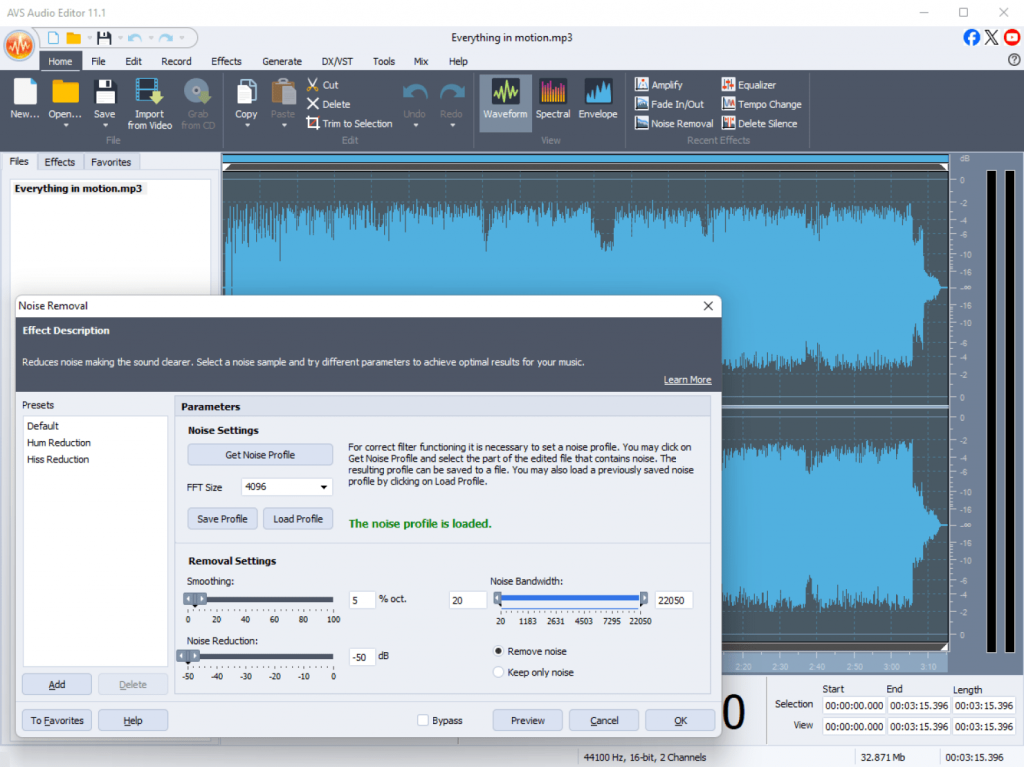
Basics of noise removal
Import an audio file or extract the audio from a video file. If you hear a constant hum or background hiss, look for the “Noise Removal” effect. Applying it will significantly clean up your audio.
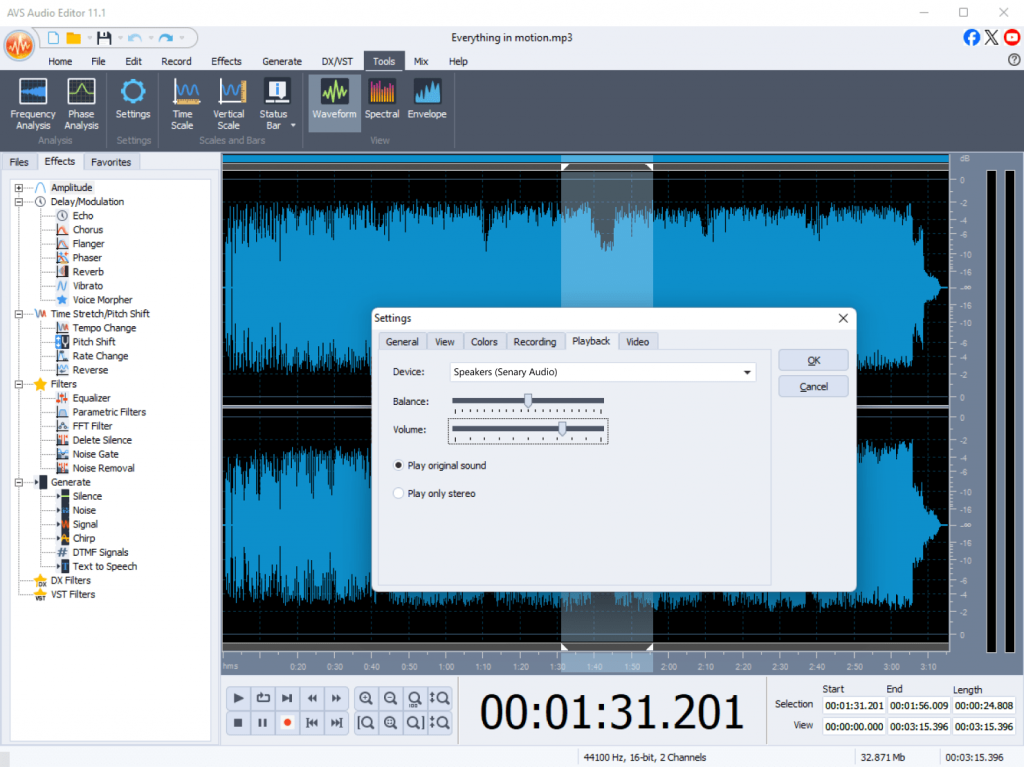
Adjust volume
To make quiet audio louder or loud audio softer, press the “Volume” button. There is a slider to increase or decrease the decibel (dB) level to your liking.
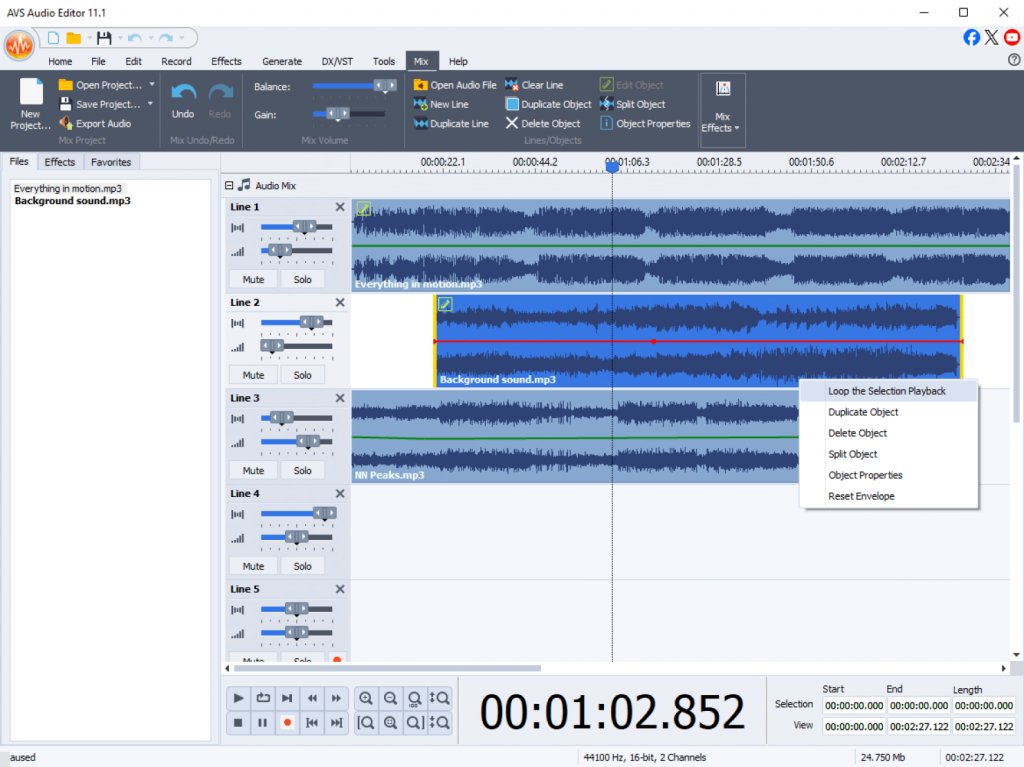
Add background music
Want to add a music track? Import your audio file and drag it to a separate audio track on the timeline. You can then adjust its length and volume so it doesn’t overpower the main dialogue.
Beginner tips:
- Listen with headphones: To catch subtle background noises, always edit your audio while wearing headphones.
- Adjust music levels: A good rule of thumb is to set your background music about 10-15 dB lower than your main vocal audio.
Step 4: Create a slideshow or presentation
If you have plenty of photos and don’t know how to organize them beautifully, create a slideshow or a presentation in AVS Video Editor. It is one of the best ways to capture your cherished memories of a trip, a birthday party, vacations, and so on.
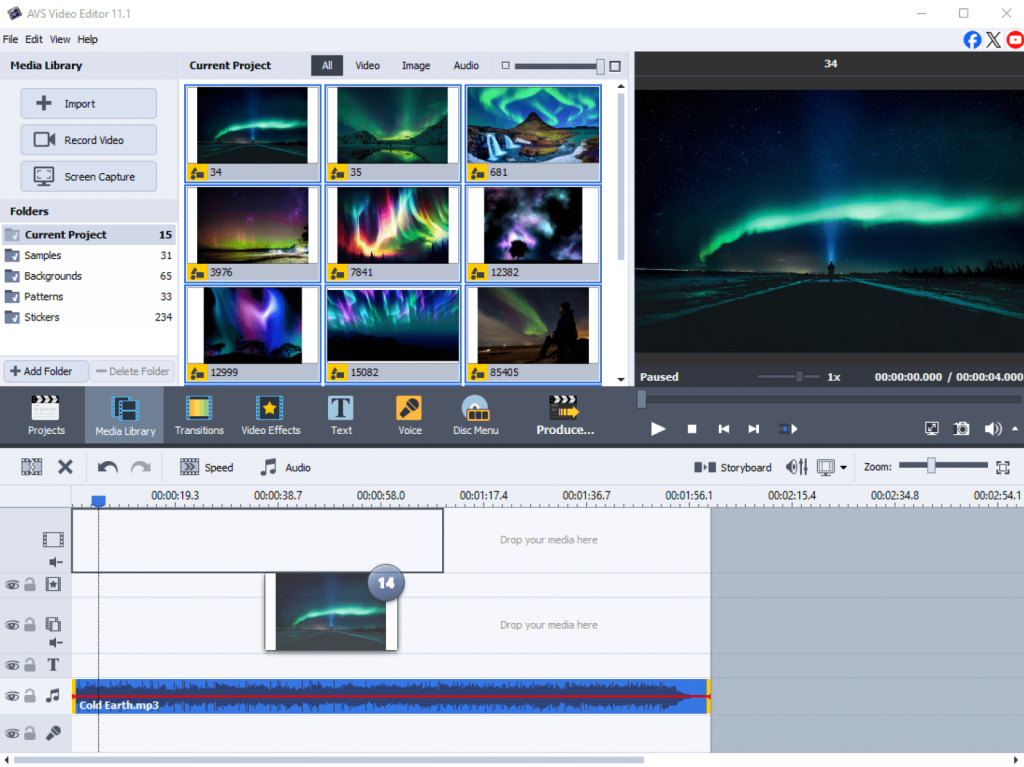
Combine your photos
Import your photos to the media library. Then, drag them onto the timeline in the order you want them to appear.
Add text and captions
To add a title slide or caption to a specific photo, click on the “Text” button, type your message, and customize the font, color, and size. Drag the text block over your chosen photo on the timeline.

Choosing background music
Just like video or image files, import a music file and place it on the audio track. Adjust the duration of the slideshow to match the length of your song.
Beginner tips:
- Don’t use long text messages: Avoid writing long paragraphs on your slides. Use concise text and a large, easy-to-read font. A single powerful word or a short, meaningful caption is often more effective.
- Balance your audio tracks: To make your voiceover stand out, fade the background music beneath the narration and bring it back up once it’s finished. This results in a smooth and professional audio balance.
Step 5: Save and export in the right format
Ready to share your creation? Choose from a range of ready-made presets optimized for different devices and platforms, and publish your video online simpler than ever.
How to select the correct format:
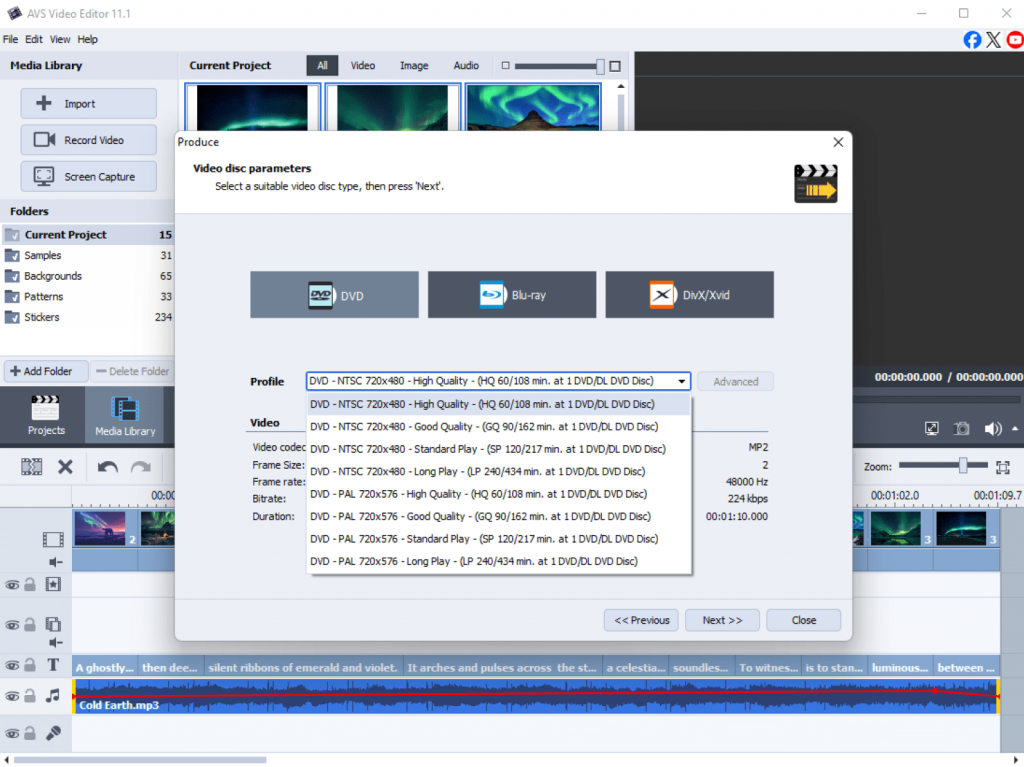
Click the “Produce” button. You will be presented with a list of profiles and formats.
- For YouTube/Vimeo: Choose MP4 (H.264) format with a 1080p resolution. This is the standard for online video platforms.
- For Instagram: For stories, use a vertical resolution like 1080×1920. For feed posts, a square (1080×1080) or vertical format works best.
- For smartphones and tablets: Go to the “Devices” tab and select your specific model for the optimal settings.
- For archiving or DVD playback: Select the “Disc” profile to create a DVD-compatible video file.
A note on the AVS4YOU Watermark
If you use a free version of the software, a watermark will be added to you output files. To remove it, you will need to purchase a subscription giving access to all features without limitations.
Beginner Tips:
- Stick with MP4: When in doubt, MP4 format is the best choice for almost all uses, from social media to personal playback.
- For maximum quality: If you want the highest quality for storage, you can choose a less compressed format such as AVI, but be aware that the file size will be very large.
- Check the file size: If you need to send a video via email or message, choose a lower resolution (for example, 720p) to keep the file size lightweight.
From beginner to creator. Keep going!
And there you have it! You’ve successfully navigated AVS4YOU Multimedia Suite in five easy steps. We started by installing the software and getting familiar with the interface, then moved on to hands-on projects from simple video editing to audio enhancement, and creating a slideshow. Finally, you learned how to correctly save and export your work for any purpose.
Remember, every expert was once a beginner. The key is to keep experimenting. Try adding a filter to your next video, or playing with different audio effects. The more you use the tools, the more comfortable and creative you will become. Now that you’ve mastered the basics, we encourage you to dive deeper. Explore the advanced effects, color correction tools, and more. Your creative journey has just begun.