
Silent pauses can quickly drain the energy from your recordings. Unnecessary dead air slows down lively conversations in podcasts, webinars, or voiceovers, making them feel sluggish and less professional. In addition, long gaps increase editing time and bloat your audio files. The good news is, removing these silent sections is easy with modern audio tools and the result is content that sounds crisp and engaging.
What causes silence in recordings
If you’ve ever listened back and wondered, “Where did all this empty space come from?” you’re not alone. Silence squeaks in for a handful of reasons:
- People naturally pause while talking – thinking, breathing, or hesitating.
- Sensitive microphones pick up faint hums or static, which can be interpreted as silence by editing software.
- Virtual calls might drop out for a second, leaving a blank in your otherwise perfect take.
- Sometimes, speakers just need a moment to gather their thoughts, which doesn’t sound as natural on playback as it does in real life.
When you’re creating a podcast, a narrated video, or an online course, those gaps can sneak in and disrupt the flow. Once you know where silence tends to show up, it’s much easier to fix it.
Key benefits of removing silence from audio
Getting rid of unnecessary silence comes with several perks:
- The flow gets smoother, so listeners stay tuned in.
- Everything sounds sharper and more professional.
- Audio files end up smaller, so sharing and storing is a breeze.
- Automated tools give you your time back, and the core message stands out, no distractions.
How to remove silence: Tools and techniques
Silence removal in AVS Audio Editor – Quick guide
AVS Audio Editor makes cleaning up silence almost effortless, even if you’re not a tech whiz. Here’s how you do it:
1. Download and install AVS Audio Editor.
2. Import your audio file.
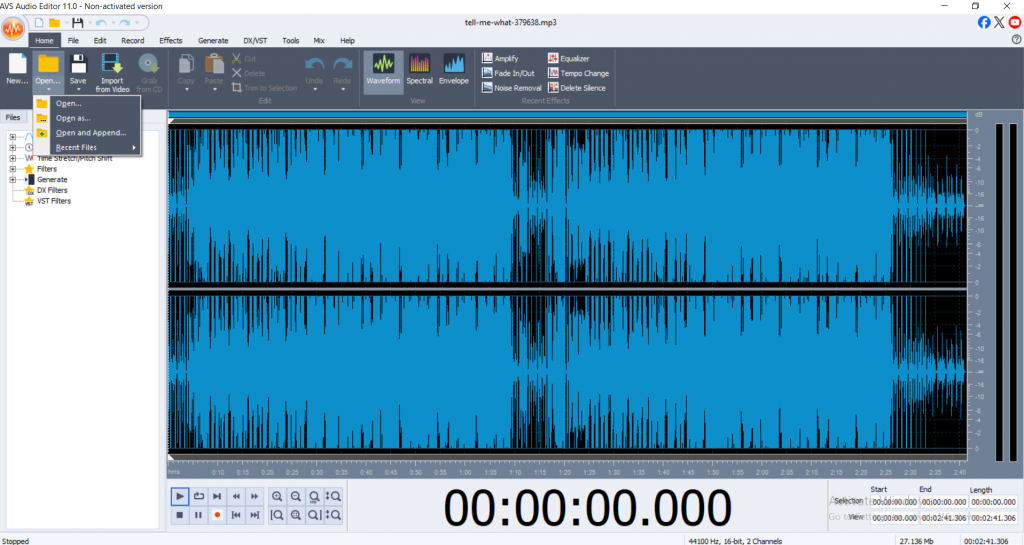
Launch AVS Audio Editor.
Click File > Open, or simply drag and drop your audio file into the workspace.
3. Select Delete Silence
In the top menu, find Effects tab and select Delete Silence.
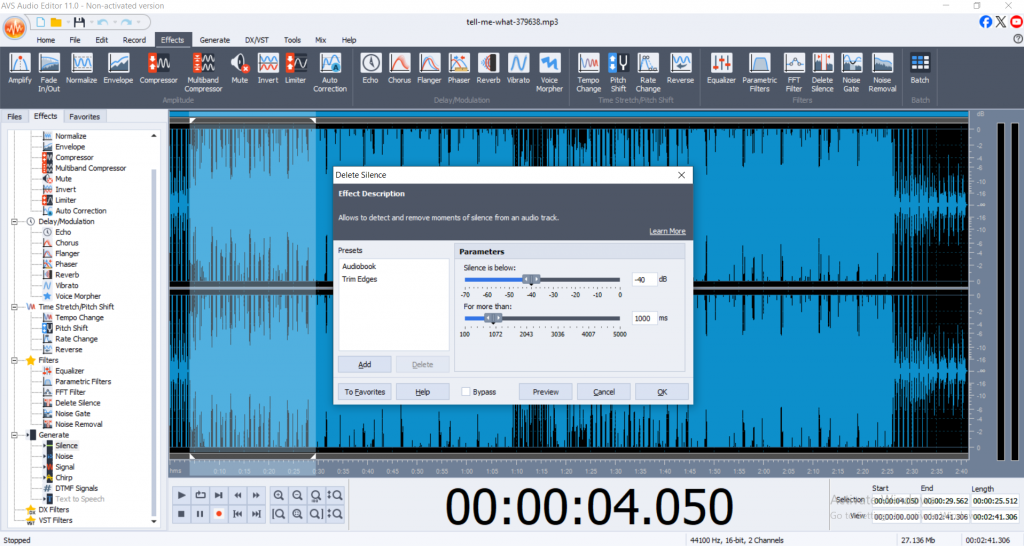
The exact wording may vary by version, but look for options related to silence or trimming.
4. Adjust silence detection settings
A dialog box will appear letting you set what counts as “silence.” You can adjust:
Threshold (dB): The loudness level below which sound is classified as silence. Lower values catch quieter sounds.
Duration (milliseconds/seconds): Minimum silence length required for detection and deletion during processing.
Adjust the settings according to your needs. For voice recordings, you might set threshold around -40dB and duration at 300ms, but experiment to achieve better results.
5. Preview detectedsilences
Click the Previewbutton in the dialog box.
AVS Audio Editor will visually highlight detected silent sections and let you preview the audio as it will sound after trimming.
6. Apply silence removal
If everything sounds right, click OK.
The editor will automatically cut out the detected silence sections across your audio file.
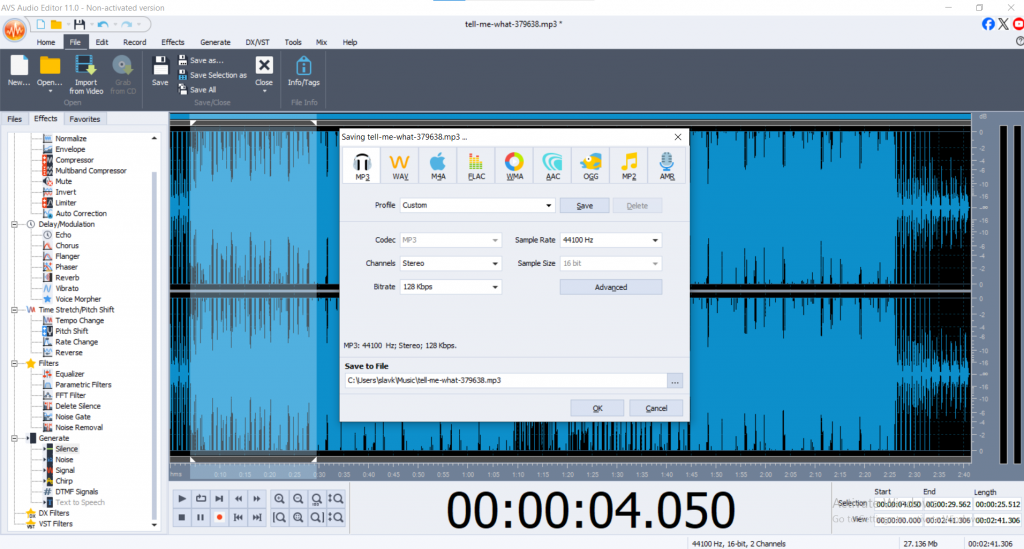
7. Export your edited audio
Go to File > Save As.
Choose your desired file format: MP3, WAV, FLAC, etc.
Every tweak you make can be undone, so you’re free to experiment until your track sounds just right.
Why AVS Audio Editor?
- It’s intuitive and quick.
- Batch processing means you can fix multiple files together.
- No steep learning curves or overwhelming menus.
How to remove silence in Audacity for cleaner audio
If you like open-source tools, Audacity is a tried-and-true classic. Its ‘Truncate Silence’ function does the trick:
- Import your audio, highlight it, then go to Effect > Truncate Silence.
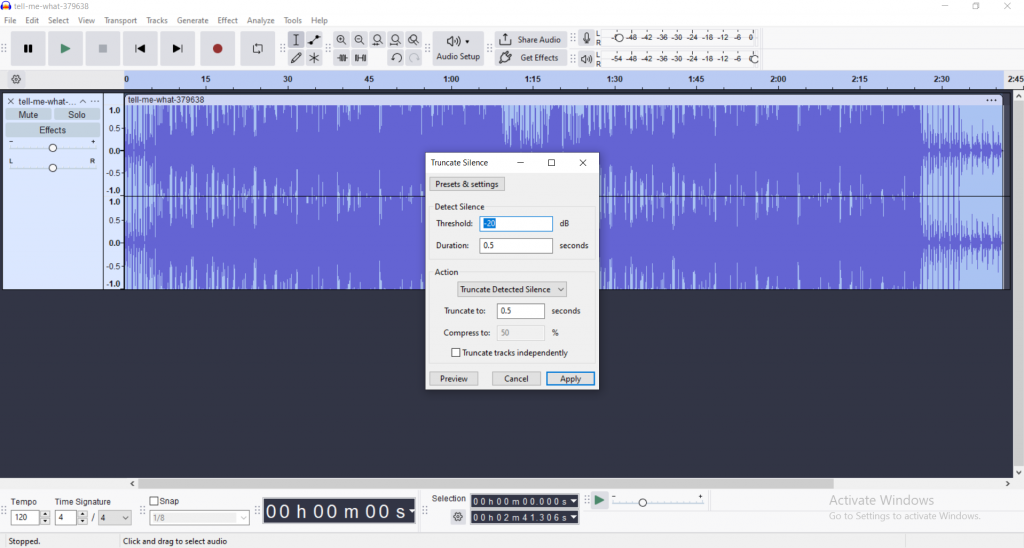
- Set your threshold and time values.
- Preview, apply, and you’re set.
Audacity is free, reliable, with a passionate community, though it might take some exploring to get comfortable with it.
Manual method: hands-on editing
Sometimes, nothing beats doing it yourself especially if you want ultra-precise control or just have a couple of spots to clean up.
Pros: you decide what stays and what goes.
Cons: it’s time-consuming and harder to keep pacing consistent for longer files.
Pro tips for better audio cleanup
Here are some expert tips to improve your audio editing workflow:
- Use noise reduction first: Clean background hiss or hum before trimming silence. This prevents removing quiet but important parts accidentally.
- Don’t cut too aggressively: Natural pauses in silence help improve understanding. Removing every pause can make speech sound rushed or robotic.
- Preview your edits: Always listen to your audio after trimming silence to catch any awkward jumps or clipped words.
- Back up originals: Save a copy of your raw audio before editing so you can revert changes if needed.
- Consider compression and equalization: After cleaning silence, apply compression to even out volume levels, and equalization to enhance sound quality for a professional finish.
Conclusion
Removing silence from your recordings is a simple way to make your audio sound more professional and engaging. By cutting out unnecessary pauses, your audience will find it easier to follow along and better understand your message.
With the Auto Silence Detection feature, AVS Audio Editor makes this process quick and easy. If you want your recordings to sound smooth and well-edited, try AVS Audio Editor and see for yourself how easily you can improve your audio quality.
Useful links
7 easy steps for an audio cleanup