
Have you ever watched a video montage that gave you chills or one that made you smile long after it ended? That’s the power of creative editing, an art that blends visuals, music, and emotion.
A video montage is the combination of video segments, images, music, as well as text clips to highlight certain events or create memorable moments for sharing on social media. Be it a birthday summary, vacation recap, or promotional video teaser, montages are undoubtedly one of the most effective ways to capture and hold your audience’s attention.
In case you are looking for a video montage maker that has incredibly simple features yet powerful in performance, AVS Video Editor is a good choice. Being a part of the AVS4YOU Multimedia Suite, it offers everything ranging from simple drag and drop editing to transitions and effects – suitable for both novices and professionals.
Let’s dive into this step-by-step guide on how you can create a video montage that stands out.
How to make a video montage in AVS Video Editor
Step 1: Collect and organize your media
Before accessing AVS Video Editor, it is beneficial to already have all assets prepared. These assets include:
- A set of relevant video files (best if short);
- Contextual images;
- Emotion evoking background music or songs.
Tip: Make subfolders such as “Clips,” “Photos,” and “Audio” for better organization.
AVS Video Editor allows to work with various formats such as MP4, AVI, MOV, WMV etc. therefore, there is no need to convert files before editing.
Step 2: Import media into AVS Video Editor
For importing files into AVS Video Editor, click on “Import” in the Media Library part of the program.
• Drag and drop the files you wish to import.
• The program displays video, images, and songs separately so you can find them without getting lost.
The software’s layout is straightforward but robust, making it ideal for anyone crafting their first video montage.
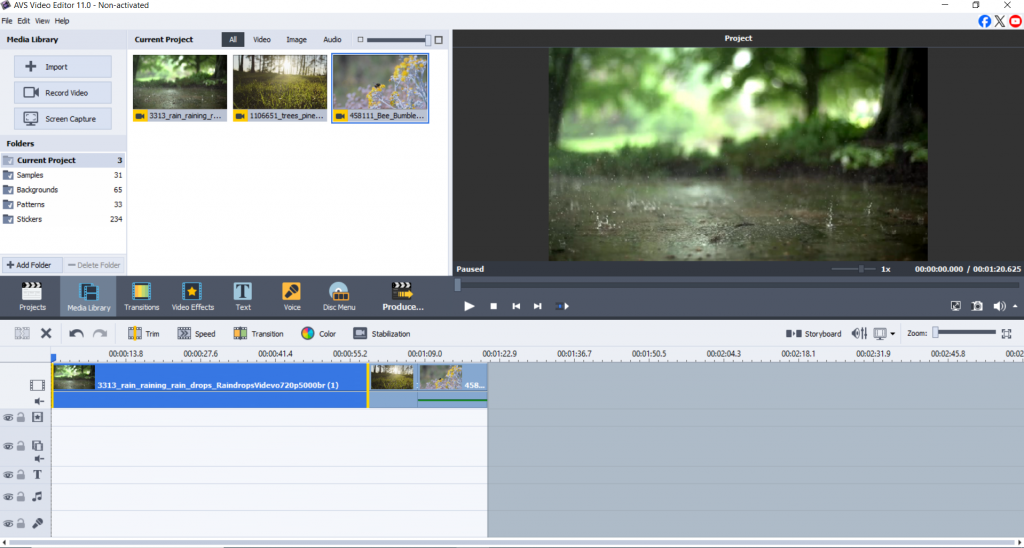
Step 3: Arrange clips on the timeline
Everything is already uploaded? Let’s work on bringing the narrative to life!
- Place the clips onto the primary video timeline.
- Remove parts that do not add value to the footage with the use of the split tool.
- Reorder clips according to the narrative structure: you can do it in chronological order, by themes, or by emotions.
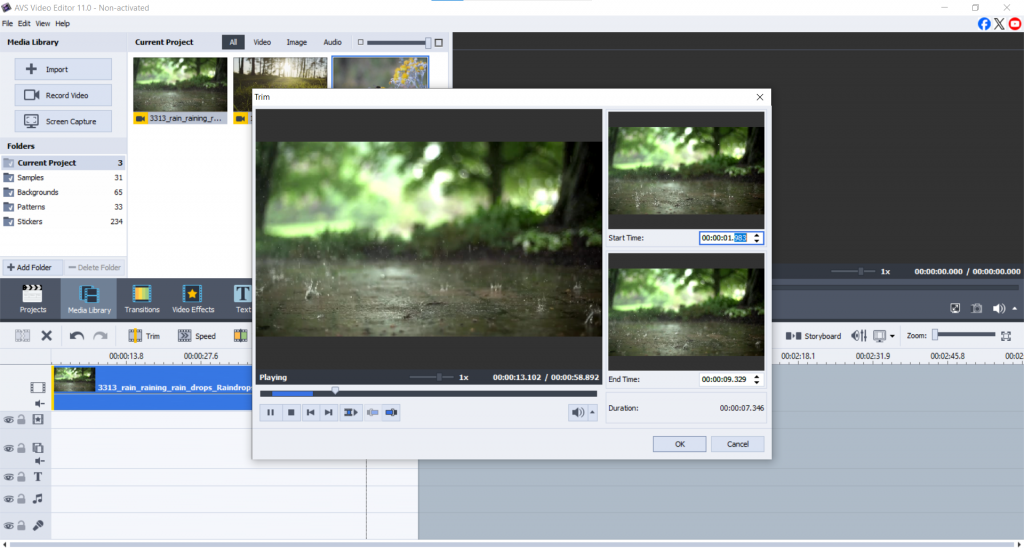
Editing tip: Keeping clips to 3-7 seconds enhances viewer engagement and maintains an energetic pace, resulting in a more captivating montage.
Step 4: Add transitions and effects
Transition elements are necessary so that there are no abrupt changes within the video clips.
To apply them:
• Navigate to the Transitions tab.
• Select taper, wipe, slide, etc.
• Drag and drop each transition element between the respective clips on the Storyboard view.

If you want to go even further, you can apply effects such as slow motion, vintage filters, or color correction using video sections of the module window. Don’t go overboard; subtle approaches tend to work best and are less distracting.
Step 5: Sync music to the video montage
The audio is one of the most essential components of your montage.
- Add your desired audio, and go to Import > Audio.
- Place your audio on the Audio Mix line within the timeline.
- Use fade-outs and fade-ins to smooth the audio flow.
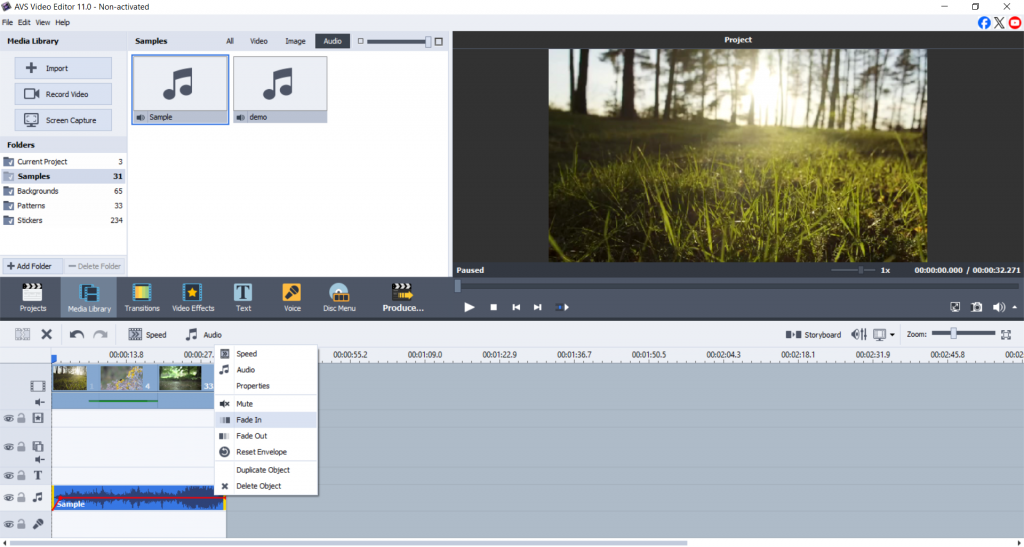
Audio Tip: When there’s voice or narration, lower the music volume. Make sure the background sound is soft and there’s a slight overlap.
Step 6: Add text, titles and captions
It’s easy to apply titles or credits to your video with the right tools.
• Click on the Text button on the menu.
• Select any type of a text template from the template library.
• A title block may be placed on the Text line.
• Change font, size, color, animation settings.
Include cover titles, intermediate captions, and credits to enhance the overall quality.
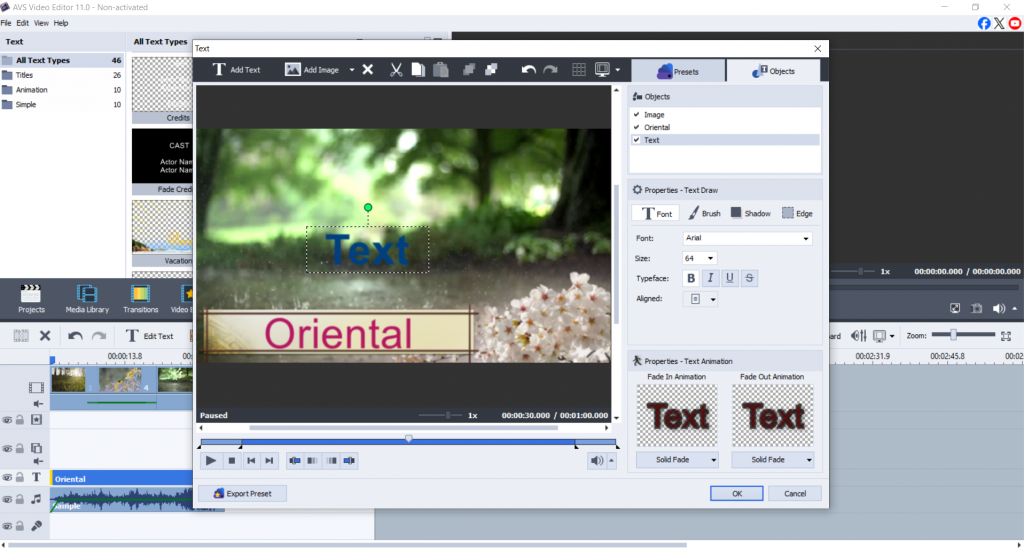
Font Tip: Use simple, legible fonts. Sans-serif types such as Roboto or Open Sans look great on all screens.
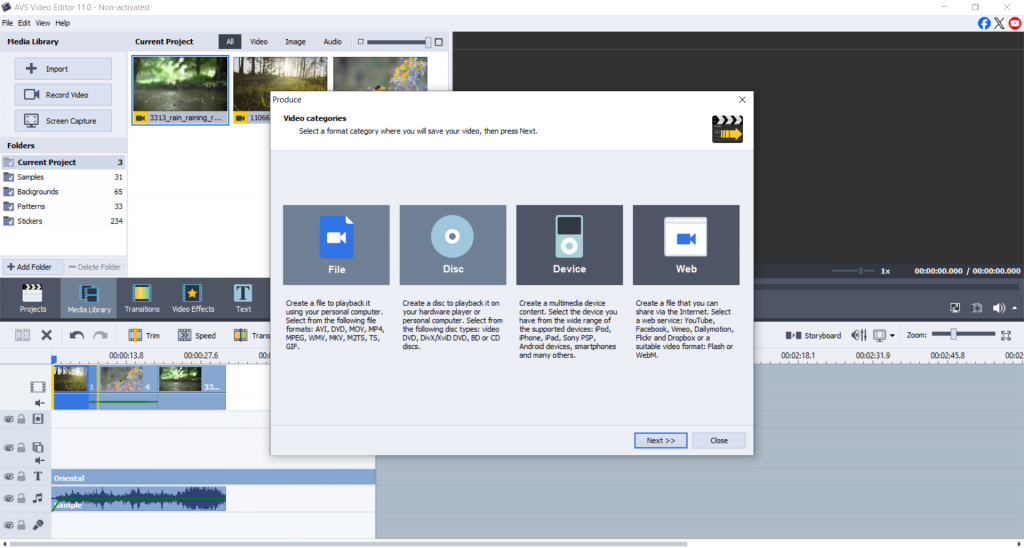
Step 7: Export your video montage
If the montage meets your expectations, finish your work by:
- Tapping “Produce”.
- Picking the chosen format (MP4 works great for every platform).
- Choose recommended resolution for your platform: 1080p for YouTube, 720p for Instagram, etc.
- Hit “Create” and watch your video montage generate.
Choose from various export options, including Facebook, TikTok, and smartphones, to ensure your montage fits any device.
Tips for creating a professional montage
Creating a unique montage to impress your audience can be a piece of cake if you follow these guidelines.
Apply color grading: Set the tone for different clips by visually linking them together. Check out: Handy Colour Correction Tips Everyone Can Use
Avoid changing the pacing too much: Slow parts can feel aimless, and uncoordinated cuts and transitions make it harder to maintain rhythm.
Sail around copyright issues by using royalty-free music from AudioJungle and Bensound.
Create smooth transitions by matching the motion and timing of clips for a seamless blend. Preview before exporting, as watching the entire montage at least once helps catch any glitches or awkward cuts.
Conclusion
A professional video montage doesn’t require expensive software or years of experience. All you need is a great story, the right tools, and a bit of creativity.
With AVS Video Editor, you get a powerful yet beginner-friendly video montage creator that helps you turn raw footage into something memorable. Explore different styles, play with effects, and craft a montage that tells your story your way.
Ready to create your first montage? Download AVS Video Editor
Check out the AVS4YOU Blog for more editing tips and handy tutorials.
Useful links
Blur it out! How to blur a video and protect sensitive information
Enhance your video storytelling with special effects for mood creation