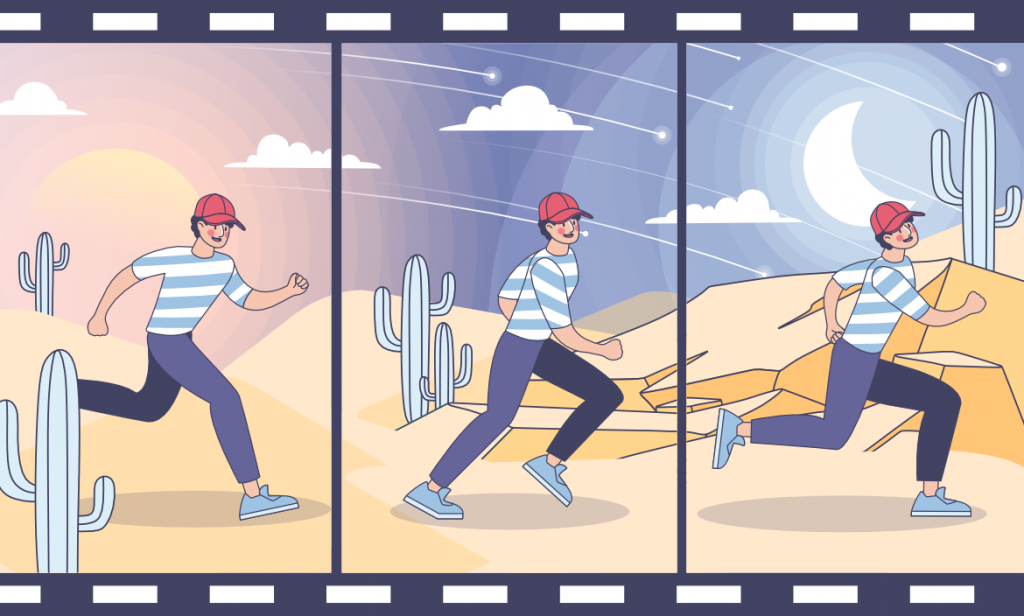
By 2025, timelapse videos have grown into a genre of their own, thanks to the mesmerizing sunsets, buzzing cityscapes, and atmospheric transitions often showcased on Instagram Reels and TikTok. These fast-paced visuals compress hours of footage into seconds, offering a creative and compelling way to tell a story.
But creating a smooth, high-quality timelapse involves much more than just speeding up a clip. Other challenges include camera shake, uneven lighting, and awkward pacing—all can lead to subpar viewer experience. AVS Video Editor helps address all these issues. Its simplicity makes the editing process accessible for casual creators, while its power allows experts transform ordinary clips into stunning pieces of art captured in time.
How to create a timelapse video in AVS Video Editor
1. Importing media into AVS Video Editor
Start by opening AVS Video Editor and clicking the Import button to upload your video files or image sequences.
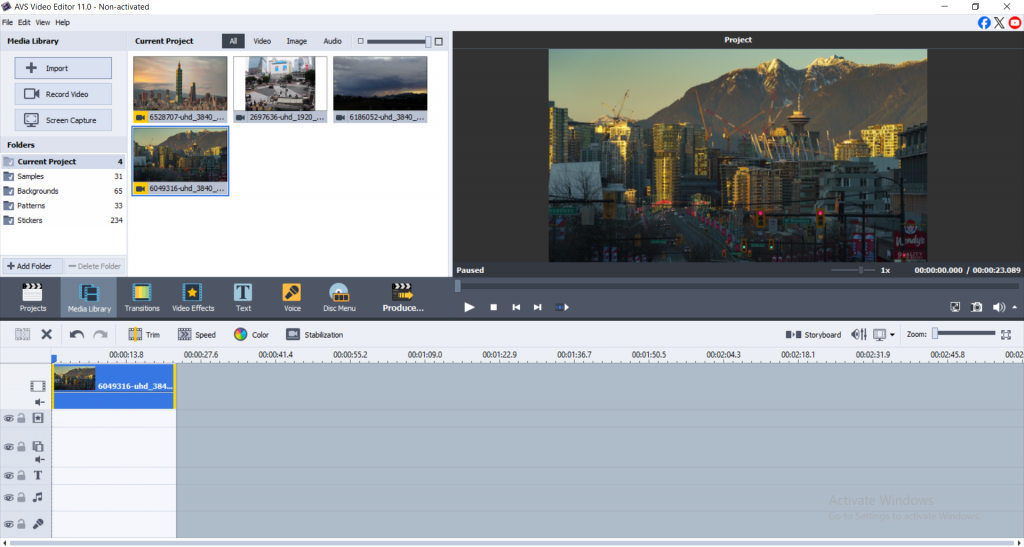
For best results, use high-resolution footage shot on a tripod in well-lit outdoor or brightly lit indoor settings, as timelapse footage typically requires more light.
2. Turn your video into a timelapse
To turn a video into a timelapse:
Right-click on the clip in the timeline and select Speed/Duration. Depending on your scene, increase the speed, for example, 500 – 2000%.
- City scenes: Go for a higher speed (1000 – 2000%) to emphasize motion.
- Natural elements (clouds, flowers): Moderate speeds (500-800%) work better to retain detail.
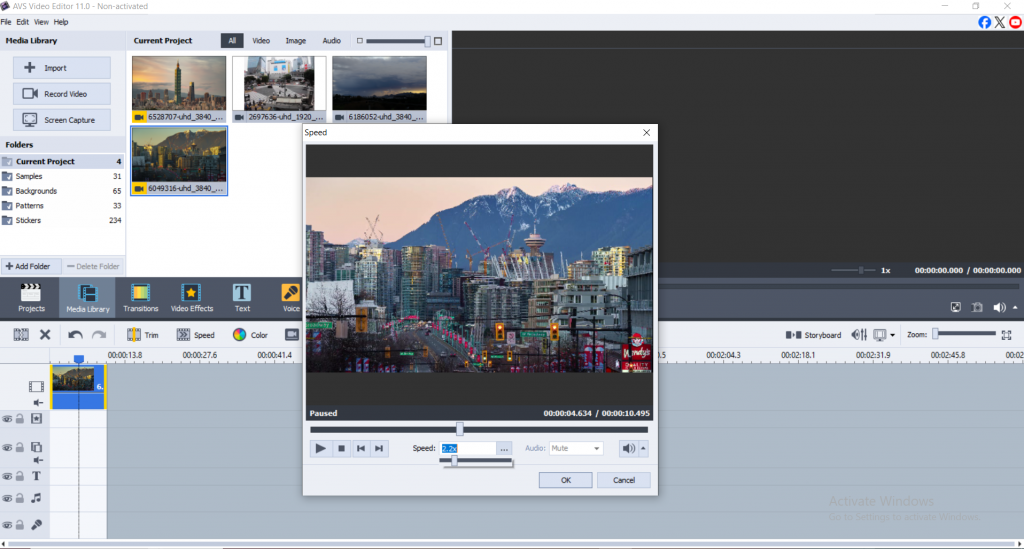
If needed, you can also slow down a timelapse video by lowering the speed percentage. This works great for highlighting slower motions like star trails or sunsets.
3. Add music to your timelapse for maximum impact
Music brings emotion and flow to your timelapse. AVS Video Editor makes audio syncing straightforward:
- Click Add Audio and drag your track onto the timeline.
- Use the waveform to align key video moments with beats in the music.
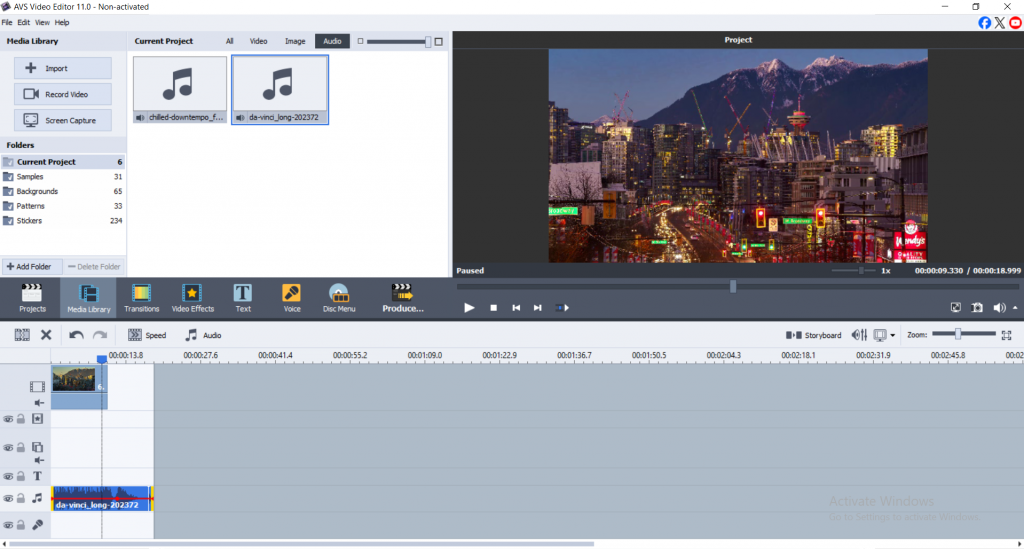
Pick music that fits the theme. Use ambient tracks for nature scenes, or upbeat electronic for urban timelapses.
4. Enhance timelapse quality with editing tools
AVS Video Editor comes with built-in tools designed to refine your footage:
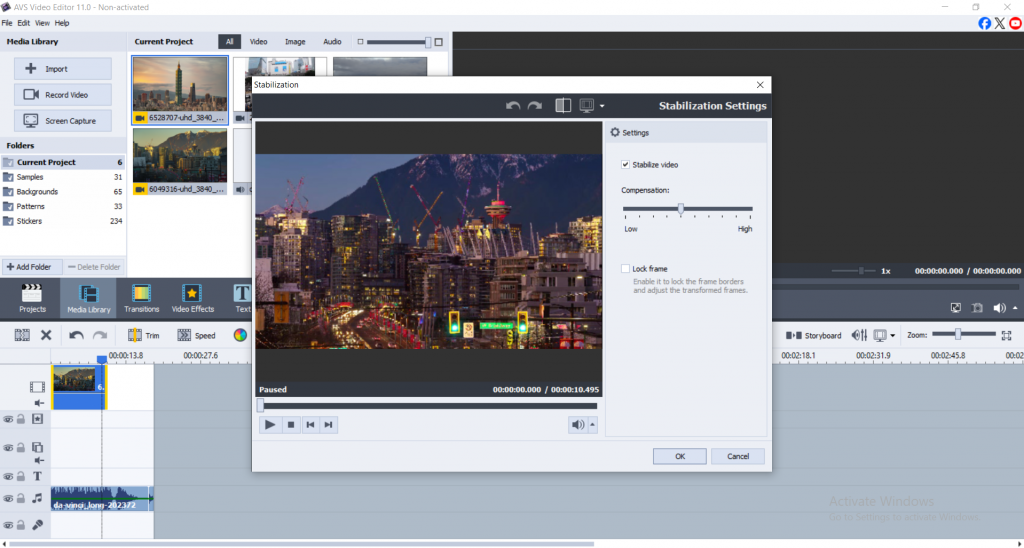
Camera shake: The stabilization tool reduces camera shake during post-production.
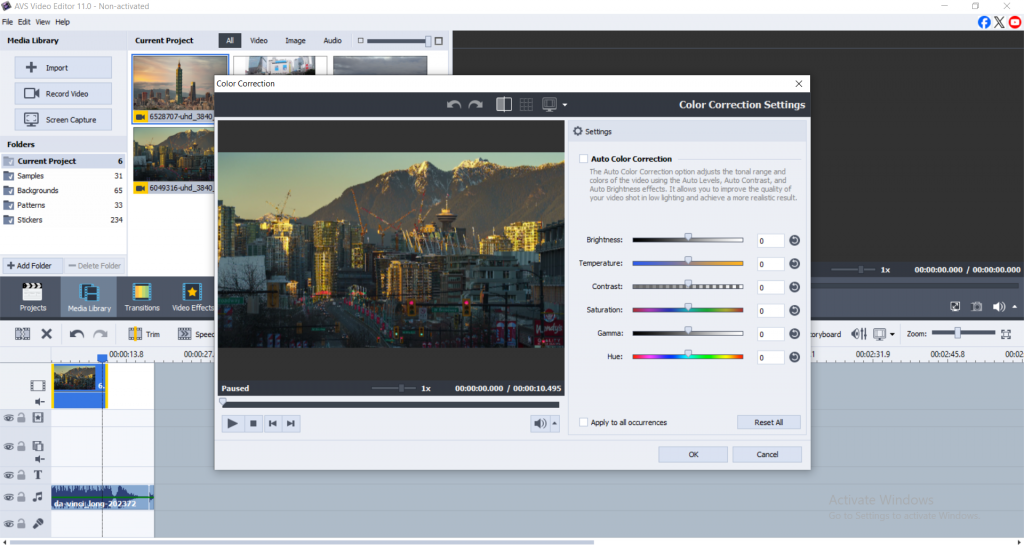
Brightness and contrast: These adjustments should be made for accuracy, especially when the light condition continuously fluctuates mid-shoot.
Color correction: Filters can be applied or color levels may be manually adjusted to achieve cinematic visuals.
These features help transform ordinary clips when you timelapse a video into something visually compelling.
5. Export your timelapse in high resolution for any platform
Once satisfied with your edits:
Click on Produce> choose File or Device.
For platforms like YouTube and TikTok select Full HD (1080p) or 4K).
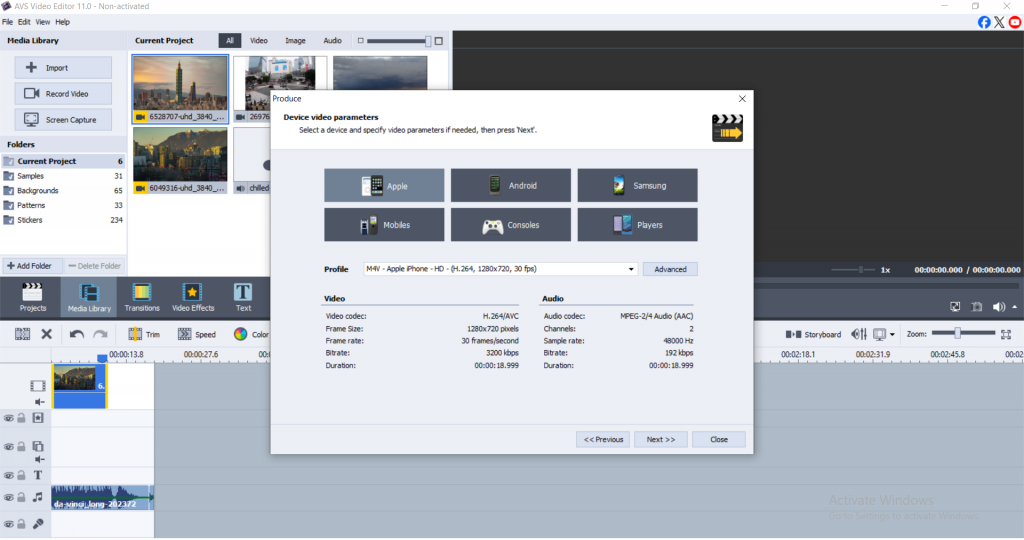
For smooth playback, adjust the bitrate when exporting to MP4 and use the built-in presets for the best results.
Top tips on how to create a timelapse video
1. Control stability when shooting
Use a tripod or gimbal to keep the shot steady, as small movements can look much bigger once the video is sped up.
2. Control lighting
Natural light can change drastically over the course of a few hours, so it’s best to shoot during overcast days or golden hour for softer, more consistent lighting.
3. Remember the frame rate
If you want to slow down parts of your timelapse later, it’s a good idea to shoot at a higher frame rate, like 60 fps. When you’re ready to export the final video, use 24–30 fps to keep the motion smooth and cinematic.
Timelapse video editing techniques for post-production
1. Use filters and transitions as creatively as possible
Cinematic filters are great for setting the mood of your clips. Additionally, smooth transitions such as fades and cross-dissolves can be used to seamlessly connect different parts of your video.
2. Enhance the video with soft zoom effects
Creating engagement through zooming during timelapse enables to improve visual attention.
AVS4YOU zoom tool enables the highlighting of changes such as flowers blooming and so crowd movement with the flowers’ blooming actions.
Set Zoom keyframes to match metered movements or lyrical sections of the audio.
3. Adjust Effects in Relation to Musical Tension
Integrate timing of all visuals such as scene changes, zooms, and cuts.
Mistakes to avoid when creating a timelapse video
1. Shaky footage
Even with stabilization, nothing beats a solid base. Use a tripod and avoid handheld shooting for long durations.
2. Over-editing
Adding too many effects, transitions, or filters can distract. Less is more, so let the timelapse speak for itself.
3. Poor pacing
If the footage is too fast, viewers miss details; too slow, and they lose interest. Test various speeds and ask for feedback.
Conclusion
It’s now easier than ever to turn your unprocessed video into a beautiful timelapse with AVS Video Editor. From importing and speeding up video, to adding music, correcting colors, and exporting in high resolution, the process is simple and easy for beginners to use, but it is also powerful enough for seasoned editors.
This is the ideal moment to start learning how to make a timelapse video, convert a video to a timelapse, or even add zoom effects to your timelapse. Get AVS Video Editor today, play around with the footage, and begin creating narratives that literally move.
Useful links
Timelapse with a twist: adding zoom effect to highlight key moments
5 Timelapse video ideas to level up your video content
Enhance your video storytelling with special effects for mood creation