You are about to run out of a hard disk empty space and still not ready to decide which home video is worth storing and which should be deleted? Of course nowadays you can just use your DVD-R drive and burn as many DVDs as you want to empty your hard disk space but it's not the way out for you because you need an instant access to your media instead of spending time in searching for the necessary disc among hundreds of them. The way out is to reduce the size of all the home video you have on your hard disk using AVS Video Converter so to have extra empty space. The steps below will help you to solve your issue successfully.
Click here to download it. After the download is finished, run the AVSVideoConverter.exe file and follow the installation wizard instructions.
[Back to the Top]
To select a video you would like to convert hit the Browse... button next to the Input File Name field. In the opened Windows Explorer window browse for the necessary video file:
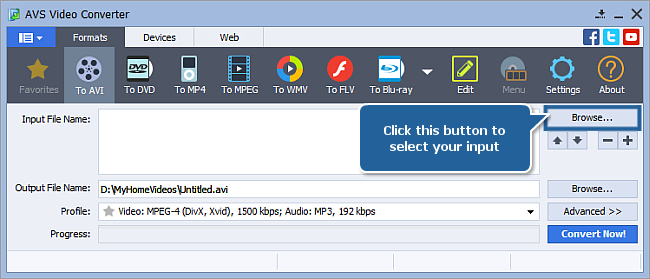
 Note
Note: when your input is a DVD disc, you will need to select the path to your source file: X:\Video_TS\Video_TS.IFO. "X" stands for your DVD-ROM or the hard disk drive folder where your DVD is stored. Please see the
online help section to find more on how to convert your home DVDs to other video formats.
[Back to the Top]
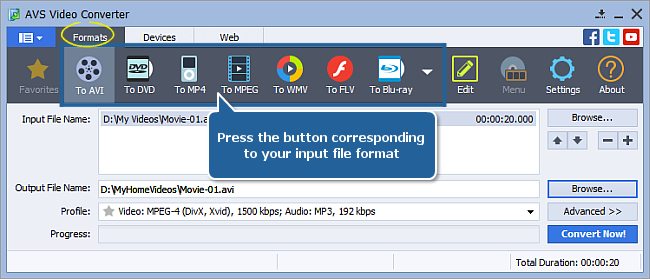
After having selected your input video file, pay attention to the Formats tab of the Main Toolbar placed at the top area of AVS Video Converter window (click the More Formats button to open the More Formats Toolbar which contains some additional formats, if necessary). Click the button corresponding to your input video file format:
[Back to the Top]
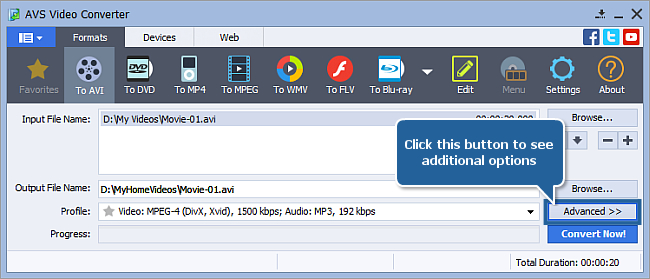
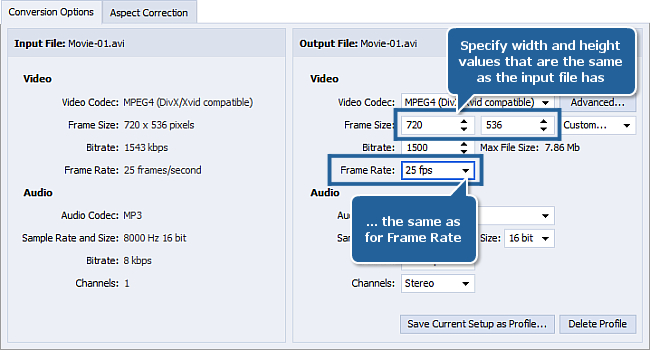
Click the Advanced >> button to see the additional file parameters:
Choose the Conversion Options tab that will help you compare the input and output file parameters. Pay attention to the following properties that should be the same in the Input File and Output File sections correspondingly: Frame Size - i.e. video image width and height and Frame Rate:
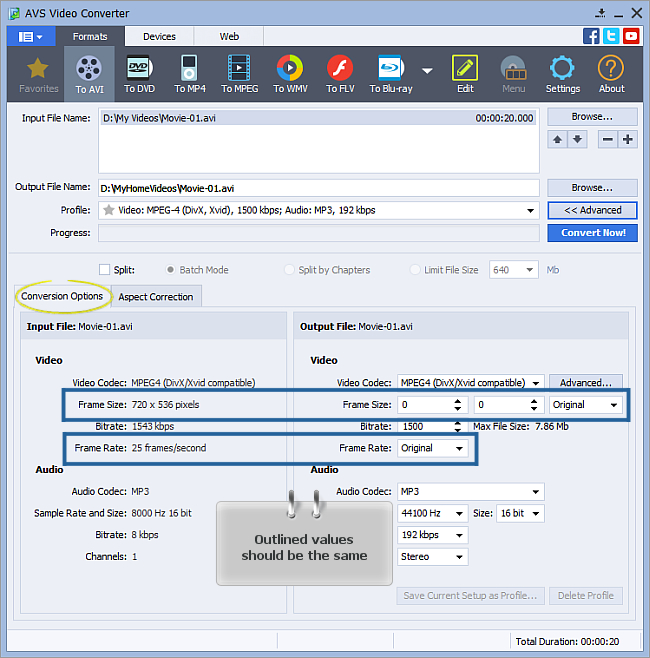
If the corresponding values of the Output File section for Frame Size, Frame Rate differ, correct them by selecting the values which are equal to those of the input file from the appropriate control boxes.
Note: you can also select the
Original option from the
Frame Rate control box and from the third
Frame Size field (in this case the width and height values will be set to 0).
Note: when converting videos to the MPEG or DVD format, you might additionally need to correct the output file
Aspect so that it will be equal to the input file aspect value. You can do it at the
Aspect Correction tab.
[Back to the Top]
To reduce the video file size saving its format means to set a lesser video and audio codecs bitrate for an output file as compared with an input one. Set a lesser value in editbox labelled as Bitrate in the Video section. You can also reduce an audio bitrate value if it turned out to be more than that of the input file:
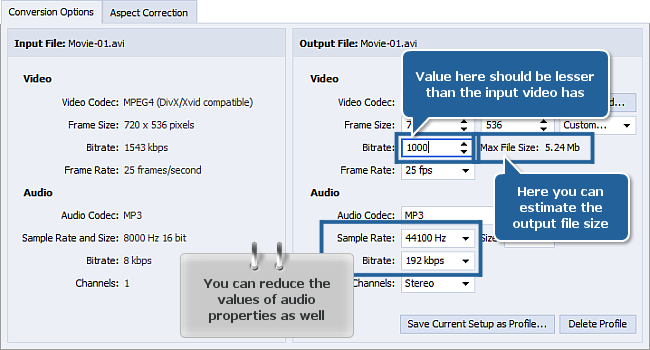
Note: the less bitrate value you set, the less both the file size and image/audio quality you get.
If the selected codec allows to evaluate the maximum output file size, you can see the Max File Size in the Output File section.
[Back to the Top]
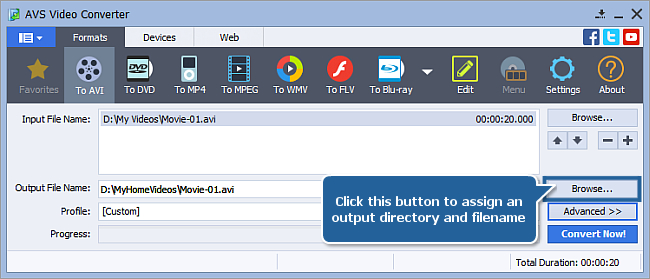
Choose the directory to save. To do that click the Browse... button placed to the right of the Output File Name area:
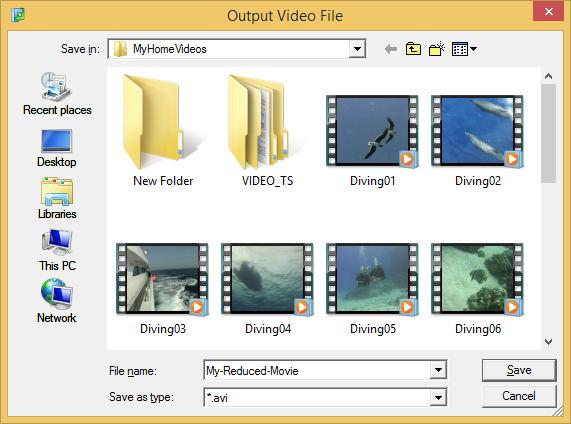
Specify the directory for saving the result and click Save:
[Back to the Top]
Everything is ready to start the reduction procedure. Click the Convert Now! button:
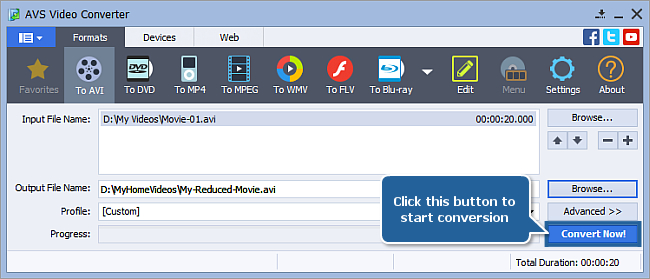
The process will take some time depending upon your hardware, the input file size, its format and parameters applied. After that you can find your reduced output video in the destination folder.
[Back to the Top]
Version: 12.0.1.650Size: 80.45 MBPlatforms: Windows 10, 8.1, 8, 7, XP, 2003, Vista
(no Mac OS/Linux support)
Download
AVS Video Converter
Registration on AVS4YOU is like buying a single product listed on
www.AVS4YOU.com and getting all other products from our site as a gift. That means you can install and use
ALL OTHER software with the same serial number without additional fees and limitations.
Please note that AVS4YOU programs do not allow you to copy protected material. You may use this software in copying material in which you own the copyright or have obtained permission to copy from the copyright owner.