How to convert AVI to DVD?
When you have a lot of separate video recordings in AVI format stored on your computer HDD you might want to convert them to DVD and create your personal DVD-video disc to watch it on your hardware DVD player or share with your friends.
Using AVS Video Converter you will be able to combine several AVI files, create chapters, organize them with the help of a DVD menu for the fast and convenient navigation through your video and burn the result onto a DVD disc.
Click here to download it. After the download is finished, run the AVSVideoConverter.exe file and follow the installation wizard instructions.
[Back to the Top]
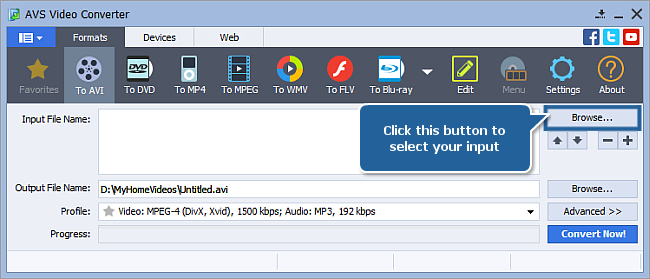
To select a video you would like to convert hit the Browse... button next to the Input File Name field. In the opened Windows Explorer window browse for the necessary video file:
[Back to the Top]
Click the To DVD button on the Formats tab of the Main Toolbar. Select the needed disc type from the Profile list.
 Note
Note: make sure that the selected standard (PAL or NTSC) is supported by your home DVD player, otherwise the video image won't be displayed correctly.
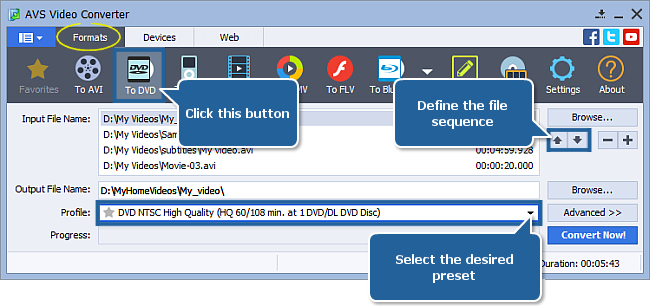
Use the Arrows buttons to set the files order or the (+/-) buttons to add or remove files.
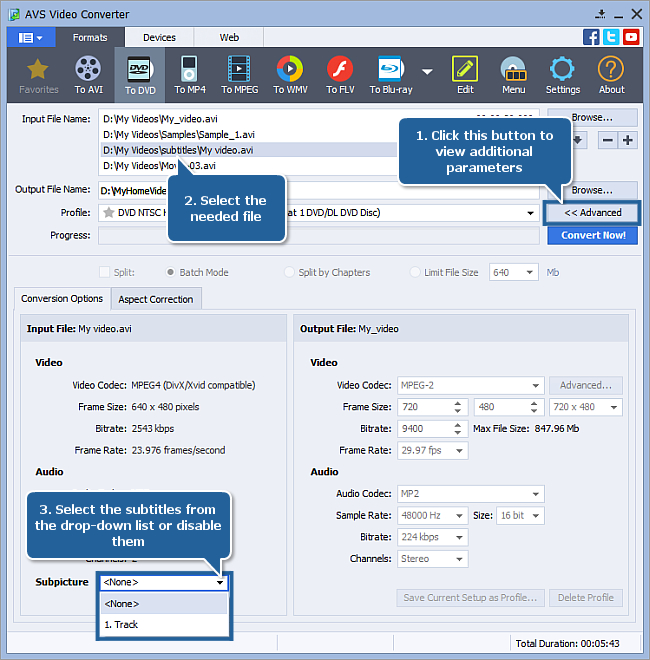
Click the Advanced >> button and select the Conversion Options tab
If your AVI video contains subtitles in external files (*.ssa, *.srt) select the subtitles or disable them by selecting the None option from the Subpicture drop-down list in the Input File section (if you have added several files into the program, select the needed one from the input files list first).
Note: the AVI file and the subtitles file must be stored in the same folder with the same file name so that the program could load the files properly.
Note: to adjust the view of the subtitles (their font, size, color etc.) press the
Settings button on the
Main Toolbar and select the
Subtitles tab in the appeared window.
All other parameters will be disabled for editing in the Conversion Options tab.
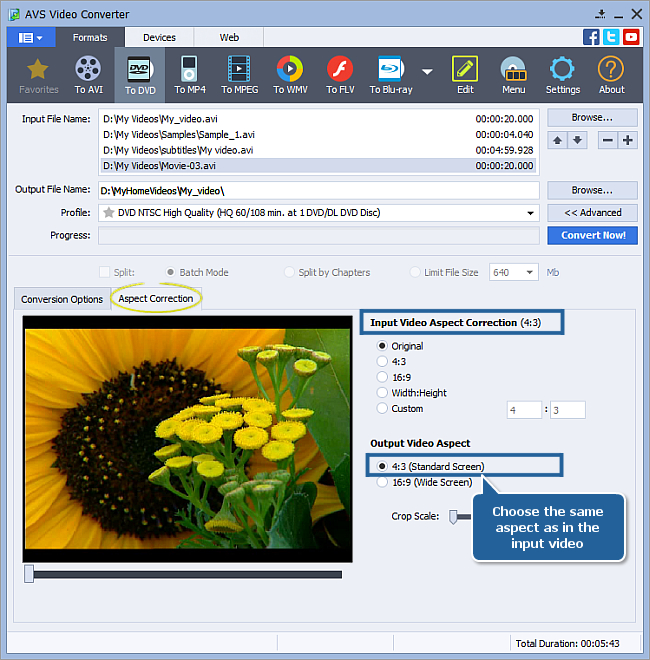
Switch to the Aspect Correction tab. Make sure that the aspect ratio of the input video is equal to that of the output video. If they are not the same, select the appropriate aspect ratio in the Output Video Aspect section to avoid distortions of the output video.
Note: if you want to convert several input files, all of them must have the same aspect values.
[Back to the Top]
Click the Browse... button next to the Output File Name field and select a location on your HDD for the output video file.
Note: when you select a location for your output video file, you should save the file to your personal computer HDD.
[Back to the Top]
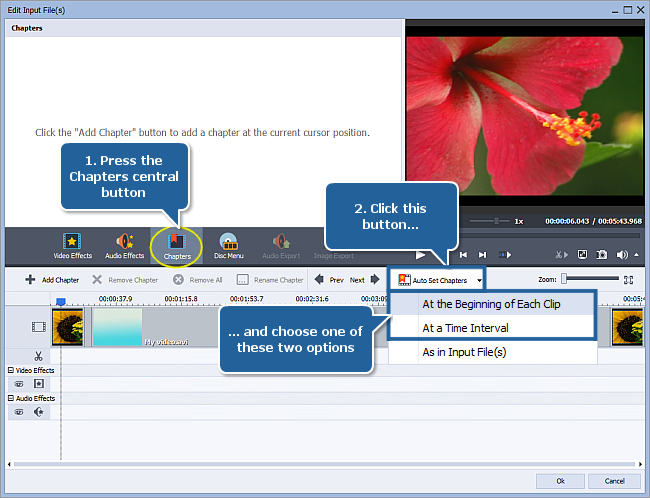
Click the Edit button on the Main Toolbar. In the opened Edit Input File(s) window click the Chapters central button.
One of the available ways to add chapters is to set them automatically by pressing the Auto Set Chapters button and selecting one of the following options:
- At the Beginning of Each Clip - it might be useful to select this mode if you have added several input files into the program. The chapters will be placed at the beginning of each video;
- At a Time Interval - use it if you want to assign an interval at which the chapters will be added over a duration of all the added videos;
- As in Input File(s) - as your input is the AVI file(s), don't select this option in the present case.
You can also set chapters manually. Put the timeline cursor to the place where a new chapter must start and click the Add Chapter button. Use the Zoom slider for more precision.
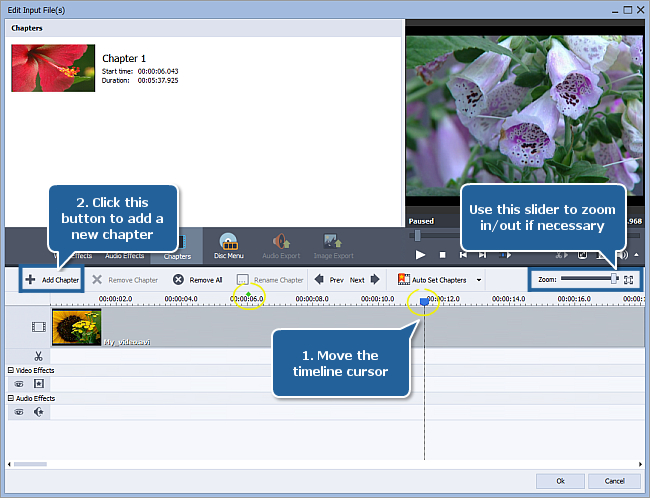
Manage the created chapters by selecting one of them and pressing the needed button on the Timeline Toolbar. You can remove a chapter, delete all your added chapters or rename them.
[Back to the Top]
Click the Disc Menu central button to start editing your DVD menu.
Select one of the Disc Menu Styles by double-clicking it or selecting the Apply Menu Style option from the right-click menu. Switch between the Main Page and the Chapters page in the Preview Area. To assign your own background pictures left-click the Working Areas (if they are available for the selected menu style) at the bottom of the Edit Input File(s) window, select the desired image or video file in the opened window and press the Open button.
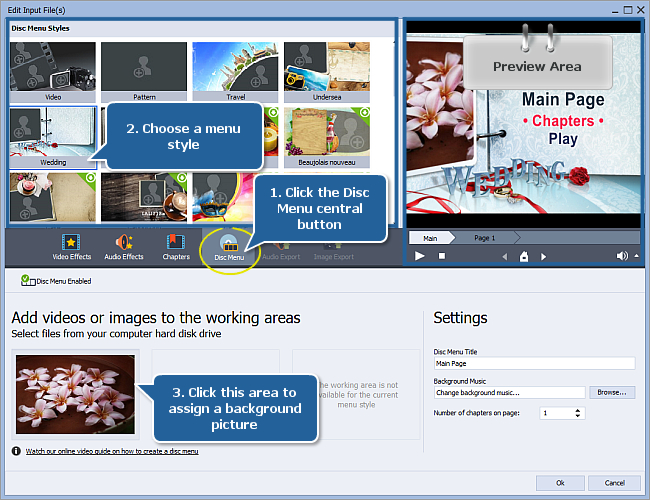
In the Settings section of the Edit Input File(s) window you can change the Disc Menu Title, assign your own Background Music or set the Number of chapters on page using the appropriate controls.
Click the Ok button to apply the adjustments and close the window.
[Back to the Top]
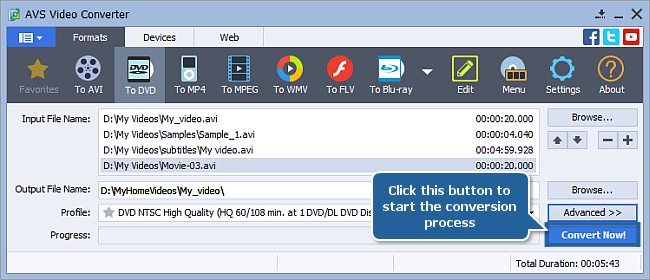
Press the Convert Now! button to start the conversion process.
When the conversion is over the following window will appear:
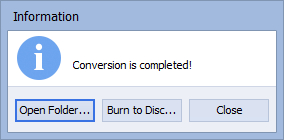
You can open the folder which contains your created DVD files by pressing the Open Folder... button or start burning DVD disc by pressing the Burn to Disc... button.
[Back to the Top]
Insert a blank DVD into your computer optical disc drive. Make sure that the disc is compatible with your drive.
You can select the necessary disc drive if you have several, refresh it and mark the Verify disc check-box to make sure the disc is recorded correctly.
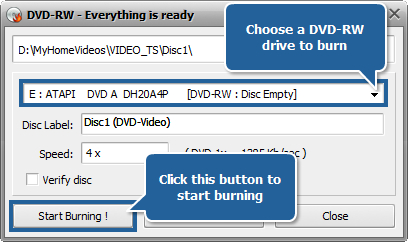
Now click the Start Burning! button to begin the recording. Note, that if the disc is not empty you will be offered to erase it. If you do not want to do that, you can eject the disc and use another one instead.
After the burning is over the disc will be ejected automatically. Note, if you checked the Verify disc, the recording will take a little longer depending on the size of the output files as the program will need time to verify them.
Now you can watch your recorded home video DVD on your Home DVD Player!
[Back to the Top]
Version: 12.0.1.650Size: 80.45 MBPlatforms: Windows 10, 8.1, 8, 7, XP, 2003, Vista
(no Mac OS/Linux support)
Download
AVS Video Converter
Registration on AVS4YOU is like buying a single product listed on
www.AVS4YOU.com and getting all other products from our site as a gift. That means you can install and use
ALL OTHER software with the same serial number without additional fees and limitations.
Please note that AVS4YOU programs do not allow you to copy protected material. You may use this software in copying material in which you own the copyright or have obtained permission to copy from the copyright owner.
By using our services, you agree to our use of cookies.