You have a bunch of high quality image files in the raw format produced by your digital camera and need to process them. Then AVS Image Converter is just what you need. Using this program you can edit your images applying some effects and resizing them to be able to view and print them later.
Click here to download it. After the download is finished, run the AVSImageConverter.exe file and follow the installation wizard instructions.
[Back to the Top]
 To launch AVS Image Converter you can double-click the corresponding desktop icon or follow Start > All Programs > AVS4YOU > Image > AVS Image Converter.
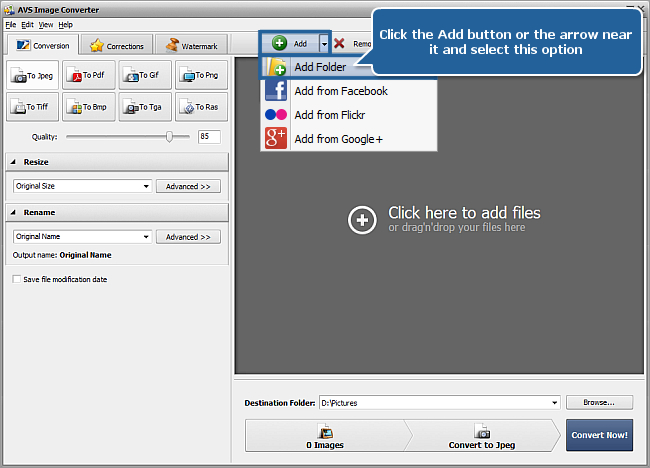
To load image files you would like to convert click the Add button on the Toolbar. You will be able to load a series of images stored on your computer HDD.
To load a folder with images stored on your computer HDD click the black arrow next to the Add button and select the Add Folder option.
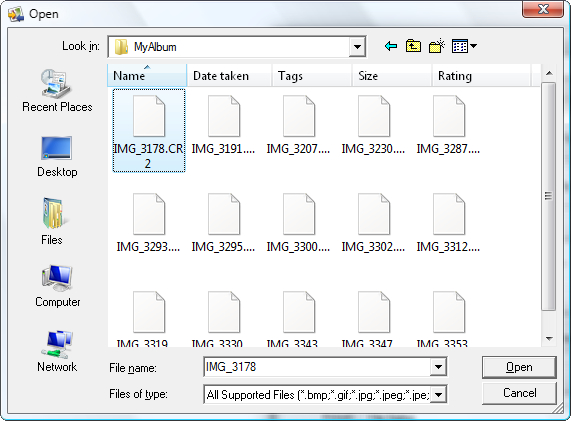
In the opened Windows Explorer window select the necessary image files or the folder with images and click the Open button to load them to the program:
All loaded images will be displayed in the Preview Area.
[Back to the Top]
To resize your pictures use one of the available presets from the drop-down list of the Resize panel. To be able to preview the result you achieve switch to the Preview mode clicking the corresponding button of the Toolbar.
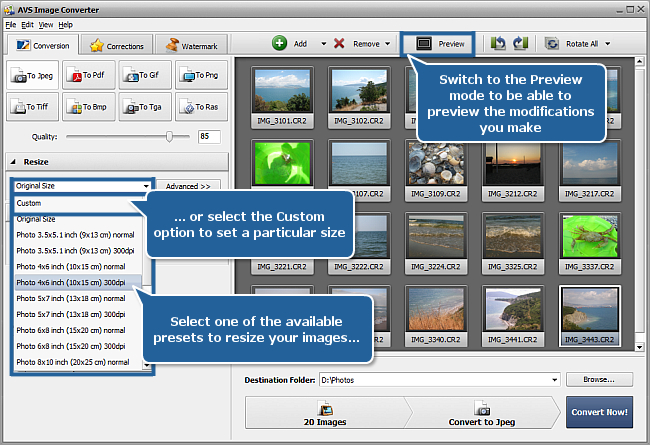
If you need to fit your images to a particular size select the Custom option from the drop-down list. The Additonal Resize Options panel will open. Set the necessary Height and Width values using the keyboard. To learn more about the additional resize options please visit our Online Help section.
[Back to the Top]
After resizing your pictures you can make some auto-correction adjustments or apply some effects.
To apply an effect switch to the Corrections tab. The basic correction mode will be available. It allows you to apply one of the effects for quick image editing. To apply the desired effect click its icon in the Working Area on the left.
The selected effect will be applied to all the images loaded into the program. Preview the result in the Preview window using the Navigation Panel.
To discard changes select the Original Photo effect.

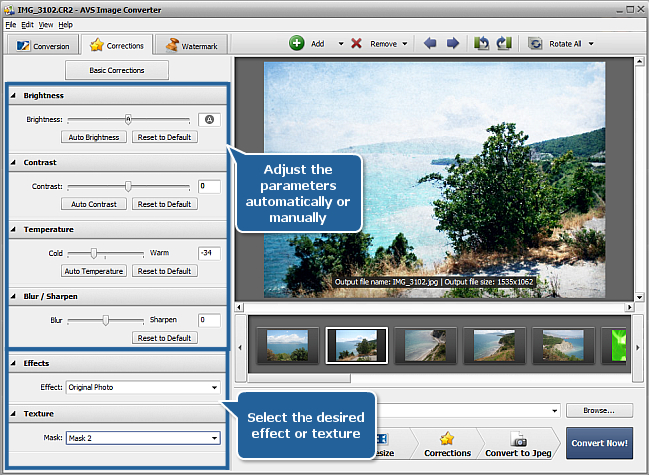
Click the Advanced Corrections button to switch to the advanced correction mode. Using this mode you can adjust the Brightness, Contrast, Temperature and Blur / Sharpen parameters, apply effects or textures in different combinations.
To apply automatic adjustments, press the Auto Brightness, Auto Contrast or Auto Temperature button. Use the corresponding sliders to correct the necessary parameter manually. To cancel the correction applied to a certain parameter click the appropriate Reset to Default button.
You can also select one of the available predetermined effects from the Effect drop-down list or choose an image texture from the Mask drop-down list. To discard these changes you can select the Original Photo effect or the None mask respectively.
To learn more about each effect please refer to our Online Help section.
[Back to the Top]
Return to the Conversion tab and select the output image format clicking the corresponding button.
Set the output image file name choosing one of the available presets from the drop-down list in the Rename section or creating your own preset.

To set up a destination folder for the output images click the Browse... button next to the Destination Folder field and select a folder on your HDD or create a new one.
 Note
Note: you can set up an output file location selecting one of the available folders in the
Destination Folder drop down list. To do that open the list clicking the arrow.
[Back to the Top]
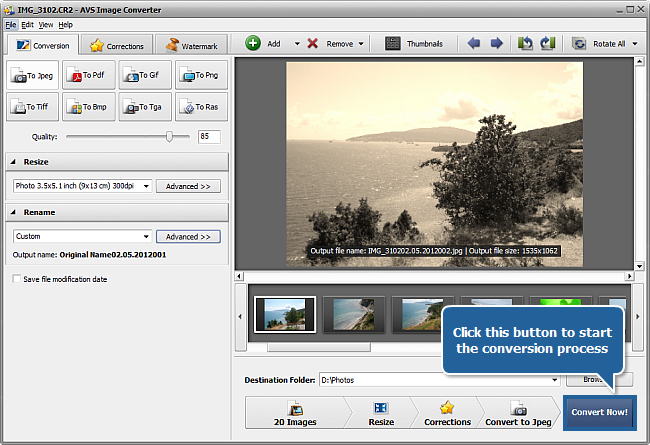
Click the Convert Now! button to start the conversion process.
Note: the conversion process may take some time depending on the size and amount of the loaded images, as well as on the configuration of your computer.
When the conversion is over you can open the folder with your edited images. If you want to protect your photos or add some comments to them you can do it applying some text or image watermark. Click here to learn on how to do that.
[Back to the Top]
Please note that AVS4YOU programs do not allow you to copy protected material. You may use this software in copying material in which you own the copyright or have obtained permission to copy from the copyright owner.