If you are working with multiple images and looking for a tool to quickly convert them all into one format, a standard JPEG one, for example, AVS Image Converter is what you need. You can also use the photos which are already stored in your Facebook or Flickr accounts and transfer whole web albums or particular images into the program to process all the photos at once and save them on your computer HDD for the further use. Just follow the easy steps below to create images of a necessary size and format.
Click here to download it. After the download is finished, run the AVSImageConverter.exe file and follow the installation wizard instructions.
[Back to the Top]
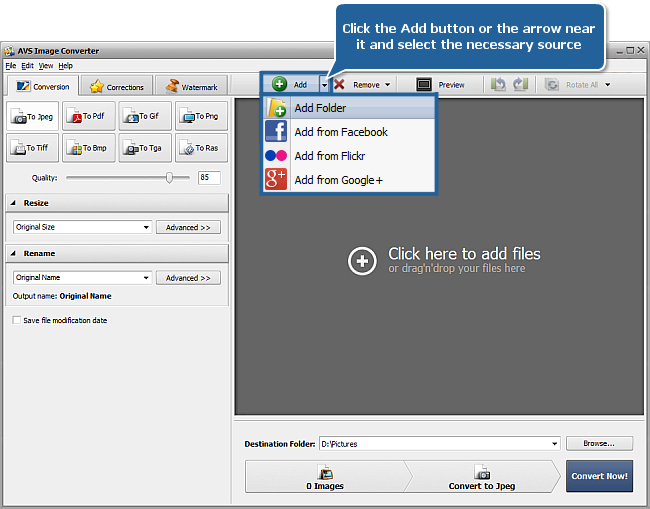
To load image files you would like to convert click the Add button on the Toolbar. You will be able to load a series of images stored on your computer HDD.
To load a folder with images stored on your computer HDD click the black arrow next to the Add button and select the Add Folder option.
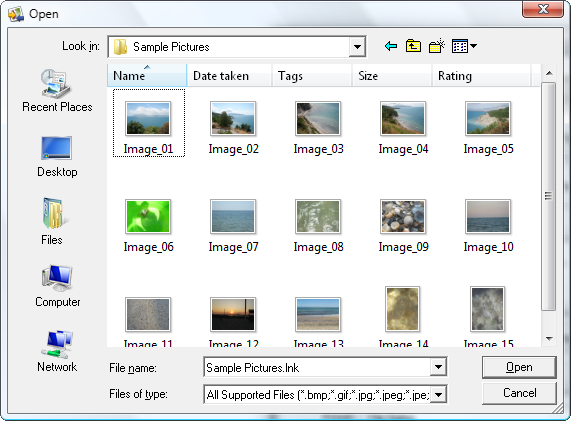
In the opened Windows Explorer window select the necessary image files or the folder with images and click the Open button to load them to the program:
To add images from social network services, such as Facebook, Flickr or Google+, click the black arrow near the Add button and select the corresponding option. When using these features for the first time, you will need to enter your login and password to sign in to your account, after that you'll be asked to authorize the AVS Image Converter application so that it can access your photos.
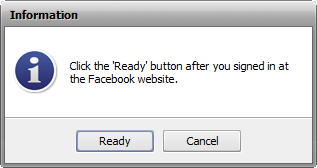
Return to the AVS Image Converter interface and click the Ready button.
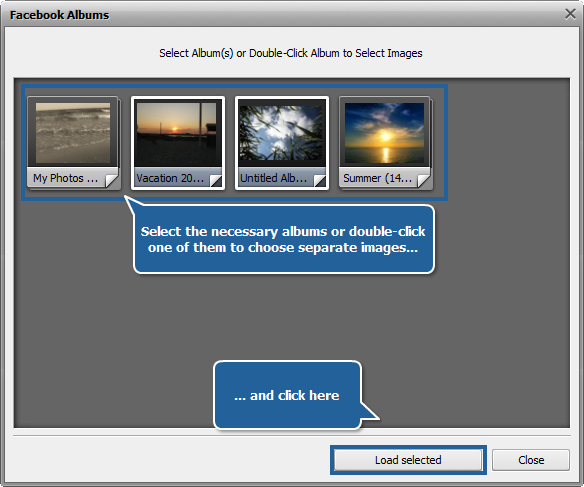
A new window which displays the albums stored in your account will open. To load entire albums, select one or more of them with the mouse. To load particular images within a certain album, double-click it and select the images you need. When the necessary albums or images are selected, click the Load selected button.
[Back to the Top]
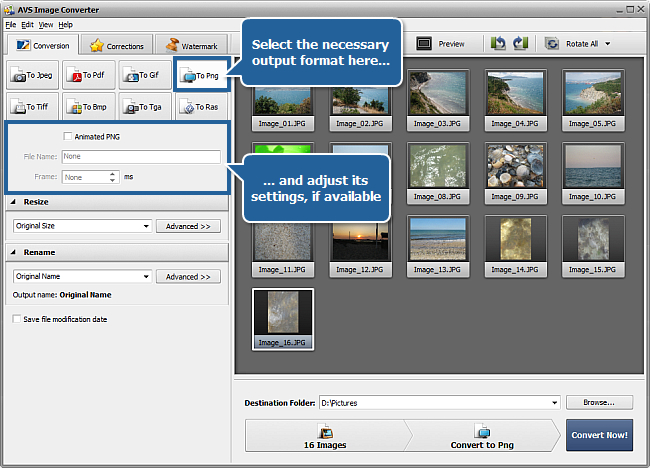
To set the image output format click one of the following format buttons on the Conversion tab:
- To Jpeg to convert your images into the Joint Photographic Expert Group format with the .jpg file extension;
- To Pdf to convert your images into the Portable Document Format with the .pdf file extension;
- To Gif to convert your images into the Graphics Interchange Format with the .gif file extension;
- To Png to convert your images into the Portable Network Graphics format with the .jpg file extension;
- To Tiff to convert your images into the Tagged Image File Format with the .tif file extension;
- To Bmp to convert your images into the Windows Bitmap format with the .bmp file extension;
- To Tga to convert your images into the Targa Image File format with the .tga file extension;
- To Ras to convert your images into the SUN Raster Format with the .ras file extension.
 Note
Note: for the
Jpeg format you can also set the image quality value. For the
Tiff format you can select the image compression type. For the
Pdf format you can select one of the available page formats. For the
Gif and
Png formats it is possible to create animated images with the specified duration of each image.
[Back to the Top]
You can also resize your images before converting them. To do that select one of the available presets in the Resize section of the Conversion tab or create a new preset clicking the Advanced >> button.
Apply the necessary effects to your images before converting them. To do that view the instructions here.
[Back to the Top]
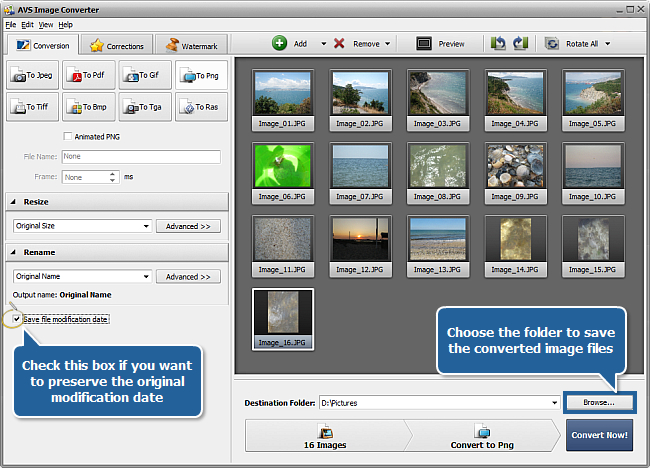
To set up a destination folder for the output images click the Browse... button next to the Destination Folder field and select a folder on your HDD or create a new one.
Note: you can set up an output file location selecting one of the available folders in the
Destination Folder drop down list. To do that open the list clicking the arrow.
Check the Save file modification date box if you need to preserve the original modification date while converting. In this case the last modification date of the source files will be preserved for the resulting images. If this option is unchecked the modification date will change to the conversion date.
[Back to the Top]
Click the Convert Now! button to start the conversion process.
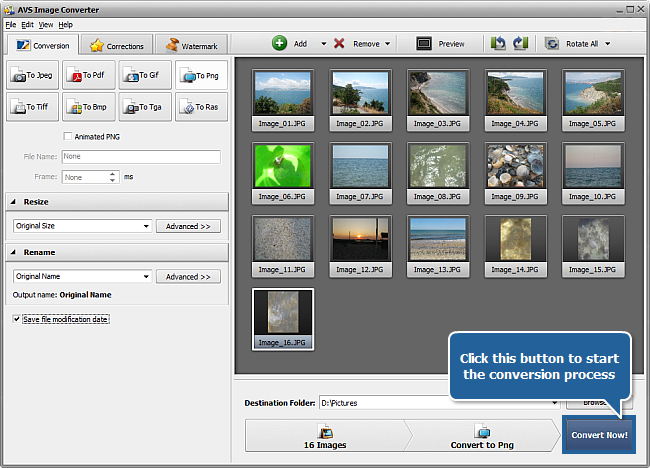
Note: the conversion process may take some time depending on the size and amount of the loaded images, as well as on the configuration of your computer.
When the conversion is over open the folder containing new images of the desired format and use them according to your needs.
[Back to the Top]
Please note that AVS4YOU programs do not allow you to copy protected material. You may use this software in copying material in which you own the copyright or have obtained permission to copy from the copyright owner.