You would like to protect the photos that you post on the web sites or just need to add captions to the pictures of your photo album explaining where and when these photos were taken? AVS Image Converter will help you perform these tasks. This program allows you to apply a visible text or image watermark to a series of pictures and convert them to one of the supported image formats. Just follow the easy steps listed below.
Click here to download it. After the download is finished, run the AVSImageConverter.exe file and follow the installation wizard instructions.
[Back to the Top]
 To launch AVS Image Converter you can double-click the corresponding desktop icon or follow Start > All Programs > AVS4YOU > Image > AVS Image Converter.
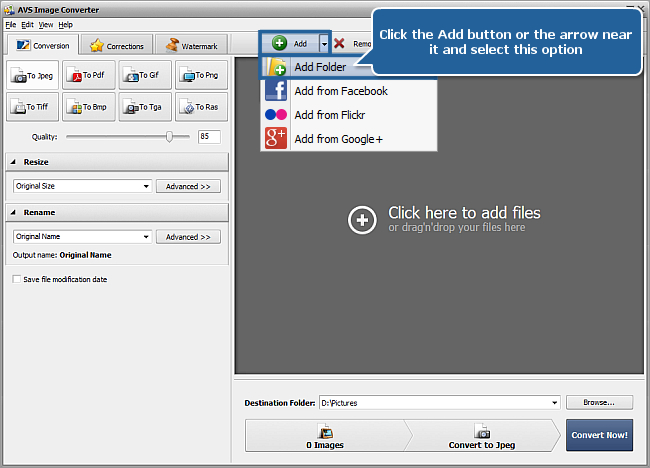
To load image files you would like to convert click the Add button on the Toolbar. You will be able to load a series of images stored on your computer HDD.
To load a folder with images stored on your computer HDD click the black arrow next to the Add button and select the Add Folder option.
In the opened Windows Explorer window select the necessary image files or the folder with images and click the Open button to load them to the program:
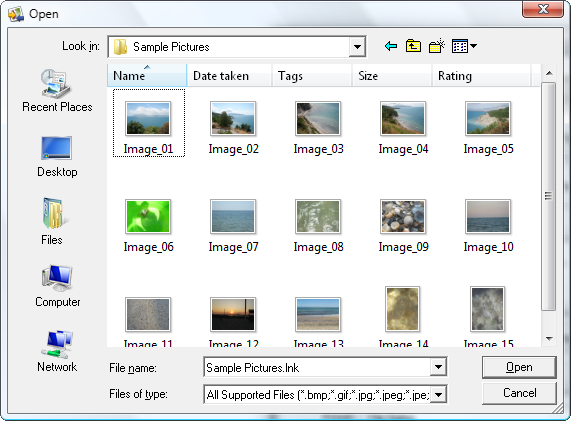
All loaded images will be displayed in the Preview Area.
 Note
Note: if you want to add the photos stored in your Facebook, Flickr or Google+ accounts see the instructions
here.
[Back to the Top]
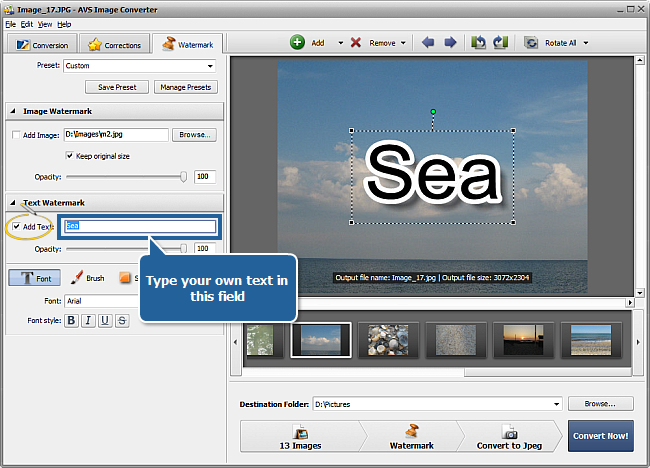
To be able to add some text or image logo you need first to switch to the Watermark tab of the Working Area. Then select the watermark type you want to apply checking the corresponding control.
Note: the selected watermark will be applied to all images loaded into the program.
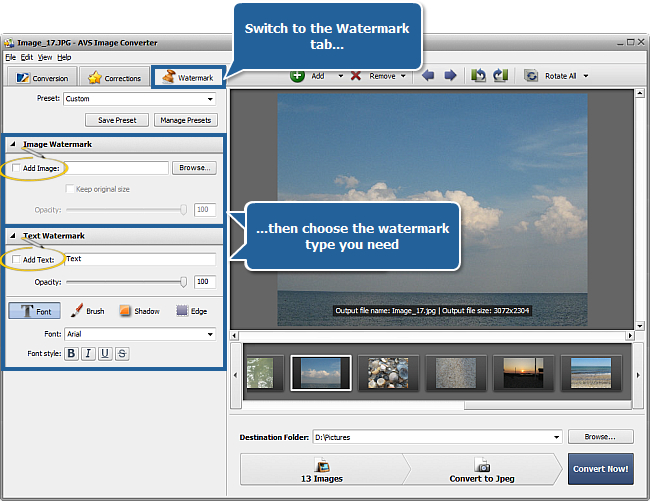
To apply an Image Watermark check the Add Image box. The Windows Explorer window will be opened. Select the needed image and press the OK button.
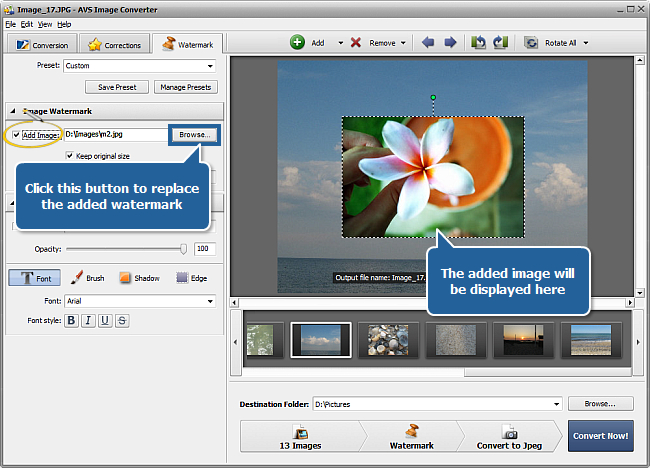
If you want to remove this image and add another one click the Browse... button near the Add Image field, select the appropriate image in the opened Windows Explorer window and press the OK button. The previously loaded image will be replaced.
If you would like to add a Text Watermark check the Add Text box at the Watermark tab and type your own text in the Add Text field.
[Back to the Top]
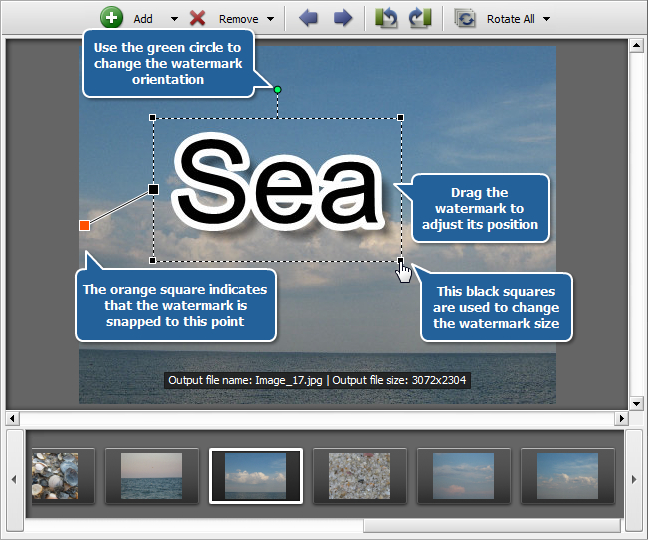
By default your image or text logo will be placed in the middle of your pictures. To adjust its position drag it without releasing the left mouse button within the Preview Area. To snap your watermark to one of the image corners or centers of the sides click the large black square  adjacent to the needed place - the square will change its color to orange
  .
.
If you need to change the watermark orientation direct the mouse cursor to the green circle  - the cursor will turn to a circular arrow
  . Hold down the left mouse button and drag it within the Preview Area.
To change the watermark size use the little black squares  at the corners of your image or text watermark. Move the mouse cursor to one of the squares (the cursor will turn to a pointing hand
  ) and drag it within the Preview Area.
Note: if you want to change an image watermark size make sure that the
Keep original size option is deselected in the
Image Watermark section of the
Watermark tab.
If you add a text logo you can also adjust the additional text parameters like font, brush, shadow and edge. Please refer to the Adding Watermark page of the online help to learn more on how to do it.
If you want to remove the applied logo deselect the Add Image or Add Text box.
[Back to the Top]
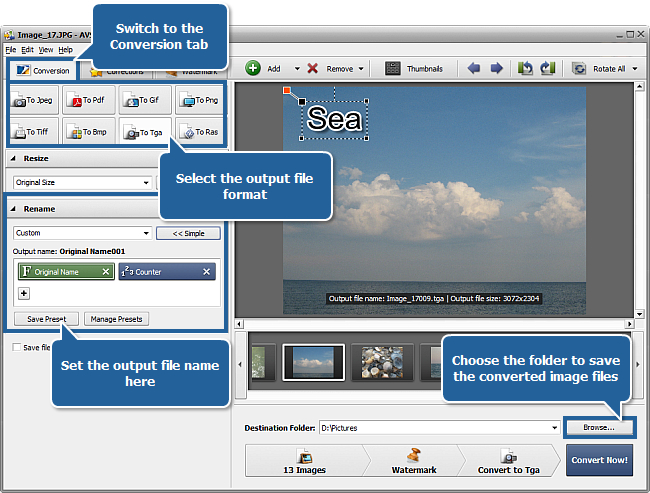
Switch to the Conversion tab and select the output image format clicking the corresponding button.
Set the output image file name choosing one of the available presets from the drop-down list in the Rename section or creating your own preset.
To set up a destination folder for the output images click the Browse... button next to the Destination Folder field and select a folder on your HDD or create a new one.
Note: you can set up an output file location selecting one of the available folders in the
Destination Folder drop down list. To do that open the list clicking the arrow.
Note: if you want to preserve the original modification date while converting see the instructions
here.
[Back to the Top]
Click the Convert Now! button to start the conversion process.
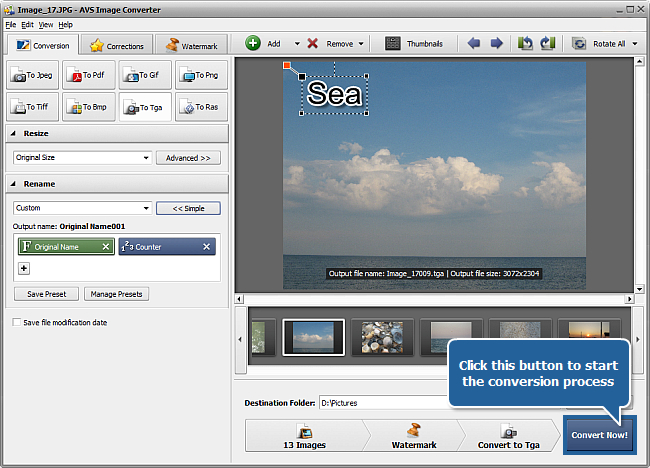
Note: the conversion process may take some time depending on the size and amount of the loaded images, as well as on the configuration of your computer.
When the conversion is over you can open the folder with your watermarked photos and post them on the web site.
[Back to the Top]
Registration on AVS4YOU is like buying a single product listed on
www.AVS4YOU.com and getting all other products from our site as a gift. That means you can install and use
ALL OTHER software with the same serial number without additional fees and limitations.
Please note that AVS4YOU programs do not allow you to copy protected material. You may use this software in copying material in which you own the copyright or have obtained permission to copy from the copyright owner.