Creativeness is a wide field to express yourself and demonstrate your aptitudes for other people. Making and editing a video is one of the things like those. Maybe you have been shooting a documentary for a scientific conference, preparing an advanced video report for your student group or just compiling videos taken from different stages of your life into a single movie and already are using AVS Video Editor for that. In these cases you are likely to face the natural intention to mention and thank people who somehow took part in what you have as a result by means of the overlaid credits that can be made with the help of AVS Video Editor as well. If you are a beginner in using AVS Video Editor, you'd better read how to download it, import your video and place it to the Timeline first and then just follow the steps of this guide to make your video complete.
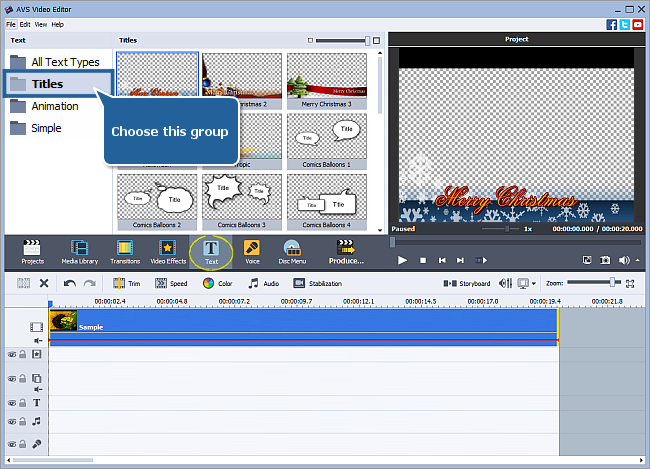
Now when you've added your video to the Timeline area you can proceed to lay credits over it. Click the Text central button and choose the Titles group from the text effects groups on the left:
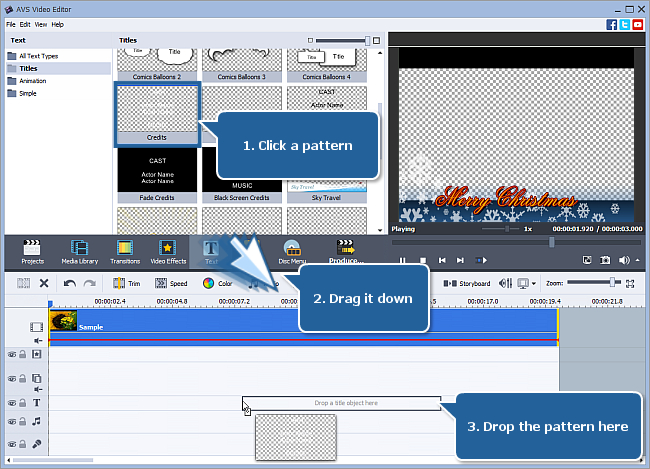
Now select a pattern whose name includes the word "Credits" in the Files and Effects Area then drag and drop it to the Text effects line of the Timeline:
 Note
Note: if you add credits with a transparent background, your video placed behind the credits will remain visible (i.e. you'll get credits which scroll simultaneously with the main video playing in the background). If you select credits with an opaque (black) background, your video underneath them will not be visible. The
Fade Credits pattern allows you to receive a smooth transition between the main video and the credits on the black screen.
[Back to the Top]
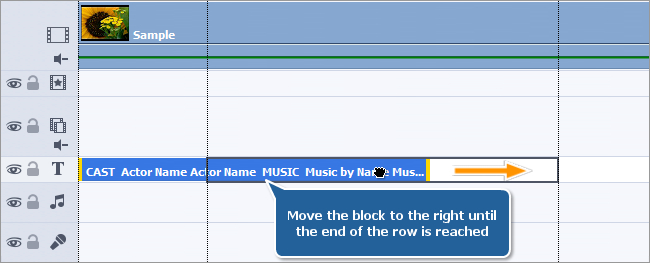
To change the position of the credits in your video click the credits pattern block you've just added to the appropriate row of the Timeline area. Hold the mouse button and move the block all the way to the end of the row. In this case the credits will end at the same time as the video placed behind them.
The next to do is to catch the exact moment when credits appear. Place the mouse cursor to the left border of the block until it looks like  (bidirectional black arrow) and then move the mouse with its left button pressed to the right or left along the Timeline:
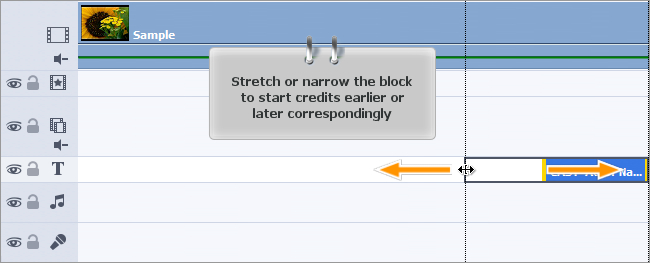
Note: the speed of credits motion depends upon the duration of the block defined for that. The more you lengthen the block, the slower the movement speed.
[Back to the Top]
Make a double click within the credits pattern block:
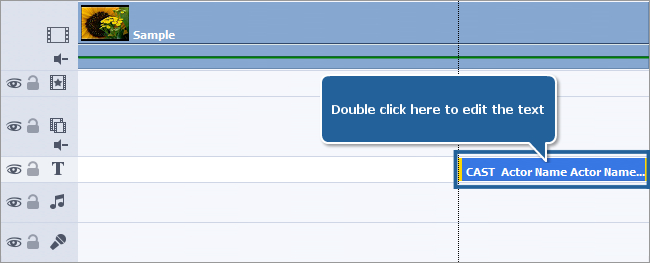
The Text editor window will appear. Make a double click on the default text, delete it and input your text:
Note: take into consideration that each time you press the
Enter key the cursor will start a new line.
[Back to the Top]
Note: the credits pause can not be applied to
Fade Credits and
Black Screen Credits.
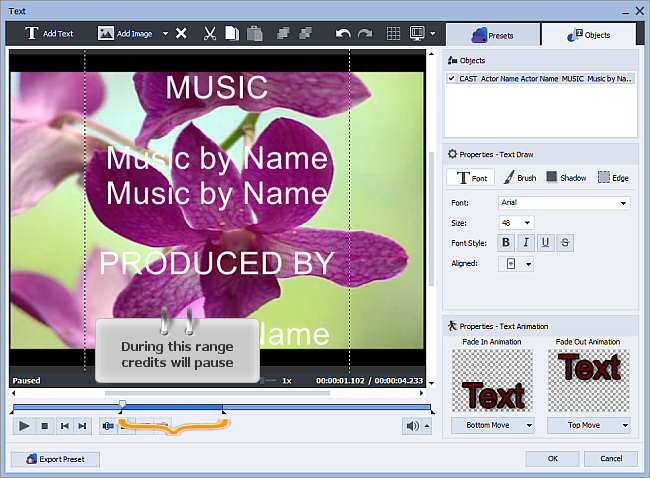
By default the credits move in the chosen direction without any pauses. If you want to apply delay you should define the moment for the credits to stop moving and continue moving again.
Move the slider to the left catching the suitable moment on the Preview screen. Then click the Fade in button placed under the Preview area - that's the moment when credits stop:

The part of the time bar became highlighted in blue – that is the duration of the credits delay:
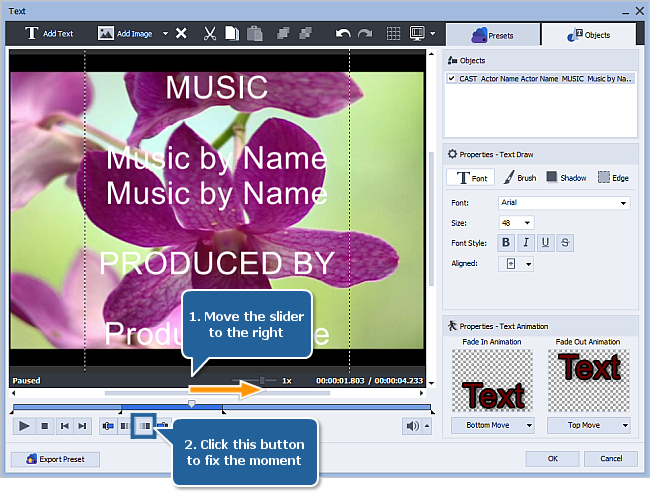
Move the slider to the right catching the suitable moment on the Preview screen. Then click the Fade out button placed under the Preview area - that's the moment when credits continue moving:
[Back to the Top]
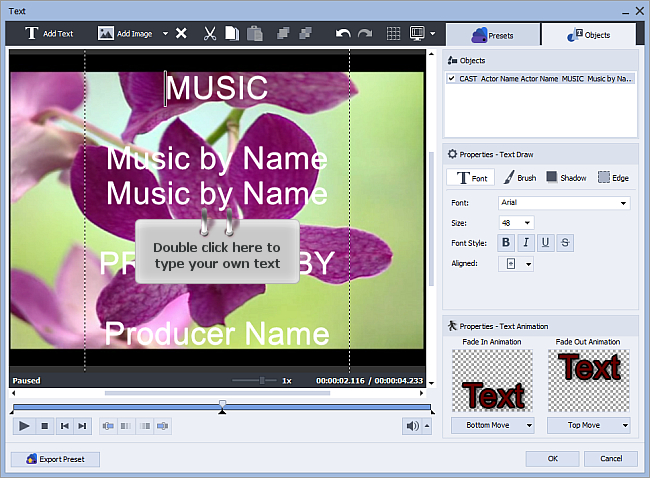
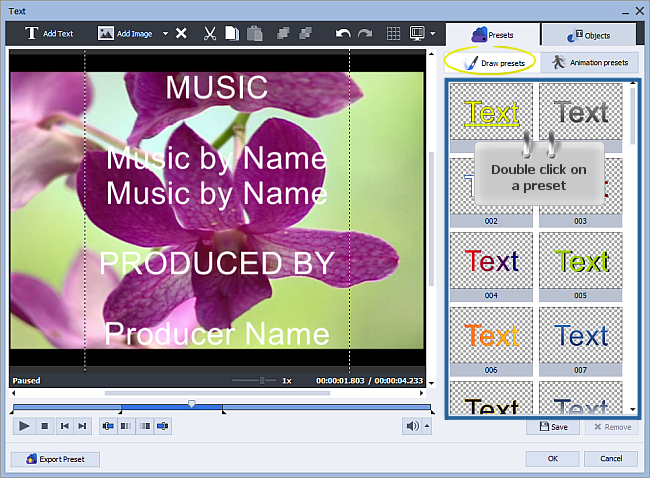
Now add a bit of individuality. Make sure you work with the Draw presets sub-tab of the Presets tab. Make a double click on the preset that fits your needs or create your own style experimenting with the properties of four categories that the Objects tab contains (Font, Brush, Shadow, Edge):
If you are satisfied with the way your credits look now - after having applied adjustments mentioned in this and the previous steps – click the OK button of the Text Editor window to confirm all the changes.
Congratulations! The major part of work is behind. So no reason to put off the minor one right now. It implies just saving your project, assigning a directory for saving your video and finally starting its creation.
[Back to the Top]
Version: 9.1.1.336Size: 155.45 MBPlatforms: Windows 10, 8.1, 8, 7, XP, 2003, Vista
(no Mac OS/Linux support)
Download
AVS Video Editor
Registration on AVS4YOU is like buying a single product listed on
www.AVS4YOU.com and getting all other products from our site as a gift. That means you can install and use
ALL OTHER software with the same serial number without additional fees and limitations.
Please note that AVS4YOU programs do not allow you to copy protected material. You may use this software in copying material in which you own the copyright or have obtained permission to copy from the copyright owner.