Sometimes your video footage may contain unnecessary scenes you want to remove. You might also face the necessity to shorten your video for more comfortable playing back the video clip on a mobile device.
Using AVS Video Editor you can quickly trim your video in several equally easy ways. It's possible to trim only the beginning and the end of the video record, or detect all the existing scenes in your video automatically and remove some of them, or cut out any fragment of your video manually.
After you import your video into the application and add it to the timeline, please follow the steps below to trim your video recording.
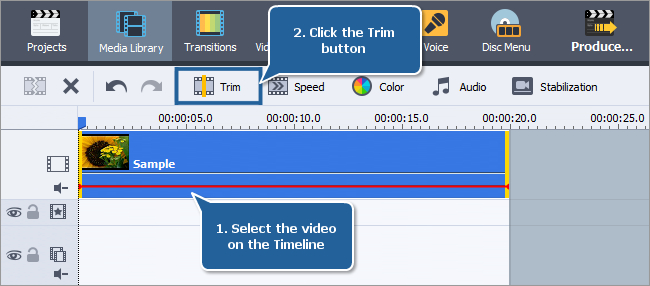
Left-click your video on the Timeline to select it and click the Trim button on the Timeline Toolbar above.
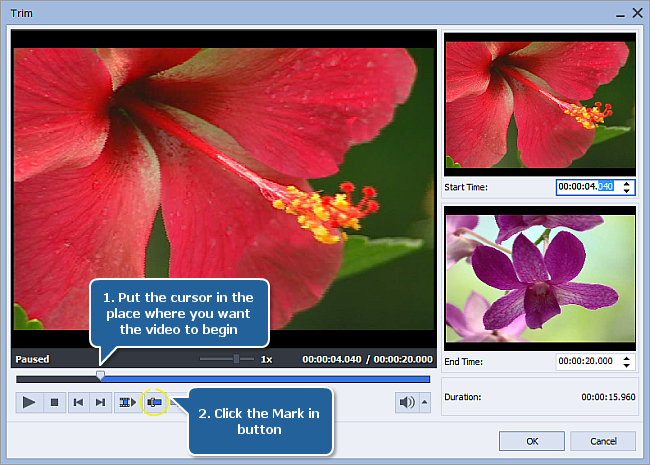
In the window that opens, put the cursor in the place where you want your video to begin and click the  Mark in button to mark the beginning of the trimmed video. All the video to the left of this mark will be deleted.
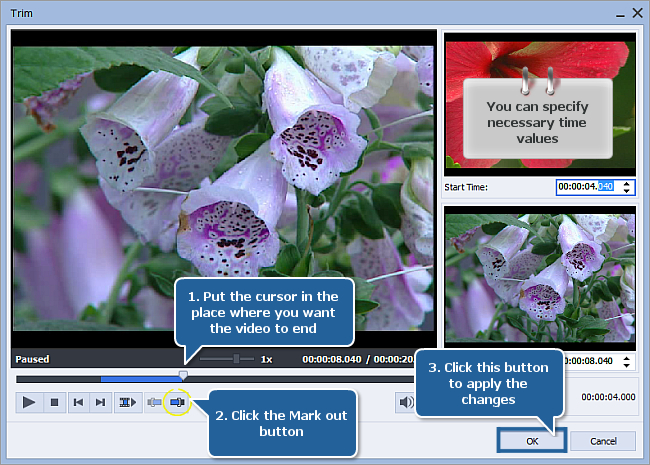
Put the cursor at the point where you want the video to end and click the  Mark out button to mark the end of the trimmed video. All the video to the right of this mark will be deleted. Only the video within the highlighted area will be left.
To find the necessary position with more precision, you can use the  Next Scene button to automatically search for the next scene or the
  Previous Frame and
  Next Frame buttons to move frame-by-frame in the selected direction. It's also possible to set exact time values in the Start/End Time fields on the right.
Click OK to apply the changes and close the window.
[Back to the Top]
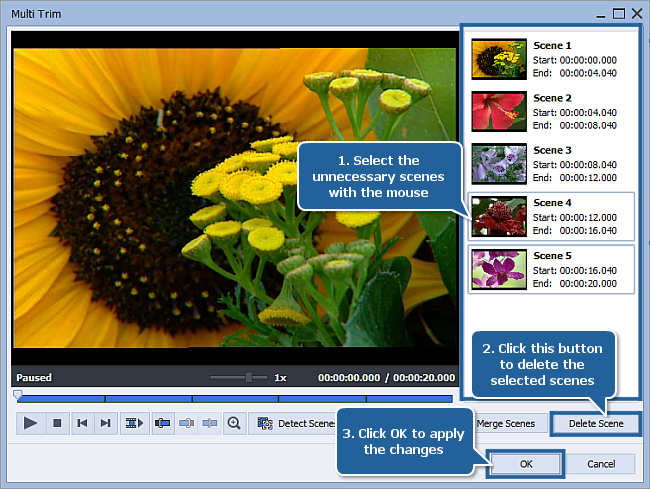
To delete several scenes in different parts of the video clip, make use of the Multi Trim feature. Right-click the video on the Timeline and select the Multi Trim option from the menu.
In the window that opens, press the Detect Scenes button located below the Preview area and wait while the program detects scenes. It may take some time depending on your video file length.
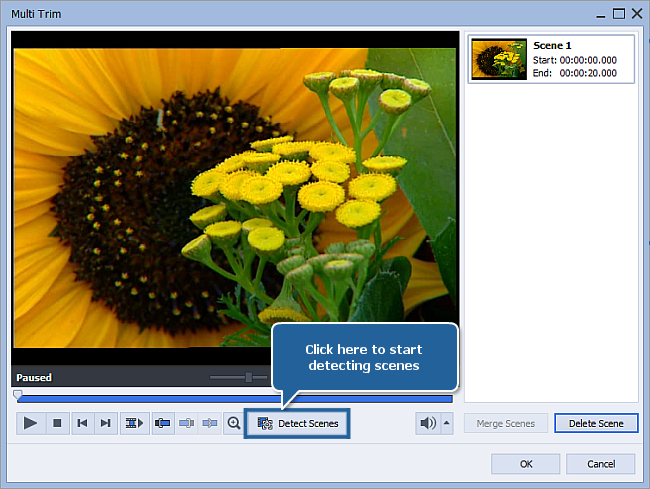
All the detected scenes are displayed in the right part of the window. Select the scene your want to delete with the mouse. You can also select several adjacent scenes holding down the Ctrl key. Press the Delete Scene button below the scenes list to remove the selected scene(s). Click the OK button to apply the changes made and close the window.
[Back to the Top]
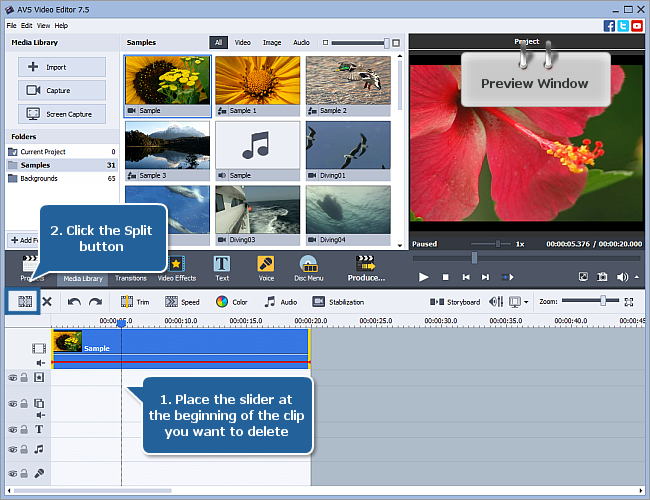
To manually select arbitrary parts for deletion, use the Timeline. Move the slider of the Timeline Scale to find the beginning of the clip to be deleted and click the  Split button on the Timeline Toolbar above. Then do the same to mark the end of the video clip. Use the Preview window to make sure that you marked the right part for deletion.
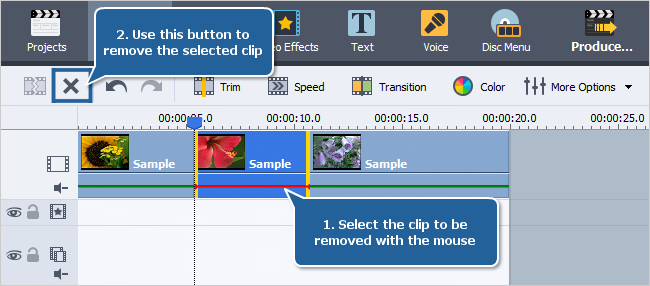
Then select the clip your want to delete by clicking it with the left mouse button and press the  Delete button on the Timeline Toolbar above. The selected clip will be removed.
Once all the unwanted parts are removed, you can add transitions between the remaining scenes and save your edited video file to a suitable format. Now your movie does not contain any superfluous scenes.
[Back to the Top]
Version: 9.1.1.336Size: 155.45 MBPlatforms: Windows 10, 8.1, 8, 7, XP, 2003, Vista
(no Mac OS/Linux support)
Download
AVS Video Editor
Registration on AVS4YOU is like buying a single product listed on
www.AVS4YOU.com and getting all other products from our site as a gift. That means you can install and use
ALL OTHER software with the same serial number without additional fees and limitations.
Please note that AVS4YOU programs do not allow you to copy protected material. You may use this software in copying material in which you own the copyright or have obtained permission to copy from the copyright owner.