Sometimes you might need to record yourself reading a short story into the microphone, or you would like to record yourself playing the piano or singing.
All that you can easily do using the AVS Audio Editor program.
Click here to download it. After the download is finished, run the AVSAudioEditor.exe file and follow the installation wizard instructions.
[Back to the Top]
After the program was launched, open the Record tab to be able to adjust recording settings.
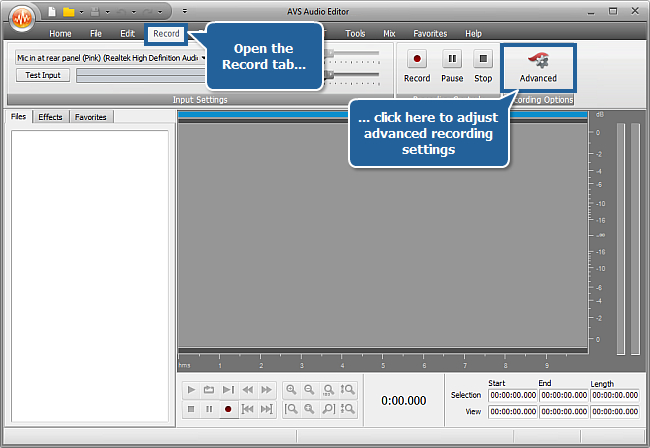
Here you can quickly adjust general recording settings: select and test an input device, set its balance and gain. If you press the Advanced button of the Recording Options group you will be able to configure the same parameters and some additional recording settings.
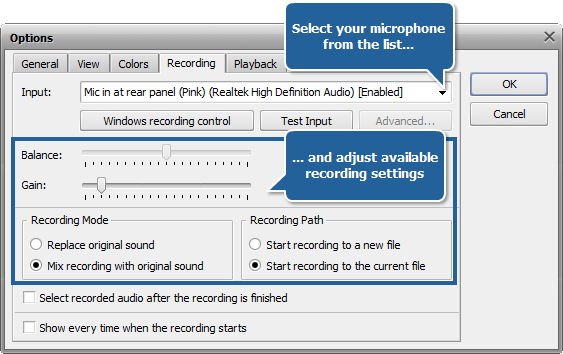
After that the Recording tab of the Options window will appear. In the Input dropdown list select your microphone connected to the microphone input of your computer sound card.
 Note
Note: you can enable or disable the needed device and adjust its properties directly from the program interface using the
Windows recording control button to open the window with the list of Windows recording devices.
After selecting the microphone you can adjust the following recording settings:
- Balance - set the difference of the sound volume between the right and the left channel;
- Gain - set the loudness of the device input;
- Recording Mode - choose the way you want to record new audio: you can either overwrite the original sound or mix it with the recorded audio;
- Recording Path - specify the file where the recorded audio will be saved to.
Pressing the Advanced... button of the opened tab you can open the Advanced Properties window where you can adjust some advanced settings depending on your microphone model. You should consult your hardware documentation for more details on these settings.
Note: some settings can be disabled depending on the operating system installed on your computer, your sound card and your microphone device.
[Back to the Top]
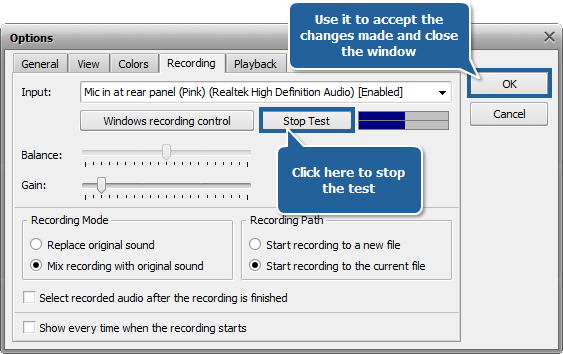
After adjusting the recording settings test your microphone to make sure it works properly. To do that click the Test Input button.
Speak in a normal tone of voice. You do not have to talk directly into the microphone, just speak normally. You will know the microphone picked you up because you will see the blue lines inside a special box move and change shape. Each line corresponds to a channel.
When you are through making your test, press the Stop Test button. Then click the OK button to apply the changes made and close the Options window.
[Back to the Top]
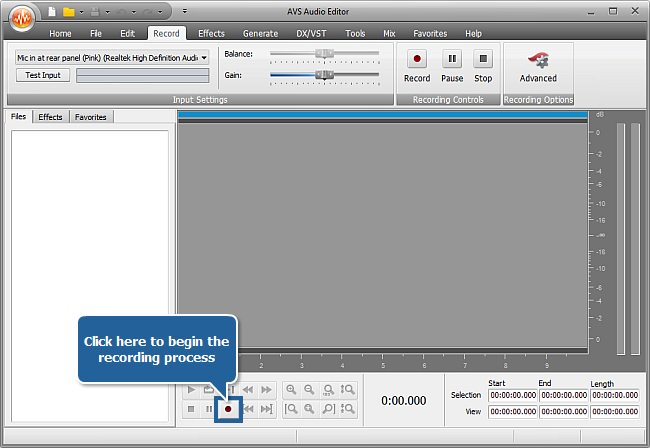
Now you can begin recording audio. To do that click the Start the recording button at the bottom of the program window.
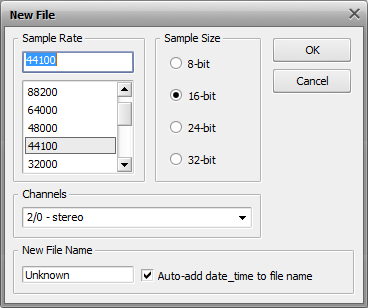
After that the window displayed below will pop up to let you set some parameters of a new file that will contain the recorded audio data. These parameters are:
- Sample Rate - select the number of samples per second taken from a continuous analogue signal to make it a discrete digital signal. As a rule, setting a higher sample rate improves audio file quality and increases its size.
- Sample Size - select the size of samples taken from a continuous analogue signal to make it a discrete digital signal. Increasing the sample size improves sound quality, but doubles file size.
- Channels - select the number of channels (stereo - two channels, mono - one channel).
- New File Name - type in your own file name instead of the default name; you can also include current date and time into your new file name by checking the corresponding option.
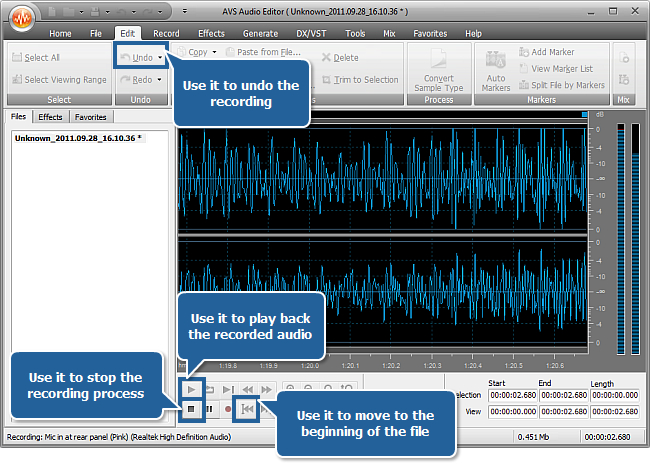
After you have set all the parameters, click the OK button to begin the recording process. In the Waveform Display you will see the sounds you will produce transforming to digital waves. The Volume Indicators on the right display whether or not the level of the signal coming from your microphone is strong enough during recording.
As soon as you finish the recording process, press the Stop the recording button at the bottom of the program window and the recording process will be stopped.
Note: you can also use buttons from the
Recording Controls group on the top of the program window to manage the recording process.
Now you can play back the resulting audio file. To do that click the Go to Previous Marker button to play back the recorded track from the very beginning and then press the Play button. If you are not satisfied with the result, you can click the Undo button situated at the Edit tab and try once again.
As soon as you are through with the recording, save the created audio file. Click here to learn everything about the saving options.
That's all! So easily you can record audio using microphone.
[Back to the Top]
Please note that AVS4YOU programs do not allow you to copy protected material. You may use this software in copying material in which you own the copyright or have obtained permission to copy from the copyright owner.