Sometimes you might need to extract audio from a home video of yours to be able to listen to it using your audio player - a portable MP3 player, for instance. That can be quite easy if you use our AVS Video Converter. Follow the steps below to learn how to do that.
Click here to download it. After the download is finished, run the AVSVideoConverter.exe file and follow the installation wizard instructions.
[Back to the Top]
To select a video you would like to convert hit the Browse... button next to the Input File Name field. In the opened Windows Explorer window browse for the necessary video file:
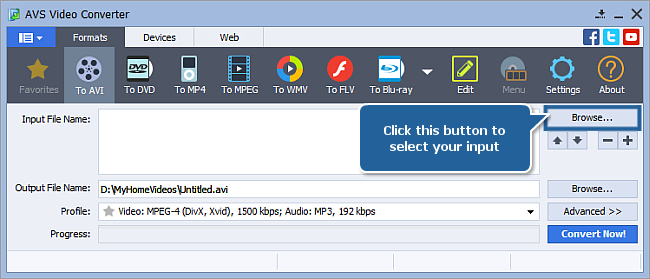
 Note
Note: when your input is a DVD disc, you will need to select the path to your source file: X:\Video_TS\Video_TS.IFO. "X" stands for your DVD-ROM or the hard disk drive folder where your DVD is stored. Please see the
online help section to find more on how to convert your home DVDs to other video formats.
[Back to the Top]
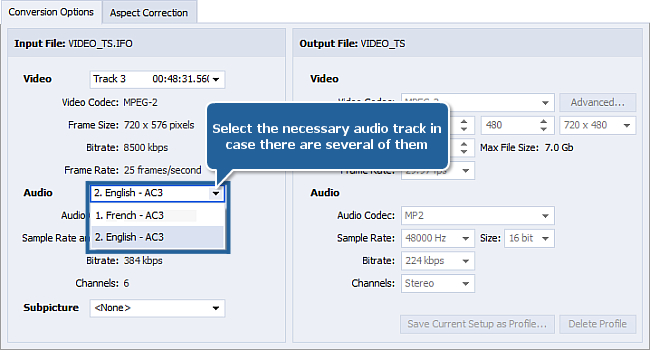
Quite often DVDs and even .avi files contain several audio tracks. That's why you should select the necessary one prior to extraction.
Click the Advanced >> button to see the additional input video file parameters:
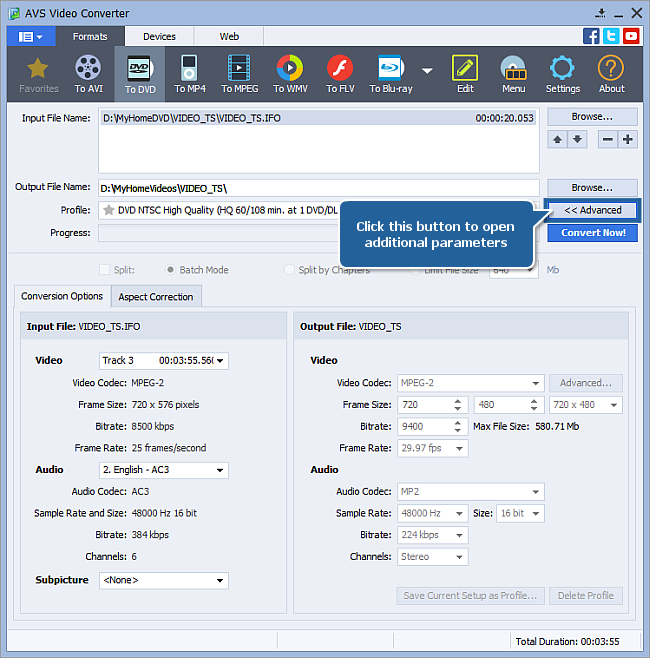
In case the video contains more than one audio track you will see the drop-down box next to the Audio caption in the Input File section. Click it with the mouse and select the one you need to extract from the list:
[Back to the Top]
Now you can click the Edit button to open the Edit Input File(s) window:
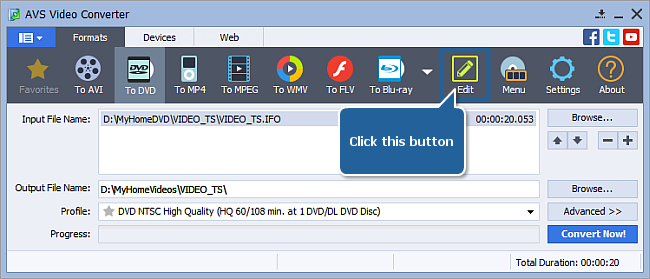
This window can be used not only to extract audio but also to select which part of the audio track exactly you will extract.
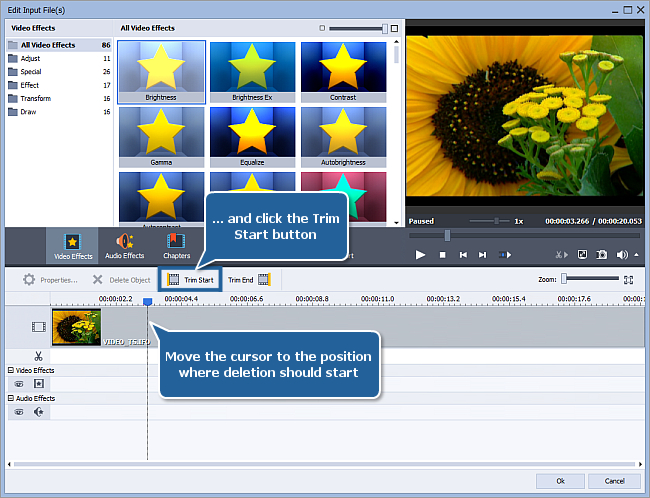
To select the deletion area, you need to mark its beginning and end. Put the cursor to the place where you would like the deletion to start and press the Trim Start button:
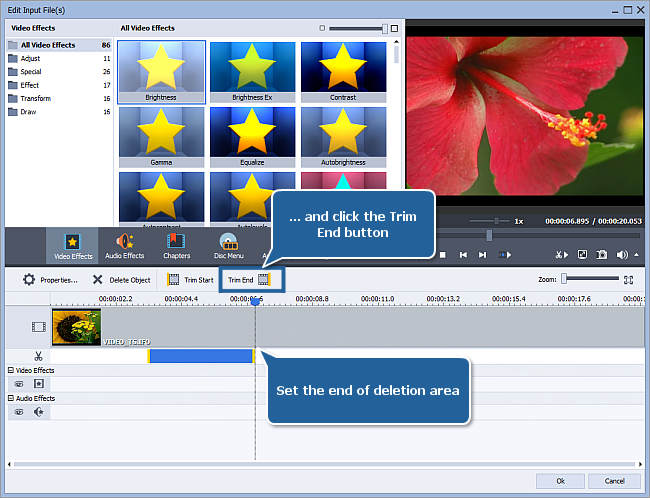
The end of the deletion area is marked similarly - select the final point of the area to be excluded from the output audio, click it with the mouse and press the Trim End button:
You can additionally select the exact location of the deletion area initial and final points. Click the deletion area with the mouse and use the Properties button to open the Properties - Trim window:
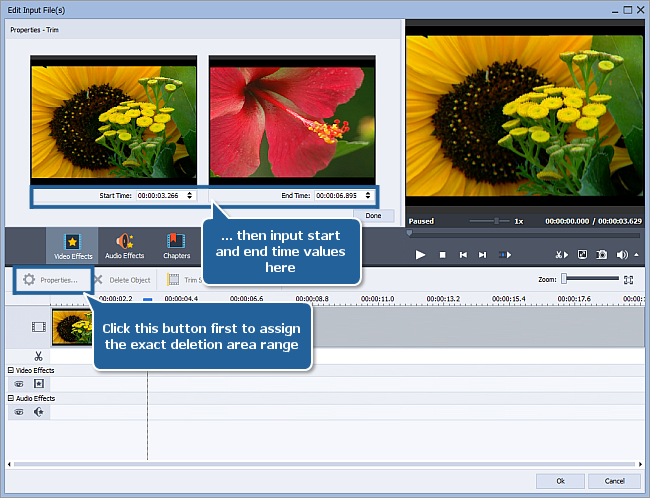
Here you can use the Start Time and End Time fields to enter the exact position for the deletion area. Click Done when ready.
The other deletion areas (in case you need them) are set the same way.
[Back to the Top]
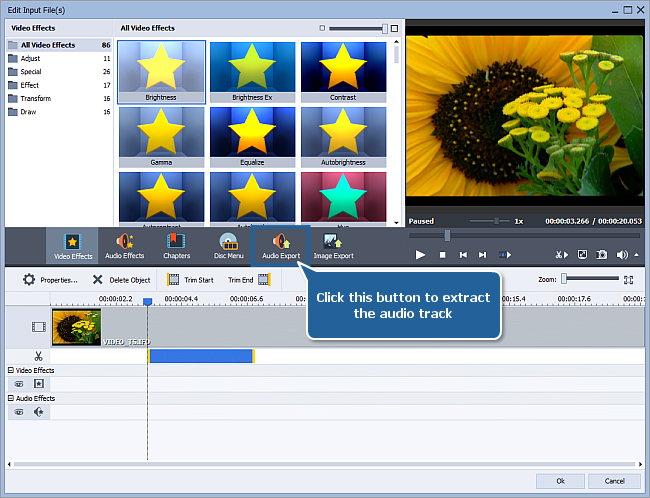
 Now that the necessary adjustments are made, you can start audio track extraction. Click the Audio Export central button represented on the left.
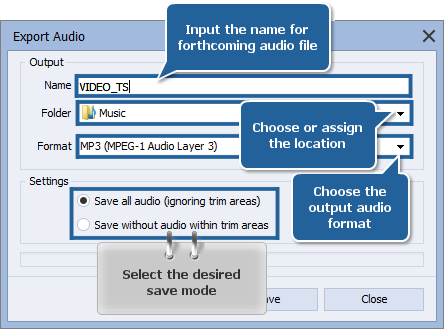
The Export Audio window will be opened to let you name your audio, either choose a folder or assign your own directory to save it in, define an audio format and decide whether to save audio as it is or take account of deletion area:
To start extracting press the Save button. The process will take some time depending on the output audio length and your computer performance.
When extraction is over, find your audio in the destination folder and play it using your favorite audio player.
[Back to the Top]
Version: 12.0.1.650Size: 80.45 MBPlatforms: Windows 10, 8.1, 8, 7, XP, 2003, Vista
(no Mac OS/Linux support)
Download
AVS Video Converter
Registration on AVS4YOU is like buying a single product listed on
www.AVS4YOU.com and getting all other products from our site as a gift. That means you can install and use
ALL OTHER software with the same serial number without additional fees and limitations.
Please note that AVS4YOU programs do not allow you to copy protected material. You may use this software in copying material in which you own the copyright or have obtained permission to copy from the copyright owner.