The universal character of AVS Video Converter is probably the main secret of its popularity. This compact tool is ideal not only for converting files, it can also be used for simple video editing and burning the resulting videos to discs.
The Edit function is the one that causes most of the questions as it implies working with the timeline. The following guide will give you some tips on editing video with AVS Video Converter, in particular, on how to delete unnecessary parts from files.
Click here to download it. After the download is finished, run the AVSVideoConverter.exe file and follow the installation wizard instructions.
[Back to the Top]
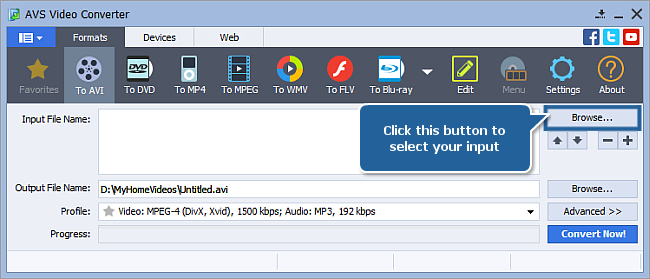
To select a video you would like to convert hit the Browse... button next to the Input File Name field. In the opened Windows Explorer window browse for the necessary video file:
 Note
Note: when your input is a DVD disc, you will need to select the path to your source file: X:\Video_TS\Video_TS.IFO. "X" stands for your DVD-ROM or the hard disk drive folder where your DVD is stored. Please see the
online help section to find more on how to convert your home DVDs to other video formats.
[Back to the Top]
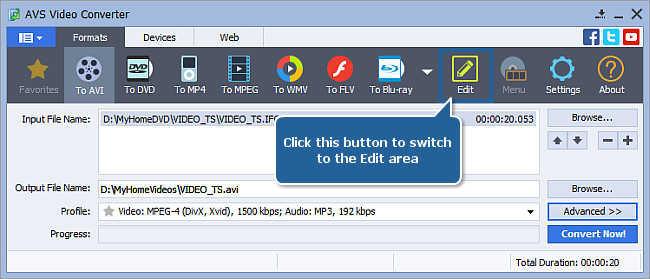
Once the input video is loaded, press the Edit button on the Main Toolbar to open the Edit Input File(s) window.
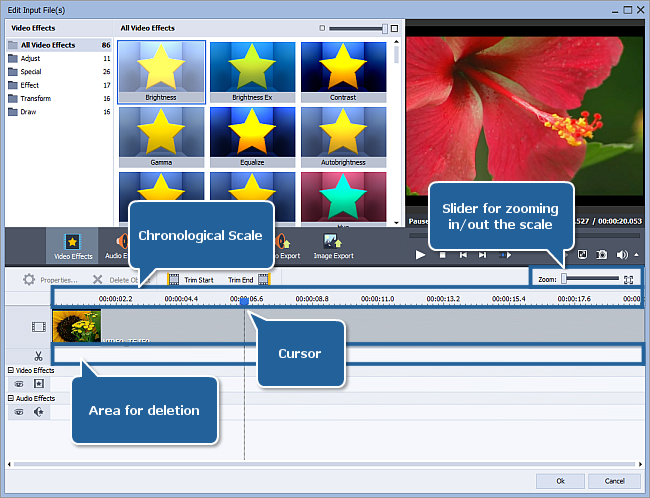
The video file(s) you loaded into the software will be represented on the Timeline. The following components will help you navigate your video:
- The Timeline Scale in the upper part of the Timeline shows the file in its chronological sequence – in hh.mm.ss format. Use the Zoom slider on the right to zoom in or zoom out the scale.
- The Preview Area located in the right part of the Edit Input File(s) screen allows you to visually control the editing process. The current position of the cursor is always displayed in this area. By default it displays the very first frame of the video you imported into the program.
[Back to the Top]
Navigate the file (use the tips provided at Step 3) to find the initial moment of the episode you wish to cut out. Left-click on the timeline to place a cursor. Use playback controls located in the Preview Area, hotkeys or simply drag the cursor to adjust its position. When ready, press Trim Start right above the timeline to set the initial point of the area you wish to delete. Perform the same actions to find the final point of the area you wish to delete. Press the Trim End button to set a marker.
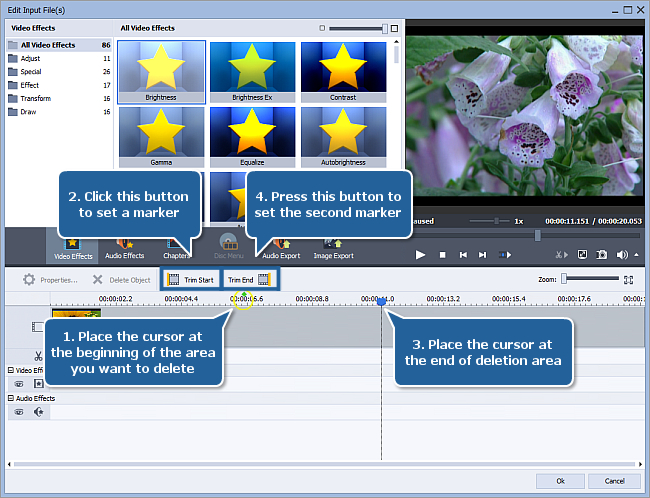
As soon as you set the second marker, a blue-colored area will apprear in the Deletions area highlighting the deleted part on the timeline.
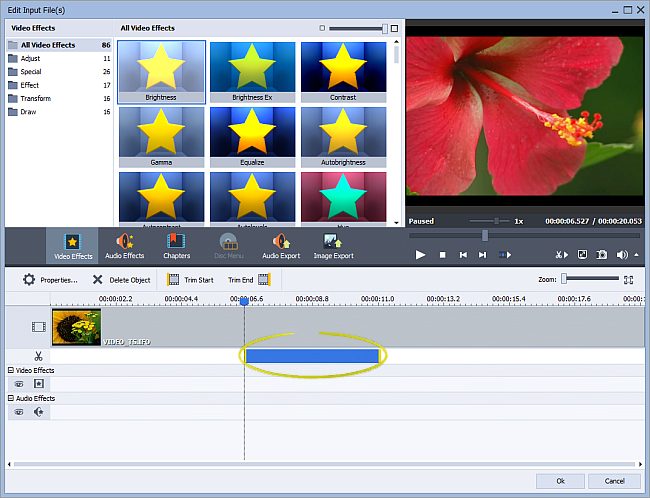
Note: you can add more than one area of deleting to your video just by going through the same procedure once agan. The active area of deletion is marked by yellow stripes at the limits of the area.
[Back to the Top]
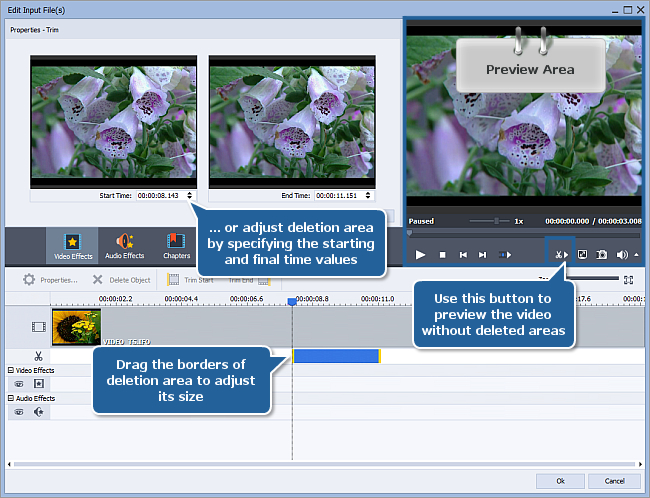
You can change the size of the selected area for deletion by adjusting its borders. To adjust the borders:
- Drag the borders of the area of deletion with the mouse.
- Adjust the borders in the Properties - Trim window. Double-click an area of deletion to access this window. It will be displayed in the left part of the Edit Input File(s) screen. The Properties - Trim screen contains 2 windows which display the initial and final points of the area of deletion. Use the arrows or enter the hh.mm.ss manually to adjust the borders of the area.
After you convert the file all the areas marked this way will disappear from the resulting file.
To preview your video without the selected areas for deletion first press the Preview Trim Result  button in the Preview Area, then click the Play
  button.
[Back to the Top]
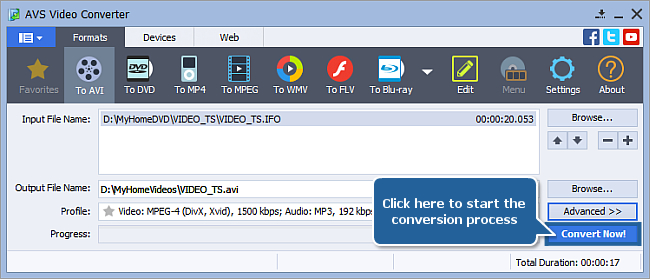
After you have set all the areas of deletion, click the OK button to accept the changes and close the Edit Input File(s) window. It will bring you back to the main screen. Configure conversion parameters as you need and press Convert Now!.
Wait while the software converts your video. It might take up to several hours depending on your computer capabilities.
That's all! The edited video of a new format is now ready to be watched.
[Back to the Top]
Version: 12.0.1.650Size: 80.45 MBPlatforms: Windows 10, 8.1, 8, 7, XP, 2003, Vista
(no Mac OS/Linux support)
Download
AVS Video Converter
Registration on AVS4YOU is like buying a single product listed on
www.AVS4YOU.com and getting all other products from our site as a gift. That means you can install and use
ALL OTHER software with the same serial number without additional fees and limitations.
Please note that AVS4YOU programs do not allow you to copy protected material. You may use this software in copying material in which you own the copyright or have obtained permission to copy from the copyright owner.