You might quite often face the need to quickly cut out some scenes in a video file you have without the need to edit or re-encode it. Using AVS Video ReMaker you can do that quickly and easily. If you cut scenes from a home DVD or Blu-ray video the program will allow you to create a video menu and burn the output onto a disc using the internal burning engine.
Click here to download it. After the download is finished, run the AVSVideoReMaker.exe file and follow the installation wizard instructions.
[Back to the Top]
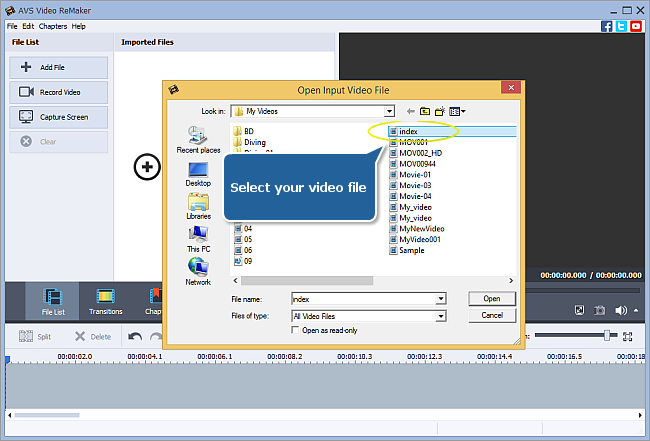
After you launch the program, you can select your video using the Add File button. In the opened Windows Explorer window browse for the necessary video:
 Note
Note: when your input is a DVD disc, you will need to select the path to your source file: X:\Video_TS\Video_TS.IFO. "X" stands for your DVD-ROM or the hard disk drive folder where your DVD is stored. Please see the
online help section to find more on how to convert your home DVDs to other video formats.
After loading your video, you can add more video files to AVS Video ReMaker program using the Add File button or remove the loaded files clicking the Clear button.
Note: in case you add several different video files to the program all of them
must have the same parameters - video resolution, aspect ratio, frame rate and bitrate.
[Back to the Top]
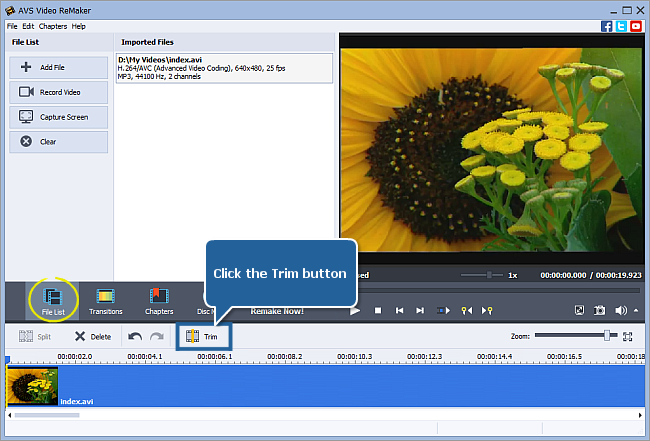
Using the Multi Trim option you will be able to detect all the existing scenes in your video automatically and delete several scenes at a time. Click the Trim button on the Timeline Toolbar to open the Multi Trim window.
Note: if you have loaded several files into the program, first you need to select one of them on the
Timeline.
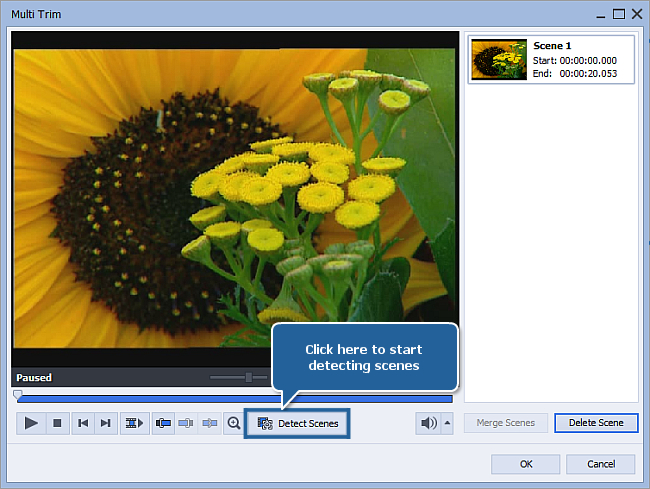
In the opened window press the Detect Scenes button located below the Preview area and wait while the program detects scenes. It may take some time depending on your video file length.
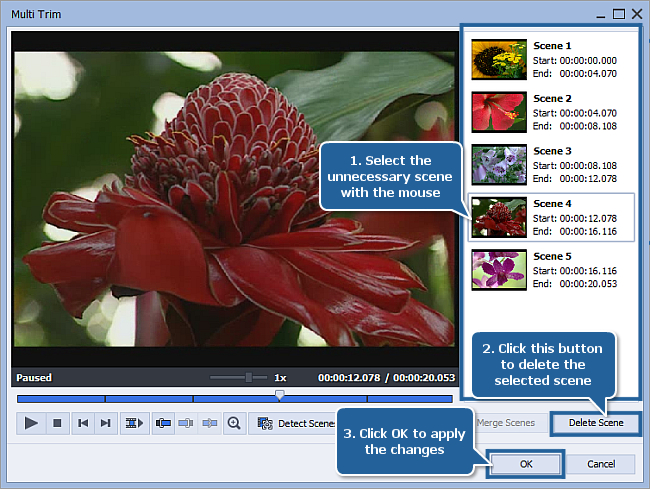
All the detected scenes will be displayed in the scenes list on the right. Select the scene your want to delete by clicking it with the left mouse button. To select several scenes press and hold the Ctrl key on the keyboard. Press the Delete Scene button below the scenes list to remove the highlighted scene(s). Click the OK button to apply the changes made and close the window.
[Back to the Top]
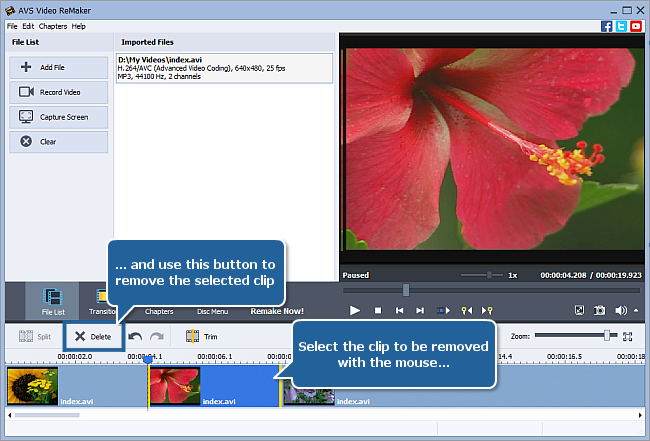
To manually select clips for deletion, use the Timeline. Move the slider of the Timeline Scale to find the beginning of the clip to be deleted and click the Split button above the Timeline. Then do the same to mark the end of the video clip to be deleted. Use the Preview window to make sure that you marked the right part for deletion.

After splitting your video into clips please select the clip your want to delete by clicking it with the left mouse button and press the Delete button above the Timeline. The highlighted clip will be removed.
[Back to the Top]
If you edit a DVD or Blu-ray video, the program lets you create a menu for your discs. Please refer to the How to create a disc menu using AVS Video ReMaker? guide to learn how to do it.
[Back to the Top]
 Now you need to set the output file parameters. Click the Remake Now! central button to open the Remake window.
In the Output section of the Remake window enter the output file Name into the appropriate field, select the Folder to save your resulting video and choose one of the available Video/Audio formats in the Settings section.
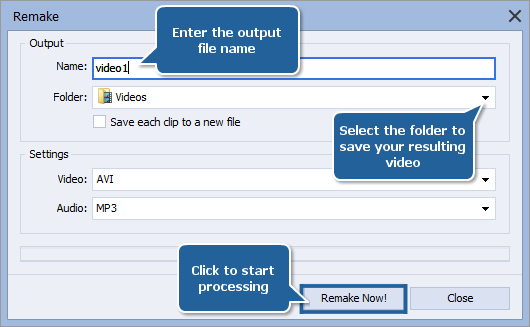
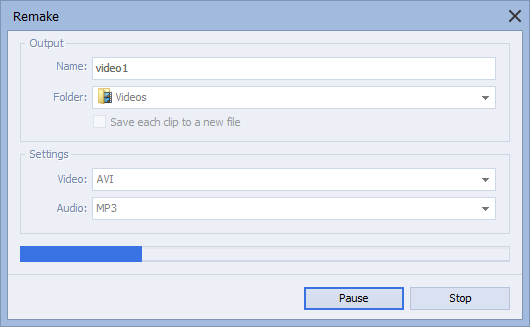
When all is ready press the Remake Now! button to start processing. You will see the deletion progress on the progress bar. It will take some time depending on the file length and your computer configuration.
When the process is over the following window will appear:
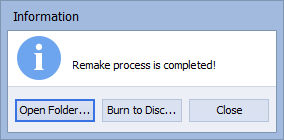
Click the Burn to Disc button to launch the AVS Video Burner application to record the resulting video onto a disc.
[Back to the Top]
Insert a blank DVD or Blu-ray disc into your computer optical disc drive. Make sure that the disc is compatible with your drive.
AVS Video Burner application will be launched to guide you through the burning process so that you could record your converted video onto a disc.
You can select the necessary disc drive if you have several, refresh it and mark the Verify disc check-box to make sure the disc is recorded correctly.
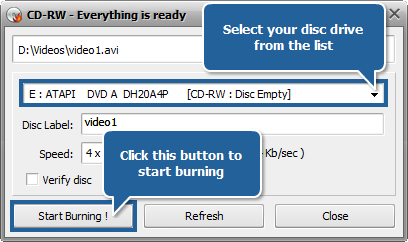
Now click the Start Burning! button to begin the recording. Note, that if the disc is not empty you will be offered to erase it. If you do not want to do that, you can eject the disc and use another one instead.
After the burning is over the disc will be ejected automatically. Note, if you checked the Verify disc, the recording will take a little longer depending on the size of the output files as the program will need time to verify them.
Now you managed to cut out all the unnecessary scenes from your home video without the need to re-encode it.
[Back to the Top]
Version: 6.3.1.230Size: 59.00 MBPlatforms: Windows 10, 8.1, 8, 7, XP, 2003, Vista
(no Mac OS/Linux support)
Download
AVS Video ReMaker
Registration on AVS4YOU is like buying a single product listed on
www.AVS4YOU.com and getting all other products from our site as a gift. That means you can install and use
ALL OTHER software with the same serial number without additional fees and limitations.
Please note that AVS4YOU programs do not allow you to copy protected material. You may use this software in copying material in which you own the copyright or have obtained permission to copy from the copyright owner.